wibo Thermatic Clima Series User manual

Thermatic Slim
Thermatic Classic
Thermatic Design
• Bitte lesen Sie diese Bedienungsanleitung vor Inbetriebnahme sorgfältig durch.
• Please read this instruction manual through carefully before use.
• Prière de lire attentivement le présent mode d’emploi avant la mise en service.
Thermatic Classic
• Bedienungsanleitung
• Instruction manual
• Mode d’emploi
Immer ein Grad besser.
MODERNES
HEIZENMITSTROM
PARTNER
DER
ENERGIEWENDE
Effizienz
System
WÄRME
PRINZIP
Thermatic Clima

Konformitätserklärung:
www.wibo.com
Gerät nicht abdecken
Um eine Überhitzung des
Heizgerätes zu vermeiden,
darf das Heizgerät nicht
abgedeckt werden.
* in der Schweiz nur mit Festanschluss oder T23-Stecker (SEV 1011 System)
Thermatic
Classic
Art.- Nr.
Prod. No.
Art. n°
kW
Schaltung
Switching
Couplage
Watt
Absicherung
Fuse
Fusible
Amp
Breite
Width
Largeur
mm
Höhe
Height
Hauteur
mm
Tiefe
Depth
Profondeur
mm
80 0,9 500 / 400 10 410 620 112
81 1,25 750 / 500 10 810 620 112
82 1,6 1100 / 500 10 810 620 112
83 2,0 1000 / 1000 10 1018 620 112
83* 2,2 1100 / 1100 16 1018 620 112
84-2* 2 x 1,25 je 750 / 500 16 1630 620 112
85-2* 2 x 1,6 je 1100 / 500 16 1630 620 112
86* 2,5 1500 / 1000 16 1018 620 112
Thermatic
Clima
81 1,0 500 / 500 10 810 620 112
82 1,6 1100 / 500 10 810 620 112
83 2,0 1000 / 1000 10 1018 620 112
83* 2,2 1100 / 1100 16 1018 620 112
Thermatic
Design
8710plus 1,0 500 / 500 10 810 455 103
8711plus 1,1 600 / 500 10 810 455 103
8716plus 1,6 1100 / 500 10 810 455 103
8720plus 2,0 1000 / 1000 10 1010 455 103
8725*plus 2,5 1500 / 1000 16 1010 455 103
Thermatic
Slim
8904 0,5 500 6372 405 90
8905plus 0,75 750 6374 585 90
8910plus 1,25 750 500 10 374 785 90
8915plus 1,5 750 750 10 374 1405 90
8915plus s 1,5 750 750 10 374 1155 90
0
I
0
I
0
I

Sicherheitshinweise
Bei In be trieb nah me durch Kinder sowie schutzbedür igen Personen
Vorsicht! Einige Teile dieses Produktes können sehr heiß werden und Verbrennungen verursachen.
Dieses Gerät darf in Reichweite von Kindern unter drei Jahren nur unter deren ständiger Beaufsichtigung
betrieben werden. Kinder ab 3 Jahren und jünger als 8 Jahren dürfen das Gerät nur ein- und ausschalten,
wenn sie beaufsichtigt werden oder bezüglich des sicheren Gebrauchs des Gerätes unterwiesen wurden
und die daraus resultierenden Gefahren verstanden haben, vorausgesetzt, dass das Gerät in seiner nor-
malen Gebrauchslage positioniert oder installiert ist. Kinder ab 3 Jahren oder jünger als 8 Jahre dürfen
nicht den Stecker in die Steckdose stecken, das Gerät nicht regulieren (und/oder nicht die Wartung durch
Benutzer durchführen). Dieses Gerät ist nicht dafür bestimmt, durch Personen (einschließlich Kinder) mit
eingeschränkten physischen, sensorischen oder geistigen Fähigkeiten oder mangels Erfahrung und/oder
mangels Wissen benutzt zu werden, es sei denn, sie werden durch eine für ihre Sicherheit zuständige
Person beaufsichtigt oder erhielten von ihr Anweisungen, wie das Gerät zu benutzen ist.
ACHTUNG:
Keine Gegenstände oder Flüssigkeiten in das Gerät geben. Es besteht die Gefahr eines Stromschlages.
Einsatz im Nassbereich
Dieses Produkt darf nicht in unmittelbarer Nähe von Nassbereichen (Badewanne, Dusche, Schwimm-
becken, Waschbecken) betrieben werden! Im Nassbereich darf das Gerät nur ausserhalb des Bereiches
2 nach VDE 0100 Teil 701 (d.h. mehr als 60 cm entfernt von Dusche oder Badewanne) betrieben werden.
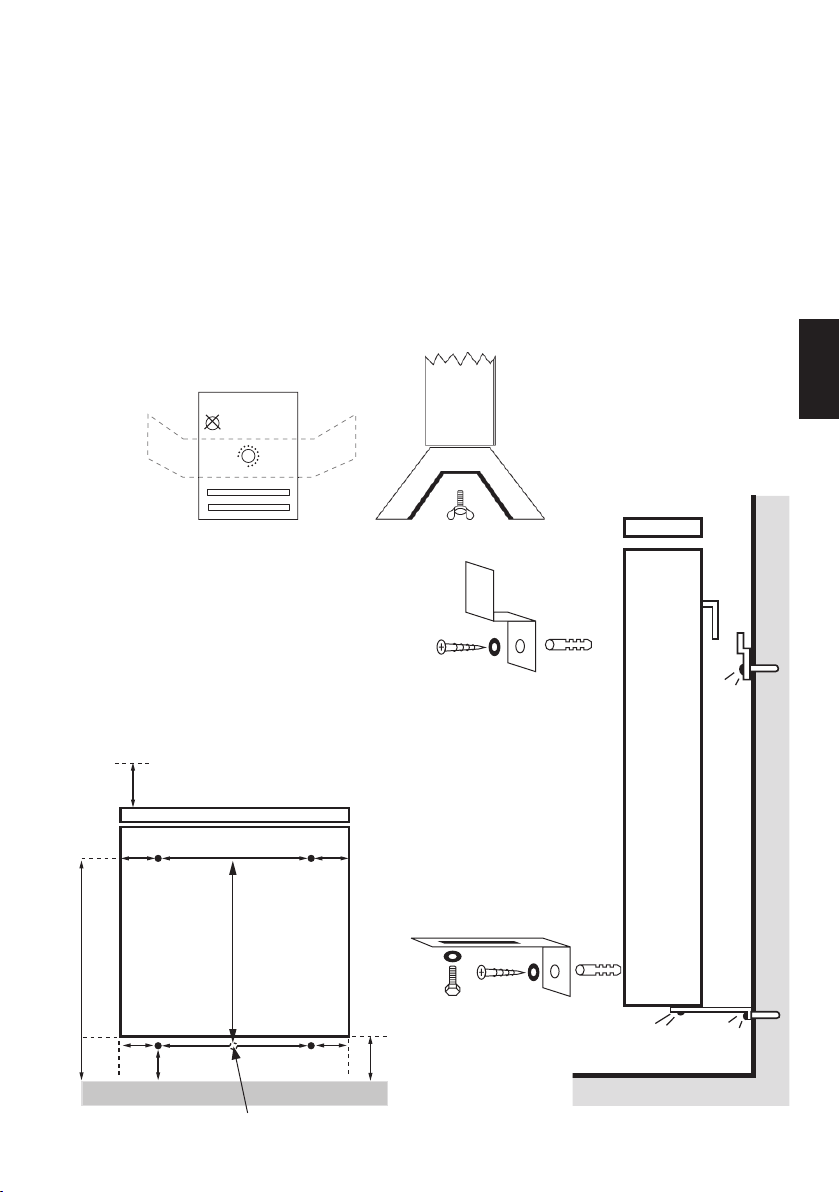
ACHTUNG: Im Nassbereich (Bad) müssen die Heizgeräte mechanisch fest an die Wand installiert
werden. Die Heizgeräte sind so anzubringen, dass Schalter und andere Regler nicht von einer sich in der
entsprechend VDE 0100 Teil 701 zu beachten (weitere Informationen unter www.wibo.com).
Inbetriebnahme in kleinen Räumen
Sofern dieses Gerät nicht mit einem Thermostaten zur Temperaturregelung ausgestattet ist, darf die
Inbetriebnahme nicht in kleinen Räumen erfolgen, welche von deren Bewohnern nicht eigenständig
verlassen werden können. Es sei denn, eine ständige Überwachung ist gewährleistet.
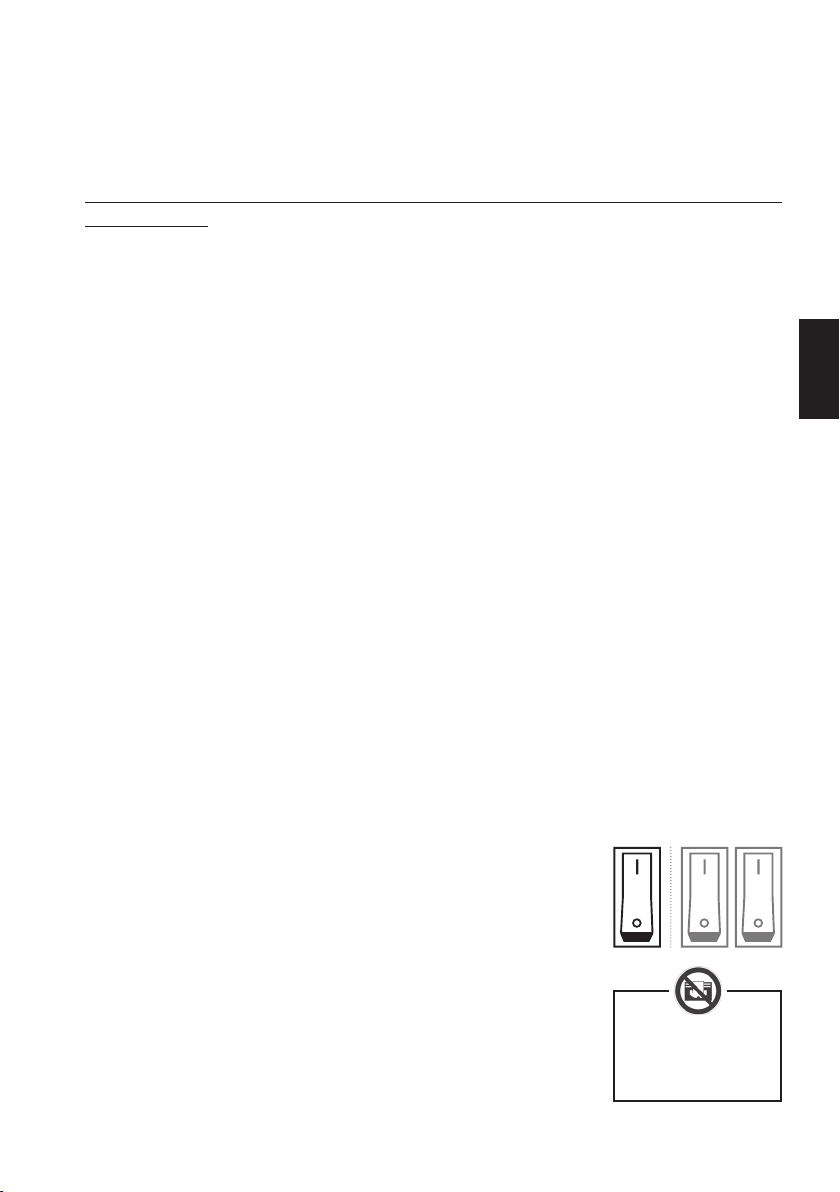
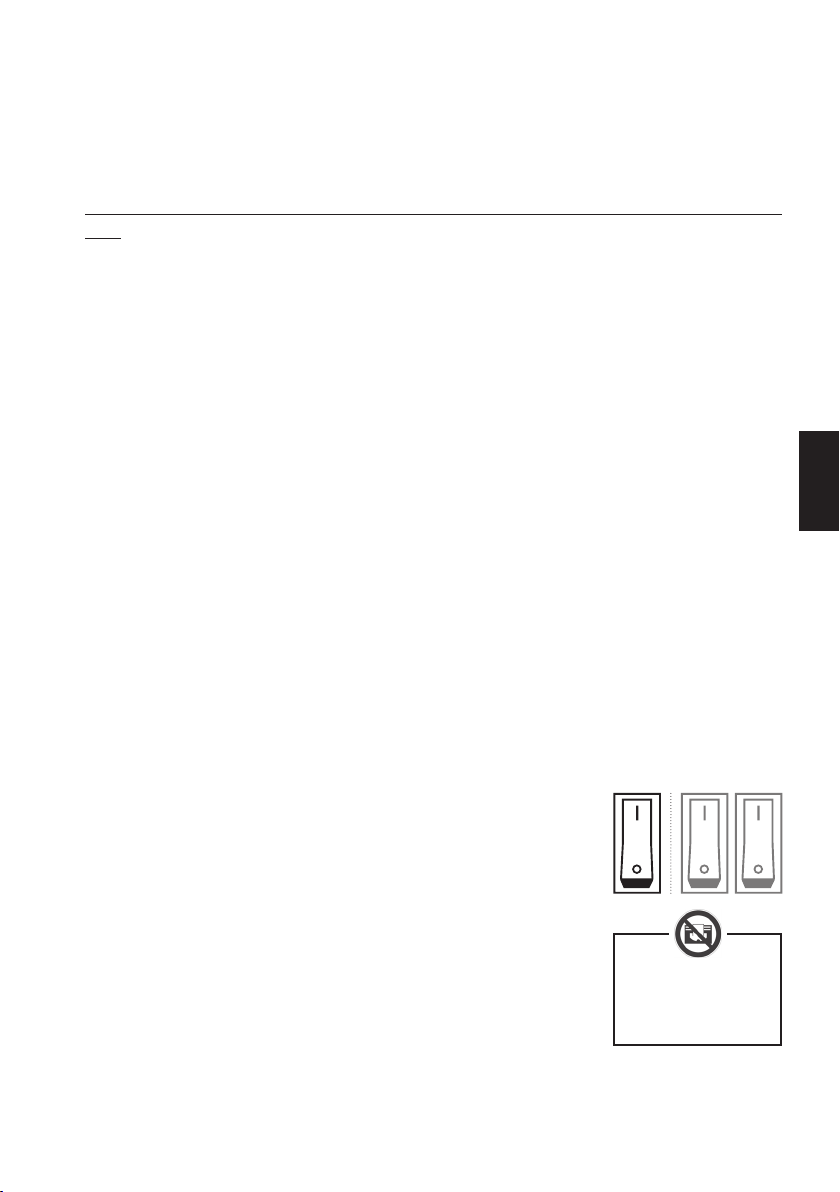
Gerät vom Stromnetz trennen
Das Gerät ist mit einem oder zwei AUS-Schaltern ausgestattet. Die AUS-Schal-
alle Heizfunktionen des Gerätes.
Abdeckung/Aufstellung von Heizkörpern
Platte, Textilien, Handtüchern und ähnlichen Gegenständen abgedeckt wer-
Gerät nicht abdecken!
Um eine Überhitzung des
Heizgerätes zu vermeiden,
darf das Heizgerät nicht
abgedeckt werden.
deutsch

Achtung! Heizgerät nicht an ein Verlängerungskabel und/oder Mehrfachsteckdose an-
schließen. Der Anschluss muss über eine Steckdose oder Festanschluss (durch autorisier-
tes Fachpersonal) erfolgen.
Wenn die Netzanschlussleitung dieses Gerätes beschädigt wird, muss sie durch den Hersteller oder seinen
Bitte beachten
mitgelieferten Standfüßen, Laufrollen oder dem Wandbefestigungsmaterial. Die Geräteanschlussleitung
darf nur für den bestimmungsgemäßen Gebrauch verwendet werden und darf nicht an oder auf wärme-
abgebende Geräteteile verlegt werden. Die Spannungsversorgung des Heizgerätes kann sowohl über eine
Steckdose oder über eine Geräteanschlussdose erfolgen. Der Kunde hat dafür Sorge zu tragen, dass der
-
schen Überwachungsverbandes des jeweiligen Landes (VDE, ÖVE, SEV, BSA) entsprechen.
Wir weisen vorsorglich darauf hin, dass bei der ersten Inbetriebnahme des Gerätes beim Transport abge-
lagerte Staubpartikel verbrennen können, die zu einer Geruchsentwicklung führen können. Ferner weisen
wir darauf hin, dass während der Aufheiz- und Abkühlphase des Gerätes geringfügige Geräuschentwick-
Materialien bedingt sind. Es handelt sich dabei nicht um Fehler, sondern um güte- und materialbedingte
Verhaltensweisen, die die Funktionsfähigkeit des Gerätes in keiner Weise beeinträchtigen
Regelung / Steuerung der Temperatur
Wird das Heizgerät mit einem Thermostaten geliefert, regelt dieser das Ein- und Ausschalten automa-
tisch. Wird die auf dem Thermostaten eingestellte Temperatur erreicht, unterbricht der Thermostat
-
chen Schalter an- und ausgeschaltet. Ist ein Doppelwippenschalter vorhanden, kann mittels der
„Sparschalteinrichtung“ die Leistungsabnahme heruntergeschaltet werden. Die Einzelwerte entnehmen
Sie bitte der Leistungsbeschilderung am Schalter. Für den vollen Leistungsabruf beide Wippschalter
-
taste ) für die Geräte, die über die integrierte Funksteuerung geregelt werden. Bei Betätigung des
Notschalters wird Ihr Gerät nicht mehr temperatur gesteuert durch das Thermostat und heizt im
Dauerbetrieb!
Betrieb ohne Thermostat (nicht zu empfehlen)
Wenn die gewünschte Raumtemperatur erreicht ist, muss das Gerät von Hand abgeschaltet werden.
Wir empfehlen, das von Ihnen erworbene Gerät mit einer Thermostatsteuerung auszustatten.
einzusparen.
Tipp zum Energie sparen: Wir empfehlen außerhalb der Heizperiode das Gerät vom Netz zu trennen.

Reinigung des Gerätes
Um Schäden am Gerät zu vermeiden, muss eine regelmäßige Reinigung des Heizgerätes erfolgen. Fremd-
körper dürfen nicht in das Heizsystem gelangen! Sie würden dort möglicherweise verbrennen. Dadurch
können Schäden und Ablagerungen am Heizsystem, den Heizaggregaten sowie in der Umgebung entste-
hen. Wir empfehlen dringend, das Gerät regelmäßig mit dem Staubsauger vorsichtig von unten/unterhalb
des Unterrahmens abzusaugen, um das Gerät von Staubansammlungen zu befreien, die die ordnungsge-
Vor Reinigungs- oder Wartungsarbeiten muss das Gerät zwingend vom Stromnetz getrennt wer-
den (bei Festanschluss: Ausschalten (Sicherungsregeln beachten). In jedem Fall muss das Gerät
gegen Wiedereinschalten gesichert werden. Gerät bitte nur in kaltem Zustand anfassen. Sollte
das Gerät mit einer Funktion zur Befeuchtung der Raumlu ausgestattet sein, muss der Wasserbe-
hälter vollständig leer sein, bevor das Gerät gekippt wird.
-
-
nungen absaugen.
Entsorgung
Entsorgung von gebrauchten elektrischen und elektronischen Geräten (anzuwenden in den Ländern der
Europäischen Union und anderen europäischen Ländern mit einem separaten Sammelsystem für diese
Geräte). Das Symbol auf dem Produkt oder seiner Verpackung weist darauf hin, dass dieses Produkt nicht
als normaler Haushaltsabfall zu behandeln ist, sondern an einer Annahmestelle für das Recycling von
Ihrer Gemeinde oder den kommunalen Entsorgungsbetrieben.
Montage
Das Gerät ist sowohl für den Anbau an Wänden als auch bei Anbau von Füßen für die Aufstellung auf dem
Boden geeignet (ausgenommen Thermatic Slim). Als Aufstellplatz wird die Nähe des Fensters empfohlen,
und durch Konvektion in Umlauf gebracht. Kann das Gerät nur an einem anderen Platz aufgestellt wer-
-
hängung, die Abstandshalter, die Standfüße oder Konsolen und das Befestigungsmaterial.
Standgeräte:
Zur Befestigung der Standfüße (11) müssen die am Unterboden innenliegend mittig befestigten Sechs-
kopfschrauben (12) entfernt werden. Anschließend die Standfüße (11) mit den Flügelschrauben (9) an der
Unterseite des Gerätes in den M6 Gewindebohrungen anschrauben. Hierzu ist Werkzeug erforderlich.
deutsch

Wandbefestigung:
Übernehmen Sie das Bohrmaß Faus der Tabelle (rechte Tabelle) und ermitteln Sie den Aufhängungs-
punkt anhand des senkrechten Mittelmaßes des Gerätes.
Zeichnen Sie die Bohrung B
Bohrer eine 50 mm tiefe Bohrung für die Wandhalter. Anschließend setzen Sie die Dübel (1) ein und trei-
ben sie bündig in die Bohrlöcher. Danach befestigen Sie die beiden Wandhaltewinkel (2) mittels der
Schrauben (3) und der Unterlegscheiben (5).
Thermatic
Classic
Art.- Nr.
Prod. No.
Art. n°
Bohrabstand in mm Minimum
in mm
A B C D E F G
80 62,5 55 290 285 520 600 200
81+82 62,5 100 600 675 520 600 200
83, 86 61,5 104 800 885 520 600 250
84+85 62,5 100 600 675 520 600 200
Thermatic
Clima
81 B 62,5 100 600 675 520 600 200
82 B 62,5 100 600 675 520 600 200
83 B 61,5 104 800 885 520 600 250
Thermatic
Design
8710 62,5 100 600 675 400 480 200
8716 62,5 100 600 675 400 480 200
8720 62,5 100 800 875 400 480 250
8725 62,5 100 800 875 400 480 300
Thermatic
Slim
8904 180 64 232 -315 395 250
8905 180 49 262 -459 539 300
8910 180 49 262 -667 747 450
8915 180 49 262 -1285 1365 500
8915s 180 49 262 -1035 1115 500
Um die Abstandhalter (6) zu montieren, markieren Sie die Bohrlöcher gemäß der Bohrmaße Aund Ean
der Wand und setzen mittels einem 8 mm Bohrer jeweils eine 50 mm tiefe Bohrung für die Abstandshalter.
Setzten Sie nun die Dübel (1) ein und treiben sie bündig in die Bohrlöcher. Befestigen Sie anschließend die
beiden Abstandhalter mittels der Schrauben (3) und der Unterlegscheiben (5).
Mit den Schrauben (7) legen Sie den Abstand des Heizgerätes von der Wand fest, indem Sie die Schrauben
(7) mit den Unterlegscheiben (5) auf der Führungsschiene an der gewünschten Stelle befestigen.
Abschließend hängen Sie das Heizgerät in den Wandhalter (2) und auf den Abstandhalter (6) ein.

Für Wandmontage
F
G
E
CBB
D
AA
8 cm 10 cm
(1x Thermatic Slim)
1
2
35
4
2
1
3
5
5
2x
2x (1x Thermatic Slim)
11
7
6
5
3
5
7
6
53
9
11
11
12
Bei Standgeräten
Wichtiger Hinweis:
Bei Montage des Gerätes mit Festanschluss darf die Inbetriebnahme nur erfolgen, wenn eine allpolige
Trennvorrichtung gewährleistet ist, z. B. Sicherungsautomaten.
Nach der Montage des Gerätes muss der Netzstecker gut zugänglich sein und das Gerät darf nicht
direkt unter einer Steckdose positioniert werden. Reparaturen und Ö nen des Gerätes nur durch
geschultes- oder Fachpersonal durchführen.
Beim Festanschluss werden die Geräteanschlussleitungen mit der Geräteanschlussdose fest verdrahtet.
Hierzu bitte die Farbkennzeichnung der Leitung (braun = Phase; blau = Nullleiter; grün-gelb = PE/Schutz-
leiter) beachten.
ACHTUNG: Aderfarben können nach Baujahr des Gebäudes oder der Installation abweichen
(Schwarz = Phase, Grau = Nulleiter, Rot = Potenzial Erde).
deutsch

Declaration of conformity:
www.wibo.com
Do not cover the appliance
In order to prevent the
heating appliance from
overheating, it must
not be covered.
* Only with xed connection or T23 plug in Switzerland (SEV 1011 system)
Thermatic
Classic
Art.- Nr.
Prod. No.
Art. n°
kW
Schaltung
Switching
Couplage
Watt
Absicherung
Fuse
Fusible
Amp
Breite
Width
Largeur
mm
Höhe
Height
Hauteur
mm
Tiefe
Depth
Profondeur
mm
80 0.9 500 / 400 10 410 620 112
81 1.25 750 / 500 10 810 620 112
82 1.6 1100 / 500 10 810 620 112
83 2.0 1000 / 1000 10 1018 620 112
83* 2.2 1100 / 1100 16 1018 620 112
84-2* 2x 1.25 each 750 / 500 16 1630 620 112
85-2* 2x 1,6 each 1100 / 500 16 1630 620 112
86* 2.5 1500 / 1000 16 1018 620 112
Thermatic
Clima
81 1.0 500 / 500 10 810 620 112
82 1.6 1100 / 500 10 810 620 112
83 2.0 1000 / 1000 10 1018 620 112
83* 2.2 1100 / 1100 16 1018 620 112
Thermatic
Design
8710plus 1.0 500 / 500 10 810 455 103
8711plus 1.1 600 / 500 10 810 455 103
8716plus 1.6 1100 / 500 10 810 455 103
8720plus 2.0 1000 / 1000 10 1010 455 103
8725*plus 2.5 1500 / 1000 16 1010 455 103
Thermatic
Slim
8904 0.5 500 6 372 405 90
8905plus 0.75 750 6 374 585 90
8910plus 1.25 750 500 10 374 785 90
8915plus 1.5 750 750 10 374 1405 90
8915plus s 1.5 750 750 10 374 1155 90
0
I
0
I
0
I

Safety guidelines
When being operated by children and vulnerable persons
Warning! Some parts of this product can get very hot and cause burns.
Extra care is needed when children or vulnerable adults are present.
Children under three years old must be kept under constant supervision when this appliance is being
used. Children over the age of 3 but younger than 8 may only turn the appliance on under the supervision
of an adult or if they have been instructed on how to use the device safely and have understood the possi-
ble dangers. The device must also only be operated in its normal position in this case. Children over the
age of 3 but younger than 8 may not put the plug into the socket and must not regulate it (and/or carry out
any user maintenance). This appliance is not intended for use by persons (including children) with limited
physical, sensory, or mental capabilities, or persons who lack in experience and/or knowledge of how the
appliance is used, unless they are supervised by a person who is responsible for their safety, or they have
received instruction on how the appliance is used.
CAUTION: Do not place any objects or liquids in the appliance. There is a risk of electronic shock.
Use in wet areas
This product must not be operated in close proximity to wet areas (bath, shower, swimming pool, washba-
sin)! In wet areas, the appliance must only be used outside of zone 2, as per VDE 0100 Part 701 (i.e. more
than 60 cm away from the shower or bathtub).
CAUTION: In the wet area (bathroom), the heating appliances must be mechanically secured to the wall.
who is having a shower or sitting in the bathtub. The protective area as per VDE 0100 Part 701 must be
observed (further information at www.wibo.com).
Use in small rooms
If this appliance does not come with a thermostat, it must not be used in small rooms that the occupants
cannot leave without assistance. This is unless they are under constant supervision.
Disconnect appliance from the mains
functions of the appliance.
Covering/Installing radiators
In order to prevent overheating and ensure proper air circulation, the air out-
lets of the appliance must not be covered with a panel, textiles, towels and
similar objects. The warm air must always be able to rise freely! Do not place
the appliance on deep pile carpet!
Caution! Do not plug the heating appliance into an extension lead or multiple plug.
It must be connected directly to a socket or a xed connection (carried out by a
quali ed professional).
Do not cover the appli-
ance!
In order to prevent the
heating appliance from
overheating, it must not be
covered.
english

If the mains connection cable of this appliance is damaged, it must be replaced by the manufacturer or its
Please note
wheels or wall mountings. The power cord must be used in its intended manner and must not be placed
on or by hot parts. The heating appliance can either be plugged into a power socket or a junction box. The
customer must ensure that the plug/power connection conforms to the safety guidelines set by the local
electricity regulatory authority (VDE, ÖVE, SEV, BSA).
We would like to point out that deposited dust particles may burn during transportation when the appli-
ance is initially used which may lead to odour development. We would also like to point out that slight
odour development is possible during the heating and cooling phase of the appliance which is caused by
-
al-induced behaviour which does not impair the functions of the appliance.
Regulating / Controlling the temperature
If the heating appliance is supplied with a thermostat, this thermostat automatically controls whether it is
the heating appliance. If there is a double rocker switch, the power supply can be turned down using the
“economy switching mechanism”. Please refer to the rating plate on the switch for individual values.
Switch both rocker switches to achieve full power. An emergency switch is optionally available on the ra-
dio receiver on the back of the appliance (manual switch ) for appliances which are controlled using
the integrated radio control. When the emergency switch is activated, your appliance will no longer be
temperature-controlled by the thermostat and it will heat continuously!
Operation without thermostat (not recommended)
equipping the appliance you have purchased with a thermostat control. This enables automatic tempera-
ture monitoring and is essential in helping to save energy costs.
Tip for saving energy:
We recommend disconnecting the appliance from the mains outside the heating period.
Cleaning the appliance
The heating appliance must be cleaned on a regular basis to prevent it from being damaged. Foreign bod-
ies must not enter the heating system! They may combust inside the system. This may cause damage to
and deposits on the heating system, the heating units and in the immediate environment. We strongly
recommend carefully vacuuming the appliance from below/under the lower frame with a vacuum cleaner
The appliance must be disconnected from the mains before cleaning or maintenance work
(for xed connection: Switch o (ad here to fuse rules). The appliance must always be

secured from being switched on again.Please only touch the appliance if it is cold.If the appli-
ance is equipped with a function for humidifying the room air, the water tank must be completely
empty before the appliance is tilted.
Do not open the appliance and penetrate the interior with objects. Do not use any strong detergents. Only
wipe the appliance with a damp cloth and vacuum air inlet and outlets.
Disposal
Disposal of used electrical and electronic appliances (to be used in the countries of the European Union
and other European countries with a separate collection system for these appliances). The symbol on the
product or its packaging points out that this product must not be treated as normal household waste and
must be transferred to a collection point for recycling of electrical and electronic appliances. Material
recycling helps to reduce the consumption of raw materials. You can obtain more information on the
recycling of this product from your local council or local waste disposal operators.
Assembly
Thermatic Slim). We recommend installing the appliance next to the window and, if possible, in front of
the window. The cold air which lowers there is heated in the appliance and brought into circulation by
means of convection. If the appliance can only be installed in another location, we recommend installing
it against a free wall surface so that the appliance heats the wall surface and, in addition to circulation,
a large radiant heating surface is achieved.
wall suspension, spacers, supporting feet or brackets and the fastening material.
Floor-mounted appliances:
in the centre must be removed. Subsequently screw the supporting feet (11) with the wing screws (9) on
the bottom of the appliance into the M6 threaded holes. A tool is required for this.
Wall mounting:
Adopt the drilling dimension Ffrom the table (page 12) and calculate the suspension point based on the
vertical mean dimension of the appliance.
Draw the hole Bwith a suitable pen on the wall and drill a 50 mm hole for the wall holder using an 8 mm
drill. Following this, insert the dowels (1)
(2) using the screws (3) and washers (5).
To mount the spacers (6), mark the drilled holes on the wall in accordance with the drilling dimensions
Aand E and drill a 50 mm hole for each of the spacers using an 8 mm drill.
Now insert the dowels (1)
the screws (3) and washers (5).
Use screws (7) to specify the distance of the heating appliance from the wall by mounting the screws (7)
in the desired position with washers (5) on the guide rail. In conclusion, mount the heating appliance in
the wall holder (2) and on the spacer (6).
english

Important information:
present (e.g. a circuit breaker).
When the appliance has been tted, the plug must be easily accessible. The appliance must not be
placed directly under a socket. Only trained and specialist personnel may perform repairs and open
the appliance.
Thermatic
Classic
Art.- Nr.
Prod. No.
Art. n°
Drilling distance in mm Minimum
in mm
A B C D E F G
80 62,5 55 290 285 520 600 200
81+82 62,5 100 600 675 520 600 200
83, 86 61,5 104 800 885 520 600 250
84+85 62,5 100 600 675 520 600 200
Thermatic
Clima
81 B 62,5 100 600 675 520 600 200
82 B 62,5 100 600 675 520 600 200
83 B 61,5 104 800 885 520 600 250
Thermatic
Design
8710 62,5 100 600 675 400 480 200
8716 62,5 100 600 675 400 480 200
8720 62,5 100 800 875 400 480 250
8725 62,5 100 800 875 400 480 300
Thermatic
Slim
8904 180 64 232 - 315 395 250
8905 180 49 262 - 459 539 300
8910 180 49 262 - 667 747 450
8915 180 49 262 - 1285 1365 500
8915s 180 49 262 - 1035 1115 500
Please refer to the colour coding of the cable (brown = phase; blue = neutral conductor; green and yellow
= PE/protective earth.
PLEASE NOTE:
grey = neutral conductor; red = potential earth).

For wall assembly
F
G
E
CBB
D
AA
8 cm 10 cm
(1x Thermatic Slim)
1
2
35
4
2
1
3
5
5
2x
2x (1x Thermatic Slim)
11
7
6
5
3
5
7
6
53
9
11
11
12
For fl oor-mounted appliances
english

Déclaration de conformité :
www.wibo.com
Ne pas couvrir l'appareil
-
ne pas couvrir le radiateur.
* en Suisse uniquement avec un raccordement xe ou une che T23 (système AES 1011)
Thermatic
Classic
Art.- Nr.
Prod. No.
Réf. art.
kW
Schaltung
Switching
Couplage
Watt
Absicherung
Fuse
Fusible
Amp
Breite
Width
Largeur
mm
Höhe
Height
Hauteur
mm
Tiefe
Depth
Profondeur
mm
80 0,9 500 / 400 10 410 620 112
81 1,25 750 / 500 10 810 620 112
82 1,6 1100 / 500 10 810 620 112
83 2,0 1000 / 1000 10 1018 620 112
83* 2,2 1100 / 1100 16 1018 620 112
84-2* 2 x 1,25 750 / 500 chacun 16 1630 620 112
85-2* 2 x 1,6 1100 / 500 chacun 16 1630 620 112
86* 2,5 1500 / 1000 16 1018 620 112
Thermatic
Clima
81 1,0 500 / 500 10 810 620 112
82 1,6 1100 / 500 10 810 620 112
83 2,0 1000 / 1000 10 1018 620 112
83* 2,2 1100 / 1100 16 1018 620 112
Thermatic
Design
8710plus 1,0 500 / 500 10 810 455 103
8711plus 1,1 600 / 500 10 810 455 103
8716plus 1,6 1100 / 500 10 810 455 103
8720plus 2,0 1000 / 1000 10 1010 455 103
8725*plus 2,5 1500 / 1000 16 1010 455 103
Thermatic
Slim
8904 0,5 500 6372 405 90
8905plus 0,75 750 6374 585 90
8910plus 1,25 750 500 10 374 785 90
8915plus 1,5 750 750 10 374 1405 90
8915plus s 1,5 750 750 10 374 1155 90
0
I
0
I
0
I

Consignes de sécurité
En cas de mise en service par des enfants ou des personnes vulnérables Attention !
Certaines pièces de ce produit peuvent devenir très chaudes et causer des brûlures.
lance permanente. Les enfants à partir de trois ans et de moins de huit ans peuvent allumer et éteindre
(enfants compris) ne disposant pas de leur intégrité physique, sensorielle ou mentale ou manquant
ATTENTION :
Ceci pourrait provoquer une électrocution.
Utilisation dans les pièces humides
Ce produit ne doit pas être utilisé à proximité directe de zones humides (baignoires, douches, bassins
baignoire).
ATTENTION :
au mur. Les radiateurs doivent être positionnés de sorte que les personnes se trouvant dans la baignoire
ou la douche ne puissent pas atteindre les dispositifs de commutation et de régulation. Le périmètre de
protection doit être respecté conformément aux prescriptions VDE 0100, partie 701 (pour de plus amples
informations, consulter www.wibo.com).
Mise en service dans les pièces de petite taille
température, sa mise en service ne doit pas être réalisée dans les pièces
de petite taille que les occupants ne peuvent pas quitter par leurs propres
moyens, sauf si elles se trouvent sous supervision permanente.
Déconnexion de l'appareil du réseau d'alimentation
Ces interrupteurs de mise hors tension se trouvent sur le côté gauche en
Ne pas couvrir l'appa-
reil !
A n d'éviter toute
surchau e du radiateur, ne
pas couvrir le radiateur.

Recouvrement / implantation des radiateurs
-
quettes à poils longs.
Attention ! Ne pas raccorder le radiateur à une rallonge et/ou une multiprise.
Le raccordement doit être eectué via une prise ou un raccordement xe
(par du personnel spécialisé et agréé).
À noter
-
raccordement électrique choisi satisfait aux prescriptions de sécurité technique des organismes de
précisons également que de faibles développements de bruits peuvent se produire durant la phase de
Réglage / commande de la température
Si le radiateur est fourni avec un thermostat, celui-ci prend automatiquement en charge la mise en
-
-
-
Pour faire appel à la pleine puissance, il faut enclencher les deux commutateurs à bascule. Les appareils
-
gence au niveau du récepteur radio (touche de réglage manuel ). Lorsque l'interrupteur d'urgence
est actionné, la température de votre appareil n'est plus commandée par le thermostat, l'appareil
chaue alors en continu !

Fonctionnement sans thermostat (non recommandé)
Celui-ci assure la surveillance automatique de la température et vous permettra de réaliser des écono-
Conseil pour réaliser des économies d'énergie : nous recommandons de débrancher l'appareil du
réseau électrique en dehors de la période de chauage.
Nettoyage de l'appareil
-
L'appareil doit être impérativement débranché du réseau électrique avant toute opération de
nettoyage ou de maintenance (en cas de raccordement xe retirer le fusible). Dans tous les cas de
gure, l'appareil doit être protégé contre toute remise en marche inopinée.Prière de ne toucher
l'appareil que lorsqu'il est à froid.Si l'appareil est doté d'une fonction d'humidication de l'air
ambiant, le récipient d'eau doit être vidé intégralement avant de basculer l'appareil.
Mise au rebut
-
symbole sur le produit ou son emballage indique que ce produit ne doit pas être jeté avec les ordures
-
reils électriques et électroniques. Le recyclage de matériel aide à réduire la consommation de matières
premières. Pour plus de renseignement sur le recyclage de ce produit, veuillez vous adresser à votre com-
mune ou aux services communaux de traitement des déchets.
Montage
-
-
-

Appareils sur pieds :
Fixation murale :
Fdu tableau et déterminez le point de suspension à partir de la cote médiane
Thermatic
Classic
Art.- Nr.
Prod. No.
Réf. art.
Minimum
en mm
A B C D E F G
80 62,5 55 290 285 520 600 200
81+82 62,5 100 600 675 520 600 200
83, 86 61,5 104 800 885 520 600 250
84+85 62,5 100 600 675 520 600 200
Thermatic
Clima
81 B 62,5 100 600 675 520 600 200
82 B 62,5 100 600 675 520 600 200
83 B 61,5 104 800 885 520 600 250
Thermatic
Design
8710 62,5 100 600 675 400 480 200
8716 62,5 100 600 675 400 480 200
8720 62,5 100 800 875 400 480 250
8725 62,5 100 800 875 400 480 300
Thermatic
Slim
8904 180 64 232 -315 395 250
8905 180 49 262 -459 539 300
8910 180 49 262 -667 747 450
8915 180 49 262 -1285 1365 500
8915s 180 49 262 -1035 1115 500
B
avec une mèche de 8 mm pour les supports muraux. Insérez ensuite les chevilles (1) dans les trous percés
(2)
vis (3) et des rondelles (5). Pour monter les entretoises (6)-
Aet Epuis percez un trou de 50 mm de profondeur avec une mèche de
8 mm pour chacune des entretoises. Insérez maintenant les chevilles (1) dans les trous percés pour
(3) et des rondelles
(5)(7),
(7) avec les rondelles (5)
(2) et sur les entretoises (6).

Pour le montage mural
F
G
E
CBB
D
AA
8 cm 10 cm
(1x Thermatic Slim)
4
2
1
3
5
5
1
2
35
2x
2x (1x Thermatic Slim)
11
7
6
5
3
5
7
6
53
9
11
11
12
Pour les appareils sur pieds
Remarque importante :
Une fois le montage de l'appareil réalisé, la che doit être aisément accessible sans toutefois que
l'appareil ne soit implanté directement en dessous de la prise. Les réparations et l'ouverture de
l'appareil doivent être réalisées uniquement par du personnel spécialisé ou formé.
neutre ; vert-jaune = conducteur de mise à la terre/PE).
ATTENTION :

Stand 15.11.2017 • WM9100• wibo-Werk • Technische Änderungen vorbehalten •
wibo-Werk GmbH Hamburg · Jägerlauf 41-51 · 22529 Hamburg · Telefon +49(0)40 55 48 00
wibo-Werk Austria GmbH · Mariahilfer Straße 36 · 1070 Wien · Telefon +43(0)1 597 88 83
This manual suits for next models
20
Table of contents
Languages:
Other wibo Heater manuals