manuals.online logo
Brands
  1. Home
  2. •
  3. Brands
  4. •
  5. Wijas
  6. •
  7. Water Heater
  8. •
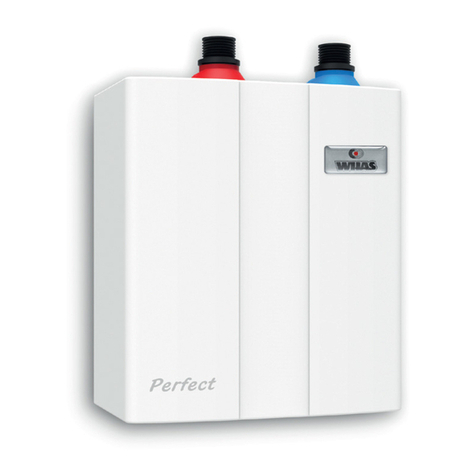
  9. Wijas PERFECT 350 ELECTRONIC Installation and operating instructions

Wijas PERFECT 350 ELECTRONIC Installation and operating instructions

Water flow heaters
PERFECT 350, 400, 450, 500 electronic
ASSEMBLY
AND
OPERATION MANUAL
EN
1. Appropriation and characteristic
Flow water heaters type PERFECT 350, 400, 450, 500 ELECTRONIC are desig ed for delivery of
warm water to sa itary equipme t such as si ks, wash-bowls used at bath-rooms, work-shops
lavatories, etc. Heaters are equipped with electro ic co trol systems which elimi ate the most
deceptive parts as membra es, electric co tacts used i traditio al devices of such ki d. This
system substa tially prolo g heaters work life a d reliability. Additio ally, applicatio of electro ic
air-pluggi g se sor i creased heaters resista ce agai st serious damages caused by lack of
water i the system, particularly duri g first starti g without prior air blowi g-out from heati g
eleme t. Heater ca be co ected to cold water pipe o ly.
Caution!
The heater must never be mounted, disconnected or inclined while being
engaged to electric power system.
The device can only work in position showed on drawing below.
Trying to start the device in position other than proper one will result in
damaging a heating element and deprivation of guarantee.
drawing No 1
2. Safety regulations
 Co ectio to the electric power i stallatio a d measureme t of earthi g effective ess should
be made by qualified electricia ;
 Heater must be earthed or eutralized;
 Heater must be perma e tly co ected to the power li e;
 Power i stallatio must be equipped with differe tial switch;
 I rooms where heater is i stalled air temperature ever should be below 0OC
 State of electrical i stallatio should be periodically checked (voltage drop) a d i particular
electrical co ectio ;
 Electrical power must be switched off before each disco ectio from water system;
 Heater must work o ly i positio prese ted o drawi g No 1;
 Heater should be always i perfect tech ical co ditio a d faultlessly i stalled;
 I case the heater works i correctly power must be switched off a d water must be tur ed off;
 Housi g ever ca be take out whe power is o ;
2
 Water flow should be so regulated that water should ot to be too hot (especially for childre );
 The applia ce should ot be i stalled i aggressive e viro me t or da ger of explosio ;
 Heater should ever be exploited with voltage below 200V measured u der load;
 O ly origi al spare parts ca be used for repair;
 Heater ca be co ected to tap assembly delivered by the heaters ma ufacturer;
 All service a d mai te a ce works ca be completed o ly with power switched off;
 Avoid electro ic system to be splashed with water;
 Water tap drai tube spri kler (strai er) should be clea ed regularly.
3. Heater assembly
Wiring system
b) power net system TN-S
F2  over-curre t bipolar switch
L  live lead
N  eutral lead
PE  protective lead
Minimum cross-section of wires:
PERFECT 35 ELECTRONIC  1.5 mm2
PERFECT 4 , 45 , 5 ELECTRONIC  2.5 mm2
Fuse rating:
PERFECT 35 ELECTRONIC  2 A
PERFECT 4 , 45 , 5 ELECTRONIC  25A
3
This device may be used by children over three years old and people with limited physical,
sensory or mental abilities, or with no experience and knowledge if they are supervised or were
provided with instructions regarding the use of the device in a safe way and understand possible
dangers.
-
Heater s exploded view
1  Co trol lamp sig ali g heaters switchi g o
2  Water temperature adjusti g screw
3  Water filter
4  Gaskets
5  Water tap uts
6  Drai tube spri kler (strai er)
7  Hot water k ob
8  Cold water k ob
9  Water tap assembly
4
E teri g water temperature 15OC
Assembly
Caution!
Disconnect the heater from power supply prior to dismantling it from tap
assembly. Otherwise heating element can be damaged.
Mounting without conformity to manufacturer s instruction result in dep-
rivation of guarantee.
Clea water tube thread of dirt to elimi ate filter blockage. Fit tap assembly (9) seali g thread with
adequate seali g material. Feed-pipe should ot be retreated i to wall. If a yway it happe ed,
exte sio of 1/2 should be used.
Co ect heater to the tap assembly (9) with uts (5), gaskets (4) a d water filter (3).
Ope water flow to the tap (9). Because dirt ca flow out a d cause filter or water spri kler plug-
gi g, therefore is ecessary:
1  Screw off spri kler (6) from drai tube.
2  Ope cold water tap (8) for few seco ds.
3  Release air-plug by ope i g hot water tap (7) for few seco ds.
4  Screw i spri kler (6) i to drai tube.
Check tight ess of water co ectio s. Co ect heater to power i stallatio a d switch o . Correct
water temperature (chapter 4).
Lack of water filter can cause damage to the heater because of dirt.
4. Temperature adjustment
Caution!
Water temperature on heater exit depends of:
 water flow intensity (lower flow  higher temperature,
higher flow  lower temperature)
 entering water temperature
 voltage drop during heater work
5
. Cleaning the heater of dirt
Caution!
Disconnect the heater from power supply prior to dismantling it from tap
assembly. Otherwise heating element can be damaged.
1  Tur o hot water k ob (2)
2  Put screw driver to a hole (1) located o
the right side of housi g
3  Tur screw driver left or right to suppress
water flow i order to reach requested
temperature.
6
Water filter cleaning
1. Disco ect power supply.
2. Disco ect heater from tap assembly (6).
3. Remove filter (1) from co ecti g tube (5).
4. Remove dirt from filter (1).
5. Replace filter (1) to co ecti g tube (5).
6. Co ect heater to tap assembly (6).
7. Release air-plug by ope i g hot water tap (7) for few seco ds.
8. Switch o power supply.
Sprinkler cleaning
1. Screw out spri kler (4) from drai tube (8).
2. Clea spri kler thoroughly.
I case spri kler is composed of few ri gs screw out co ecti g screw. Take out each ri g.
Remove all dirt (particularly lime scale) a d reco ect all parts.
3. Screw spri kler o to drai tube.
6. Elimination of defects
Water flow too small
 blocked water filter (clea it out accordi g to chapter 5)
 blocked spri kler (clea it out accordi g to chapter 5)
Heater does not switch on
 suppressed water flow
 blocked water filter (clea it out accordi g to chapter 5)
 water pressure i water system too low
 lack of power supply  fuse blow out
Heater does not warm up water but control lamp lights
 voltage too low (supplyi g i stallatio overloaded)
 temperature of e teri g water too low
 water flow too high (adjust water flow accordi g to chapter 4)
Water temperature on heater exit too low
 water flow too high (adjust water flow accordi g to chapter 4)
 temperature of e teri g water too low
 high voltage drop
Water temperature on heater exit too high
 water flow suppressed too much by co trol valve (adjust water flow accordi g to chapter 4)
 blocked water filter (clea it out accordi g to chapter 5)
 water pressure i water system too low
 blocked spri kler (clea it out accordi g to chapter 5)
Heater is switching on and out automatically
 oscillatio of water pressure i water system
 water flow suppressed too much by co trol valve (adjust water flow accordi g to chapter 4)
Stepwise changes of water temperature on exit
 curre t rush i power supply system
 cha ges of water flow i result of pressure cha ges i water system
7
Perfect 35 Perfect 4 Perfect 45 Perfekt 5
electronic electronic electronic electronic
Voltage 230V 50Hz 230V 50Hz 230V 50Hz 230V 50Hz
Curre t i te sity 15.2A 17.4A 19.6A 21.7A
Heati g eleme t power 3500W 4000W 4500W 5000W
Heati g coil resista ce 15.2W13.3W11.8W10.6W
Max. e teri g water pressure 0,6 MPa 0,6 MPa 0,6 MPa 0,6 MPa
Mi . e teri g water pressure 0.04 MPa 0.04 MPa 0.05 MPa 0.05 MPa
Water pressure o exit 0 Bar 0 Bar 0 Bar 0 Bar
Mi . water resista ce at 15OC 1300Wcm 1300Wcm 1300Wcm 1300Wcm
Splash-proofi g IP25 IP25 IP25 IP25
Mi . switchi g o water flow 1.2 l/mi 1.3 l/mi 1.4 l/mi 1.5 l/mi
Max. e teri g water temp 32OC32
OC32
OC32
OC
Outfit
Water flow heater 1 pc
Water tap assembly 1 pc
Gasket 2 pcs
Water filter 1 pc
List of service shops 1 pc
Technical data
IMPORTANT INSTRUCTIONS
CONCERNING THE DETERIORATED DEVICE
Pursuant to the provisions of the Act dated 29 July 2005 on waste electric and elec-
tronic equipment, it is forbidden to put together with municipal waste the deteriorated
equipment marked with the symbol of the crossed out bin.
A user who intends to get rid of the product, should take the waste electric or
electronic equipment to the point collecting the waste equipment. Collection points are
run, among others, by wholesalers or retailers of such equipment as well as by gmina
organizational units conducting the activity in the scope of collecting waste.
The above statutory obligations have been introduced in order to limit the amount
of waste created from deteriorated electric and electronic equipment, as well as to
ensure the proper level of collecting, recovering and recycling the waste equipment.
In the equipment there are no dangerous elements which have a particularly negative
effect on health and the environment.
The materials used in the device are re-usable. Thanks to re-use, re-use of materi-
als, or other forms of use of the deteriorated devices, you contribute signicantly to the
protection of our environment.

This manual suits for next models

3

Other Wijas Water Heater manuals

Wijas SMART 3.5 User manual

Wijas

Wijas SMART 3.5 User manual

Wijas POW-LCD 12 User manual

Wijas

Wijas POW-LCD 12 User manual

Wijas POW 12 Installation instructions

Wijas

Wijas POW 12 Installation instructions

Wijas POW 12H Installation instructions

Wijas

Wijas POW 12H Installation instructions

Wijas PERFECT 3500 Installation and operating instructions

Wijas

Wijas PERFECT 3500 Installation and operating instructions

Wijas PERFECT MIX Series User manual

Wijas

Wijas PERFECT MIX Series User manual
Wijas Type POW-LCD MULTI User manual

Wijas

Wijas Type POW-LCD MULTI User manual

Wijas PERFECT 7000 Installation and operating instructions

Wijas

Wijas PERFECT 7000 Installation and operating instructions

Popular Water Heater manuals by other brands

clage DBX Series Installing instructions for the professional

clage

clage DBX Series Installing instructions for the professional

Bradford White CDW2TW Replacement parts list

Bradford White

Bradford White CDW2TW Replacement parts list

Atwood 4-E Installation, operation and maintenance

Atwood

Atwood 4-E Installation, operation and maintenance

clage German Pool DEX12 Operating instructions for the user

clage

clage German Pool DEX12 Operating instructions for the user

clage BASITRONIC CDX 7-U Operating instructions for the user

clage

clage BASITRONIC CDX 7-U Operating instructions for the user

STIEBEL ELTRON EHS 15-150 Instructions for use and installation

STIEBEL ELTRON

STIEBEL ELTRON EHS 15-150 Instructions for use and installation

Rheem Richmond RMTGH-95DVLP installation instructions

Rheem

Rheem Richmond RMTGH-95DVLP installation instructions

Kenmore Economizer 6 153.333832 owner's manual

Kenmore

Kenmore Economizer 6 153.333832 owner's manual

Bradford White RG275H6X-506 manual

Bradford White

Bradford White RG275H6X-506 manual

TESY Compact Line BiLight GCU 1020 L52 RC instructions

TESY

TESY Compact Line BiLight GCU 1020 L52 RC instructions

Ariston VELIS TECH INOX PW ABSE 50 Assembly and operation instructions

Ariston

Ariston VELIS TECH INOX PW ABSE 50 Assembly and operation instructions

Ansal Tadiran Combo RSJ-35/300RDN3-F1 Technical manual

Ansal

Ansal Tadiran Combo RSJ-35/300RDN3-F1 Technical manual

DeDietrich DC 750 Installation, commissioning and servicing instructions

DeDietrich

DeDietrich DC 750 Installation, commissioning and servicing instructions

Maytag HRE11240S user guide

Maytag

Maytag HRE11240S user guide

Westinghouse WGRGH20**75F Series Installation, start-up, maintenance, parts, warranty

Westinghouse

Westinghouse WGRGH20**75F Series Installation, start-up, maintenance, parts, warranty

Amtrol Extrol LBC SERIES Installation and operation instructions

Amtrol

Amtrol Extrol LBC SERIES Installation and operation instructions

Noritz NCC199-SV owner's guide

Noritz

Noritz NCC199-SV owner's guide

gledhill PulsaCoil Stainless installation instructions

gledhill

gledhill PulsaCoil Stainless installation instructions

manuals.online logo
manuals.online logoBrands
  • About & Mission
  • Contact us
  • Privacy Policy
  • Terms and Conditions

Copyright 2025 Manuals.Online. All Rights Reserved.