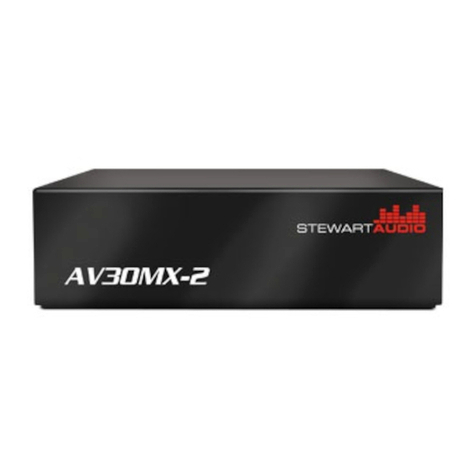
Wilcoxon WST7B3 User manual

97042 Rev A 11/21 Page 2 of 16
Contents
Safety section 3
Safety summary 4
1.0 Product description 5
1.1 Front panel 5
1.2 Rear panel 7
2.0 Operation of the power amplifier 8
2.1 Using the power amplifier with an electromagnetic shaker 8
2.2 Using the power amplifier with a piezoelectric shaker 9
2.3 Matching networks 9
3.0 Initial system setup 11
3.1 AC line power 11
3.2 Signal input 11
3.3 The power amplifier, matching network, and shaker cables 11
4.0 Operation 12
4.1 Connecting to AC power 12
4.2 Test operation 14
5.0 Maintenance 15
6.0 Technical assistance 16
6.1 Technical assistance 16
6.2 Customer service 16

97042 Rev A 11/21 Page 3 of 16
WARNING: OPERATION OF THIS AMPLIFIER IS SAFE WHEN THE INSTRUCTIONS IN THIS
MANUAL ARE READ THOROUGHLY BEFORE THIS SYSTEM IS CONNECTED TO ELECTRICAL
POWER. PARTICULAR ATTENTION MUST BE PAID TO THE SAFETY SECTION OF THIS
MANUAL. IT IS THE ULTIMATE RESPONSIBILITY OF THE USER TO SAFELY SET UP,
OPERATE AND MAINTAIN THE SYSTEM.
WARNING: TO PREVENT FIRE OR SHOCK HAZARD, DO NOT EXPOSE THIS EQUIPMENT TO
RAIN OR MOISTURE.
WARNING: LETHAL VOLTAGES ARE PRESENT IN THE AMPLIFIER AND MATCHING
NETWORKS. THE AMPLIFIER CONTAINS ENERGY STORING DEVICES. THEY MUST BE
ALLOWED TO DISSIPATE ENERGY BEFORE OPENING THE AMPLIFIER ENCLOSURE.
Safety section
The power amplifier can be safely operated when the instructions in this manual are carefully followed.
This section summarizes the safety considerations. Reminders, in the form described below, will
appear in the detailed instructions to assure operator awareness of these safety considerations.
Qualified personnel should operate and maintain this power amplifier only after becoming thoroughly
familiar with this manual.
WARNING: This symbol is used in the instruction manual where operator safety must be
considered. The instruction manual should be consulted and read carefully.
CAUTION: This symbol is used when caution is needed to prevent damage to equipment.
It is used where careful attention to certain procedures described in the instruction manual
is needed. This symbol is also used to emphasize procedures other than normaloperating procedures.

97042 Rev A 11/21 Page 4 of 16
Safety summary
1. Make sure that the power amplifier is properly grounded to a good earth ground.
2. Make sure that any piezoelectric shaker being driven is properly grounded to a good earth ground.
3. Disconnect the power cord at its source before connecting or removing power amplifier cables.
4. To reduce the risk of electric shock, do not remove the power amplifier cover. No user-serviceable
parts are inside. Refer all servicing issues to Wilcoxon Sensing Technologies.
5. Do not attempt to operate a power amplifier without the protective covers secured.
6. All cables must be connected between the power amplifier, matching network and shaker before
electrical power is connected. Inspect for frayed or cut cables prior to operation.
7. Hearing protection devices are highly recommended in the vicinity of a piezoelectric shaker
whenever the shaker is being driven at high output levels.
8. Do not expose this equipment to rain or moisture.
9. Lethal high voltage may be present at the power amplifier output connector.
10. Use common sense and avoid haste!

97042 Rev A 11/21 Page 5 of 16
1.0 Product description
The WST7B3is a single-channel, rack-mountable power amplifier designed to high performance
standards. The WST7B3develops a maximum of 900 watts of power into a 4 Ohm load. The amplifier
will drive the full range of Wilcoxon shakers, with the ability to drive the larger shakers to the full
performance limits of the shakers.
The WST7B3combines the latest power amplifier technology with uniquely simple circuit technology to
reduce distortion of all types, and at all power levels, over the full frequency range. In addition to
performance achievements, the power amplifier is designed for long-term reliability and exceptional
resistance to abusive operating conditions.
The power amplifier has circuit breaker protection for AC power input.
Specifications WST7B3
Power output 900 Watts, maximum, into 4load
Power bandwidth 0.5 Hz to 100,000 Hz
Input sensitivity 2.5 Volt peak, for full output
Input impedance 10 k, nominal
Dimensions 19” wide, 15.5” deep, 5.25” high
Weight 42 lb
Power requirements 115V, 15A (WST7B3) or 220V, 15A (WST7B3-220)
1.1 Front panel
1.1.1 Power switch: The front panel features a push-on/push-off type latching power switch used to
apply or remove AC line power to the SoftStart circuitry. Note that the rear circuit breaker must be on
for the amplifier to power-up.

97042 Rev A 11/21 Page 6 of 16
1.1.2 Power indicator: The WST7B3has an LED indicator above the power switch to monitor the
following conditions:
POWER UP SEQUENCE –After pushing the power switch, the LED will turn from unlit to red
(mute). When the power supply has stabilized, the amplifier will come out of mute and the LED
will change to green (normal operation).
UNLIT LED (No power) –The amplifier channel LED when unlit indicates no AC mains power is
present at the channel power transformer. This usually indicates that the amplifier probably
needs only to be powered on.
CLIPPING (flashing red) –Clipping occurs when the amplifier output level no longer can follow
the level increase at the input (over driven input condition). When a channel is driven into
clipping, the channel LED will change from green to red then back to green when the level is
reduced. Momentary clipping can be tolerated, however, it indicates that maximum undistorted
power has been surpassed and potential speaker/shaker damage may result if overload
conditions persist. Any amplifier that is constantly operaed into clipping indicates a more
powerful amplifier is neededfor that application.
THERMAL SHUTDOWN (orange) –The amplifier has thermal shutdown circuitry to prevent
damage due to overheating. Should thermal shutdown occur, the channel will mute, and the
channel LED will turn orange. When the channel has cooled to a safe operating condition, the
channel will return to normal operation.

97042 Rev A 11/21 Page 7 of 16
1.2 Rear Panel
1.2.1 Connecting to AC power: Please check the Data Plate on the right rear of the amplifier to verify
power requirements agree with your location. Before plugging in the power cord, make sure the Mast
Circuit Breaker is switched to the “ON”position. Plug the IEC-320 C14 end of the power cord into the
amplifier, then plug the other end into an approved and grounded AC receptacle. The “STATUS”LED
should flash green, then switch to red, indicating AC power is present in the unit.
1.2.2 Master Circuit Breaker: The WST7B3amplifier uses a magnetic-trip
circuit breaker to protect the amplifier. This breaker is not an on/off switch
and must be in the “ON”position during the installation and normal
operation. Use the front panel push-button power switch or an external control
voltage to power-up or power-down the amplifier.
Should the breaker trip, or switch “OFF,”lower or remove the amplifier input signals. Remove the AC
power by disconnecting the power cord from the amplifier for 20 seconds. Switch the breaker to the
“ON”position. Reconnect the power cord, then power the unit up normally. The circuit breaker must be
“ON”at all times for the WST7B3amplifier to operate.
1.2.3 Output connector: Connection to the shaker or matching network is accomplished by attaching
high quality cable to the Output Binding Posts. The output binding posts provide three different
interconnect options:
BANANA PLUGS (Optional) provide a quick disconnect option. Before inserting a banana plug
into the binding post, be sure to tighten the post nut to avoid rattling and to provide full insertion
of the banana plug.
SPADE LUGS (Recommended) provide high contact area and secure fastening. Post diameter
is 5/16”(8mm), lug width 5/8”(16mm).
STRIPPED BARE WIRE (Not Recommended) up to 3 gauge can be inserted through the hole in
the binding post and held in place by tightening the post knob. Additional tightening pressure

97042 Rev A 11/21 Page 8 of 16
can be achieved using a coin in the slots of the knob.
1.2.4 Input connector: Single-ended BNC and Balanced XLR and TRS connections are available and
can be selected using the Input Select switch on the rear panel of the amplifier. It is recommended to
use the BNC single-ended input. The balanced input requires a balanced pre-amplifier source.
1.2.5External/local switch: To power-up the amplifier using an external control voltage, supply a 5V
to 12V AC or DC control voltage to the ‘IN’ terminals of the control voltage connector. Use paired wire
of 22 to 18 gauge between the source device and the WST7B3amplifier. By selecting the switch to the
“external” position, the amplifier will power-up only when the control voltage is present (on). Immediately
following power up, the control voltage will appear at the ’OUT’ terminals of the control voltage
connector for the control of other equipment. The removal of the control voltage (0V) causes the
amplifier to turn ‘off’ and the control voltage at the ‘OUT’ terminals will be interrupted. In the “Local”
setting, the amplifier will ignore the control voltage and power up only by using the front panel push-
button power switch. If a control voltage is present at the ‘IN’ terminals, it will still be available at the
‘OUT’ terminals after the power-up sequence.
Notes: The “OUT”terminals are connect to the “IN”terminals once the amplifier has powered-up. The
control current is determined by the source equipment. The carrying current of the “OUT”relay is 2
Amps. The amplifier’s control circuitry itself draws less than 2mA from the control current when
operating.
2.0 Operation of the power amplifier
Wilcoxon Sensing Technologies manufactures a comprehensive line of vibration generating systems,
including electromagnetic and piezoelectric shakers. Electromagnetic shakers are powered directly
from the output of the power amplifier. However, piezoelectric shakers require a matching network
between the power amplifier and the shaker. A signal source to drive the power amplifier is not part of
the system and must be supplied by the user. This guide describes the operation of the WST7B3power
amplifier. Other guides describe the operation of the matching networks and shakers. For all vibration

97042 Rev A 11/21 Page 9 of 16
generating systems a customer supplied signal generator is necessary to operate the vibration
generating system. A piezoelectric accelerometer to monitor vibration output is strongly recommended.
2.1 Using the power amplifier with an electromagnetic shaker (models F3, F4, F10)
There are no specific requirements for the WST7B3amplifier to connect with the aforementioned
electromagnetic shakers.
2.2 Using the power amplifier with a piezoelectric shaker (models F7 and F7-1)
The power amplifier will drive piezoelectric shakers but must have a matching network between the
power amplifier and the shaker for full output.
CAUTION: In these modes of operation power amplifier must be used with a Wilcoxon
matching network. Do not attempt to operate the power amplifier without the appropriate
matching network.
CAUTION: The impedance matching transformers used in the matching networks are not
designed for use at low frequencies. NEVER attempt to drive the matching networks at
frequencies less than 500 Hz. Piezoelectric shakers have little or no useful output at low frequencies.
2.3 Matching networks
The operating guide for the particular matching network used will provide detailed information for the
proper use of matching networks. However, information in this section is presented to aid the user in
understanding and applying matching networks.
While an electromagnetic shaker presents a low, relatively constant, largely resistive impedance, a
piezoelectric shaker is essentially capacitive. This means that the impedance presented by the
piezoshaker will decrease almost linearly with increasing frequency. A piezoshaker creates a

97042 Rev A 11/21 Page 10 of 16
displacement proportional to the voltage input for frequencies below its resonance.
Therefore, in order to get maximum displacement and consequently maximum
acceleration levels at low frequencies, the voltage must be stepped up significantly.
The impedance matching network normally consists of a step-up transformer and an output tap
switching arrangement. A variety of output voltages are then available to maximize the voltage
delivered to the piezoshaker at different frequencies. Due to the capacitive nature of the piezoelectric
shaker, the output impedance of the power amp, and the impedance transformation of the matching
network’s transformer, the voltage at the piezoelectric shaker rolls off at 20dB per decade after the
corner frequency (exactly like an RC filter). As the voltage switch setting on the matching network is
switched from highest to lowest setting, the bandwidth of the system will increase. In general,
piezoshakers can be operated at their lower frequencies with the matching network switch in its highest
voltage position. The relatively low load (high impedance) of the piezoshaker at low frequencies is not
demanding and the power amplifier can maintain the high voltage swing for maximum shaker output,
however as the operating frequency increases, lower output voltage taps become more efficient. The
greatest power requirements for the Power Amp will occur at the corner frequencies of the matching
network and shaker system and at the resonant frequency of the shaker.
CAUTION: The piezoshakers can be damaged by internal heat build-up when run at
high levels for extended periods. This is due to the dielectric loss tangent of the
piezoceramic material that generates heat. When driven at high power levels this heat
buildup will raise the temperature of the piezoceramic to the Curie temperature where it
will depolarize itself.
CAUTION: Do not change switch settings of the matching network when there is a
signal present as this may cause the contacts to arc and destroy the switch.

97042 Rev A 11/21 Page 11 of 16
3.0 Initial system setup
Note: All cables should be installed and connections should be completed before switching the
power/circuit breaker switch to "ON."
3.1 AC line power
The power amplifier is wired at the factory for either 120 VAC or 220 VAC. This
AC voltage power wiring is not changeable by the user. The AC power source
should be capable of providing a minimum of 15 amps at 120 VAC or 220VAC. A
power cord terminating in an IEC320 plug should be connected from the power
amplifier to the AC power line socket.
3.2 Signal input
A laboratory grade low-noise oscillator should be used as a signal source. Use a coaxial cable to
provide the input signal to the BNC connector on the rear panel of the power amplifier. To avoid hum
and noise pickup, avoid running the signal cable parallel to power line cords. Any cabling near power
line cords should be crossed at right angles. The driving signal amplitude is controlled by the signal
generator amplitude control. It is recommended that the signal generating amplitude control be preset,
considering the signal generator’s capability, to eliminate the possibility of overdriving the power
amplifier.
3.3 The power amplifier, matching network, and shaker cables
Electromagnetic shakers do not require a matching network and are connected directly to the power
amplifier with the indicated cable type. Piezoelectric shakers require a matching network between the
power amplifier and shaker; therefore, two cables will be necessary to complete the connections. All
Wilcoxon shakers except the F7-1 piezoelectric shaker are standardized for use with the Wilcoxon
PA10A power amplifier and include the cables necessary to do so. Make sure you request the proper
cables if you are using the WST7B3power amplifier. Table 1 describes the cable types required for
completing all shaker system connections.

97042 Rev A 11/21 Page 12 of 16
Table 1 –Interconnecting cables
Standard cable
connecting to
matching
network (all but
F7-1 standardized
for PA10A)
Optional cable
connecting to
matching
network (for use
w/ WST7B3)
Matching
network
Standard cable
connecting to
shaker (all but F7-
1 standardized for
PA10A)
Optional cable
connecting to shaker
(for use w/ WST7B3)
Shaker
model
None
None
None
R1-8C-8C-J93-10
R1-8B-8B-J93-10
F3
None
None
None
R4M-8C-8C-J9B-10
R4M-8B-8B-J9B-10
F4
None
None
None
R4M-8C-8C-J9B-10
R4M-8B-8B-J9B-10
F10
R22-8C-8C-J9B-5
R22-8B-8B-J9B-5
N7FS
R4-4M-J9-10
N/A
F7
R22-8B-8B-J9B-5
N/A
N8HFS
R4-4M-J9-10
N/A
F7-1
4.0 Operation
4.1 Connecting to ACPower
Check the Data Plate on the right rear of the amplifier to verify power requirements agree with your
location.
1 –Before plugging in the power cord, make sure the Master Circuit Breaker is switched to the “ON”
position.
2 –Plug the IEC-320 C14 end of the power cord into the amplifier, then plug the other end into an
approved and grounded AC receptacle.
3 –The “STATUS”LED should flash
green, then switch to red, indicating AC
power is present in the unit. The
amplifier is now ready to be powered
on.

97042 Rev A 11/21 Page 13 of 16
4 –Once the Status light is green, connect the oscillator cable making certain the oscillator output is set
to its lowest (0 volts) output. You need to wait to increase the oscillator output until after the power
amplifier is operational. Attaching the oscillator cable with the signal level set to something other than
zero volt output sets up the potential of generating a transient signal that could potentially damage the
shaker.
5 - Push the front panel power switch and observe the LED turning from unlit to red (mute). When the
power supply has stabilized the amplifier will come out of mute and the LED will change to green
(normal operation).
Note: If the power indicator color remains red, a fault condition exists within the power amplifier or
output circuit. Turn off the power, repeat the steps in the initial system setup (section 3.0) then re-apply
power. If the fault persists, contact Wilcoxon Sensing Technologies. The LED, when unlit, indicates no
AC mains power is present and the amplifier probably needs only to be powered on or the rear panel
circuit breaker is switched off. The amplifier will need to be unplugged from the AC power source and
the above steps need to be taken to correct this condition.
Clipping occurs when the channel output level no longer can follow the level increase at the input
(overdriven input condition). When the WST7B3is driven into clipping the LED will change from green to
red then back to green when the level is reduced (flashing red). Momentary clipping can be tolerated;
however, it indicates that maximum output power has been surpassed and potential amplifier or shaker
damage may result if overload conditions persist. Any amplifier that is constantly clipping indicates a
more powerful amplifier is needed for that application. A different (larger force output) shaker may be

97042 Rev A 11/21 Page 14 of 16
required
The WST7B3has thermal shutdown circuitry to prevent damage due to overheating. Should thermal
shutdown occur, the amplifier will mute and the LED will turn orange –indicating this condition. When
the amplifier has cooled to a safe operating condition the WST7B3will return to normal operation.
4.2 Test operation
Follow the procedures below to test the operation of the power amplifier.
1. Verify the amplitude level of the signal sourceis set to its minimum position.
2. While monitoring the shaker force output level, or acceleration level, gradually increase the signal
output level of the signal generating system.
3. Verify that the shaker force being applied to the test structure is adequate to continue testing.
Large test levels are not normally necessary. The minimum signal level necessary to conduct your
test should be used as sudden changes in the mechanical impedance of the test object can
adversely the amplifier’s output causing overloads or shaker damage. A current monitoring device
is suggested for electrodynamic shaker applications to ensure the maximum current to the shaker
is not exceeded.
4. If there is no force output from the shaker after increasing the signal level to the PA8HF, reduce the
signal generating system output signal to its minimum, turn off all power, check all instrumentation
components, check all system fuses, and check all cabling before re-applying power.
5. If it appears that there is a problem with the power amplifier, please refer to maintenance (section
5.0) for assistance. If the shaker is producing adequate force, the system is ready to use for
testing.
6. At the completion of all testing operations, reduce the signal generating system output signal to its
minimum and turn off power to all test system components.

97042 Rev A 11/21 Page 15 of 16
5.0 Maintenance
WARNING: Lethal voltages are present within the chassis of the power amplifier
whenever AC power is connected. Users should not attempt repair operations on
components of the power amplifier.
A great deal of care has gone into every power amplifier to verify that it meets or exceeds all its
specifications before it is shipped to you. If you are certain the problem lies in the power amplifier,
check first to determine if the power indicator is illuminated. If it is not, the main AC mains breaker has
likely tripped. Reset the breaker.
After resetting the AC mains breaker, the amplifier may immediately cause another breaker trip. If this
should occur, there could be an amplifier power supply problem and the power amplifier requires
service.
CAUTION: To prevent damage to equipment, NEVER replace a fuse with anything other
than the type specified. Using types other than those specified will void the warranty and
may cause fire or injury to personnel.
For piezoelectric shaker systems employing matching networks, there may be another current-limiting
device (such as a fuse, circuit breaker, or thermal cutout) to the amplifier’s output within the matching
network. Consult the matching network’s manual for details.
CAUTION: The power amplifier contains no user serviceable components. Service or
repair of the power amplifier should not be attempted by anyone other than Wilcoxon
Sensing Technologies employees or designated representatives.

97042 Rev A 11/21 Page 16 of 16
6.0 Technical assistance
6.1 Technical assistance
For technical assistance, please contact Wilcoxon Sensing Technologies customer service at 301-330-8811 or
email info@wilcoxon.com.
6.2 Customer service
To obtain a return materials authorization number, please email info@wilcoxon.com using ‘RMA request’ in the
subject line. Please provide return contact information including name and phone number or contact customer
service directly at 301-330-8811.
Table of contents
Other Wilcoxon Amplifier manuals

