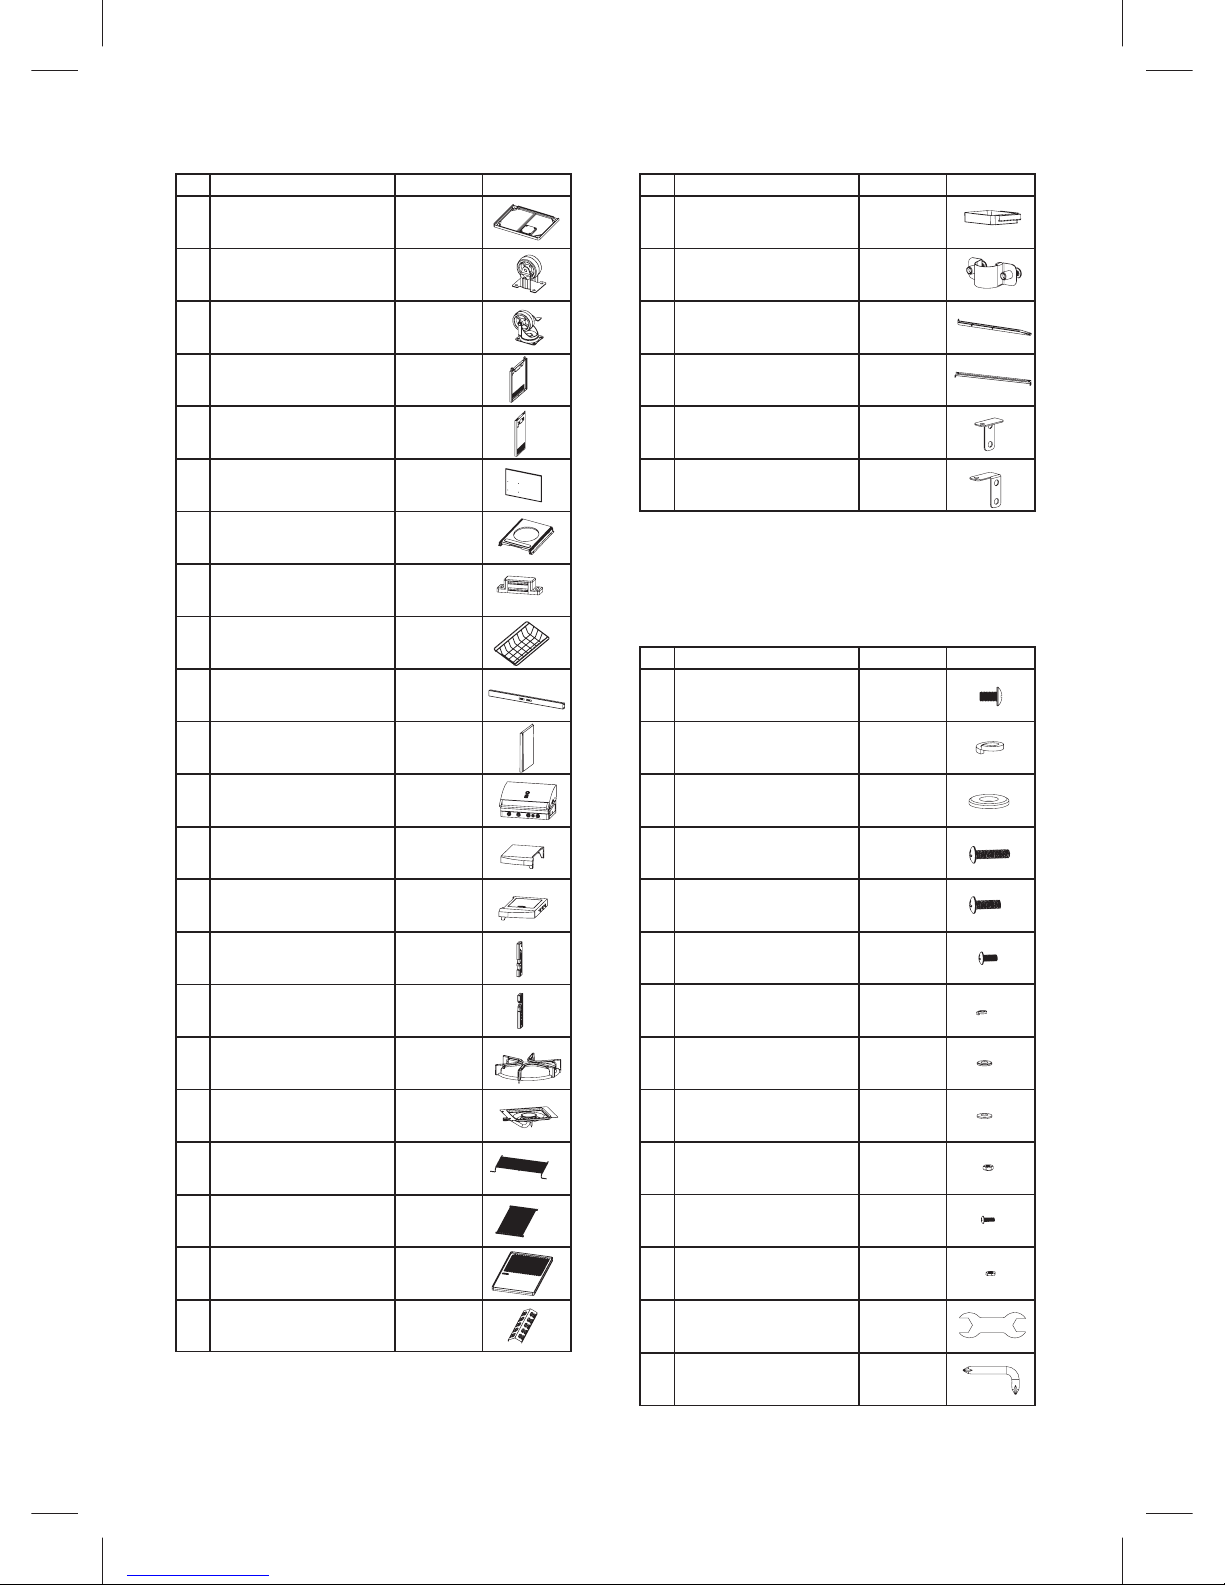
J
H
G
F
I
18
17
22
21
20
19
H VIEW
8.
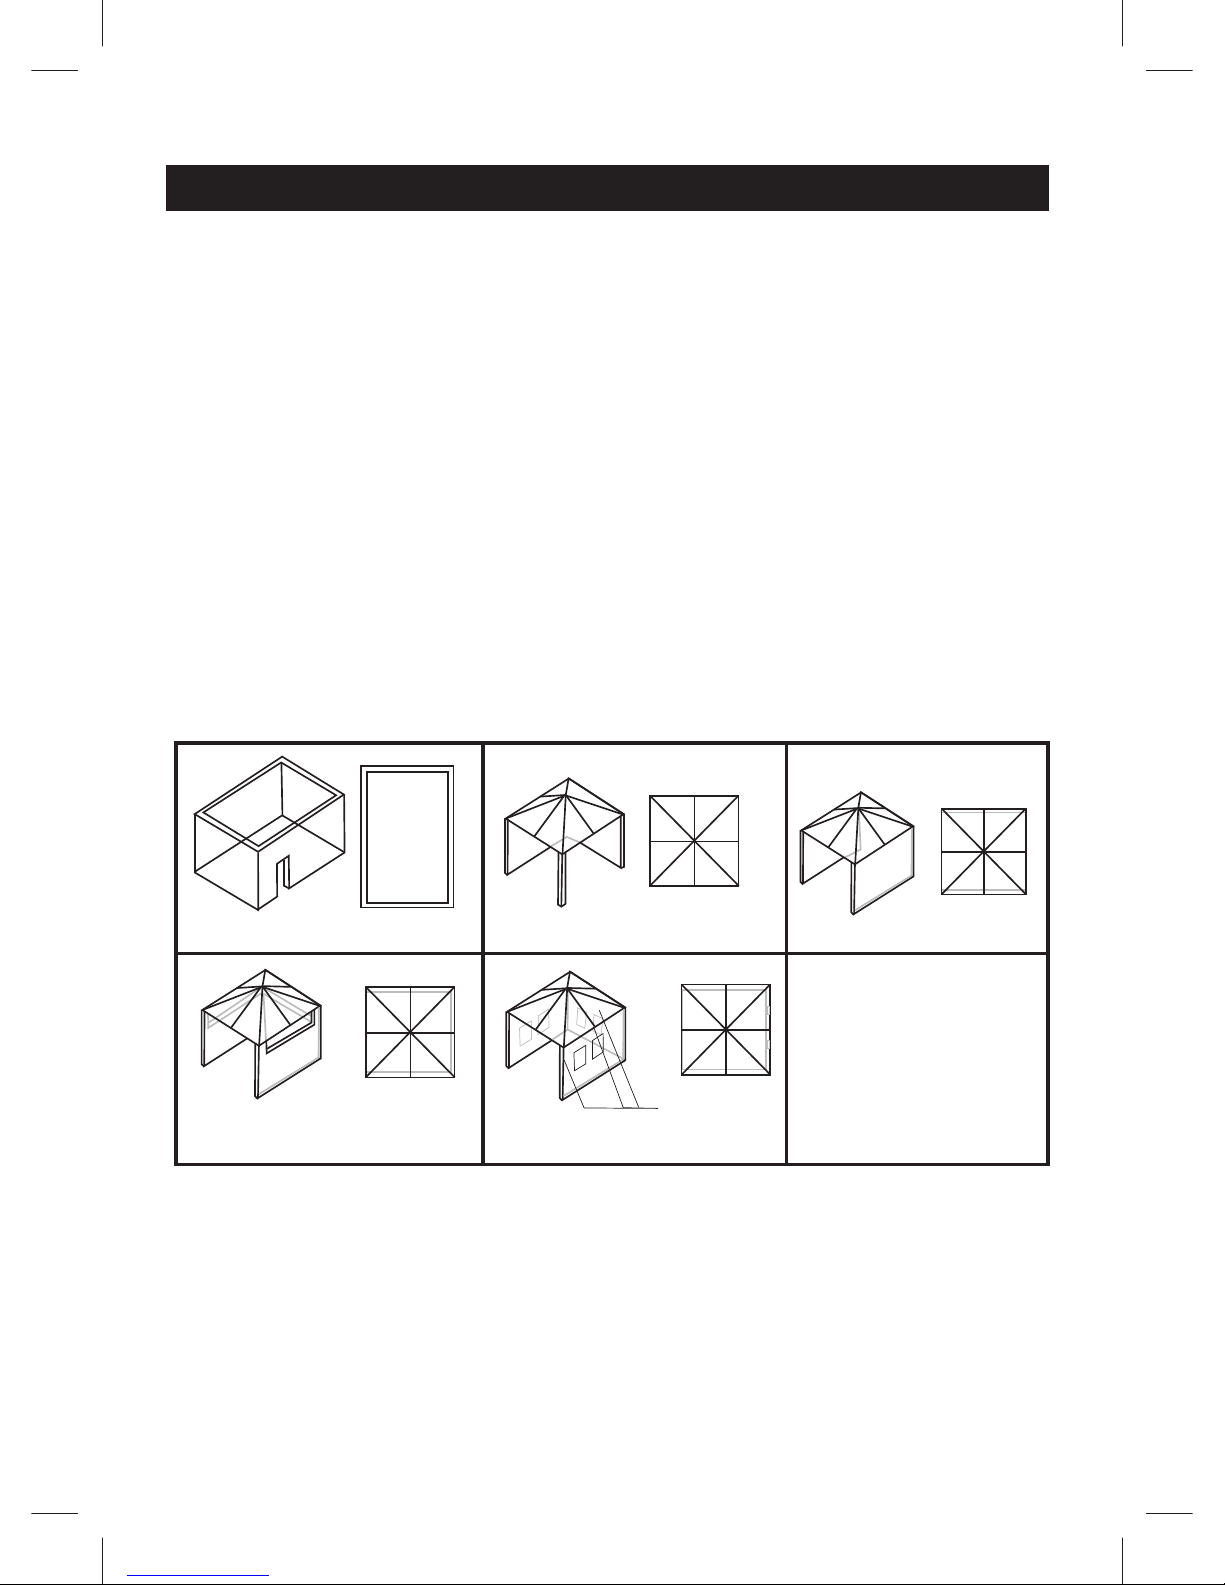
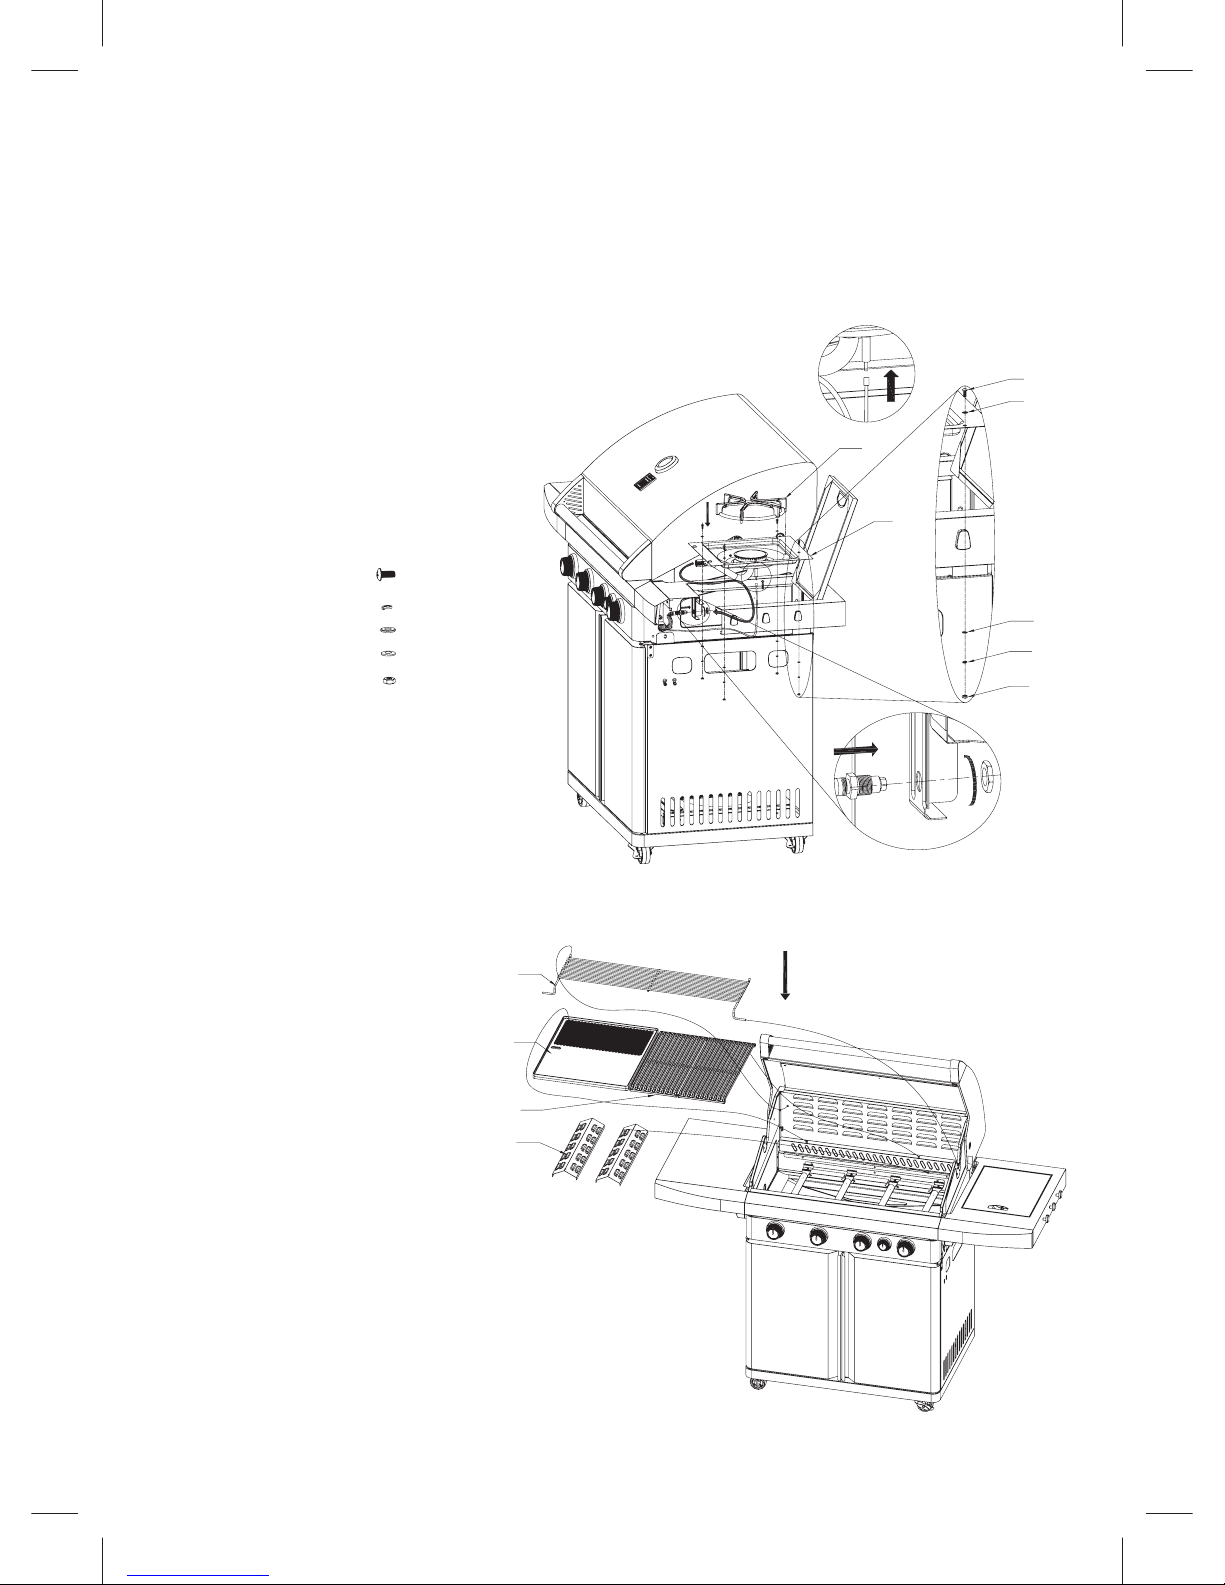
STEP 11
PLACEMENT OF WARMING RACK,
COOKING GRID AND PLATE
1. Place 2xHeat Panel (22) over the 2xright-hand
side burners.
2. Cooking Grid (20) to be placed directly over the
right-hand side burners and both Heat Panels (22),
resting on inside body ledge.
3. Place Cooking Plate (21) over both left-hand side
burners, resting on inside body ledge.
4. Insert Warming Rack (19), place back feet into holes in
back body vent panel and rest the front feet on the
side body panel. As shown in diagram.
THE ABOVE COOKING SURFACE CONFIGURATION
IS HIGHLY RECOMMENDED. ANY ALTERATION CAN
BE POTENTIALLY DANGEROUS AND WILL VOID
YOUR WARRANTY.
F M4X10...4 PCS
G M4 SPRING WASHER...4 PCS
H M4 FLAT WASHER...4 PCS
I M4 MICA WASHER...4 PCS
J M4 NUT...4 PCS
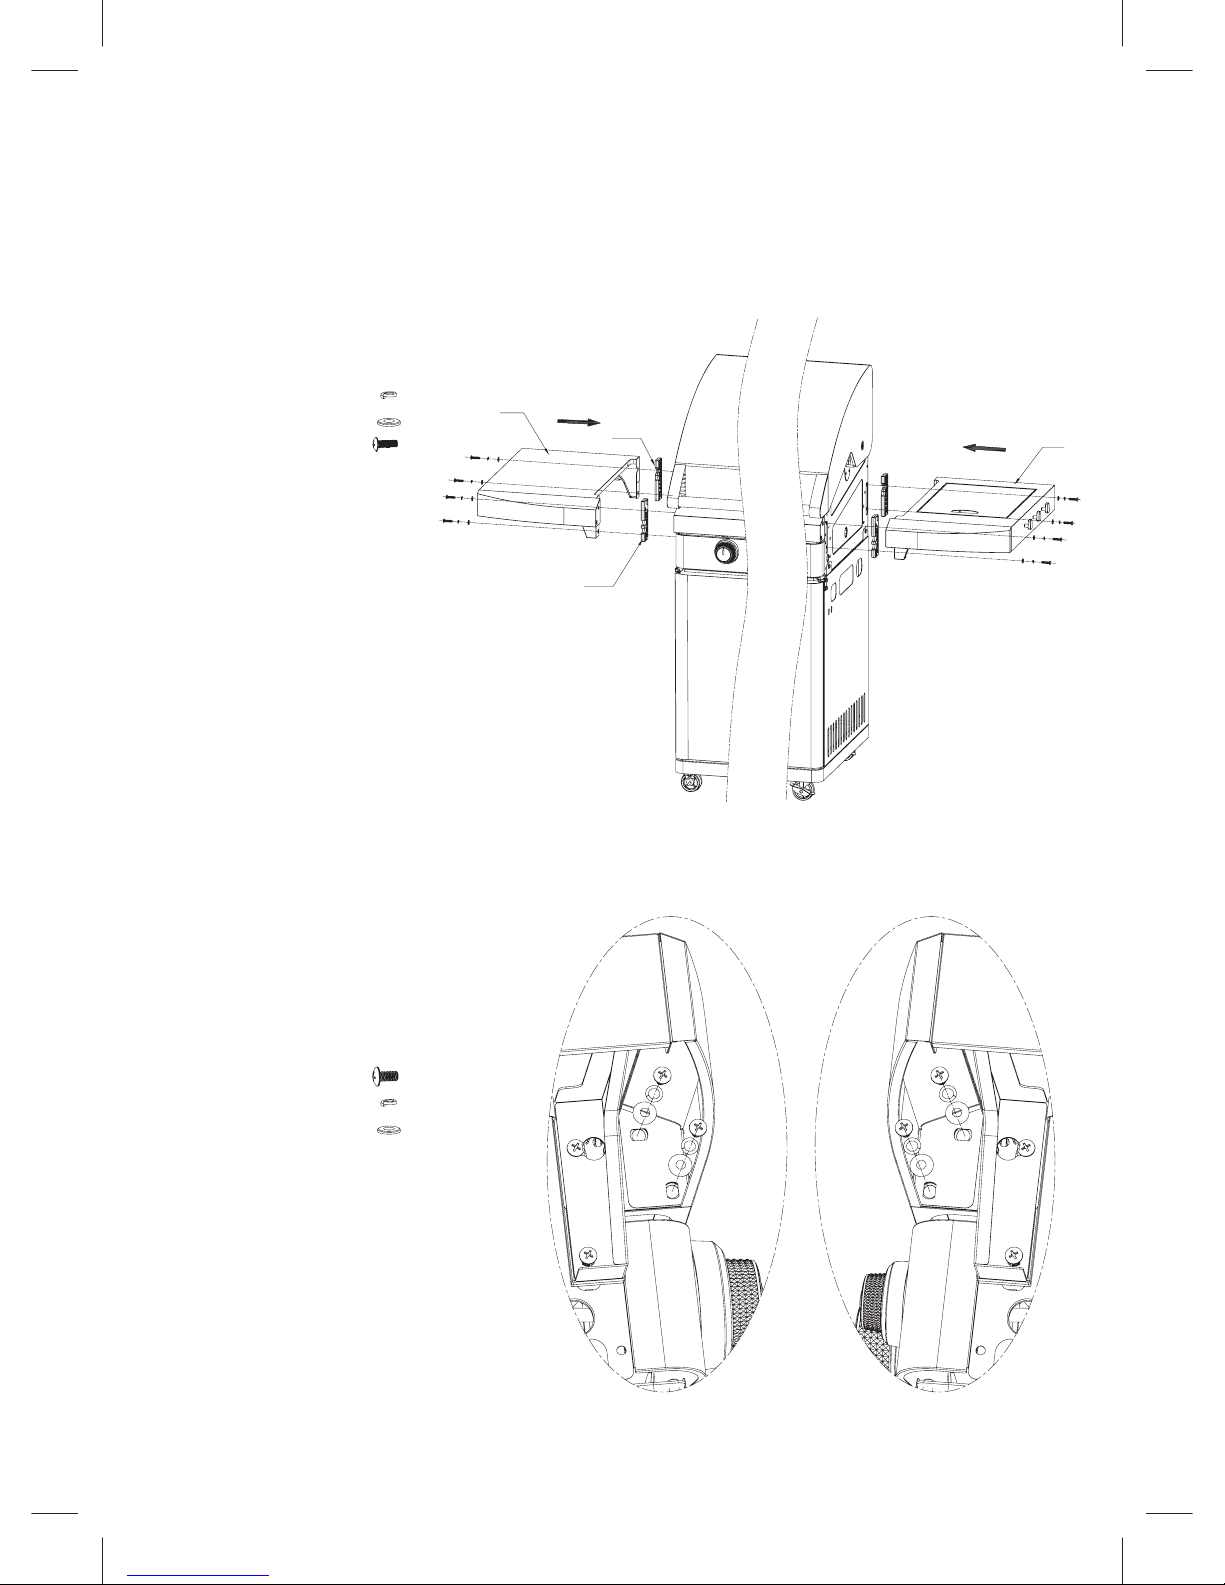
STEP 10
PLACEMENT OF SIDE BURNER ASSEMBLY AND SIDE GRILL
1. Thread side burner hose through hole in right-side Body & Lid Assembly (12)
and place behind side burner fascia as shown in diagram.
2. Unscrew side burner hose nut and place valve nozzle end of hose through
side burner bracket as shown in diagram (H View).
3. Secure in bracket with side burner hose nut, as shown in diagram (H View).
NOTE: THIS IS A LEFT-HAND THREAD MEANING IT TIGHTENS IN AN ANTI-CLOCKWISE DIRECTION.
4. Open the Right Side Shelf Assembly (14) lid and tilt the Side Burner Assembly (18)
pipe through base burner hole on to the valve nozzle, as shown in diagram.
5. Ensure the valve nozzle enters into the burner pipe.
6. Plug ignition wire into electrode.
7. Thread 4xBolt (F) first with Mica Washer (I).
8. Screw down through Side Burner Assembly (18) into Right Side
Shelf Assembly (14) and secure each bolt (F) with Flat Washer (H),
Spring Washer (G) and then Nut (J) as shown in diagram.
9. Position the Side Grill (17) over Side Burner Assembly (18).