manuals.online logo
Brands
  1. Home
  2. •
  3. Brands
  4. •
  5. Winchester
  6. •
  7. Furnace
  8. •
  9. Winchester WEFC SERIES Guide

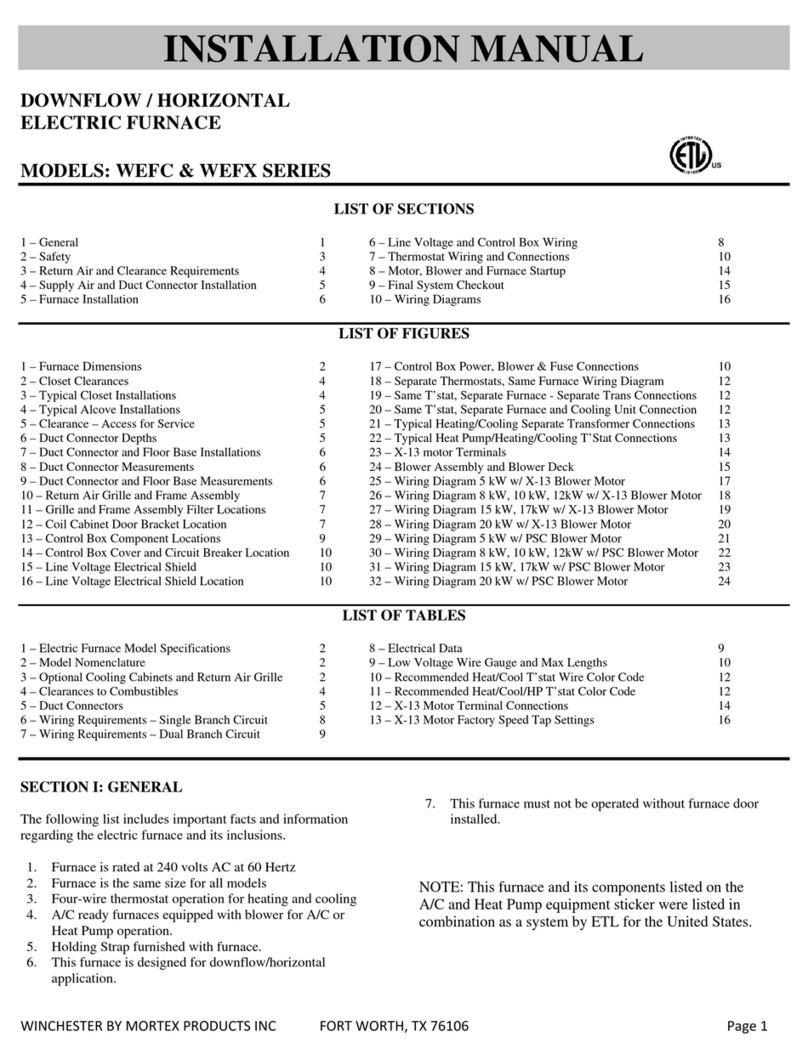
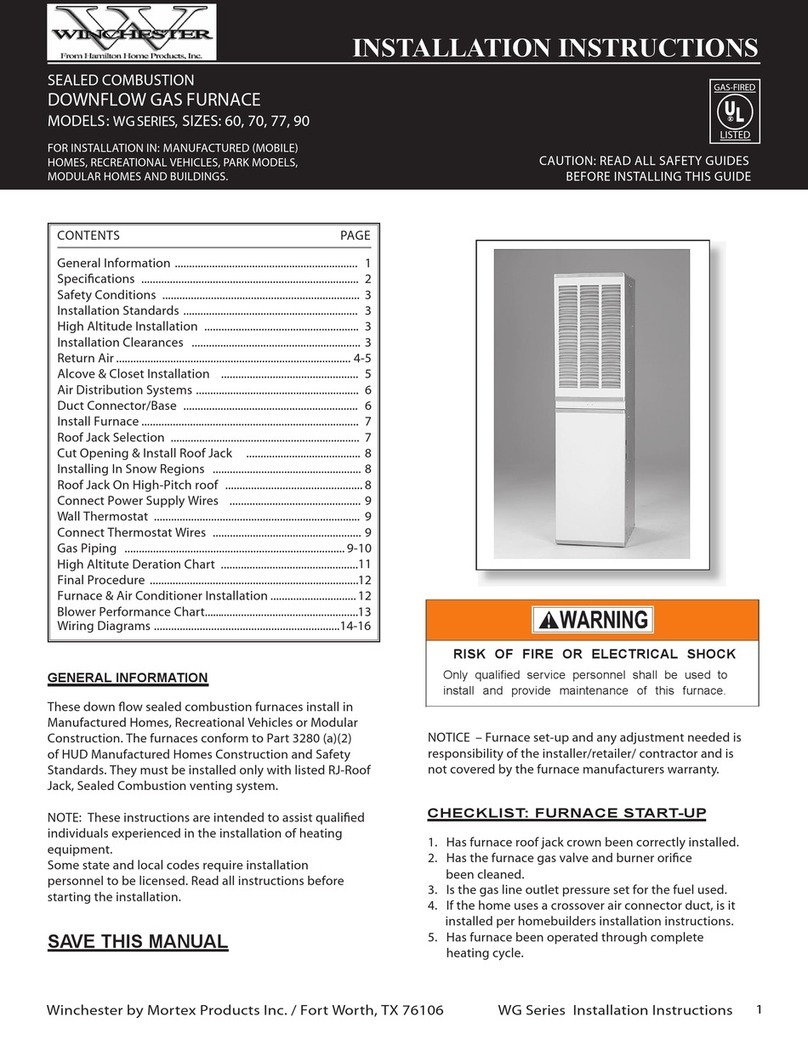
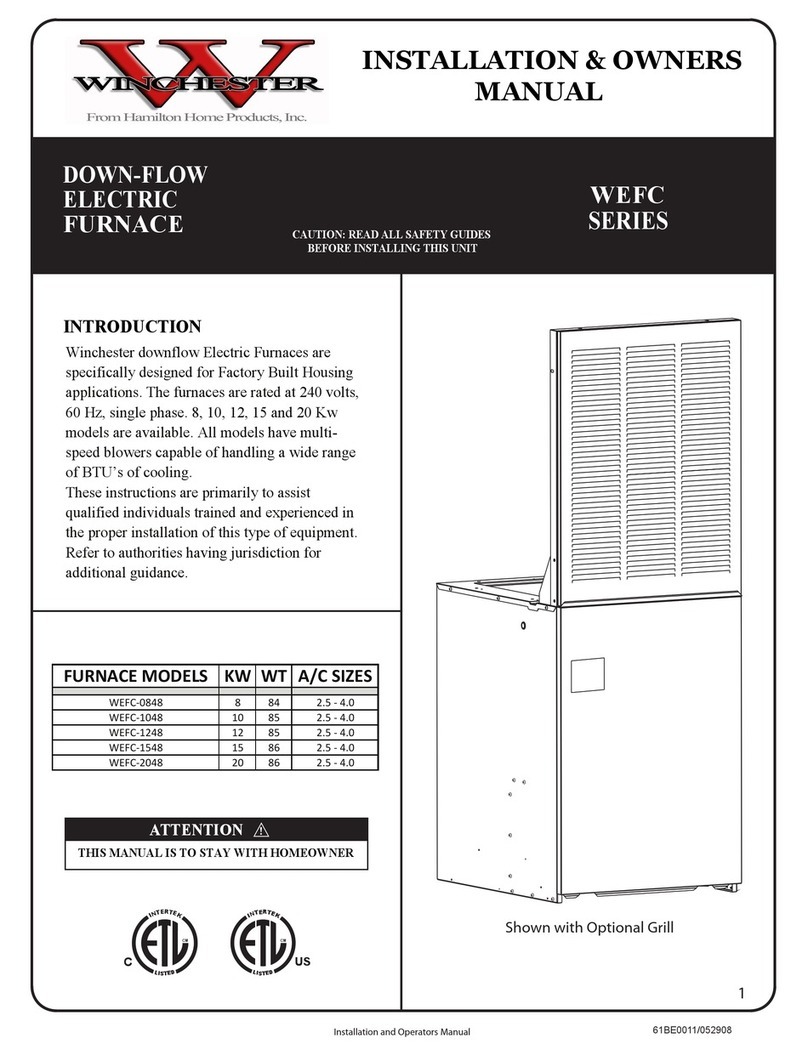
Winchester WEFC SERIES Guide

WINCHESTERHamiltonHomeProductsPage1
USERS INFORMATION MANUAL
DOWNFLOW / HORIZONTAL For Installation In:
SINGLE STAGE ELECTRIC FURNACE 1. Manufactured (Mobile) Home 2. Recreational Vehicle
3. Modular Homes & Buildings 4. Residential Homes
MODELS: WEFC & WEFX SERIES
LIST OF SECTIONS – USERS INFORMATION MANUAL
1 – General 1 4 – Start Up & Shutdown Instructions 4
2 – Safety 2 5 – Owner Maintenance 5
3 – Owners Information & Seasonal Information 3 6 – Blower Performance 13
LIST OF SECTIONS – SERVICE AND MAINTENANCE MANUAL
1 – Safety 7 5 – Trouble Shooting 11
2 – Furnace Maintenance 8 6 – Blower Performance 14
3 – Furnace Controls 9 8 – Accessories Parts 22
4 – Sequence of Operation 10 8 – Replacement Parts 23
LIST OF FIGURES
1 – Component Locations 3 10 – Control Box and Blower Component Locations 10
2 – Return Air Louvered Door 5 11 – PSC Motor Speed Tap Isolation Relay 11
3 – Return Air Louvered Door Filter Locations 5 12 – X-13 Motor Terminal Locations 12
4 – Return Air Louvered Door – Aligning Door 5 13 – Replacement Parts Drawing 1/3 HP PSC Motor 23
5 – Coil Cabinet Pleated Filter Location 6 14 – Replacement Parts Drawing 1/3 HP X-13 Motor 24
6 – Aligning Coil Cabinet door and Thumb Screw 6 15 – Replacement Parts Drawing 1/2 HP X-13 Motor 25
7 – 97-FG Frame and Grille “A” Coil Filter Location 6 16 – Replacement Parts Drawing 3/4 HP X-13 Motor 26
8 – Control Box Cover 8 17 – Replacement Parts Drawing 1/2 HP PSC Motor 27
9 – Blower Assembly and Mounting Screw Location 8 18 – Replacement Parts Drawing 3/4 HP PSC Motor 28
LIST OF TABLES
1 – X-13 Motor Terminal Connections 12 8 – Blower Performance 3/4 HP - PSC Motor 21
2 – Factory Speed Tap Settings 13 9 – Accessory Parts List 22
3 – Blower Performance 1/3 HP - PSC Motor 14 10 – Replacement Parts List – 1/3 HP - PSC Blower Motor 23
4 – Blower Performance 1/3 HP - X-13 Motor 15 11 – Replacement Parts List – 1/3 HP - X-13 Blower Motor 24
5-1 – Blower Performance 1/2 HP - X-13 Motor 16 12 – Replacement Parts List – 1/2 HP - X-13 Blower Motor 25
5-2 – Blower Performance 1/2 HP - X-13 Motor 17 13 – Replacement Parts List – 3/4 HP - X-13 Blower Motor 26
6 – Blower Performance 3/4 HP - X-13 Motor 18 14 – Replacement Parts List – 1/2 HP - PSC Blower Motor 27
7-1 – Blower Performance 1/2 HP - PSC Motor 19 15 – Replacement Parts List – 3/4 HP - PSC Blower Motor 28
7-2 – Blower Performance 1/2 HP - PSC Motor 20
CONTACT INFORMATION
Contact us by mail: Hamilton Home Products www.hamiltonhomeproducts.com
P.O. Box 185 Phone: 800.879.0123
Canal Winchester, OH 43110
SECTION I: GENERAL
The following list includes important facts and information
regarding the electric furnace and its inclusions.
1. Furnace is rated at 240 volts AC at 60 Hertz
2. Furnace is the same cabinet size for all models
3. All furnaces are equipped with a blower for A/C or Heat
Pump operation
4. This furnace is designed for downflow and horizontal
application
5. This furnace must not be operated without furnace door
installed
NOTE: This furnace and its components listed on the A/C and
Heat Pump equipment sticker were listed in combination as a
system by ETL for the United States.
FIRE OR ELECTRICAL HAZARD
Failure to follow the safety warnings exactly could result in
serious injury, death, or property damage.
A fire or electrical hazard may result causing property
damage, personal injury or loss of life.
Do not store or use gasoline or other flammable vapors and
liquids in the vicinity of this or any other appliance
WINCHESTERHamiltonHomeProductsPage2
USERS MUST READ ALL INSTRUCTIONS IN THIS
MANUAL AND THIS MANUAL MUST BE SAVED FOR
FUTURE REFERENCE
SECTION II: SAFETY
This is a safety alert symbol. When you see this symbol
on labels or in manuals; be alert to the potential for personal
injury.
Understand and pay particular attention to the signal words
DANGER, WARNING, or CAUTION.
DANGER: indicates an imminently hazardous situation, which
if not avoided, will result in death or serious injury.
WARNING: indicates a potentially hazardous situation, which if
not avoided, could result in death or serious injury.
CAUTION: indicates a potentially hazardous situation, which if
not avoided, may result in minor or moderate injury. It is also
used to alert against unsafe practices and hazards involving
property damage.
Safety Requirements
1. This electric furnace must be kept clear and free of
combustible materials, gasoline and other flammable
vapors and liquids.
2. Insulating materials may be combustible. The furnace
must be kept free and clear of insulating materials. The
furnace area must be examined when installed in an
insulated space or when insulation is added to be sure that
the insulation material has been kept away from the
furnace.
3. Follow the instructions exactly as shown in Startup and
Shutdown Section in this manual to properly Startup or
Shutdown this appliance.
4. If overheating occurs turn off the power to the furnace
and contact a qualified contractor, installer, or service
agency.
5. NEVER - Store flammable materials of any kind near
your furnace. Gasoline, solvents and other volatile liquids
should be stored only in approved containers outside the
home. These materials vaporize easily and are extremely
dangerous.
6. NEVER – Store cleaning materials such as bleaches,
detergents, powered cleaners, etc. near the furnace. These
chemicals can cause corrosion of the furnace sheet metal
and the electric heaters, the blower and the electrical
controls.
7. NEVER – Use the area around the furnace as a storage
area for items which could block or obstruct the normal
air flow to the furnace or the space around the furnace.
The flow of air is required for safe and proper operation.
Never block or obstruct air openings used for ventilation
and cooling of the furnace electrical components.
8. Refer to the furnace rating plate for the furnace model
number, for the operating specifications for safe
operation.
9. Provide clearances for servicing ensuring service access is
allowed for the control box, electric elements and the
blower.
10.Failure to carefully read and follow all instructions in this
manual can result in malfunction of the furnace, death,
personal injury, and/or property damage.
11.If the furnace is installed in a residential garage it must be
installed so that the electric heaters are located not less
than 18 inches above the floor and the furnace must be
Any adjustment, service or maintenance by the home owner
and/or user may create a condition where the operation of
the product could cause personal injury or property damage.
Only qualified service personnel, a contractor, or an installer
may refer to the service and maintenance section of this
manual for assistance or for additional information on this
appliance.
This product requires periodic routine maintenance and
cleaning of the exterior surfaces by the homeowner or user
to remove dust and debris. Any additional service must be
performed by qualified personnel. This appliance must be
serviced and maintained as specified in these instructions
and/or to any applicable local, state, and national codes
including, but not limited to building, electrical, and
mechanical codes.
FIRE OR ELECTRICAL HAZARD
Failure to follow the safety warnings exactly could result in
serious injury, death, or property damage.
A fire or electrical hazard may result causing property
dama
g
e,
p
ersonal in
j
ur
y
or loss of life.
Do not use this furnace if any part has been under water. A
flood damaged furnace is extremely dangerous. Attempts
to use the furnace can result in a fire.
A qualified contractor, installer, or service agency must be
contacted to inspect the furnace for any water damage and
replace all components, control system parts, or electrical
parts that have been damaged. If enough damage is
p
resent
,
the furnace ma
y
need to be re
p
lace
d
WINCHESTERHamiltonHomeProductsPage3
located or protected to avoid physical damage by
vehicles.
12.These instructions cover minimum requirements and
conform to existing national standards and safety codes.
In some instances these instructions exceed certain local
codes and ordinances, especially those who have not kept
up with up with changing mobile home, modular home
and HUD construction practices. These instructions are to
be followed and are the minimum requirement to perform
service or repairs on this appliance.
SECTION III: OWNERS INFORMATION
AND SEASONAL INFORMATION
How The Furnace Works
This furnace may be installed in the downflow or the
horizontal position. Figure 1 shows a typical model in the
downflow position. The furnace is equipped with a relay,
sequencer, transformer, circuit breakers, and a blower
assembly. The transformer provides 24 VAC to the
thermostat. When the thermostat calls for heat the relay(s)
energize sending 240 VAC to the electric heaters causing them
to get hot. The indoor fan motor is then energized on the low
speed tap and the circulating blower draws cool air from the
living space, passes it across the heater coils and circulates the
warmed air through the duct work to the house. When the
blower stops the heating cycle has ended and the furnace is
ready for the next call for heat to start the next cycle.
The furnace is equipped with the controls necessary for proper
and safe operation. The various components referred to in this
manual are identified in Figure 1.
Figure 1: Component Locations
Examination of the Furnace
The homeowner should perform a visual examination of the
furnace every month for any defects or problems. The items to
be inspected are:
1. The physical support of the furnace is sound without
sagging cracks, gaps, etc. around the base so as to
provide a seal between the support and the base.
2. The furnace casing for any obvious signs of
deterioration from rust or corrosion.
3. The return and supply duct connections are
physically sound and are sealed to the furnace casing.
4. The furnace must be serviced by qualified personnel
annually, preferably at the start of each heating
season.
The Service Technician
The furnace’s best friend is a qualified service technician. If
the unit gives any indication of improper operation, call the
service technician. The service technician is allowed to
perform the normal routine care of your furnace. He can detect
potential problems and make corrections before trouble
develops. Preventative maintenance of this type will allow the
furnace to operate with minimal concerns to the homeowner
and will add years of comfort.
Warranty and Responsibilities
It is the sole responsibility of the home owner to make certain
the furnace has been properly installed and adjusted to operate
properly.
The manufacturer warrants the furnace to be free from defects
in material or workmanship for a stated time in the warranty
agreement. The manufacturer will not be responsible for any
repair costs to correct problems due to improper setup,
improper installation, improper furnace adjustments, adding
parts that are not listed for use with this furnace, improper
operating procedures by the user.
Some specific examples of service calls which will be
excluded from warranty reimbursement are:
1. Correcting faulty duct work in the home. This can be
due to not enough ducts or ducts are too small to
provide proper air flow through the furnace.
2. Correcting wiring problems in the electrical circuit to
the furnace.
FIRE OR ELECTRICAL HAZARD
Servicing heating/cooling equipment can be hazardous due
to electrical components.
Only trained and qualified personnel can service or repair
heating/cooling equipment. The home owner must never try
to perform service, repair or maintenance on this appliance.
Untrained service personnel can perform only basic
maintenance functions such as cleaning of exterior
surfaces and replacing the air filters.
Observe all precautions in the manuals and on the attached
labels when working on this appliance
WINCHESTERHamiltonHomeProductsPage4
3. Resetting circuit breakers or on/off switches used for
servicing.
4. Furnace problems caused by installation and
operation of any air conditioning unit, heat pump, or
other air quality devise which is not approved for use
with this furnace.
5. Adjusting or calibrating the thermostat.
6. Problems caused by construction debris which has
fallen into the furnace.
7. Replacement of fuses.
8. Problems caused by dirty air filters.
9. Problems caused by restrictions in the return or
supply air flow causing low air flow.
The homeowner should establish a firm understanding of these
responsibilities with the installer or service company so there
is no misunderstanding at a later time.
While you are away
The furnace is equipped with safety shutoff devices which will
shut off the electric heaters in case of a malfunction. For this
reason it is never practical to assume the furnace will operate
unattended for a long period of time.
If you are planning to be away from home for a long period of
time have someone check on your home everyday especially
when the outside temperatures will be below 35°F to ensure
the furnace is operating properly. This may prevent water
pipes from freezing.
The Furnace Fails to Operate Properly
If any abnormalities are observed while the furnace is
operating normally, perform the following checks:
1. Check the setting on the thermostat to make sure the
thermostat is set above the room temperature.
2. Check to see if the electrical power is turned on at the
circuit breakers at the main service circuit breaker
box or check any on/off switches that may be used
for service disconnect switches.
3. Check the 3 amp fuse on the right side of the control
box to determine if it has blown. A replacement fuse
can be purchased at your local electronic, automotive
or home center retailer.
4. Make sure the air filters are clean, return grilles are
not obstructed, and supply air registers are open.
If the cause of the malfunction is not obvious do not attempt to
service the furnace yourself. Call a qualified service agency /
company to repair the furnace.
When Calling For Service Assistance
Providing the service agency with detailed information about
the furnace and problem you are having can save you time.
This will enable the service agency to determine the specific
components used and possibly indentify the problem, thus
arriving with the parts to fix the problem.
SERVICE AGENCY INFORMATION
Fill in Below
COMPANY:
ADDRESS:
TELEPHONE (DAYTIME):
TELEPHONE (EMERGENCY)
SECTION IV: STARTUP AND SHUTDOWN
INSTRUCTIONS
Read the instructions below before trying to start the
furnace.
A. BEFORE OPERATING; check around perimeter of
the furnace to make sure there are no flammable
materials in the area. If you smell vapors of any kind,
DO NOT turn on the power to the furnace until
vapors have been ventilated and removed from the
area of the furnace.
B. CHECK THE FURNACE; visually check the furnace
for loose screws and/or panels that may be missing or
have fallen off.
C. CHECK DUCT CONNECTIONS; visually check the
connections of the ducts to the furnace to make sure
there are no gaps or holes and ducts are securely
fastened to the furnace.
Turn ON / Start the Appliance
1. STOP! Read the safety information above before
proceeding.
2. Set the thermostat to the lowest setting.
3. Turn off all electrical power to the appliance at the
main service disconnect box.
4. Remove the furnace door.
5. Turn off the circuit breakers on the appliance control
box.
6. Remove the control box door.
7. Visually check the control box for loose wire
connections and faulty or loose components.
8. Visually check the blower compartment for
obstructions or loose debris.
9. Replace the control box door.
10. Turn the circuit breakers to the on position.
11. Replace the furnace door.
Should overheating occur turn the circuit breakers on the
control box and the main electrical service entrance (Circuit
Breaker Box) to the off position. Call qualified service
personnel to trouble shoot and repair the furnace. DO NOT
allow the furnace to continue to cycle on the limit controls.
If you do not follow these instructions exactly, a fire may
result causing property damage, personal injury, and/or loss
of life.
WINCHESTERHamiltonHomeProductsPage5
12. Turn the circuit breakers in the main service
disconnect box to the on position.
13. Set the thermostat to the desired setting.
Turn OFF / Shut Down the Appliance
1. Set the thermostat to the lowest setting.
2. Turn off all electrical power to the appliance at the
main service disconnect box.
3. Remove the furnace door.
4. Turn off the circuit breakers on the appliance control
box.
5. Replace the furnace door.
SECTION V: OWNER MAINTENANCE
All appliances need maintenance at the beginning of each
heating season in order to operate properly. The annual service
must be performed by qualified service personnel. The
homeowner is expected to perform general cleaning of the
exterior surfaces, clean dust from the louvers in the return air
door and replacement of the air filters. Air filters must be
checked every month and replaced as needed. Figures 2 and 3
indicate the location of the air filters if you have a louvered
return air door.
Figure 2: Return Air Louvered Door Air Filter Location
Figure 3: Return Air Louvered Door 20” x 20” x 1” Air
Filters
Return Air Grille Air Filters
Follow these easy steps to replace the filters located in the
return air grille:
1. Follow the procedure “Turn OFF / Shut Down the
Appliance” in the Startup and Shutdown Instructions
section of these instructions.
2. Remove the thumb screw at the top of the return air
grille by turning it counter-clockwise.
3. Let the top of the door fall towards you then lift up
slightly pulling towards you and set the door on the
floor.
4. Remove the top air filter first, and then remove the
bottom air filter. These filters are disposable filters.
DO NOT attempt to clean the filters and reuse them.
5. Remove the new pleated air filters from the plastic
wrap they come in.
6. Slide the bottom air filter in place in the door.
7. Place the top air filter in the door so both air filters
are installed as shown in Figure 3.
8. Lift the door up to the cooling cabinet and align the
slots on the bottom of the door with the tabs on the
mounting bracket on top of the furnace. Refer to
Figures 4 and 5.
9. Push the grille forward until the grille is touching the
cabinet and align the door so it is even with the sides
of the cabinet. Aligning the grille with the cabinet is
an important step in order to align the screw hole
with the thumb screw. Refer to Figure 6.
10. Turn the thumb screw clockwise to screw it into the
hole until the plastic head of the thumb screw
snuggly fits against the grille. DO NOT over tighten
the thumb screw as it will make it difficult to remove
at a later time.
11. Follow the instructions to “Turn ON / Start the
Appliance” in the Startup and Shutdown section of
these instructions.
Figure 4: Aligning The Sides Of The Louvered Filter Door
and Reinstalling Thumb Screw.
WINCHESTERHamiltonHomeProductsPage6
Coil Cabinet Top Air Filters
Follow these easy steps to replace the filters located in the top
of the coil cabinet:
1. Follow the procedure “Turn OFF / Shut Down the
Appliance” in the Startup and Shutdown Instructions
section of these instructions.
2. Remove the thumb screw at the top of the louvered
door by turning it counter-clockwise.
3. Let the top of the door fall towards you then lift up
slightly pulling towards you and set the door on the
floor.
4. Remove the air filter first at the top of the coil
cabinet. The 20” x 24” x 2” filters is a disposable
filter. DO NOT attempt to clean the filter and reuse
it.
5. Remove the new 20” x 24” x 2” pleated air filter
from the plastic wrap they come in.
6. Slide the air filter into the filter rack at the top of the
coil cabinet as shown in Figure 5.
7. Lift the door up to the cooling cabinet and align the
slots on the bottom of the door with the tabs on the
mounting bracket on top of the furnace.
8. Push door forward until the door is touching the
cabinet and align the door so it is even with the sides
of the cabinet. Aligning the door with the cabinet is
an important step in order to align the screw hole
with the thumb screw. Refer to Figure 6.
9. Turn the thumb screw clockwise to screw it into the
hole until the plastic head of the thumb screw
snuggly fits against the door. DO NOT over tighten
the thumb screw as it will make it difficult to remove
at a later time.
10. Follow the “Turn ON / Start the Appliance” in the
Startup and Shutdown Instructions section of these
instructions.
Figure 5: Coil Cabinet Top Return Pleated Air Filter
Location.
Figure 6: Aligning The Sides Of The Solid Coil Cabunet
Door and Reinstalling Thumb Screw.
Figure 7:“A” Coil Filters
NOTE: Coil Filters are used with the 97-FG Frame and Grille
assemblies only.
Position filters over the coil as shown in Figure 7.
Homeowners must be instructed as to how to clean and
reinstall washable or replaceable filters for good preventive
maintenance. Care must be taken that the edges of the
washable or replaceable filter are resting on the protruding
edges of the metal plates at each end of the aluminum fins.
This allows a ½” gap between the filter and the coil surface to
prevent dirt from wicking from the filter to the coil.
WINCHESTERHamiltonHomeProductsPage7
SERVICE AND MAINTENANCE MANUAL
SECTION I: SAFETY
THE HOMEOWNERS AND/OR APPLIANCE USERS
MUST STOP HERE!
This section has been designed to assist a qualified service
agency in performing service and maintenance on this
appliance.
The homeowners and/or the user must never attempt to
perform any service or maintenance on the appliance
especially when it involves the removal or adjustment of any
parts and/or components.
The following safety rules must be followed when servicing
this furnace.
This is a safety alert symbol. When you see this symbol
on labels or in manuals, be alert to the potential for personal
injury. Understand and pay particular attention to the signal words
DANGER, WARNING, or CAUTION.
DANGER: indicates an imminently hazardous situation, which
if not avoided, will result in death or serious injury.
WARNING: indicates a potentially hazardous situation, which if
not avoided, could result in death or serious injury.
CAUTION: indicates a potentially hazardous situation, which if
not avoided, may result in minor or moderate injury. It is also
used to alert against unsafe practices and hazards involving
property damage.
Safety Requirements
1. This electric furnace may have a dual electrical supply
circuit. Make sure you check each electrical circuit with a
meter to be sure the power has been disconnected.
2. Insulating materials may be combustible. The furnace
must be kept free and clear of insulating materials.
3. Follow the instructions exactly as shown in Startup and
Shutdown Section in this manual to properly Startup or
Shutdown this appliance.
4. Make sure all moving parts have come to a complete stop
before attempting to perform any work once the furnace
door has been removed. Moving parts can cause serious
injury if clothing or body parts get caught in the moving
part.
The manufacturer will not be responsible for any
repairs due to improper parts changes, improper
maintenance, improper furnace adjustments or
improper modifications made by the homeowner
and/or the appliance user.
The manufacturer will not be responsible if the
homeowner and/or appliance user use this section
of the instructions in an attempt to perform
maintenance or repairs to the furnace. This
practice is very dangerous and may result in a fire
causing property damage, personal injury, loss of
life and/or will void the appliance warranty.
Improper adjustment, service or maintenance may create a
condition where the operation of the product could cause
personal injury or property damage.
Refer to this manual for assistance or for additional
information consult a qualified contractor, installer, or
service agency.
This product must be serviced and maintained as specified
in these instructions and/or to any applicable local, state,
and national codes including, but not limited to building,
electrical, and mechanical codes.
FIRE OR ELECTRICAL HAZARD
Failure to follow the safety warnings exactly could result in
serious injury, death, or property damage.
A fire or electrical hazard may result causing property
damage, personal injury or loss of life.
WINCHESTERHamiltonHomeProductsPage8
SECTION II: FURNACE MAINTENANCE
The interior sections of the furnace must be cleaned and
adjusted by a qualified service contractor once a year or before
the start of each heating season. The following items must be
checked:
1. The blower wheel and motor for excessive dirt.
2. The electric heaters for wear, damage or corrosion.
3. The supply air duct system for excessive dust, dirt or
debris
4. The return air duct system for excessive dust, dirt or
debris
5. All electrical wiring for wear and/or damage.
6. Check the air conditioning evaporator coil for dust,
debris or damage.
7. Check the evaporator coil drain pan for proper
drainage to prevent water backup into the furnace.
8. The furnace casing and all interior sheet metal panels
or dividers.
Furnace Cleaning Procedure
1. Follow the instructions exactly as shown for “Turn
ON / Start Appliance” and “Turn OFF / Shut Down
the Appliance” in this manual to properly operate this
appliance.
2. Remove the access door on the front of the furnace.
3. Remove the access door on the front of the
evaporator coil cabinet.
4. Remove the screw on the right side of the control box
cover and remove the control box cover. Refer to
Figure 8.
5. Remove the blower mounting screw on the right front
side of the blower mounting plate and slide the
blower out of the furnace. Refer to Figure 9.
Figure 8: Control Box Cover
Figure 9: Blower Mounting Screw
6. Use a vacuum cleaner and a small brush to remove
any dirt and debris from the blower compartment.
7. Check in the area below the blower compartment
where the heater elements are located and remove
any dust, dirt or debris from around the heater
elements. Be careful not to damage the heater
elements with the vacuum hose or the brush.
8. Check the blower wheel for dust and debris. Use the
brush and the vacuum cleaner to remove any dust or
debris from the wheel. Be careful not the move or
accidentally remove the blower wheel balance weight
located on the wheel fins. If it is moved or removed it
will cause the blower wheel to vibrate. If the wheel is
vibrating, you must replace it.
ELECTRICAL SHOCK, FIRE HAZARD
Failure to follow the safety warnings exactly could result
in dangerous operation, serious injury, death, or
property damage.
Improper servicing could result in dangerous operation,
serious injury, death, and/or property damage.
Before servicing, disconnect all electrical power to
the furnace. Make sure you disconnect both power
supplies if the furnace has a dual power supply
circuit. Dual circuits may be used on the 15kW,
17kW and 20kW furnaces.
When servicing controls, label all wires prior to
disconnecting to aid in proper reconnection of
wires.
Verify proper operation after servicing by turning
the thermostat above the room temperature for a
brief period of time to ensure future furnace
operation.
Placing jumper wires between the RED and
WHITE wires at the furnace in order to override
the thermostat and energize the heater elements is
an extremely dangerous practice that can result in
damage to the thermostat, dangerous operation,
serious injury, death, and/or property damage.
WINCHESTERHamiltonHomeProductsPage9
9. Check the blower motor for dust and debris. Be sure
to clean the openings on the motor housing as these
openings are used to cool the motor. If dust, dirt or
debris has not been removed from these openings it
will cause the motor to run hotter than normal and
will shorten the life of the motor.
10. Check and clean with the brush and vacuum cleaner
any dust in the supply and return ducts as far as you
can reach. If these ducts look like they have an
excessive amount of dust, dirt or debris you should
recommend the ducts be cleaned to the homeowner
or user.
11. Check and clean any dust, dirt, or debris from all of
the controls and all of the surfaces in the control box.
Dust or dirt left on the components will cause the
components to operate at a much hotter temperature
resulting in premature component failure.
12. Check the evaporator coil compartment for dirt, dust
or debris and remove any that exists.
13. Check the evaporator condensate drain pan for any
debris and ensure the pan is properly draining by
pouring water into the drain to check it.
14. Remove any excess water that may have spilled from
checking the evaporator condensate drain.
15. Reinstall the blower assembly and secure the
assembly using the screw that was removed in step 5.
16. Reinstall the control box cover and secure it to the
control box with the screw removed in step 4.
17. Reinstall the access door on the front of the furnace.
18. Reinstall the access door on the front of the
evaporator coil cabinet or grille and frame assembly.
19. Follow the instructions exactly as shown in “Startup
and Shutdown Section” in this manual to properly
startup this appliance.
SECTION III: FURNACE CONTROLS
This section discusses the furnace controls and how they
operate. Refer to Figure 10 for component locations.
1. The Limit Controls – Each electric heater element
has a limit control directly in front of it to sense
overheating of the element and open if the
temperature gets above the set point of the limit
control.
2. The Heater Relays – The electric heater relays
simply turn the heater elements on and off. The
relays are controlled by the thermostat. On a call for
heat 24 VAC is sent to the relay(s) 24 VAC coil
energizing the relay. When the call for heat has been
satisfied the 24 VAC is removed from the relays 24
VAC coil de-energizing the relay(s).
3. Cooling Sequencer – The cooling sequencer is used
only when 24 VAC is on the “G” terminal from the
thermostat. The sequencer controls the blower 28 sec
on and 14 sec off time delay.
4. Circuit breakers – The circuit breakers are designed
as over-current protection for the electric heaters
only. The circuit breakers MUST NEVER be used for
over-current protection for the transformer, 24 VAC
circuit, or the blower motor.
5. 3 Amp Fuse – This fuse is used for over-current
protection of the 24 VAC circuit.
6. Transformer – The transformer is used to step down
voltage from 240 VAC to 24 VAC. The transformer
provides the required 24 VAC for the system control
circuit.
7. PSC Motor Isolation Relay - This relay is used for
the PSC motor. This relay is used as an isolation
relay to isolate the cooling speed tap from the heating
speed tap on the PSC motor. The wiring has been
designed so that the normally closed contacts are
used for heating and the normally open contacts are
used for cooling. The relay coil is energized with a
call from the “G” terminal on the thermostat.
8. PSC motor Time Delay Sequencer - The heating
sequencer is used only when 24 VAC is on the “G”
terminal from the thermostat. The sequencer controls
the blower 28 sec on and 14 sec off time delay.
WINCHESTERHamiltonHomeProductsPage10
Figure 10: Component Locations
SECTION IV: SEQUENCE OF OPERATION
Continuous Blower
The thermostat has a manual switch that can be moved to the
“On” position or it can be programmed for continuous fan
operation. This setting causes the thermostat to complete the
circuit between “R” and “G” terminals on the thermostat
causing the sequencer to energize starting the blower motor
delay on. When the sequencer has completed the delay on
cycle the contacts will close sending 24 VAC to the selected
indoor blower motor speed tap.
This will cause the indoor blower to operate continuously until
the 24 VAC signal has been removed by changing the fan
operation from continuous to auto.
Intermittent Blower - Cooling
The thermostat has a manual switch that can be moved to the
“Auto” position or it can be programmed for auto fan
operation. When the thermostat calls for cooling, a circuit is
completed between the “R, “Y” and “G” Terminals. The
indoor fan motor is energized from the “G” terminal on the
thermostat through the sequencer to the motor and the motor
will operate on the speed tap that has been selected for “G”.
The sequencer “ON” delay for the indoor fan motor is 28 sec
and the “Off” delay is 14 sec.
The Heating Cycle
When the thermostat is in the HEAT mode, the fan is set to
AUTO.
When the thermostat calls for heat (X-13 Blower Motor)
1. The thermostat closes the circuit between the “R” and
“W” terminals.
2. 24 VAC is sent from the “W” terminal, through the
white thermostat wire to the white pigtail wire on the
furnace.
3. 24 VAC is sent from the W2 terminal through the
black thermostat wire to the white pigtail wire on the
furnace. Used on the 15 kW, 17 kW and 20 kW
models only.
4. 24 VAC is sent through the white pigtail wire to the
24 VAC coil on the heater relay(s).
5. This signal energizes the heater relays closing the
contacts to the heaters.
6. 240 VAC is sent from the relay contacts through the
limit switch(s) to the heater element(s).
7. At the same time, 24 VAC is sent from 24 VAC
heater relay coil through a white wire connected to
the low speed tap on the blower motor. The indoor
fan motor is energized on low speed after a 5 sec on
delay.
When the thermostat call for heat has been satisfied
1. The thermostat opens the circuit between the “R” and
“W” terminals.
2. 24 VAC is removed from the “W” terminal on the
thermostat and the white thermostat wire that is
connected to the furnace pigtail wire.
3. The thermostat opens the circuit between the “R” and
“W2” terminals.
4. 24 VAC is removed from the “W2” terminal on the
thermostat and the black thermostat wire that is
connected to the furnace pigtail wire.
5. 24 VAC is removed from the white pigtail wire and
the 24 VAC coil on the heater relay(s)
WINCHESTERHamiltonHomeProductsPage11
6. This de-energizes the heater relays opening the
contacts to the heaters.
7. 240 VAC is removed from the relay contacts, the
limit switch(s) and the heater element(s).
8. At the same time, the 24 VAC is removed from the
low speed tap on the blower motor. The indoor fan
motor low speed tap is de-energized after a 5 sec off
delay.
The heating cycle is complete, and the furnace is ready for the
start of the next heating cycle.
The Cooling Cycle
When the thermostat calls for cooling
1. The thermostat closes the circuit between the “R”, “Y
and “G”” terminals.
2. 24 VAC is sent from the “Y” terminal through the
Yellow thermostat wire to the 24 VAC coil terminal
on the condenser contactor.
3. At the same time the “Y” terminal has 24 VAC
placed on it, the “G” terminal is sending 24 VAC
through the green pigtail wire to the 24 VAC coil
terminal on the indoor blower sequencer.
4. The sequencer goes through a 28 second on delay,
and then closes the contacts sending 24 VAC to the
black wire connected to the selected indoor fan motor
speed tap.
5. The 24 VAC signal on the “Y” terminal energizes the
compressor contactor closing the contacts and
sending 240 VAC to the compressor and the outdoor
fan motor.
When the thermostat call for cooling has been satisfied
1. The thermostat opens the circuit between the “R”, “Y
and “G”” terminals.
2. 24 VAC is removed from the thermostat “Y”
terminal, the Yellow thermostat wire and the 24 VAC
coil terminal on the condenser contactor.
3. At the same time the “Y” terminal has 24 VAC
removed, the “G” terminal is removing 24 VAC from
the green pigtail wire and the 24 VAC coil terminal
on the indoor blower sequencer.
4. The sequencer goes through a 14 second off delay,
and then opens the contacts removing 24 VAC to the
black wire connected to the selected indoor fan motor
speed tap.
5. The 24 VAC signal on the “Y” terminal de-energizes
the compressor contactor opening the contacts and
removing 240 VAC from the compressor and the
outdoor fan motor
The cooling cycle is complete, and the cooling unit is ready
for the start of the next cooling cycle.
The PSC Motor Isolation Relay
This relay is used in conjunction with the motors to prevent
the possibility of the motors being energized on two speed
taps at the same time. This condition would burn out the motor
windings.
A black wire is connected from the circuit breaker to the
supply side of the normally open (N/O) terminals on the relay.
The blower motor high speed tap wire is connected to the load
side normally open terminal on relay.
A red wire is connected from the heat relay to the normally
closed (N/C) terminal on the relay. The load side of the
normally closed terminal is connected to the low speed tap
blower motor.
Figure 11: PSC Motor Speed Tap Isolation Relay
Section V: TROUBLESHOOTING
The following checks should be made before troubleshooting
the furnace controls for a no heat issue.
1. Check all of the circuit breakers. Make sure they are
turned to the “ON” position and have not tripped.
2. Check all fuses, especially the 3 amp fuse on the right
side of the control box. If the fuse is blown, check the
wiring with an OHM meter for a short to ground.
Repair the short, and then replace the fuse.
3. Check any switches that are external to the furnace to
make sure they are turned on.
4. Make sure all wiring connections, especially on any
of the components, to ensure they are securely
fastened.
If you have 240 VAC coming out of the circuit breakers in the
control box and you have 24 VAC between the load side if the
3 amp fuse and ground, then continue on through the rest of
the checks.
5. Remove the furnace door. Place your hand near the
blower motor. If you feel any heat rising up from the
blower wheel but the motor is not running, check for
240 VAC and 24 VAC at the motor terminals. If the
For personal safety be sure to turn the electrical power
“OFF” at the main entrance (Circuit Breaker Box) and at the
control box circuit breakers before attempting any service or
maintenance operations. Homeowners should never attempt
to perform any maintenance which requires opening the
furnace control box door.
WINCHESTERHamiltonHomeProductsPage12
240 VAC and 24 VAC is present at the motor
terminals but the motor is not operating, then replace
the motor. Refer to Figure 12 and Table 1 for
terminal locations and definitions.
6. If 240 VAC is not present at the motor check for a
broken wire between the circuit breakers and the
motor. If 240 VAC is present at the motor terminals
continue to the next check.
7. If 24 VAC is not present at the motor check for 24
VAC across the heater relay coil. If 24 VAC is
present at the heater relay coil then, the wire going to
the motor is bad and needs to be replaced.
Figure 12: X-13 Motor Terminals
Terminal Connection
CSpeedTapCommon‐24VACCommon
L SupplyVoltagetoMotor‐240VACLine1
G GroundConnection
N SupplyVoltagetoMotor‐240VACLine2
1LowSpeedTap‐24VAC
2Med‐LowSpeedTap‐24VAC
3MediumSpeedTap‐24VAC
4Med‐HighSpeedTap‐24VAC
5HighSpeedTap‐24VAC
Table 1: X-13 Motor Terminal Connections
If the PSC Blower Speed Tap Isolation Relay is used
8. If 24 VAC is not present at the motor check for 24
VAC across the heater relay coil. If 24 VAC is
present at the heater relay coil then, check the line
and load terminals on the Humidity Blower Speed
Change Relay. If there is not 24 VAC across the coil
and no 24 VAC signal is present on the load
terminals, then replace the relay.
9. If no 24 VAC is present at the heater relays then
check the thermostat wire for a broken wire or the
thermostat for a bad thermostat.
Indoor Fan motor is running but it is blowing cool air
10. Check for 240 VAC between each of the heater
elements. If 240 VAC is present, check the current
draw on each heater. If a heater is not drawing the
proper current or is showing almost no current draw
then, replace that heater.
The heater amps are as follows:
4 kW Heater = 16.7 amps
5 kW Heater = 20.8 amps
6 kW Heater = 25.0 amps
11. If 240 VAC is not present at the heater element but
there is 240 VAC present between the load terminal
of the relay and L2 then check the limit control for an
open limit and replace the open limit control.
12. If 240 VAC is not present at the heater element or
between the load terminal of the relay and L2 then
replace the heater relay.
13. Blower Motor FLA
1/3 HP PSC Motor – 3.3
1/3 HP X-13 Motor – 2.8
1/2 HP X-13 Motor – 4.3
3/4 HP X-13 Motor – 6.8
Replacing the Blower
1. Turn off all electrical supply circuits to the furnace at
the main service panel.
2. Remove furnace front door and switch furnace circuit
breaker(s) to “OFF”.
3. Disconnect the plastic wire plug that has the wires
that go to the motor terminals from the right side of
the control box.
4. Remove the screw on the right side of the blower
mounting plate.
5. Slide the blower out of the blower compartment and
set on the floor.
6. Remove the wires from the terminals. Be sure to
write down the motor terminal identifier and wire
color so the wires do not get mistakenly placed on the
wrong terminals.
7. Remove the blower housing from the mounting
bracket by removing the screws on the sides of the
blower that secure the blower to the bracket.
8. Insert the new blower housing into the blower
mounting bracket and secure to the bracket with the
screws.
9. Connect the wires to the motor terminals so the wires
are connected to the same terminals on the new motor
as they were on the previous motor.
10. Slide the blower assembly into the blower deck and
insert the screw on the right side of the mounting
bracket.
11. Connect the pin plug to the pin plug on the right side
of the control box.
12. Switch the circuit breakers to ON and replace furnace
front door.
13. Turn on all electrical supply circuits to the furnace at
the main service panel.
14. Set the thermostat to the desired temperature.
To avoid personal injury take precautions not come into
contact with non-insulated electrical components.
Avoid wearing loose clothing or any items that can come in
contact with moving parts, such as the blower wheel. This
can cause serious
p
ersonal in
j
ur
y
To avoid personal injury or property damage, make certain
that the motor leads cannot come into contact with non-
insulated metal components of the unit.
WINCHESTERHamiltonHomeProductsPage13
SECTION VI: BLOWER PERFORMANCE
Table 2: Factory Speed Tap Settings
WINCHESTERHamiltonHomeProductsPage14
SPDTAP
0.1 0.2 0.3 0.4 0.5 0.6 0.7 0.8 0.9
1
LO
1042 1036 1030 1024 1018 1006 911 708 542 386
MEDIUM
1210 1205 1199 1194 1189 1137 1036 769 601 427
HI
1550 1498 1427 1357 1273 1169 1048 924 704 526
CFMwithCoil98‐8Z7W‐OPLO
982 976 970 964 951 898 721 609 511 357
withCabinet97‐FLSB‐27MEDIUM
1196 1190 1180 1149 1100 1037 951 680 569 405
or97‐FLSF‐27 HI
1509 1440 1371 1285 1203 1133 880 792 684 482
CFMwithCoil98‐8Z7W‐OPLO
1011 1008 994 965 916 758 669 588 447
withCabinet97‐FSOB‐27 MEDIUM
1215 1189 1153 1104 1040 973 739 639 511 377
HI
1455 1394 1326 1260 1184 1081 852 703 585 441
CFM‐WITH‐Coil98‐8G7W‐OPLO
955 952 949 946 928 890 724 648 532 364
withCabinet97‐FLSB‐27 MEDIUM
1175 1170 1164 1143 1100 1025 964 716 558 405
or97‐FLSF‐27 HI
1536 1463 1403 1328 1249 1155 1075 900 716 493
CFMwi thCoil98‐8G7W‐OPLO
1010 1013 1001 975 930 874 688 587 463 363
withCabinet97‐FSOB‐27 MEDIUM
1205 1184 1153 1110 1048 975 751 640 496 367
HI
1553 1482 1407 1328 1244 1154 1039 747 608 438
CFMwi thCoil96‐8G4W‐OPLO
964 961 958 952 928 881 708 609 470 355
withCabinet97‐FLSB‐21MEDIUM
1195 1185 1154 1122 1072 1013 820 680 556 405
or97‐FLSF‐21 HI
1535 1479 1407 1331 1250 1180 1094 812 658 487
CFMwithCoil96‐8G4W‐OP LO
1005 999 979 943 881 758 641 561
withCabinet97‐FSOB‐21 MEDIUM
1197 1163 1113 1060 999 916 708 633 490 367
HI
1418 1352 1292 1213 1119 1062 946 698 549 409
EXTERNALSTATICPRESSURE(ESP)INCHESWCDUCT
CFM‐NO‐COIL
Table 3: Blower Performance -10 X 9 Morrison Wheel - 1/3 HP 3 SPD PSC Motor (With Air Filters)
WINCHESTERHamiltonHomeProductsPage15
SPDTAP
0.10.20.30.40.50.60.70.80.9 1
LO
935 763 680 560 498 437 347
MED‐LO
968 881 810 756 680 566 531 446 382
MEDIUM
1074 1022 953 904 842 789 663 623 565 475
MED‐HI
1192 1131 1079 1042 971 914 862 748 697 519
HI
1429 1372 1327 1285 1227 1176 1128 1072 941 602
LO
813 742 655 596 490 436 349
MED‐LO
913 864 806 742 673 593 521 438 379
MEDIUM
1050 990 939 885 843 813 726 642 568 471
MED‐HI
1150 1096 1082 1002 958 913 857 806 737 533
HI
1360 1314 1267 1227 1182 1134 1096 1002 885 564
CFMwithCoilLO
745 689 595 513 453 393 323
98‐8Z7W‐OPMED‐LO
859 800 745 641 581 527 458 401 384
withCabinet MEDIUM
978 926 872 832 721 655 600 563 514 420
97‐FLSB‐27MED‐HI
1066 1023 965 923 875 793 709 655 596 439
or97‐FLSF‐27 HI
1276 1237 1197 1150 1117 1061 977 798 668 500
CFMwithCoilLO
721 655 556 490 462 382 321
98‐8Z7W‐OPMED‐LO
832 775 717 623 556 528 470 404 352
withCabinet MEDIUM
939 898 845 793 701 633 623 559 502 413
97‐FSOB‐27 MED‐HI
1037 994 956 901 832 752 697 655 554 453
HI
1231 1178 1146 1101 1058 1003 832 741 615 466
LO
764 689 586 507 460 399 332
MED‐LO
855 807 733 632 571 521 478 416 367
MEDIUM
990 923 878 825 741 672 628 574 520 440
MED‐HI
1085 1031 988 929 878 789 725 663 603 474
HI
1291 1247 1202 1160 1117 1073 1020 821 665 524
CFMwithCoilLO
721 655 566 507 451 374 315
98‐8G7W‐OPMED‐LO
828 756 705 623 561 529 462 404 359
withCabinet MEDIUM
948 898 845 778 705 641 595 553 502 406
97‐FSOB‐27 MED‐HI
1048 1003 965 907 851 771 701 637 562 431
HI
1252 1227 1166 1139 1090 1026 871 709 618 466
CFMwithCoilLO
731 634 577 473 368 394 290
96‐8G4W‐OPMED‐LO
827 754 703 629 530 520 457 383 312
withCabinet MEDIUM
937 870 812 769 698 620 590 540 474 403
97‐FLSB‐21MED‐HI
1030 967 919 877 816 784 673 615 591 472
or97‐FLSF‐21 HI
1230 1194 1136 1086 1046 998 947 784 634 500
CFMwithCoilLO
731 678 587 503 458 398 333
96‐8G4W‐OPMED‐LO
848 792 739 630 562 527 483 419 387
withCabinet MEDIUM
956 913 868 820 719 657 597 572 524 447
97‐FSOB‐21 MED‐HI
1051 1012 962 923 875 766 711 661 603 458
HI
1251 1216 1169 1132 1093 1053 986 770 643 510
EXTERNAL STATIC PRESSURE(ESP) INCHES WC DUCT
CFM‐NO‐COIL‐
OPENTOP,
SOLIDDOOR
CFM‐WITH‐Coil
98‐8G7W‐OP
with97‐FLSB‐27
or97‐FLSF‐27
CFM‐NO‐COIL‐
SOLIDTOP,
LOUVERED
DOOR
Table 4: Blower Performance -10 X 9 Morrison Wheel - 1/3 HP 5 SPD X-13 Motor (With Air Filters)
WINCHESTERHamiltonHomeProductsPage16
SPDTAP
0.1 0.2 0.3 0.4 0.5 0.6 0.7 0.8 0.9 1
LO
984 922 851 799 740 604 578 497 423 365
MED‐LO
1149 1096 1051 995 933 870 795 891 658 604
MEDIUM
1397 1344 1293 1250 1200 1148 1105 1048 982 699
MED‐HI
1630 1584 1533 1493 1443 1392 1352 1258 1136 702
HI
1736 1712 1661 1612 1570 1515 1432 1321 1184 704
CFMwithCoilLO
875 818 764 718 611 558 507 455 419 372
98‐8G7W‐OPMED‐LO
1027 996 952 897 858 752 688 634 615 497
withCabinet MEDIUM
1241 1212 1176 1129 1090 1051 997 867 713 545
97‐FLSB‐27MED‐HI
1440 1411 1371 1328 1285 1232 1155 1062 734 593
OR97‐FLSF‐27 HI
1546 1506 1474 1415 1349 1270 1186 1079 702 603
CFMwithCoilLO
845 811 753 682 611 563 522 467 407 364
98‐8G7W‐OPMED‐LO
1032 990 949 897 838 800 730 677 607 477
withCabinet MEDIUM
1238 1191 1155 1107 1068 1033 991 809 660 492
97‐FSOB‐27 MED‐HI
1419 1380 1340 1294 1217 1145 1068 839 665 486
HI
1506 1445 1389 1313 1241 1166 1079 824 646 483
CFMwithCoilLO
884 817 771 722 616 568 536 472 417 380
98‐8W7W‐OPMED‐LO
1040 984 955 893 864 756 698 656 630 494
withCabinet MEDIUM
1251 1216 1170 1134 1079 1045 1009 860 685 570
97‐FLSB‐27MED‐HI
1450 1410 1380 1335 1303 1221 1139 1056 737 580
or97‐FLSF‐27 HI
1549 1506 1457 1410 1335 1246 1165 1056 741 648
CFMwithCoilLO
878 811 771 714 625 558 536 478 417 377
98‐8W7W‐OPMED‐LO
1035 981 943 891 852 797 702 652 609 474
withCabinet MEDIUM
1223 1190 1151 1111 1072 1018 940 842 647 523
97‐FSOB‐27MED‐HI
1422 1378 1325 1262 1159 1062 983 868 665 523
HI
1478 1416 1338 1277 1174 1095 992 845 657 513
CFMwithCoilLO
897 842 796 733 619 566 522 470 408 361
98‐8W12W‐OPMED‐LO
1054 1013 961 925 874 798 680 623 572 533
withCabinet MEDIUM
1281 1237 1202 1154 1111 1071 1012 902 723 613
97‐FLSB‐39MED‐HI
1478 1453 1414 1374 1333 1271 1191 1094 752 596
or97‐FLSF‐39 HI
1581 1522 1477 1421 1350 1270 1180 1070 777 657
CFMwithCoilLO
885 825 763 704 612 553 522 459 392 357
98‐8W12W‐OPMED‐LO
1043 986 941 891 858 735 687 630 573 504
withCabinet MEDIUM
1240 1178 1139 1100 1076 1013 945 800 679 520
97‐FSOB‐39MED‐HI
1456 1404 1359 1322 1256 1190 1087 845 712 535
HI
1550 1485 1426 1355 1294 1221 1104 874 735 534
EXTERNALSTATICPRESSURE(ESP)INCHESWCDUCT
CFM‐NO‐COIL
Table 5-1: Blower Performance -10 X 9 Morrison Wheel - 1/2 HP 5 SPD X-13 Motor (With Air Filters)
WINCHESTERHamiltonHomeProductsPage17
SPDTAP
0.1 0.2 0.3 0.4 0.5 0.6 0.7 0.8 0.9 1
CFMwithCoilLO
884 824 774 692 595 560 507 460 391 360
98‐8G12W‐OPMED‐LO
1035 992 954 893 844 783 692 640 545 474
withCabinet MEDIUM
1250 1211 1170 1127 1083 1037 982 834 675 520
97‐FLSB‐39MED‐HI
1449 1415 1376 1345 1289 1218 1127 884 708 535
or97‐FLSF‐39 HI
1547 1511 1462 1402 1326 1245 1159 976 724 531
CFMwithCoilLO
862 817 752 672 619 560 525 458 395 381
98‐8G12W‐OPMED‐LO
1013 967 925 887 824 744 692 636 563 435
withCabinet MEDIUM
1209 1173 1125 1098 1050 1000 865 748 578 484
97‐FSOB‐39MED‐HI
1415 1376 1321 1255 1175 1099 924 767 609 479
HI
1478 1428 1362 1279 1195 1110 915 755 600 484
CFMwithCoilLO
899 837 784 724 609 570 519 455 388 360
98‐8Z12W‐OPMED‐LO
1040 1004 964 909 851 751 700 640 616 493
withCabinet MEDIUM
1258 1235 1185 1143 1099 1060 1000 848 704 533
97‐FLSB‐39MED‐HI
1484 1441 1393 1353 1316 1245 1137 1012 679 551
or97‐FLSF‐39 HI
1570 1531 1488 1415 1344 1279 1170 1070 736 562
CFMwithCoilLO
851 813 759 708 618 555 523 458 394 362
98‐8Z12W‐OPMED‐LO
1021 982 934 884 837 740 684 636 573 452
withCabinet MEDIUM
1210 1170 1138 1092 1052 999 922 751 613 469
97‐FSOB‐39MED‐HI
1419 1385 1344 1279 1210 1083 1010 774 621 480
HI
1503 1458 1393 1312 1230 1103 1019 785 629 486
CFMwithCoilLO
856 795 740 680 572 536 502 450 398 358
96‐8W4W‐OPMED‐LO
1002 965 920 866 819 712 650 619 630 502
withCabinet MEDIUM
1204 1163 1128 1093 1048 1007 952 785 667 581
97‐FLSB‐21MED‐HI
1383 1364 1332 1291 1248 1184 1099 837 696 528
or97‐FLSF‐21 HI
1468 1458 1424 1368 1300 1219 1126 1019 700 536
CFMwithCoilLO
816 775 708 672 557 557 507 444 398 357
96‐8W4W‐OPMED‐LO
988 926 876 836 791 692 633 630 596 423
withCabinet MEDIUM
1163 1114 1087 1038 1002 959 895 680 653 477
97FSOB‐21MED‐HI
1355 1323 1281 1224 1147 1081 977 736 653 483
HI
1433 1381 1314 1243 1166 1082 989 740 656 493
EXTERNALSTATICPRESSURE(ESP)INCHESWCDUCT
Table 5-2: Blower Performance -10 X 9 Morrison Wheel - 1/2 HP 5 SPD X-13 Motor (With Air Filters)
WINCHESTERHamiltonHomeProductsPage18
SPDTAP
0.1 0.2 0.3 0.4 0.5 0.6 0.7 0.8 0.9 1
LO
1225 1174 1121 1077 1036 976 924 877 740 629
MED‐LO
1429 1386 1345 1308 1245 1220 1158 1115 1070 608
MEDI UM
1569 1529 1476 1438 1403 1368 1313 1260 1109 707
MED‐HI
1785 1740 1711 1664 1619 1592 1488 1359 1137 967
HI
2129 2057 2017 1959 1838 1733 1603 1432 1225 1183
CFMwithCo i l LO
1104 1059 1012 975 930 876 780 719 662 581
98‐8W7W‐OPMED‐LO
1292 1244 1214 1184 1136 1098 1053 981 773 584
andCabinetMEDI UM
1400 1365 1334 1301 1263 1219 1168 1070 780 592
97‐FLSB‐27MED‐HI
1596 1569 1521 1468 1392 1301 1204 1087 811 604
or97‐FLSF‐27 HI
1743 1659 1615 1505 1425 1341 1236 1106 809 582
CFMwithCo i l LO
1067 1017 978 942 889 805 758 703 661 518
98‐8W7W‐OPMED‐LO
1268 1229 1199 1158 1109 1075 1012 826 675 536
withCabinet MEDI UM
1374 1343 1311 1278 1224 1163 1053 812 708 524
97‐FSOB‐27 MED‐HI
1549 1481 1409 1338 1258 1189 1087 848 669 481
HI
1611 1529 1460 1383 1297 1199 1115 889 708 578
CFMwithCo i l LO
1104 1085 1025 979 936 882 786 719 682 580
98‐8W12W‐OPMED‐LO
1309 1266 1232 1197 1156 1119 1074 1010 790 606
withCabinet MEDI UM
1429 1390 1350 1323 1281 1234 1203 1124 801 629
97‐FLSB‐39MED‐HI
1607 1573 1539 1497 1430 1332 1256 1152 815 637
or97‐FLSF‐39 HI
1751 1663 1607 1533 1455 1372 1270 1160 811 619
CFMwithCo i l LO
1104 1059 1023 974 935 902 841 723 676 563
98‐8W12W‐OP MED‐LO
1285 1246 1211 1175 1126 1104 1065 874 711 561
withCabinet MEDI UM
1404 1350 1327 1294 1251 1211 1145 1005 718 535
97‐FSOB‐39 MED‐HI
1601 1538 1468 1400 1327 1241 1148 888 719 541
HI
1725 1613 1530 1442 1360 1283 1190 1088 739 576
CFMwithCo i l LO
1111 1072 1019 976 931 877 781 712 680 548
98‐8G12W‐OPMED‐LO
1289 1255 1226 1185 1143 1105 1066 938 732 556
withCabinet MEDI UM
1415 1367 1345 1308 1270 1226 1170 1072 751 573
97‐FLSB‐39MED‐HI
1594 1571 1519 1449 1380 1294 1205 1043 736 551
or97‐FLSF‐39 HI
1716 1643 1563 1511 1411 1317 1228 1088 748 596
CFMwithCo i l LO
1084 1038 996 952 899 813 748 705 823 494
98‐8G12W‐OP MED‐LO
1262 1227 1187 1150 1112 1067 1014 775 621 488
withCabinet MEDI UM
1373 1341 1314 1265 1207 1134 1032 807 638 489
97‐FSOB‐39 MED‐HI
1513 1455 1373 1309 1247 1150 1067 793 672 509
HI
1557 1484 1417 1337 1271 1172 1055 835 885 533
CFMwithCo i l LO
1106 1072 1026 969 938 878 774 721 676 532
98‐8Z12W‐OPMED‐LO
1299 1266 1222 1186 1139 1100 1057 938 752 539
withCabinet MEDI UM
1416 1377 1341 1309 1271 1241 1181 1067 740 539
97‐FLSB‐39MED‐HI
1603 1588 1540 1476 1390 1336 1232 1095 748 545
or97‐FLSF‐39 HI
1741 1667 1607 1532 1435 1350 1253 1148 1165 558
CFMwithCo i l LO
1088 1019 1007 967 924 870 824 716 621 507
98‐8Z12W‐OP MED‐LO
1270 1240 1200 1143 1110 1077 990 747 612 496
withCabinet MEDI UM
1371 1340 1303 1265 1210 1138 1019 796 627 506
97‐FSOB‐39 MED‐HI
1555 1487 1424 1331 1270 1148 1037 792 675 494
HI
1613 1543 1445 1385 1279 1200 1083 924 700 507
EXTERNAL STATIC PRESSURE (ESP) INCHES WC DUCT
CFM‐NO‐COI L
Table 6: Blower Performance -10 X 9 Morrison Wheel - 3/4 HP 5 SPD X-13 Motor (With Air filters)
WINCHESTERHamiltonHomeProductsPage19
SPDTAP 0.1 0.2 0.3 0.4 0.5 0.6 0.7 0.8 0.9 1
LO 982 979 976 962 932 894 835 711 598 502
MEDIUM 1417 1404 1369 1333 1291 1242 1177 1085 959 579
HI 1771 1704 1624 1544 1448 1372 1270 1167 1037 738
CFMwithCoilLO 944 931 918 904 863 834 692 590 525 438
98‐8G7W‐OPMEDIUM 1317 1293 1255 1210 1169 1099 1013 918 656 579
withCabinet HI 1620 1563 1499 1432 1362 1293 1195 1066 812 608
97‐FLSB‐27OR97‐FLSF‐27
CFMwithCoilLO 935 926 901 862 818 717 650 603 513 395
98‐8G7W‐OPMEDIUM 1307 1260 1205 1143 1088 1013 923 737 642 563
withCabinet HI 1519 1445 1362 1298 1225 1138 1054 950 732 594
97‐FSOB‐27
CFMwithCoilLO 957 951 942 911 866 822 699 635 446 383
98‐8W7W‐OPMEDIUM 1345 1308 1266 1207 1155 1085 998 902 699 546
withCabinet HI 1600 1542 1478 1415 1336 1242 1134 1028 908 694
97‐FLSB‐27or97‐FLSF‐27
CFMwithCoilLO 956 925 891 852 800 697 641 608 521 393
98‐8W7W‐OPMEDIUM 1271 1222 1166 1117 1055 983 796 721 634 565
withCabinet HI 1438 1369 1304 1232 1166 1090 1008 811 705 615
97‐FSOB‐27
CFMwithCoilLO 932 919 913 893 860 808 752 674 555 450
98‐8W12W‐OPMEDIUM 1336 1303 1279 1234 1172 1111 1030 948 793 678
withCabinet HI 1683 1615 1552 1465 1386 1303 1208 1100 987 771
97‐FLSB‐39or97‐FLSF‐39
CFMwithCoilLO 961 934 902 863 811 752 675 596 505 379
98‐8W12W‐OPMEDIUM 1302 1243 1197 1134 1061 988 910 764 632 488
withCabinet HI 1488 1415 1339 1268 1182 1101 1013 910 709 543
97‐FSOB‐39
CFMwithCoilLO 955 940 922 884 838 786 714 593 510 396
98‐8G12W‐OPMEDIUM 1331 1289 1236 1181 1118 1055 960 874 690 511
withCabinet HI 1607 1538 1461 1362 1284 1191 1096 1003 861 706
97‐FLSB‐39or97‐FLSF‐39
CFMwithCoilLO 950 925 891 845 797 745 669 556 485 374
98‐8G12W‐OPMEDIUM 1272 1207 1151 1096 1022 948 875 768 589 511
withCabinet HI 1411 1354 1285 1222 1140 1063 986 875 726 567
EXTERNALSTATICPRESSURE(ESP)INCHESWCDUCT
CFM‐NO‐COIL
Table 7-1: Blower Performance -10 X 9 Morrison Wheel - 1/2 HP 3 SPD PSC Motor (With Air filters)
WINCHESTERHamiltonHomeProductsPage20
SPDTAP
0.1 0.2 0.3 0.4 0.5 0.6 0.7 0.8 0.9 1
CFMwi thCoilLO
959 953 947 916 870 815 732 643 547 451
98‐8Z12W‐OPMEDIUM
1367 1331 1283 1233 1155 1105 1017 921 763 585
wi thCabinet HI
1641 1579 1506 1425 1340 1238 1150 1053 934 736
97‐FLSB‐39or97‐FLSF‐39
CFMwi thCoilLO
957 939 904 862 810 755 653 585 502 384
98‐8Z12W‐OPMEDIUM
1281 1217 1170 1111 1048 975 902 704 637 553
wi thCabinet HI
1448 1387 1314 1242 1175 1094 1006 916 732 578
97‐FSOB‐39
CFMwi thCoilLO
946 940 913 890 850 807 701 613 555 445
96‐8W4W‐OPMEDIUM
1319 1279 1229 1192 1155 1080 991 897 711 552
wi thCabinet HI
1590 1534 1467 1396 1313 1223 1127 1028 904 731
97‐FLSB‐21or97‐FLSF‐21
CFMwi thCoilLO
942 920 885 835 789 708 630 573 494 364
96‐8W4W‐OPMEDIUM
1264 1203 1150 1090 1025 950 883 709 634 542
wi thCabinet HI
1428 1348 1283 1208 1129 1049 969 890 704 607
97FSOB‐21
EXTERNALSTATICPRESSURE(ESP)INCHESWCDUCT
Table 7-.2: Blower Performance -10 X 9 Morrison Wheel - 1/2 HP 3 SPD PSC Motor (With Air filters)

This manual suits for next models

1

Other Winchester Furnace manuals

Winchester WOL Series Manual

Winchester

Winchester WOL Series Manual

Winchester WUn Series User manual

Winchester

Winchester WUn Series User manual

Winchester WG SERIES User manual

Winchester

Winchester WG SERIES User manual

Winchester WEFC**48 User manual

Winchester

Winchester WEFC**48 User manual

Winchester WEFC SERIES Operating instructions

Winchester

Winchester WEFC SERIES Operating instructions

Popular Furnace manuals by other brands

Modine Manufacturing IFS Installation and service manual

Modine Manufacturing

Modine Manufacturing IFS Installation and service manual

Maytag *TC installation instructions

Maytag

Maytag *TC installation instructions

Vogelzang International 1500 owner's manual

Vogelzang International

Vogelzang International 1500 owner's manual

USSC Clayton 1537Q owner's manual

USSC

USSC Clayton 1537Q owner's manual

Amana CVC96 BB Series installation instructions

Amana

Amana CVC96 BB Series installation instructions

Coleman TG9S Technical guide

Coleman

Coleman TG9S Technical guide

VERDER CARBOLITE GERO CWF 13/5 Installation, operation and maintenance instructions

VERDER

VERDER CARBOLITE GERO CWF 13/5 Installation, operation and maintenance instructions

Bard WG3S1-A WG3S1-B WG3S1-CWG4S1-A installation instructions

Bard

Bard WG3S1-A WG3S1-B WG3S1-CWG4S1-A installation instructions

Rinnai RHFE-263FA Conversion manual

Rinnai

Rinnai RHFE-263FA Conversion manual

Carbolite BLF 17/3 Installation, operation & maintenance instructions

Carbolite

Carbolite BLF 17/3 Installation, operation & maintenance instructions

Goodman GMS8 Installation & operating instructions

Goodman

Goodman GMS8 Installation & operating instructions

Fire Chief FC1000 manual

Fire Chief

Fire Chief FC1000 manual

GAMA PO8LAA installation manual

GAMA

GAMA PO8LAA installation manual

Comfortaire GUH96C installation instructions

Comfortaire

Comfortaire GUH96C installation instructions

Comfortaire GDD95A installation instructions

Comfortaire

Comfortaire GDD95A installation instructions

Fire Chief FCOS1600D user manual

Fire Chief

Fire Chief FCOS1600D user manual

Isotech 414 User maintenance manual/handbook

Isotech

Isotech 414 User maintenance manual/handbook

HomComfort DV8 Installation instructions and owner's manual

HomComfort

HomComfort DV8 Installation instructions and owner's manual

manuals.online logo
manuals.online logoBrands
  • About & Mission
  • Contact us
  • Privacy Policy
  • Terms and Conditions

Copyright 2025 Manuals.Online. All Rights Reserved.