manuals.online logo
Brands
  1. Home
  2. •
  3. Brands
  4. •
  5. WindowMaster
  6. •
  7. Weather Station
  8. •
  9. WindowMaster NVC BP KNX 11 02 Service manual

WindowMaster NVC BP KNX 11 02 Service manual

KNX
WET 200
Outdoor temperature / LUX sensor / GPS
Außentemperatur-/Luxsensor
Udetemperatur-/Luxsensor
WLA 340
Rain and wind sensor
Regen und Wind-Sensor
Regn/vindsensor
2
4m WLL 601(2x4x0.75mm )
- UV resistant cable supplied
- UV beständiges Kabel wird mitgeliefert
- UV resistent kabel medleveres
DK
· Kabler anvendt udendørs skal, hvis de
udsættes for sollys, være UV-bestandige.
· Vind/regnsensoren WLA 340 placeres så
højt som muligt dog min. 2 m over
bygningens højeste punkt for at give en
retvisende måling.
· WLA 340 sensoren tilsluttes til
MotorController WCC 310 P / WCC 320 P
med de medleverede UV-bestandige
kabler.
· Udendørstemperatursensoren WET 200
placeres på bygningens nordside, således
at den ikke udsættes for direkte sollys.
Sensoren er IP 54.
NVC BP KNX 11 02
Basis package - weather station
Basis-Paket - Wetterstation
Basispakke - Vejrstation
NVC BP KNX 11 02 install 1703-UK-D-DK ©WindowMaster 2017 ®WindowMaster is a registered trademark used under licence by WindowMaster International
WindowMaster International A/S, Skelstedet 13, DK-2950 Vedbæk
WCC MotorController
Plus version
D
· Im Aussenbereich verwendete Kabel
sollten UV-beständig sein wenn diese
direkter Sonneneinstrahlung ausgesetzt
sind.
· Der Wind/Regensensor WLA 340 muss
am höchstmöglichen Ort, jedoch mind.
2 m über dem höchsten Punkt des
Gebäudes montiert werden, um eine
verlässliche Messung zu erzielen.
· Der Sensor WLA 340 wird mittels der
mitgelieferten UV-beständigen Kabel an
die WCC 310 P / WCC 320 P
angeschlossen.
· Der Außentemperatursensor WET 200
muss an der Nordseite des Gebäudes
plaziert werden, damit er nicht dem
direktem Sonnenlicht ausgesetzt ist.
Die Schutzart des Sensors ist IP54.
UK
· Cables used outdoors have to be
resistant to ultraviolet light if they are
exposed to sun.
· The wind and rain sensor is to be
placed as high as possible however
min. 2 m above the highest point of the
building to give a true measuring.
· The WLA 340 sensor is to be connected
to the WCC 310 P / WCC 320 P with
the supplied ultraviolet light resistant
cables.
· The outdoor temperature sensor
WET 200 is to be placed at the north
side of the building where it is not
exposed directly to sunlight.
The sensor is IP 54.
Installation instructions:
Read installation instructions carefully
before proceeding and keep for future
reference.
(Translated text)
Montageanleitung
Vor Montage beginn bitte sorgfältig die
Montageanleitung lesen und für spätere
Verwendung aufbewahren.
(Übersetzer Text)
Monteringsvejledning
Læs vejledningen grundigt igennem før
montering. Vejledningen bør gemmes.
(Original tekst)
UK DDK
—For all WindowMaster products it is
recommended to make a WindowMaster
service contract to ensure long life and a
reliable functioning of the product.
—The function of the rain sensor is to be
tested regularly.
—The wind sensor is to be checked visually
and its function checked.
—The rain sensor is to be cleaned every 3 -
6 months with a soft damp cloth using a
small amount of household cleaner diluted
in water.
—The product is to be installed by
WindowMaster professionals or an
authorized KNX-electrician.
—The product must be disposed of in
conformity with national regulations for
electronic waste and not with usual
household waste.
—The packing can be disposed of together
with ordinary household waste.
—We reserve the right to make technical
changes.
—In case of technical questions contact the
supplier.
—Es wird empfohlen, einen WindowMaster
Wartungsvertrag abzuschließen, um eine
lange Lebensdauer und die einwandfreie
Funktion des Produktes zu gewährleisten.
—Die Funktion des Regensensors muss
regelmäßig überprüft werden.
—Der Windsensor wird visuell überprüft und
die Funktionen werden überprüft /
kontrolliert.
—Der Regensensor sollte alle 3-6 Monate
mit einem weichen, feuchten Tuch und
mildem Reinigungsmittel gereinigt werden.
—Das Produkt darf nur von WindowMaster
oder einem autorisierten KNX-
Elektroinstallateur installiert werden.
—Das Produkt ist nach Nationalen
Bestimmungen als elektronischer Müll zu
entsorgen und darf nicht in den Hausmüll
gelangen.
—Die Verpackung kann zusammen mit dem
allgemeinen Haushaltsmüll beseitigt
werden.
—Technische Änderungen vorbehalten.
—Bei technischen Fragen wenden Sie sich
bitte an den Lieferanten.
—Det anbefales at tegne en WindowMaster
serviceaftale for at sikre en lang levetid
samt en upåklagelig funktion af
WindowMaster produktet.
—Regnsensorens funktion skal kontrolleres
jævnligt.
—Vindhastighedsmåleren checkes visuelt og
funktionen kontrolleres.
—Regnsensoren skal rengøres hver 3. - 6.
måned med en blød klud opvredet i vand
tilsat en smule rengøringsmiddel.
—Produktet skal tilsluttes af WindowMaster
fagfolk eller autoriseret KNX-elinstallatør.
—Elektriske produkter må ikke smides ud
med almindeligt husholdningsaffald, men
skal bortskaffes i henhold til nationale
regler for elektronisk affald.
—Emballagen kan bortskaffes sammen med
almindeligt husholdningsaffald.
—Der tages forbehold for tekniske
ændringer.
—Ved tekniske spørgsmål kontakt Deres
leverandør.
Important information Wichtige Informationen Vigtig information
www.windowmaster.com
– to be placed on the north side of the building
– auf der Nordseite des Gebäudes montieren
– skal placeres på husets nordside
UK – WLA 340 to be placed as high as possible
min. 2m above the highest point of the buing.
D – WLA 340 so hoch wie möglich montieren
jedoch min. 2m über die höchste Stelle des Gebäudes.
DK – WLA 340 placeres så højt som muligt dog
mindst 2m over højeste punkt på bygningen.
2
6 x 0,5 mm max. 50m
Mitglied im
Fachkreis
elektromotorisch
betriebene
Rauch- und Wärme-
abzugsanlagen
DK
+45 4567 0300
[email protected]
UK
+44 1536 614070
[email protected]
DE
+49 (0) 40 870 409 560
[email protected]
CH
+41 62 289 22 22
[email protected]
NO
+47 33 99 71 00
[email protected]
USA
+1 650 543 8166
[email protected]
Other
+45 4567 0300
[email protected]
UK - Pole to be ordered locally and is not in the WindowMaster product range
DE - Mast muss lokal bestellt werden und ist nicht in der WindowMaster Produktpalette
DK - Mast bestilles lokalt og er ikke i WindowMasters produkt sortiment
Mounting / Montage / Montering
Connection diagram / Anschlussschema / Tilslutningsdiagram
UK – WLA 340 to be placed as high as possible min. 2m above
the highest point of the buing.
D – WLA 340 so hoch wie möglich montieren jedoch min. 2m
über die höchste Stelle des Gebäudes.
DK – WLA 340 placeres så højt som muligt dog mindst 2m over
højeste punkt på bygningen.
WxC Configuration / WxC Konfiguration / WxC Konfiguration
UK - Please refer to the WCC 310 PLUS / WCC 320 PLUS installation instruction for connection of the WLA 340 to
the MotorController
DE - Bitte beachten Sie die Bedienungsanleitung der WCC 310 Plus / WCC 320 Plus für den Anschluss der WLA 340
an den MotorController
DK - Der henvises til WCC 310 PLUS / WCC 320 PLUS vejledningen for tilslutning af WLA 340 til MotorControlleren.
UK - Configure the Object as an Output.
DE - Konfigurieren Sie das Objekt als ein Ausgang.
DK - Konfigurer Objektet som et Output
UK - Configure the Ouput as shown.
Here is motor group 1 used as an example.
DE - Konfigurieren Sie den Ausgang als gezeigt.
Hier wird die Motorgrupe 1 als Beispiel
verwendet
DK - Konfigurer Outputtet som vist.
Motorgruppe 1 er her brugt som eksempel.
UK - Ensure that the chosen motor group is a
member in the ´safety output´ of ´Local
input´ X1.S10.
DE - Stellen Sie sicher, dass die gewählte
Motorgruppe in ´Sicherheits Ausgang´in der
`Lokale Eingänge´ X1.S10 enthalten ist.
DK - Sørg for, at den valgte motorgruppe er
inkluderet i ´Sikkerhed output´ i ´Lokalt
input´ X1.S10.
Configuration / Konfiguration / Konfiguration
UK - After connecting the WLA 340, a free KNX object must be used to share the rain signal on the KNX bus.
We recommend to use Obj.1.
See screen shots below for configuration.
DE - Nach dem Anschliessen des WLA 340, muss ein freies KNX-Objekt verwendet werden, um das Regensignal auf dem
KNX-bus zu teilen.
Wir empfehlen Obj.1 zu verwenden.
Siehe Screenshots unten zur Konfiguration.
DK - Efter tilslutning af WLA 340 skal et ledigt KNX objekt anvendes til at dele regnsignalet på KNX-bussen.
Vi anbefaler at anvende Obj.1.
Se skærmbilleder nedenfor for konfiguration.
UK - The wind speed is now send from the WCC object 234 or 235, depending on the purpose, see the installation instruction for
the NV Comfort® ´NVC Install version xxx´.
DE - Die Windgeschwindigkeit wird nun aus dem WCC-Objekt 234 oder 235 verschickt, je nach Zweck, sieh Anleitung für den
NV Comfort® ´NVC instal version xxx´.
DK - Vindhastigheden sendes nu fra WCC objektet 234 eller 235, afhængig af formålet, se vejledningen for NV Comfort®
´NVC Install version xxx´.

Other WindowMaster Weather Station manuals

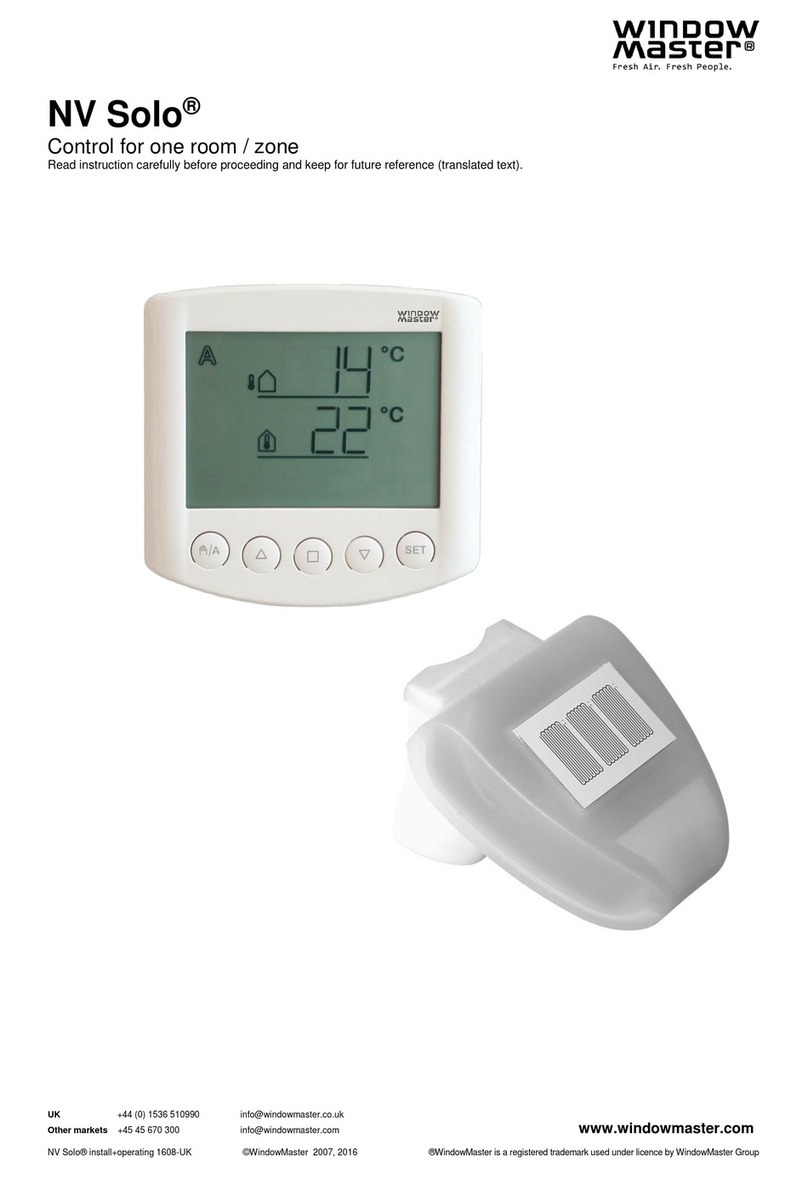
WindowMaster NV Solo User manual

WindowMaster

WindowMaster NV Solo User manual

WindowMaster WOW 600 User manual

WindowMaster

WindowMaster WOW 600 User manual

Popular Weather Station manuals by other brands

Levenhuk Wezzer PLUS LP20 user manual

Levenhuk

Levenhuk Wezzer PLUS LP20 user manual

BALDR B0359WST2H2PR user manual

BALDR

BALDR B0359WST2H2PR user manual

IROX HBR556 Instructions for use

IROX

IROX HBR556 Instructions for use

Hama 00076045 "EWS-800" operating instructions

Hama

Hama 00076045 "EWS-800" operating instructions

Ambient Weather WS-290D Quick setup guide

Ambient Weather

Ambient Weather WS-290D Quick setup guide

La Crosse Technology WS-9760U-IT instruction manual

La Crosse Technology

La Crosse Technology WS-9760U-IT instruction manual

RST IQ785 instructions

RST

RST IQ785 instructions

La Crosse Technology CA80550 instruction manual

La Crosse Technology

La Crosse Technology CA80550 instruction manual

Hama 186421 operating instructions

Hama

Hama 186421 operating instructions

Dual XGPS170 owner's manual

Dual

Dual XGPS170 owner's manual

Corintech EL-WiFi-TH quick start guide

Corintech

Corintech EL-WiFi-TH quick start guide

Oregon Scientific RMR606HGPA user guide

Oregon Scientific

Oregon Scientific RMR606HGPA user guide

La Crosse Technology WS-7213U instruction manual

La Crosse Technology

La Crosse Technology WS-7213U instruction manual

Youshiko YC9465 user manual

Youshiko

Youshiko YC9465 user manual

Oregon Scientific BAR888A instruction manual

Oregon Scientific

Oregon Scientific BAR888A instruction manual

Ambient Weather WS-2801A user manual

Ambient Weather

Ambient Weather WS-2801A user manual

La Crosse Technology V21V3 Faqs

La Crosse Technology

La Crosse Technology V21V3 Faqs

Thies CLIMA Compact WSC11 Instructions for use

Thies CLIMA

Thies CLIMA Compact WSC11 Instructions for use

manuals.online logo
manuals.online logoBrands
  • About & Mission
  • Contact us
  • Privacy Policy
  • Terms and Conditions

Copyright 2025 Manuals.Online. All Rights Reserved.