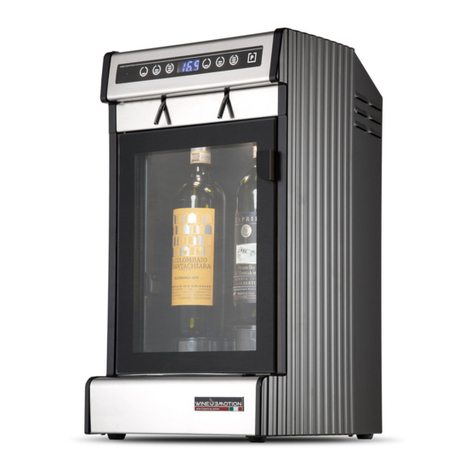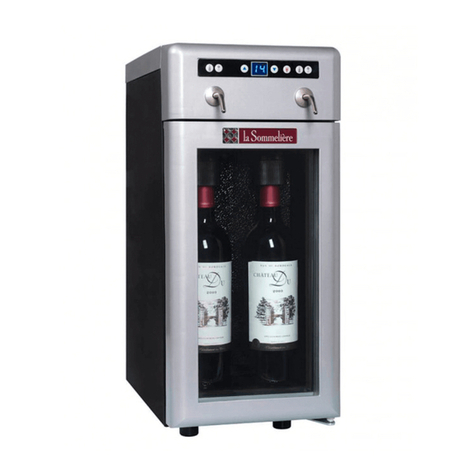
2. Turn on the dispenser
3. Insert the bottle
• Open the door.
• Insert the bottle tube into the
wine bottle.
• Insert the upper part of the tube
into the tap head O-ring.
• Remove the bottle height adapter
if required, then press the piston
down to install the wine bottle.
• Remove the two screws "M" on the back (no tools required)
• Lift up the cover
Make sure that the bottle is in the
right vertical position.
1. Insert the Argon canister*
N
O
M
6. Volume conguration
• Free Pour
The factory default settings for the 3 buttons of each bottle position are “Free
Pour”, 50mls (approx.) and 100mls (approx.).
Access the setup menu as at point 4, scroll to menu item “1”
5. Prime the wine bottle with gas
Press the“P” button until “0” appears on the display.
Place a glass under the spout and press the middle serving button to prime
the wine bottle with gas. A small amount of wine will be served.
The display will turn o and all the serving buttons will ash on/o to
indicate the volume conguration mode is active.
Select any button to set as either “Free Pour” or with a set volume.
To set a button as“Free Pour”, quickly press and release the
button. The button will then turn o (stop ashing).
- The dispenser pours wine while the button is pressed.
4. Access the setup menu
Use the buttons as shown in the picture below to choose the menu
items:
P
P
- 1 -
P
• Preset Volume
Hold the measuring cylinder or a glass under the spout.
Press the desired button until the required volume is
measured. The button will then turn o (stop ashing).
Quickly press the “P” button in order to show the current temperature.
- The dispenser pours the volume of wine you set.
P
P
- 0 -
0. Prime the wine bottle with gas (a small amount of wine will be served)
1. Volume conguration
2. Temperature setup (from OFF to 20C)
3. Select Celsius or Fahrenheit temperature
4. Lighting intensity (from OFF to 5)
5. Gas level check (from 0 to 5)
6. Factory Reset
7. Temperature setup
Access the setup menu as at point 4, scroll to menu item “3”.
When the dual zone divider is installed there will be approximately a 7ºC
differential between the cold left side and right side.
Access the setup menu as at point 4, scroll to menu item “2”.
After two seconds, the set temperature will appear on the display. Use the
buttons as in the picture to change the temperature (from OFF to 20C).
P
10.0
-
+
8. Select Celsius or Fahrenheit temperature standard
12. Temperature check
After 2 seconds the temperature standard will be displayed. Use the
buttons as in the picture to change the temperature standard.
P
c.
-
+
* Argon canister supplied separately
Screw the Argon canister clockwise into the connector "N" all the
way down (you will hear a hiss as the gas comes out, tighten until it
seals.)
• Place the Argon canister in the housing.
• Close the cover and replace the screws “M”.
P
-
+
- 0 -
Access the setup menu as at point 4, scroll to menu item “4”.
9. Lighting Intensity
After two seconds, the light intensity (from OFF to 5) will be displayed.
Use the buttons as in the picture to change the light intensity.
P
3
-
+
Access the setup menu as at point 4, scroll to menu item “5”.
10. Gas level check
After 2 seconds, the current gas level (from 0 to 5) will show up where 0
means “empty bottle”.
Access the setup menu as at point 4, scroll to menu item “6”.
11. Factory reset
After 2 seconds the rst button on the left will light up, press it to reset the
machine to the factory defaults.
P
4
P
Bottle Tube Cleaning
• When changing bottles, it is strongly recommended to wash the bottle
tubes (dishwasher safe).
Deep Cleaning
• Every 5 bottles perform a deep cleaning.
• Insert a wine bottle lled with warm water with a dissolved teaspoon
of citric acid powder.
• Pour the whole bottle, then insert a wine bottle of clean water and
pour again.
• Repeat for both bottle positions.
For assistance, please check contact details at www.beverageserving.com
13. Maintenance
14. Assistance
Wineemotion Spa
Strada di Sant’appiano 9/A
Barberino Val d’elsa - Firenze
Repeat for all desired buttons, then press the “P” button to save.
Press the“P” button to save.
Press the“P” button to save.
Press the“P” button to save.
Press the“P” button for two seconds to enter the menu.
