2. Turn on the dispenser.
3. Insert the bole
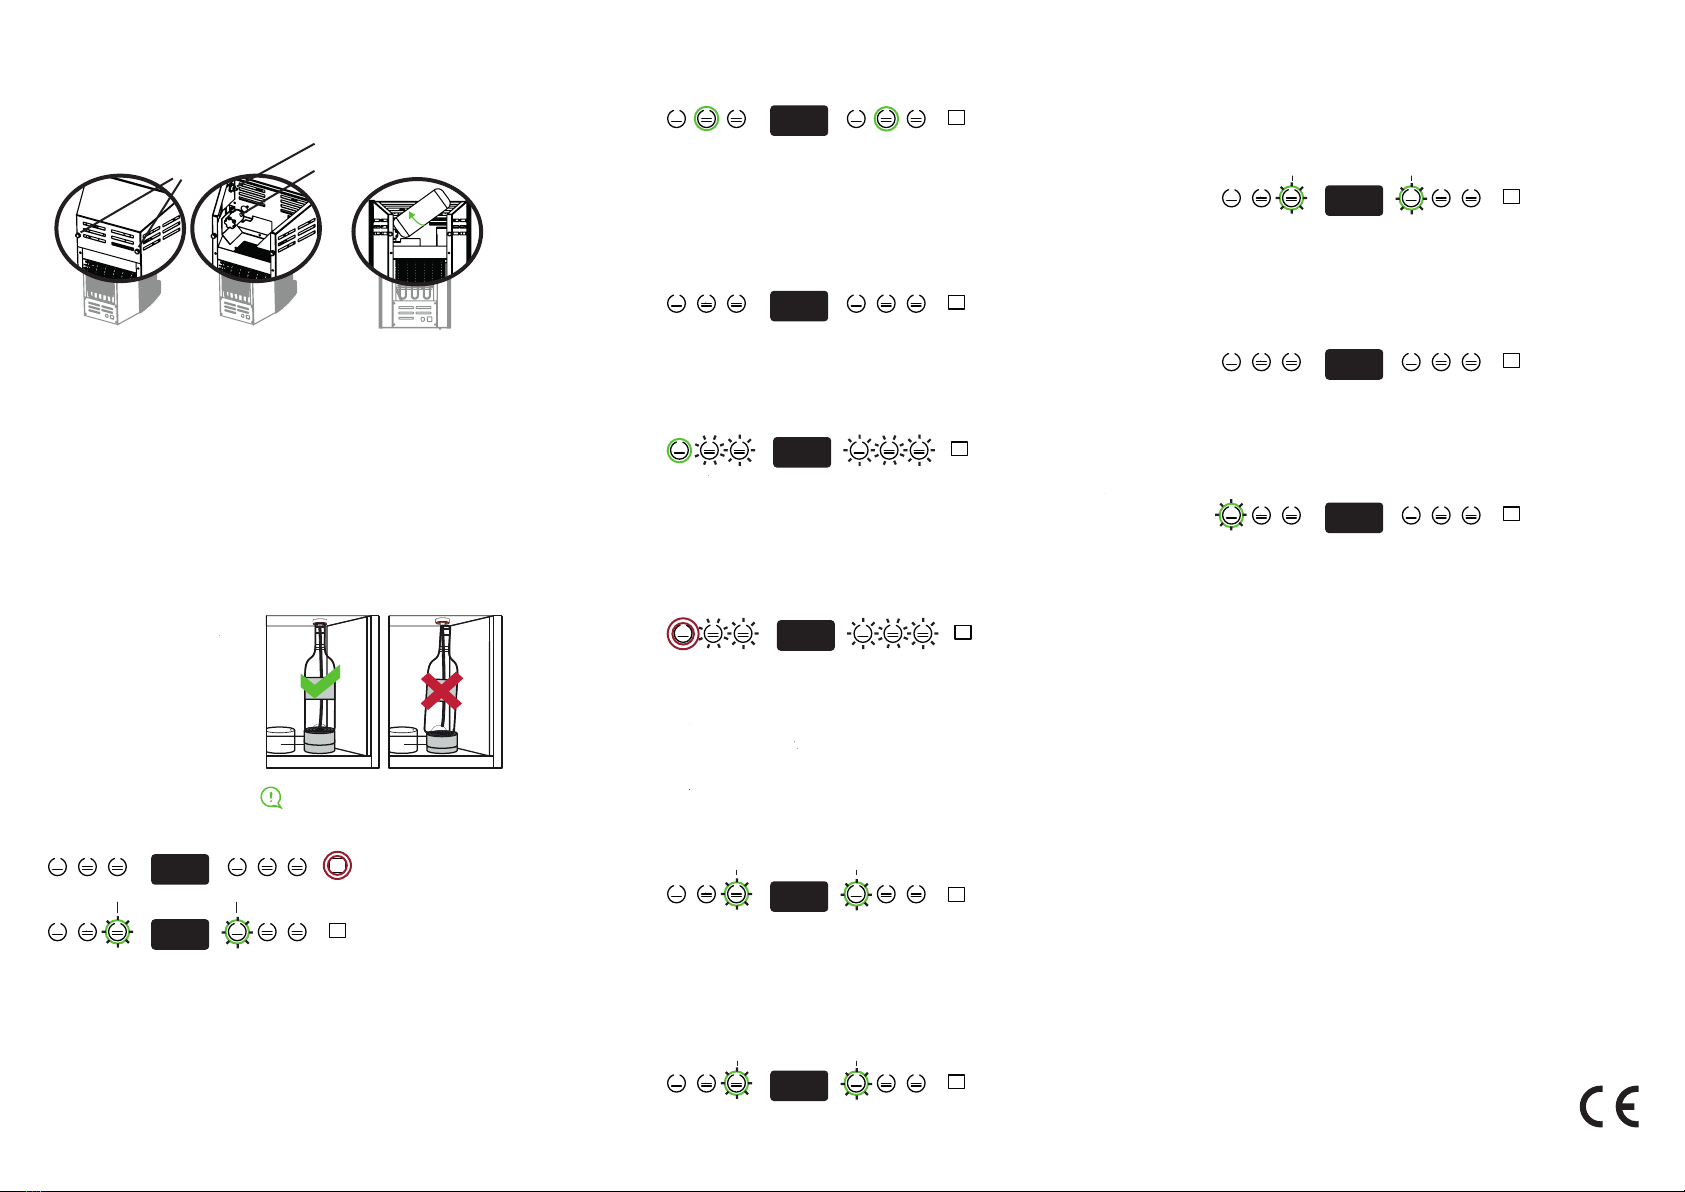
• Open the door
• Insert the suction tube in the
bottle
• Insert the upper part of the
tube in the tap o-ring.
• Press the piston to fit the
bottle.
• Remove the two "M" screws on the back (no tools required)
• Remove the cover
• Remove the plastic pipe from the "O" connector and replace it with
the tube connected to the pressure regulator in the nitrogen or Argon
bottle.
Use of an external cylinder of Nitrogen or Argon
Make sure that the bottle is in the right
position.
1. Insert the Argon canister
N
O
M
6. Dosage configuraon
• Free dose
Access the setup menu as at point 4, and reach the menu item “1”
5. Fill the bole with gas
Press the “P” button until “0” appears on the display.
Place a glass under the nozzle and press the “G” button. Gas will fill up
the bottle and a small quantity of wine will be poured in order to activate
the system.
The display will turn off and the pour buttons will turn on. This
indicates the configuration mode.
In order to activate the “Free dose” mode, quickly press and
release the desired button. It will eventually turn off.
- The dispenser pours wine until the button is pressed.
4. Access the setup menu
Press the “P” button for two seconds to enter the menu and use the
buttons as in the picture to choose the menu items
P
P
- 1 -
P
• Preset dose
Press the “G” button until the desired dose is reached. The button
will turn off.
Repeat the procedure for all the desired buttons.
Quickly press the “P” button in order to show the current temperature.
- The dispenser pours a preset dose of wine.
Put the graduated cylinder or a glass under the nozzle .
P
P
- 0 -
0. Fill the buon with gas (the tap will pour a small amount of wine);
1. Dosage configuraon;
2. Temperature setup;
3. Select Celsius or Fahrenheit temperature standard;
4. Lighng regulaon;
5. Gas level check (from 0 to 5);
6. Factory Reset .
7. Temperature seutp
Access the setup menu as at point 4, and reach the menu item “3”
Access the setup menu as at point 4, and reach the menu item “2”
After two seconds, the set temperature will appear on the display. Use
the buttons as in the picture to change the temperature.
P
10.0
-
+
8. Select Celsius or Fahrenheit temperature standard
12. Temperature check
After 2 seconds the temperature system will show up. Use the
buttons as in the picture to change the temperature standard.
P
c.
-
+
* Argon canister not included
Screw the Argon canister into the "N" connector all the way down
(you will hear a hiss produced by the gas coming out, tighten until
it locks.)
• Place the can in the housing.
• Close the lid.
P
-
+
- 0 -
Access the setup menu as at point 4, and reach the menu item “4”
9. Lighng Intensity
After two seconds, the set intensity will appear on the display.
Use the buttons as in the picture to change the light intensity.
P
3
-
+
Access the setup menu as at point 4, and reach the menu item “5”
10. Gas level check
After 2 seconds, the current gas level (from 0 to 5) will show up where 0
means “empty bottle”.
Access the setup menu as at point 4, and reach the menu item “6”
11. Factory reset
After 2 seconds the first button on the left will light up, pressing it the
machine settings will be restored as for factory standard.
P
4
P
Tubes cleaning
• When changing bottles, it is strongly recommended to wash the
suction tubes (dishwasher safe).
Deep Cleaning
• Every 5 bottles perform a deep cleaning,
• Insert a bottle filled with water and 10ml of Sanikleen®
• Pour the whole bottle, then insert a bottle with just water and pour
again.
• Repeat on both positions.
For assistance, please check the closest dealer at
https://www.wineemotion.com/distribution
8. Maintenance
9. Assistance
Wineemotion Spa
Strada di Sant’appiano 9/A
Barberino Val d’elsa - Firenze


