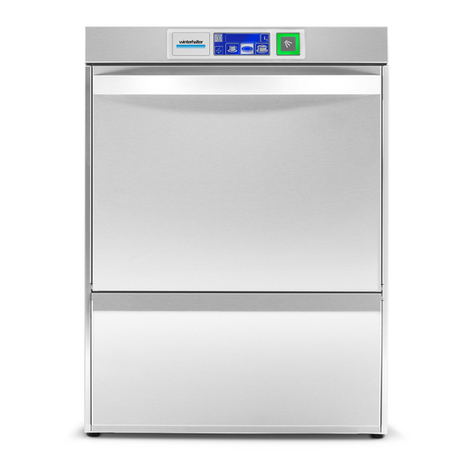
Winterhalter UF Series UF-M User manual

Utensil Washer
UF SeriesUtensil Washers
UF Series
Operating instructions


About this manual
1
Operating instructions
for Winterhalter utensil washers in the UF series
(translation of the original German operating instructions)
Contents
1About this manual-------------------------------- 1
2Proper use------------------------------------------ 2
2.1 Improper use---------------------------------------- 2
3Safety notes---------------------------------------- 3
3.1 General safety notes ------------------------------ 3
3.2 Electrical safety------------------------------------- 3
3.3 Maintenance and repair work ------------------- 3
4Before working with the machine----------- 4
5Machine description----------------------------- 5
5.1 Overview --------------------------------------------- 5
5.2 Mode of operation---------------------------------- 5
5.3 Options ----------------------------------------------- 6
5.4 Customer-specific modifications---------------- 6
6General operation -------------------------------- 7
6.1 Display (touch screen)---------------------------- 7
6.2 Start button and quick start button------------- 7
6.3 Menu levels------------------------------------------ 8
7PIN menu-------------------------------------------13
7.1 General settings-----------------------------------13
7.2 Programming automatic switch on / switch off-15
7.3 Operating data-------------------------------------16
7.4 Hygiene logbook ----------------------------------17
7.5 Descaling / basic cleaning ----------------------17
7.6 Changing the amount of detergent / rinse aid--19
7.7 Resetting the water back-flow counter-------20
8Rinse aid and detergent-----------------------21
8.1 Rinse aid --------------------------------------------21
8.2 Detergent--------------------------------------------21
8.3 Suction tube with level control -----------------22
9Operation-------------------------------------------24
9.1 Before switching on the machine--------------24
9.2 Switching on the machine-----------------------24
9.3 Washing---------------------------------------------24
9.4 Switch off the machine---------------------------26
10 Servicing and maintenance ------------------27
10.1 Daily cleaning --------------------------------------27
10.2 Weekly cleaning-----------------------------------29
10.3 Monthly cleaning ----------------------------------29
10.4 Descaling--------------------------------------------30
10.5 Maintenance by the Customer Service
Department -----------------------------------------30
11 Malfunctions --------------------------------------31
11.1 Accessing the error code------------------------32
11.2 Poor wash result-----------------------------------33
11.3 Calibrate display-----------------------------------33
12 Switch off the machine during work
breaks-----------------------------------------------33
13 Putting the machine back into service
after a long period of disuse-----------------34
14 Installing the machine -------------------------34
15 Connecting the machine ----------------------34
15.1 Location of the connections on the machine--34
15.2 Installation diagram-------------------------------35
15.3 Water connection----------------------------------35
15.4 Connecting the inlet water hose---------------36
15.5 Electrical connection -----------------------------36
16 External dosing devices-----------------------37
16.1 Terminals--------------------------------------------37
16.2 Electrical connection -----------------------------38
16.3 Setting parameters--------------------------------39
17 Technical data------------------------------------40
18 Emissions------------------------------------------40
19 Disposal --------------------------------------------40
20 EC Declaration of Conformity ---------------41
1 About this manual
These operating instructions will give you a quick overview of the main functions and safe operation of your
warewasher. Keep the operating instructions accessible.
Please carefully observe the safety notes listed here (3).

Proper use
2
The following symbols are used in these instructions:
Symbol
Meaning
Danger
Warning against potential serious or fatal injuries to persons if the precautionary measures
described are not taken.
Warning
Warning against potential minor injuries to persons or material damage if the precautionary
measures described are not taken.
Caution
Warning against possible defects or damage of the product if the precautionary measures
described are not followed.
Carefully read through the safety notes and operating instructions in this manual before
working with this machine.
IMPORTANT
Important information is provided here.
INFO
Useful information is given here.
This symbol indicates instructions.
This symbol indicates the results of your actions.
This symbol indicates itemisations.
This symbol refers to a chapter with more detailed information.
2 Proper use
The UF series warewashers are technical devices for commercial use and not intended
for private use.
Use the warewasher only for washing utensils and wash items for gastronomic and
similar use (butcher’s shop, bakeries).
Always operate the machine as described in these operating instructions.
2.1 Improper use
The water in the warewasher may not be used as drinking water.
Children must not play with the appliance.
Cleaning and user maintenance by children, should only be carried out under
supervision.
Do not use the warewasher to wash electrically heated devices or parts made of wood.
Do not wash without a wash rack.
Do not make any changes, additions or modifications to the device without the approval
of the manufacturer.
Winterhalter Gastronom GmbH does not assume liability for any damage caused due to
improper use of the warewasher.

Safety notes
3
3 Safety notes
3.1 General safety notes
Read through the safety notes and operating instructions in this manual carefully.
Winterhalter Gastronom GmbH does not assume liability or warranty in case of non-
compliance with these safety and operating instructions.
Use the warewasher only after you have read and understood the operating
instructions. Allow the Winterhalter Customer Service Department to provide information
about the operation and functioning of the warewasher.
Do not climb or sit on the opened hinged door.
Train the operating personnel as regards handling the machine and inform them about
the safety notes. Repeat the training sessions at regular intervals to prevent accidents.
For your safety, test the on-site residual current circuit breaker (FI) regularly by pressing
the test button.
Close the on-site water stop cock after the work is complete.
Switch off the on-site mains disconnector after the work is complete.
Warning
Risk of crushing when closing the door
Do not place hands or objects beside or behind the
upper part of the door.
When closing the door, there is a risk that fingers or
objects may become trapped in the gap and be crushed.
The hazardous area is normally out of the reach of the person who
closes the door. The risk is only posed to persons who are also on or
in the vicinity of the machine.
3.2 Electrical safety
The electrical safety of this machine is guaranteed only if it is connected to a correctly
installed protective circuit and a residual current circuit breaker. It is crucial that this
basic safety requirement is tested and, in case of doubt, that the house installation is
checked by a qualified electrician.
Winterhalter cannot be held responsible for damage caused by a missing or broken
protective conductor (e.g. electrical shock).
3.3 Maintenance and repair work
When performing installation, maintenance and repair work, unplug the machine from
the mains supply.
Maintenance work and repairs may only be performed by authorised Winterhalter
service technicians. Improper maintenance or repairs may cause significant danger for
the user, for which Winterhalter is not liable.
Original spare parts must be used for repairs or to replace consumable parts. If original
spare parts are not used, the warranty is invalidated.
Operate this machine only when it is in perfect condition.
A damaged or leaking machine may endanger your safety. In case of danger and/or
defects, switch off the machine immediately. Switch off the on-site mains disconnector
(main switch). Only then is the machine without power.

Before working with the machine
4
Contact your installer or electrician if the on-site water or electricity supply is the cause
of the malfunction.
Contact an authorised service technician or your dealer if any other fault occurs.
If the mains cable is damaged, to prevent hazards it must be replaced by Winterhalter
or its Customer Service or another qualified person. The mains cable must be an
H07 RN-F type or equivalent.
4 Before working with the machine
Have the machine set up by an authorised service technician or your dealer (14).
Have the machine connected as per the locally applicable standards and the regulations of the authorised
mechanics (water, waste water, electrical system) (15).
After connecting the water and the power properly, contact the relevant Winterhalter dealer or your dealer
for the commissioning of the machine and for providing training in its operation. Have yourself and your
operating personnel trained in the operation of the machine.

Machine description
5
5 Machine description
5.1 Overview
UF-M, UF-L
UF-XL
Item
Description
Item
Description
(1)
Energy module (optional)
(8)
Filter cylinder
(2)
Wash arm (crescent)
(9)
Strainer
(3)
Rinse arm
(10)
Lifting/hinged door
(4)
Quick start button
(11)
Rack guide
(5)
Display and start button
(12)
Suction tube
(6)
Pump inlet filter
(13)
Chemicals compartment (only UF-XL)
(7)
Tank heating element
5.2 Mode of operation
The boiler and the tank fill are warmed up to the operating temperature after the machine is switched on.
During the heating-up phase, the lighting of the start button changes gradually from red to green. When the
rated temperatures are reached, the machine is ready for use. The start button lights up green.
The machine is fully automatic with programmes consisting of three steps: Wash, Drain and Rinse. While a
washing programme is running, the start button gradually changes from blue to green.

Machine description
6
5.3 Options
The following options are available by default:
Energy
Requirement: Connect the machine to the cold water.
The structure above the machine includes a fan motor and a heat exchanger. The fan motor extracts the
moist, warm air (= vapours) out of the washing compartment and transfers the generated energy to the
cold inlet water via a heat exchanger.
Long-term improvement in the kitchen climate and reduced operating costs.
Hinged door (10.1.2)
The following options can be fitted on request:
Cold water pre-wash (6.3.2.2)
Requirement: Second water connection (max. 20 °C) required.
At the beginning of the washing programme, starch and protein deposits are rinsed away with cold water.
This prevents caking of starch and protein deposits.
Defoamer dosing device
Increased protein in the warewasher causes significant foam build-up. Adding a defoamer helps prevent
foam forming.
Improvement of wash result.
Dosing device for crust cracker (TurboZyme process)
Before the actual wash cycle, the wash items are moistened with the crust cracker (special cleaning
agent) (6.3.2.1). Next is a soaking phase.
Dried-on residues can be removed effortlessly, even without manual pre-rinsing.
Screen protector
5.4 Customer-specific modifications
The controls of the machine can be adapted to individual needs within certain limits.
Examples
The rinsing pressure can be adapted to the wash items.
The cold water pre-wash can be activated for individual programmes.
The beep which occurs when a button is pressed can be disabled.
Contact an authorised service technician for any changes.

General operation
7
6 General operation
6.1 Display (touch screen)
Caution
Operate the screen only with your fingers; do not use any sharp objects.
The display is a touch screen, which responds to touch. Each touch of a button is confirmed by a beep. Events
such as the end of the programme or malfunctions are indicated by a sequence of tones.
INFO The authorised service technician can deactivate the beep and the sequence of tones.
If pressing the buttons no longer functions perfectly, the display must be recalibrated (11.3).
6.2 Start button and quick start button
Item
Explanation
Start button
Quick start button
Both buttons have the following functions:
Start washing programme
Cancel washing programme
Start intensive programme using a "double click" (9.3.2)
The start button changes colour for the subsequent programme. The colours have the following meanings:
Colour
Meaning
red
Machine is not yet ready for use
•
–
red green
Machine is filling and heating up
•
–
green
Machine is ready for use
•
•
flashing green
Washing programme is ended; door has not been opened yet
•
•
flashing green-blue
Only for the Energy version:
Vapours being extracted. The washing programme has not
completely finished.
•
•
blue
Machine is washing
•
•
flashing blue
Soaking phase in the soaking programme
•
•
blue green
Washing programme is running
•
–
blue not lit
Self-cleaning programme is running
•
–
not lit
Machine is switched off
•
•

General operation
8
6.3 Menu levels
Operating personnel have access to the following 3 levels:
Main level (6.3.1)
Info level 1 (6.3.2)
Info level 2 (6.3.3)
Standard washing
programmes
Info field
Show temperatures
Activate additional programme
Priming the dosing devices
List of events and
malfunctions
Access to the PIN menu
6.3.1 Main level
The main level appears automatically when the machine is ready for operation.
Item
Description
(1)
On/Off button
IMPORTANT Once the machine has completed operation, drain with the self-cleaning
programme (10.1.1)
(2)
Info field
Display of activated additional programmes and error pictograms
(3)
Switch to Info level 1 (6.3.2)
(4)
Switch to tank water exchange programme (9.3.6) and self-cleaning programme (10.1.1)
(5)
Standard washing programme 1 for slightly dirty wash items
(6)
Standard washing programme 2 for medium dirty wash items
(7)
Standard washing programme 3 for heavily soiled wash items
The 3 standard washing programmes differ in their various properties (e.g. time and cleaning pressure) and
are thus suited to wash items with different levels of soiling. Programme 2 is already pre-selected when the
machine is ready.
INFO The display of standard washing programmes on your warewasher may differ. The service
technician chooses the pictogram optimally suited to the wash items and level of soiling from a
large selection of images.
At your request, the service technician can also hide programmes.

General operation
9
6.3.2 Info level 1
Item
Description
(1)
On/Off button
IMPORTANT Once the machine has completed operation, drain with the self-cleaning
programme (10.1.1)
(2)
Info field
(3)
Machine type
(4)
Current rinse temperature
INFO The rinse temperature is lowered between rinse stages to save energy. The effective
rinse temperature is only displayed at the start of the rinse.
(5)
Current tank temperature
(6)
Machine number
(7)
Switch to Info level 2 (6.3.3)
(8)
Back button (including menu number)
(9)
Buttons for selecting additional programmes, priming of the dosing devices and retrieving
information
(10)
Scroll keys
Overview of buttons (9)
Addresses
Tap the button.
The following 2 addresses appear:
SERVICE: Address of the service technician
CHEMICALS: Address of the chemicals supplier (rinse aid, detergent, etc.)
INFO If no addresses appear, the authorised service technician can enter the
corresponding addresses.
Soaking programme (6.3.2.1)
To dissolve dried-on residues.
Prime the detergent dosing device and dosing tubes
Keep the button pressed.
The background of the button becomes white.
The dosing device is activated (max. 30 seconds).
Prime the rinse aid dosing device and dosing tubes
Keep the button pressed.
The background of the button becomes white.
The dosing device is activated (max. 30 seconds).
Cold water pre-wash (optional) (6.3.2.2)
To rinse off starch and protein deposits.

General operation
10
Short programme
Activate
Tap the button.
The background of the button becomes white.
Press the start button to start the additional programme.
INFO The additional programme remains stored until it is disabled or another
additional programme is selected.
Special programme
The special programme can be freely programmed by an authorised service technician
according to your wishes (time, temperature, rinse pressure and detergent metering).
Activate
See short programme.
Integrated operating instructions
Tap the button.
The integrated operating instructions appear.
Tips
Tap the button.
Tips appear concerning themes such as hygiene, conservation of wash items and
economy.
6.3.2.1 Soaking programme
The soaking programme is particularly suited to removing dried-on residues.
The soaking programme for programme 3 is available by default, but not activated.
INFO On request, the service technician can also make the soaking programme available for the 2 other
programmes.
IMPORTANT If an additional dosing device for the crust cracker is present, the crust cracker is used in the
soaking programme. Without an additional dosing device, the wash items are moistened with
tank water.
Activate soaking programme
Preselect programme 3.
Access info level 1.
Press button (1).
The background of the button becomes white.
INFO The soaking programme remains activated, until
it is deactivated (pressing the button again) or
the machine is switched off.

General operation
11
Use soaking programme
Leave the door open for 6 seconds after loading. The soaking programme starts automatically once the door
is closed.
IMPORTANT Following the soaking programme, immediately start a washing programme, so that the tank
water or crust cracker is rinsed off of the wash items.
INFO We recommend a soaking time of 7 minutes.
Open door.
Place wash items in the wash rack. Leave door open for at
least 6 seconds.
Close door.
The wash items are moistened with tank water (or crust
cracker).
The start button and the quick start button flash blue.
Warning
Possible risk of injury due to tank water
The wash items are moistened with tank water. Wear protective gloves when placing
additional wash items in the basket and when touching wash items already present in the
process.
Only remove the wash items when the washing programme has finished and the start button
flashes green.
After the desired soaking time: Press start button.
INFO If the washing programme has not yet been started and the start button is still flashing blue,
additional wash items can be placed in the basket. The soaking programme restarts each time
the door has been open for at least 6 seconds.
6.3.2.2 Cold water pre-wash (optional)
At the beginning of the washing programme, starch and protein deposits are rinsed away with cold water.
This prevents caking of starch and protein deposits.
The cold water pre-wash is available for programme 1, but not activated.
INFO On request, the service technician can also make the cold water pre-wash available for the 2 other
programmes.
Cold water pre-wash activate
Preselect programme 1.
Access info level 1.
Scroll down until button (1) appears.
Press button (1).
The background of the button becomes white.
INFO The cold water pre-wash remains activated, until
it is deactivated (pressing the button again) or
the machine is switched off.

General operation
12
Use cold water pre-wash
At the beginning of the washing programme, the wash items are automatically pre-washed with cold water.
Start programme 1.
6.3.3 Info level 2
Item
Description
(1)
On/Off button
IMPORTANT Once the machine has completed operation, drain with the self-cleaning
programme (10.1.1)
(2)
Info field
(3)
Current date
(4)
Current rinse temperature
INFO The rinse temperature is lowered between rinse stages to save energy. The effective
rinse temperature is only displayed at the start of the rinse.
(5)
Current tank temperature
(6)
Current time
(7)
Switch to PIN menu (7)
(8)
Back button (including menu number)
(9)
List with events and malfunctions
(10)
Scroll keys
List with events and malfunctions
newer entries
older entries
Display
Explanation
Evt xx
Event (e.g. sequence of a washing programme)
ERR xx
Malfunction
ERR xx OK
Malfunction resolved
INFO Information with dates can be found in the hygiene logbook (7.4).

PIN menu
13
7 PIN menu
INFO If you switch to the PIN menu, the machine switches off. After leaving the PIN menu, the machine
must be switched back on.
Accessing the PIN menu
Tap the following buttons in turn:
Enter "1575".
INFO
Incorrectly entered digits can be corrected
with the button.
INFO An incorrectly entered PIN is displayed on the screen with the symbol. If you have entered
your PIN incorrectly five times, the input is locked for 2 minutes.
Overview
Enter general settings (time, date, language, contrast) (7.1)
Programme automatic switching On/Off (7.2)
Display the operating data (7.3)
Access the hygiene logbook (7.4)
Start descaling or basic cleaning programme (7.5)
Change dosing amount for detergent and rinse aid (7.6)
Set parameters for external dosing devices (16.3)
Reset the water back-flow counter (7.7)
Leaving the PIN menu
Tap the button.
7.1 General settings
7.1.1 Date, time, temperature unit
Here you can enter the current date and the current time, change the format of the time, and change the
temperature unit.
INFO The time must be changed for the summer/winter time changeover.

PIN menu
14
Retrieving the settings
Tap the following buttons in turn:
1
Current date
(Format: YYYY-MM-DD (year-month-day))
INFO You can only enter only a plausible date.
2
Time format
AM/PM = 12-hour mode
24 h = 24-hour mode
3
Current time
4
Temperature unit
°C = degrees Celsius
°F = degrees Fahrenheit
5
Back button
Press the back button (5) to exit from the menu.
7.1.2 Setting the contrast
Here you can change the contrast to match the display of the screen to the lighting conditions in your
kitchen.
Retrieving the settings
Tap the following buttons in turn:
Change the setting with the and buttons until all of
the data on the display is readable.
Confirm with the button.
Press the back button (1) to exit from the menu.
7.1.3 Setting the language
Here you can set the language in which to display texts on the screen.
Retrieving the settings
Tap the following buttons in turn:
Select the required language.
Press the back button (1) to exit from the menu.

PIN menu
15
7.2 Programming automatic switch on / switch off
Here you can:
programme, when the machine is to fill and heat up automatically.
programme, when the machine is to switch off automatically.
The automatic switching on/off can be set either per day or for a special date. If the inputs overlap, a specific
date always takes precedence over the weekly programme.
IMPORTANT The following requirements must be met at the time of the automatic switch on:
The hood is closed.
The on-site mains disconnector is switched on.
The water stop cock is open.
Programming automatic switch on
Tap the following buttons in turn:
Setting the weekday
Setting a special date
INFO The date and time of the next automatic activation are
displayed when the machine is switched on. However,
the machine can be used before this point of time.
Select weekday.
Activate weekday.
Enter the time.
Repeat as necessary
for the other weekdays.
Save.
Activate functions.
Enter the date and time.
Activate functions.
Save.

PIN menu
16
Programming automatic switch off
Tap the following buttons in turn:
The setting of days of the week or special dates is much the same as for automatic switch on. Proceed as
described in this section.
Sequence of the automatic switch off
3 short
beeps
10 s
pause
3 short
beeps
10 s
pause
3 short
beeps
Machine is emptied and switched off
using the self-cleaning programme
INFO If the door is open during the automatic switch-off, the machine is pumped empty and switched off,
but not cleaned inside.
7.3 Operating data
Here you can read out all operating data.
Retrieving the operating data
Press the button.
The following operating data is shown on the display.
Commissioning
Date
Next service in①
x hours or washing cycles
Total operation hours
x hours
Total washing cycles
x
Total water consumption
x litres
Full washing cycles Energy②
x
Total energy savings②
x kWh
Op. hours/day
x hours
Washing cycles/day
x
Water consumption/day
x litres
Remaining capacity water treatment
x litres
Operating hours Master old③
x hours
INFO The display depends on the facilities of the machine.
Press the back button to exit from the menu.
①
An authorised service technician can activate this function.
②
only for Energy models
③
when a new display is installed

PIN menu
17
7.4 Hygiene logbook
In the hygiene logbook you can:
retrieve all operating conditions, actions, and failures for one day in chronological order.
retrieve all HACCP and hygiene relevant data.
The list starts with the current date and the first event on this day. Then the following events on that day, and
then the events of days before. The most important operating data are summarized at the end of each day.
INFO When the memory capacity is reached, the oldest data is deleted as soon as new data is added.
Accessing the hygiene logbook
Press the button.
The hygiene logbook display then appears:
The list starts with the current date and the first event on this day.
This is followed by the events from the days before.
Press the back button to exit from the menu.
7.4.1 Data transfer to PC (option)
Because the hygiene logbook stores only a limited number of entries, there is also the possibility to transfer
the records to a PC and archive them there.
For more information, see the related documents.
7.5 Descaling / basic cleaning
7.5.1 Descaling programme
If the machine is operated with hard water without water treatment, the boiler, the machine interior, all water
lines and other components may scale.
Grease residues and dirt that remain in the machine can contribute towards an unhygienic interior and can
lead to failure of heating elements. Regular removal of these layers is absolutely essential.
Using the descaling programme you can descale the interior of the dishwasher. The water lines and the
boiler can only be descaled by an authorised service technician.
For descaling, you need an acid-based descaler suitable for commercial dishwashers. We recommend the
Winterhalter Descaler A 70 LS.
Danger
When handling chemicals, observe the safety precautions and the dosage recommendations
on the packaging.
Wear protective clothing, protective gloves and protective goggles when handling chemicals.
Ideally, start the descaling programme when the machine is empty and switched off. If the machine is
already prepared for use, it will automatically empty first.
Only with an external detergent dosing device:
Warning
Development of chlorine gas
If you mix active chlorinated detergent and descaler, chlorine gas is produced. Stop the
detergent dosing (e.g. remove the suction tube or switch off the dosing device).
INFO A detergent dosing device built into the machine will be disabled automatically in the descaling
programme.

PIN menu
18
Starting the descaling programme
Tap the following buttons in turn:
The button flashes while the
programme is running.
Warning
Descaler causes corrosion
The descaling solution must not remain in the machine. If you switch off the machine when the
descaling programme is in progress or if you terminate the programme, the machine must be
emptied, refilled and again emptied. Use the self-cleaning programme for this.
Sequence of the descaling programme
Open door.
Close door.
Open the door and check the result:
Continue with step 8.
Close the door and repeat steps 5 + 6.
Close door.
Put descaler
(A 70 LS) into the
tank:
UF-M/UF-L: 690 ml
UF-XL: 1380 ml
Add descaler.
Press start button.
Test descaling.
Good: Press button 28.
Bad: Press start button.
This manual suits for next models
2
Table of contents
Other Winterhalter Washer manuals

Winterhalter
Winterhalter UC series User manual

Winterhalter
Winterhalter CTR Series Quick guide

Winterhalter
Winterhalter GSR 36 User manual

Winterhalter
Winterhalter PAY PER WASH UC V02 Series User manual

Winterhalter
Winterhalter GS 310 User manual

Winterhalter
Winterhalter UF Series User manual

Winterhalter
Winterhalter PAY PER WASH UC V01 Series Parts list manual