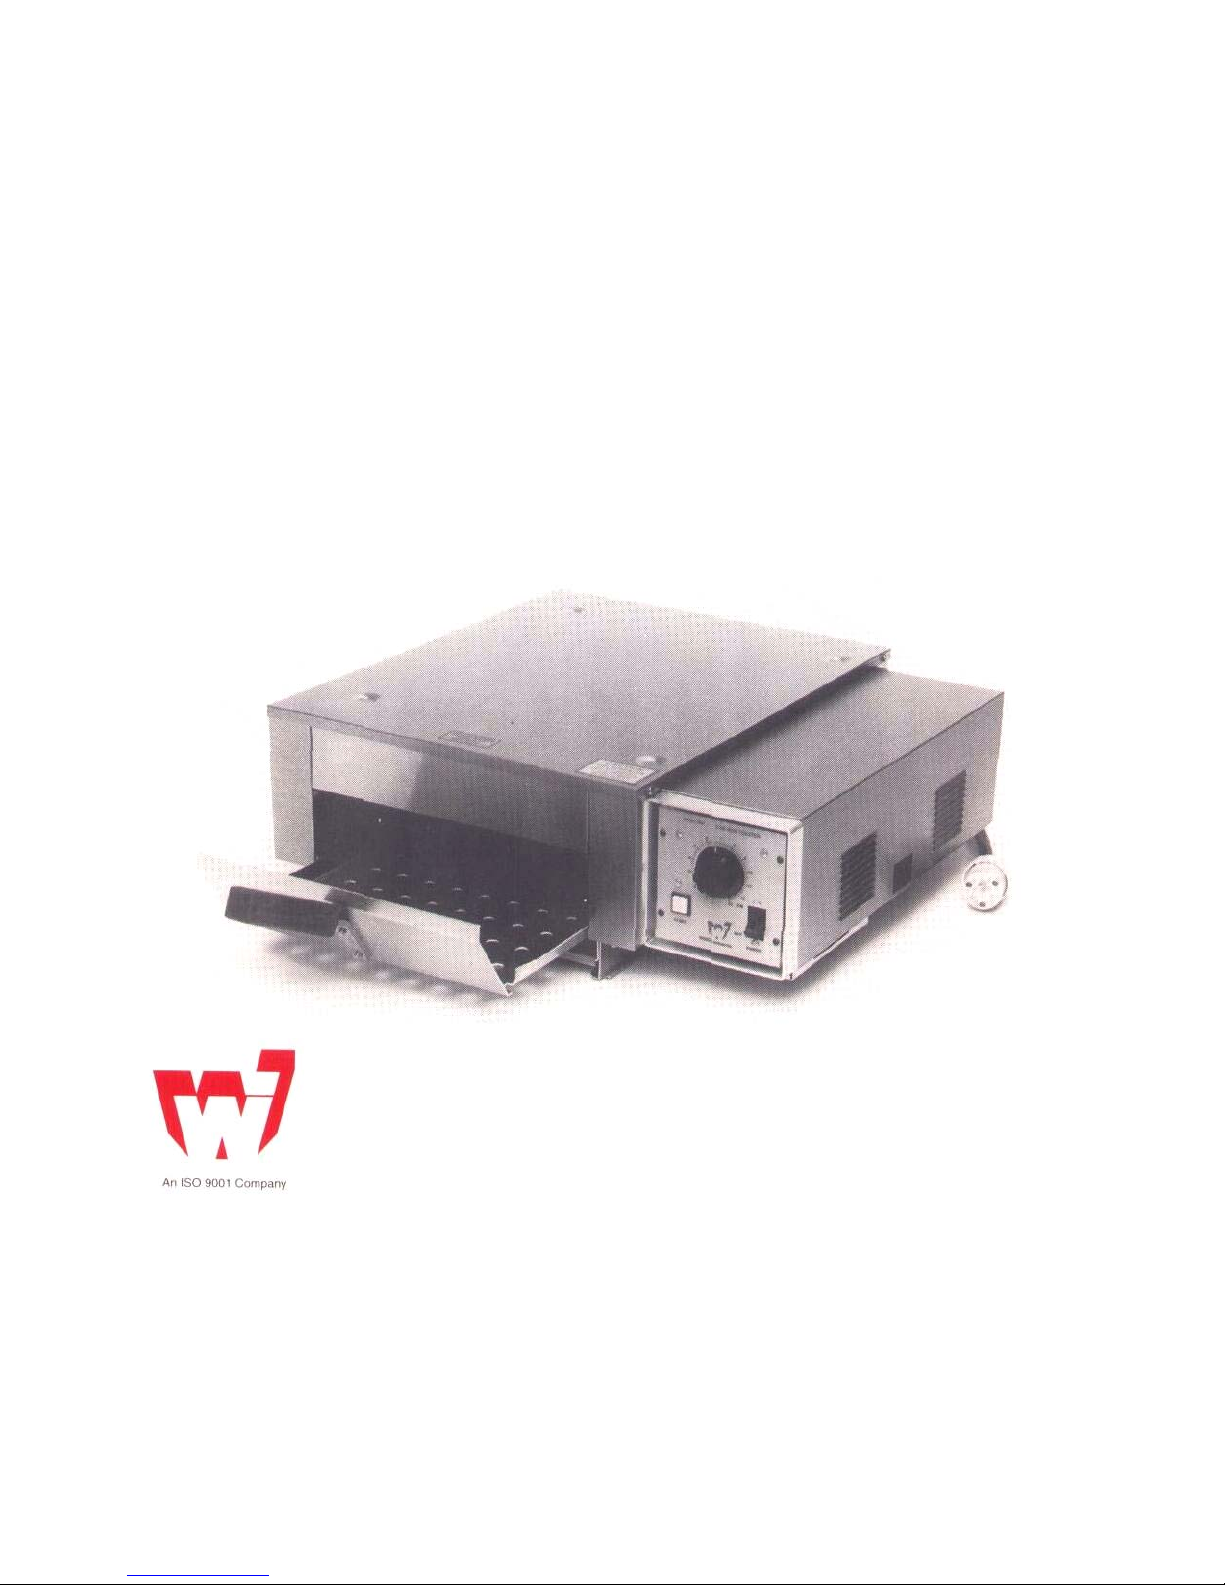
Wisco Industries 575 EC User manual

575 EC TOASTER OVEN
575 EC TOASTER OVEN
575 EC TOASTER OVEN
575 EC TOASTER OVEN
WISCO INDUSTRIES, INC.
OREGON, WISCONSIN 53575-0010 • TELEPHONE 608-835-3106 • FAX 608-835-7399

LIMITED WARRANTY
All parts are guaranteed to be free of defects in material and workmanship for a period of one year from
date of purchase, with the exception of the Infrared Quartz Lamps which are guaranteed for thirty days.
Date of purchase shall be the day of shipment.
Wisco agrees to replace or repair any part which proves defective, without charge for that part, during this
one-year period.
Parts will be replaced or repaired, F.O.B. factory, or by an authorized parts and service agency.
During the initial 90-day period of the one-year warranty, Wisco will repair or replace without charge any
defective parts, assume expenses incurred to perform the service, including up to a total of 50 miles
travel. Travel expenses exceeding the 50 mile total shall be the obligation of the purchaser.
Wisco Industries, Inc. neither assumes nor authorizes any person to assume any other obligation or
liability in connection with this equipment.
The above warranty applies only to the original purchaser, providing that the equipment has been properly
installed, all parts have been serviced as recommended, and providing the allegedly defective parts, upon
examination by Wisco, shall prove to be defective.
This warranty will not apply to any equipment or part thereof which has been subjected to any accident,
abuse, misuse, tampering, or service by an unauthorized service agency.

CONTENTS
INTRODUCTION 1
GENERAL 1
MODEL DESCRIPTION 2
Construction
SPECIFICATIONS
Dimensions 2
Electrical
OPERATING INSTRUCTIONS 3-4
Preparation
Handle Installation
Lamp Installation
Power Cord Installation
GENERAL MAINTENANCE 5
LOCATION AND FUNCTION OF CONTROLS 5
OPERATION 6
TROUBLESHOOTING GUIDE 6
REPLACEMENT PARTS (QUICK REFERENCE) 7
REPLACEMENT INSTRUCTION 8-9
Lamps
Contr lyol Assemb
Relay
Fan Motor
COMPLETE PARTS LIST 10-11
575 EC EXPANDED VIEW DRAWING 12
575 EC WIRING DIAGRAM 13

INTRODUCTION
We congratulate you on your recent selection of the Wisco Model 575 EC Toaster Oven. Our organization has
tremendous pride in presenting you with a dependable, top quality unit that is designed to provide you with years of
reliable service.
GENERAL
The 575 EC offers speed with economy at the touch of a fingertip. Solid state reliability ensures consistent
performance with each cycle when preparing items of your choice. The selective cycle setting provides the precise
control for preparing the product to your exact specifications.
With capacity for toasting 400 buns per hour, the 575 EC will handle your most demanding needs. With its unique
ENERGY SMART circuitry design, energy consumption is minimized until services are required which saves 50-80%
more energy than conveyor-type toasters.
As a safety precaution, we recommend all instructions and safety tips appearing in this manual be reviewed prior to
operation.

MODEL DESCRIPTION
CONSTRUCTION
Wisco's Toaster Oven is constructed with a 22 gauge brushed stainless steel exterior and an
aluminum interior. Specular aluminum reflectors focus the infrared waves to maximize
efficiency when toasting or melting cheese.
SPECIFICATIONS
DIMENSIONS
Figure 1. Model 575 EC Toaster Oven
Height: 9 1/4" Width: 23 1/2" Depth: 22"
Opening height is 3 1/4" for a variety of products
ELECTRICAL
This unit is designed to operate on 208 AC, single phase. It is equiped with a 6 ft. cord and plug that
requires a standard NEMA L6-20R or L6-30R receptacle rated 20 A, 250V AC, or 30 A, 250V AC,
respectively.
Upon request, NO POWER CORD will accompany the unit for firms that prefer to install their own
power cord.
Electical Rating: 208V AC 60 Hz 3200 WATT 15.4 Amp.

OPERATING INSTRUCTIONS
CAUTION: To prevent electrical shock, DO NOT apply power or try to operate toaster
until after proper preparation of this unit.
PREPARATION
Prior to operation, you must install the infrared lamps, grill tray handle, cleanout tray knob, and
install a power cord (if requested without). The hardware and screws required to complete
assembly are attached to the grill tray. The lamps are packaged internally beneath the top of the
unit.
HANDLE INSTALLATION
Transfer the handle from the interior of the grill tray to its exterior position. Screws are with
handle (see figure 2).
Figure 2. Handle Assembly

LAMP INSTALLATION
CAUTION: DO NOT touch the glass surface when handling the quartz lamps. The oil from your hands creates hot
spots that will diminish the life of the lamps. When handling, grip the metal end caps.
1. Remove the top of the unit to access the lamps. Two lamps are required for operation,
2. Remove the inner lid. Avoid handling or bending the specular reflector shield attached to the lid.
3. Install lamps by inserting the metal end caps into the white porcelain insulators, fitting the lamps snugly in place
and attaching lead to any terminal on insulator.
4. Replace inner lid. Proper positioning places the air deflector on the side of the fan/control box. Secure at all six
points, required screws are in hardware packet.
5. Replace top, required screws are in hardware packet.
POWER CORD INSTALLATION
When installing a unit without a power cord (supplied upon request), we recommend a Type SO or SOW-A, #12 AWG 3-
conductor cord, rated 20 amps, 250 volts.

GENERAL MAINTENANCE
Proper maintenance includes regular cleaning. The exterior should be cleaned with glass
cleaner or substitute cleaner that is not abrasive. DO NOT allow grease or dust particles to
accumulate in the louvers. Adequate airflow is essential for proper cooling of the solid state
components. The cleanout tray should be removed and cleaned daily. A standard detergent is
recommended—dishwasher safe.
If at some point you remove the top lid and there is a buildup of spattered particles on the
specular aluminum reflector, DO NOT use a caustic oven cleaner or scratch pad when cleaning.
It will damage the reflective finish. General detergents and a soft wipe are recommended.
FUNCTION OF CONTROLS
1. MAIN POWER SWITCH
This switch is used to turn the entering power line on and off.
2. TIMING CONTROL
Use this dial to regulate the length of the toast cycle. Each digit indicates an approximate 10
second cycle. For example, 1 is a 10 second cycle, 2 is a 20 second cycle, 6 is a 60 second
cycle.
3. START SWITCH
This momentary contact switch initiates the toast cycle.

OPERATION
To determine the appropriate calibration for your product, begin by setting the timer at 6, which is approximately a 60
second cycle—initiate cycle by pressing toast switch. If a darker finish is desired, advance the control to a higher
setting. Reduce the setting for a lighter finish. Cycle times will vary depending on product weight and compostition.
When melting cheese, begin with a lower setting. At the completion of the toast cycle, remove product. The unit is
designed for consecutive cycles as demand requires.
TROUBLESHOOTING GUIDE
When more than one possible cause is listed, check the components in the order provided. The list is arranged from
most probable cause to least.
PROBLEM CAUSE
No power to unit Unit not plugged in, main power switch
in control assembly, relay, thermostat-
limiting
No power to lamps Start button (toastswitch in control
assembly), relay, thermostat
No power to lamps after Blocked air vents, cooling fan,
consecutive toast cycles lamp
Uneven toasting Heat lamp burned out or lamp could be
unplugged
No power to unit except fan is on Blocked air vents, thermostat-limiting,
after consecutive cycles connection between fan thermostat and
fan, fan motor, fan
No tone at completion of toast cycle Control assembly
Irregular tone length Control assembly
Uncontrolled toast cycle Control assembly

TROUBLESHOOTING GUIDE (continued)
PROBLEM CAUSE
Lamp does not stay on once started Lamp, control assembly, unit over
heating—check fan motor
REPLACEMENT PARTS LIST
(QUICK REFERENCE)
The following is a quick reference parts list designed for quick access and identification of common components
575 EC DESCRIPTION
PART NO
0017806 Control Panel Assembly
00122 Knob Cleanout Tray
009052SK Moto
r
009075 Cooling Fan
009220 Bun Tray
0017899 Thermisto
r
009181 Handle
009188 Wiring Diagram For E Series
0017898 Power Cord Assembly
009634 Relay
009103 Leg Cap
009757 Leg
009107 Thermostat (Limiting)
009108 Thermostat (Fan)
009218 Cleanout Tray
009973SK Quartz Lamp (208V)

REPLACEMENT INSTRUCTIONS
LAMPS
1. Disconnect unit from power.
2. Unscrew top panel and remove.
3. Unscrew reflector panel, and remove carefully, so as not to damage the sensor located on
top of the reflector panel.
4. Remove lamp and replace with new lamp.
5. Replace reflector panel.
6. Replace top panel.
7. Connect power to unit.
CONTROL ASSEMBLY
1. Disconnect unit from power.
2. Unscrew (3) screws located on the bottom of the unit, and remove access panel.
3. Disconnect wires to the control assembly.
4. Unscrew (4) outside screws on the front of the control assembly.
5. Remove control assembly.
6. Install new control assembly by replacing (4) outside screws.
7. Rewire according to wire diagram (see page 13).
8. Replace access panel and tighten (3) screws.
RELAY
1. Disconnect unit from power.
2. Remove access panel by removing (3) screws located on the bottom of the unit.
3. Disconnect wires to the relay.
4. Unscrew (2) screws located on the back side of the relay. NOTE: DO NOT WIPE AWAY
THERMAL GREASE. APPLY ADDITIONAL GREASE IF NECESSARY.
5. Install new relay by replacing (2) screws.
6. Rewire according to wire diagram (see page 13).
7. Replace access panel and tighten (3) screws.

FAN MOTOR
1. Disconnect unit from power.
2. Remove access panel by removing (3) screws located on the bottom of the unit.
3. Disconnect (2) wires leading to the fan motor.
4. Remove fan blade by lifting up on the hub of the fan carefully, so as not to break the blades of the fan.
5. Remove (2) screws on both sides of the motor shaft.
6. Remove fan motor, install new motor, and replace (2) screws on both sides of the motor shaft.
7. Replace fan blade by aligning the flat on the motor shaft with the flat inside hub of the fan blade.
8. Rewire according to the wire diagram (see page 13).
9. Replace access panel and tighten (3) screws.

COMPLETE PARTS LIST
NO 575 EC DESCRIPTION
PART ON
1009121 #10 Screw
2009205 Top Panel
30017806 Control Assembly
40017899Thermistor A blyssem
5009014 Access Panel
6009181 Handle an Mounting Bracketd
7009220 Bun Tray
800146 Speed Nut
9905063 193/8" Nut
10 009218Cleanout Tray
11 00122 Cleanout Tray Knob
12 009973SKQuartz Lamp 208V
13 0017898Power Cord Assembly
14 009004 Venturi Panel
15 009011 Duct Panel
16 009052 KSFan Motor
17 009075 Fan Bla ed
18 009022 Venturi
19 009023 Venturi Mounting Bracket
20 009024 Motor Support Bracket
21 009130 Mountin Panelg
22 009028 Bushing
23 009129 Lamp Guard
24 009503 Back Panel
25 009510 Back P nel-Controla
26 009549 Baffel
27 009070 Rivet
28 009632 Relay Mounting Bracket
29 009634 Solid State Relay
30 009754 Frame
31 009219 Heat Shield
32 009757 Leg
33 009155 1/4-20 Screw
34 009012 Comer Pan le
35 009013 Side Panel
36 009764 Front anelP
37 009009 Bezel
38 009697 8-32 X 1/2" Screw
39 009136 Bezel Clip
40 009753 Left Bulk Head

COMPLETE PARTS LIST (continued)
NO 575 EC DESCRIPTION
PART NO
42 009752 Right Bulkhead
43 009612 Roller Ramp
44 009016 Reflector
45 009135 Air Deflector
46 009763 Cover
47 009107 Thermostat Temp Limit
48 009108 Thermostat Fan Control
49 009141 Lamp Socket
50 009555 Universal Lamp Panel
51 009113 8-32 x 5/8" Screw
52 008047 Strain Relief
53 009544 Universal Bushing
54 009611 Spacer
55 009613 Ramp Panel
56 009117 8-32 Nut
57 009111 6-32 x 2" Screw
58 009046 Toast Switch (Hall Effects)
* If Requested For a detailed listing of electrical components and wires, see Figure 5 on page 13

575 EXPANDED DRAWING
Figure 4. Expanded View Drawing

Figure 5. 575 EC Wiring Diagram
Table of contents
Other Wisco Industries Oven manuals

Wisco Industries
Wisco Industries 421 User manual

Wisco Industries
Wisco Industries Amore User manual

Wisco Industries
Wisco Industries 620 User manual

Wisco Industries
Wisco Industries 412-5-NCT User manual

Wisco Industries
Wisco Industries 621 User manual

Wisco Industries
Wisco Industries 560C User manual

Wisco Industries
Wisco Industries 560B User manual