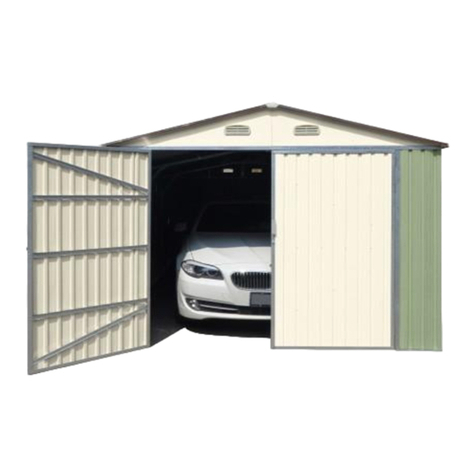
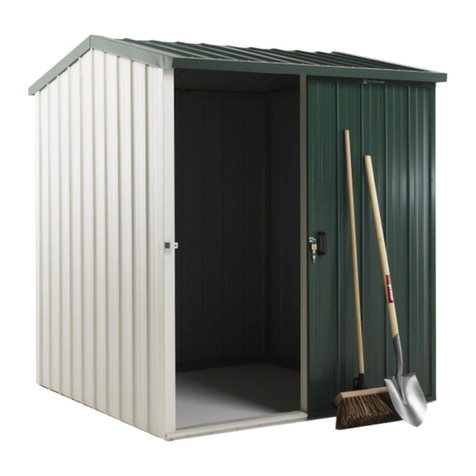
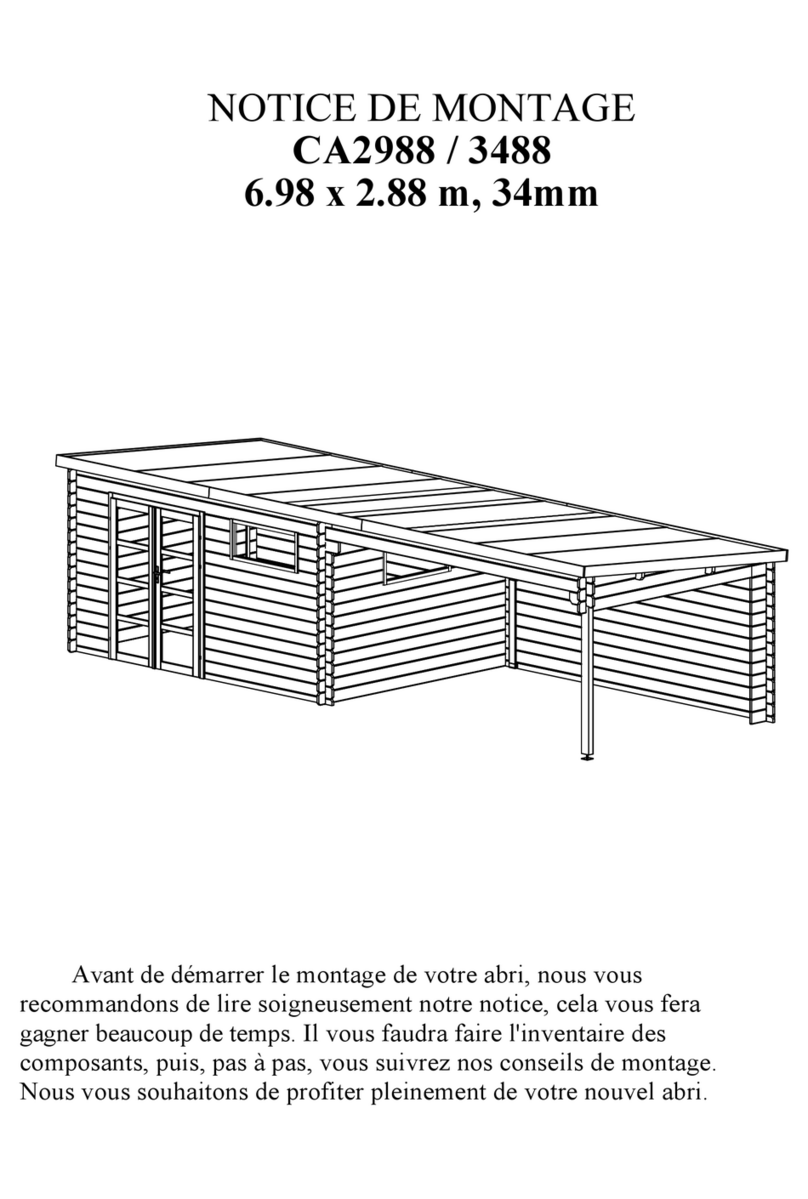
WoodLife Garden 3X3M User manual

GARDEN
INSTALLATION INSTRUCTIONS
NOTICE DE MONTAGE
MONTAGEANLEITUNG
INSTRUCIONES DE MONTAJE
IISTRUZIONI DI MONTAGGIO
INSTRUKCJA MONTAŻU
3X3M
8.7 m²
3020mm305mm 305mm
300mm225mm 2870mm

2
GARDEN
ENGLISH
RECOMMENDATIONS
Please read the components list BEFORE assembly, make sure that no parts are damaged or missing.
Read through the complete assembly instructions again.
Assemble all parts according to the instructions in this manual and do not skip any step.
Treat the wall panels with extreme care before and during assembly. Carefully place them on the ground.
Avoid stepping on or placing any objects on it.
At least two people are required to assemble the garden sheds.
Recommendation: Build a base of wood/composite or concrete as a foundation.
Leave enough space at the installation site outside of the WPC shed so that you can access the WPC Garden
sheds from the outside during assembly.
Remove all parts from the packaging and spread them out on a clean work surface by Area I/II and III.
Due to the high proportion of wood, the surface may have different shades and change color over time. This
does not require special treatment, nor does it affect the life of the WPC Garden sheds.
If you want to paint the WPC shed, please ask a professional painter for advice on choosing the right colors
for the wood-plastic composite material.
Do not use aggressive cleaning agents as they can stain or damage the WPC shed.
CARE AND SAFETY INSTRUCTIONS
ǛThe garden shed is generally used for storing objects. The WPC shed is not especially designed for
residential purposes.
ǛIt is recommended to anchor the WPC shed on an immovable object or foundation (it will serve as storm
protection).
ǛDo not set up on a windy or cold day.
ǛCheck the WPC shed regularly for stability and make sure that the location is level.
ǛBe careful when handling parts with steel edges.
ǛFor the construction and handling of the WPC shed, please only use tools that are listed in the assembly
instructions.
ǛAlways wear work gloves, safety glasses and any other kind of clothing with long sleeves when
assembling the garden shed or performing any kind of maintenance work.
ǛAvoid using lawnmowers and mechanical scythe in the immediate vicinity of the WPC shed.
ǛAlways wear safety goggles and always follow the manufacturer’s instructions when using power tools.
ǛClean the WPC shed with a garden hose and a mild detergent. You can use a hard brush but do not use any
abrasive or degreasing agents, as well as cleaning agents containing oil or acetone, as these can stain or
damage the product.
ǛDo not store any hot objects in the WPC shed, such as recently used grills or blowtorches, or any volatile
chemicals.
ǛDo not lean heavy objects against the walls of the WPC shed, as this could distort the entire WPC shed.
ǛKeep the roof free of snow and accumulated foliage. Large amounts of snow can damage the WPC shed
and make it dangerous for entering.
ǛMake sure there is sufficient ventilation at the WPC shed. This way you avoid moisture.
ǛCover the roof of the WPC shed with a tight roof covering. Pay attention to the roof slope. A self-adhesive
sealing membrane is best suited.
ǛThe wind direction is an important factor that must be taken into account when setting up the WPC
shed. Try to avoid placing it anywhere where there could be excessive wind loads, especially high wind
pressure on the doors. Always keep the doors closed and locked when the WPC shed is not in use to avoid
any kind of wind damage.
ǛPlease contact your local authorities to inquire if a permit is required to build the WPC shed.

3
GARDEN
REF. STRUCTURE DESCRIPTION QTY ZONE*
Gutter for roof
133x91 L = 3650mm 1 B
Gutter cover 1 C
Gutter cover 1 C
Gutter outlets 1
Connection clamps 3
Downpipes for gutters
Length = 2000 mm 1
Elbow 3
Screw M4x32 3
18
M
N
*Pieces are separated and identified in 3 parts for an easy installation.
A : first installed part; B : second installed part ; C : last installedpart.

4
GARDEN
FRANÇAIS
RECOMMANDATIONS
Avant de débuter l’installation, vérifiez que toutes les pièces nécessaires à l’assemblage sont présentes et
non endommagées.
Lisez entièrement la notice de montage et ne sautez aucune étape.
Ne posez pas d’objets sur les panneaux muraux, ne marchez pas dessus et manipulez-les avec précaution.
Deux personnes minimum sont nécessaires pour le montage de cet abri.
Laissez suffisamment d’espace autour de l’abri afin de ne pas être gêné lors de son installation.
Sortez des cartons toutes les pièces, placez-les sur une surface propre et rassemblez-les par zone A, B et C.
En raison de la proportion élevée de bois, la surface peut avoir différentes nuances et changer de couleur au
fil du temps. Cela ne ne nécessite pas de traitement spécial et n’affecte pas la durée de vie de l’abri.
Si vous souhaitez peindre l’abri, demandez conseil à un peintre professionnel.
N’utilisez pas de produit corrosif ou autre produit de nettoyage agressif pouvant altérer l’abri.
AVERTISSEMENTS
ǛL’abri ne peut être utilisé à des fins résidentiels.
ǛLa fondation doit être plane, stable et solide : nous recommandons une fondation de type dalle béton.
ǛN’effectuez pas l’installation par temps pluvieux ou venteux.
ǛManipulez les pièces avec des bords en acier avec prudence.
ǛPour le montage, n’utilisez que les outils listés dans la notice.
ǛPortez des vêtements de protection lors de l’installation : gants de travail, lunettes de protection et
habits recouvrant les membres.
ǛPortez toujours des lunettes de sécurité et suivez les instructions lorsque vous utilisez des outils
électriques.
ǛNettoyez l’abri à l’eau claire et au savon. Vous pouvez également utiliser une brosse non abrasive et
non dégraissante. Les produits de nettoyage contenant de l’huile ou de l’acétone, peuvent tacher ou
endommager l’abri.
ǛNe stockez pas d’objets chauds dans l’abri, tels que des barbecues ou des chalumeaux récemment
utilisés, ou tout produit chimique volatile.
ǛAfin d’éviter toute déformation de l’abri, ne pas appuyer d’objets lourds contre les murs.
ǛEn cas de neige, déblayez le toit.
ǛAssurez-vous que l’abri est suffisament ventilé afin d’éviter toute moisissure.
ǛLa direction du vent est un facteur important, évitez d’exposer l’abri et particulièrement les portes à une
zone très venteuse. Gardez toujours les portes fermées et verrouillées lorsque l’abri n’est pas utilisé pour
éviter les dommages.
ǛVeuillez contacter votre municipalité et vous renseigner si un permis est nécessaire.

5
GARDEN
RÈF. PIÈCES DESCRIPTION QTÉ ZONE*
Gouttière de toit
133x91 L = 3650mm 1 B
Embout de gouttière 1 C
Sortie de gouttières 1
Colliers de connexion 3
Tuyaux de descentes de
gouttières L = 2000mm 1
Coude 3
Vis M4x32 3
18
M
N
*Afin de faciliter le montage, les pièces sont séparées et identifiées en 3 parties.
A : première partie d’installation; B : seconde partie d’installation ; C : dernière partie d’installation

6
GARDEN
DEUTSCH
HINWEISE
Vergewissern Sie sich vor Beginn der Montage, dass alle für den Zusammenbau erforderlichen Teile
vorhanden und unbeschädigt sind.
Lesen Sie die Montageanleitung vollständig durch und überspringen Sie keine Schritte.
Legen Sie keine Gegenstände auf die Wandpaneele, treten Sie nicht darauf und gehen Sie vorsichtig damit
um.
Zum Aufbau dieses Gartenhauses sind mindestens zwei Personen erforderlich.
Lassen Sie genügend Platz um das Gartenhaus herum, damit Sie bei der Montage nicht eingeschränkt
werden.
Entnehmen Sie alle Teile aus den Kartons, legen Sie sie auf eine saubere Oberfläche und ordnen Sie sie den
Zonen A, B und C zu.
Aufgrund des hohen Holzanteils kann die Oberfläche unterschiedliche Schattierungen aufweisen und sich im
Laufe der Zeit verfärben. Hierfür ist keine besondere Behandlung erforderlich, und die Nutzungsdauer des
Gartenhauses wird dadurch nicht beeinträchtigt.
Wenn Sie das Gartenhaus streichen möchten, holen Sie den Rat eines professionellen Malers ein.
Verwenden Sie keine ätzenden oder anderen aggressiven Reinigungsmittel, die das Gartenhaus beschädigen
könnten.
WARNHINWEISE
ǛDas Gartenhaus kann nicht für Wohnzwecke genutzt werden.
ǛDas Fundament muss eben, stabil und fest sein: Wir empfehlen ein Fundament vom Typ Betonplatte.
ǛNicht bei regnerischem oder windigem Wetter aufbauen.
ǛBehandeln Sie Teile mit Stahlkanten mit Vorsicht.
ǛVerwenden Sie für die Montage nur die im Handbuch aufgeführten Werkzeuge.
ǛTragen Sie während der Montage Schutzkleidung: Arbeitshandschuhe, Schutzbrille und Kleidung, die
Ihre Gliedmaßen bedeckt.
ǛTragen Sie stets eine Schutzbrille und befolgen Sie die Anweisungen bei der Verwendung von
Elektrowerkzeugen.
ǛReinigen Sie das Gartenhaus mit klarem Wasser und Seife. Sie können auch eine nicht scheuernde, nicht
entfettende Bürste verwenden. Reinigungsmittel, die Öl oder Aceton enthalten, können Flecken oder
Schäden verursachen.
ǛLagern Sie keine heißen Gegenstände im Schutzraum, wie z.B. kürzlich benutzte Grillgeräte, Fackeln
oder brennbare Chemikalien.
ǛUm eine Verformung des Gartenhauses zu verhindern, lehnen Sie keine schweren Gegenstände gegen die
Wände.
ǛBei Schnee ist das Dach zu räumen.
ǛStellen Sie sicher, dass das Gartenhaus ausreichend belüftet ist, um Schimmelbildung zu vermeiden.
ǛDie Windrichtung ist ein wichtiger Faktor. Vermeiden Sie es, das Gartenhaus und insbesondere die Türen
einem sehr windigen Gebiet auszusetzen. Halten Sie die Türen immer geschlossen und verriegelt, wenn
das Gartenhaus nicht in Gebrauch ist, um Schäden zu vermeiden.
ǛBitte wenden Sie sich an Ihre örtliche Behörde und erkundigen Sie sich, ob eine Baugenehmigung
erforderlich ist.

7
GARDEN
REF. TEILE BESCHREIBUNG ANZAHL ZONE*
Dachrinne
133x91 L = 3650mm 1 B
Rinnen-Mundstück 1 C
Rinnenstutze 1
Rohrmuffe 3
Fallrohre L - 2000mm 1
Fallrohrbogen 3
Schrauben M4x32 3
18
M
N
*Zur Erleichterung des Zusammenbaus sind die Teile getrennt und in 3 Gruppen eingeteilt.
A:Erster Teil der Montage; B : zweiter Teil der Montage ; C : letzter Teil der Montage.

8
GARDEN
ESPAÑOL
RECOMENDACIONES
Antes de comenzar la instalación, verifica que todas las piezas necesarias para el montaje estén presentes y
no estén dañadas.
Lee las instrucciones de montaje por completo y no omitas ningún paso.
No coloques objetos, pises ni manipules paneles de pared.
Se necesitan dos personas como mínimo para el montaje de esta caseta.
Deja suficiente espacio alrededor para que no se obstruya la instalación.
Saca todas las piezas de las cajas, colócalas en una superficie limpia y recógelas por zona A, B y C.
Debido a la alta proporción de madera, la superficie puede tener diferentes tonos y cambiar de color con el
tiempo. Esta
no requiere un tratamiento especial y no afecta la vida de la caseta.
Si quiere pintarlo, pide consejo a un pintor profesional.
No utilices productos de limpieza corrosivos u otros productos fuertes que puedan dañarlo.
ADVERTENCIAS
ǛLa caseta no se puede usar con fines residenciales.
ǛLa base debe ser plana, estable y sólida: recomendamos una base tipo losa de concreto.
ǛNo lo instales en clima lluvioso o ventoso.
ǛManipula las piezas con bordes de acero con cuidado.
ǛPara el montaje, usa solo las herramientas enumeradas en las instrucciones.
ǛUsa ropa protectora durante la instalación: guantes de trabajo, anteojos protectores y ropa que cubra las
extremidades.
ǛSiempre usa gafas de seguridad y sigue las instrucciones cuando uses herramientas eléctricas.
ǛLimpia la caseta con agua limpia y jabón. También puedes usar un cepillo no abrasivo, no desengrasante.
Productos de limpieza que contienen aceite o acetona, ya que pueden manchar o dañar el refugio.
ǛNo almacenes objetos calientes en el refugio, como parrillas o antorchas usadas recientemente, ni
ningún producto químico volátil.
ǛPara evitar la deformación de la caseta, no presiones objetos pesados

9
GARDEN
REF. PIEZAS DESCRIPCIÓN CANTI-
DAD ÁREA*
Canalón de techo
133x91 L = 3650mm 1 B
Boquilla para canaleta 1 C
Canalones de salida 1
Abrazaderas de
conexión 3
Bajantes para canalones
L=2000mm 1
Tubo 3
Tornillo M4x32 3
18
M
N
*Para facilitar el montaje, las partes se separan e identifican en 3 partes.
A : primera parte de la instalación; B : segunda parte de la instalación; C : última parte de la instalación.

10
GARDEN
ITALIANO
RACCOMANDAZIONI
Prima di iniziare l’installazione, assicurarsi che tutte le parti necessarie per il montaggio siano presenti e
non danneggiate.
Leggere interamente le istruzioni di montaggio e non saltare nessun passaggio.
Non appoggiare alcun oggetto sui pannelli delle pareti, non calpestarli e maneggiarli con cura.
Per assemblare questa casetta sono necessarie almeno due persone.
Lasciate abbastanza spazio intorno al rifugio in modo da non essere ostacolati durante installazione.
Togliere tutte le componenti dai cartoni, posizionarle su una superficie pulita e assemblarle per le zone A, B
e C. A causa dell’alta percentuale di legno, la superficie può avere sfumature diverse e cambiare colore nel
tempo. Questo non non richiede un trattamento speciale e non influisce sulla vita della casetta stessa.
Se volete dipingere il rifugio, chiedete consiglio a un pittore professionista.
Non utilizzare prodotti per la pulizia corrosivi o altri prodotti aggressivi che possano danneggiare il rifugio.
AVVERTENZE
ǛIl rifugio non può essere utilizzato per scopi residenziali.
ǛLa base deve essere piana, stabile e solida: si consiglia una base in calcestruzzo.
ǛNon installare in caso di pioggia o vento.
ǛManeggiare con cura le parti con i bordi in acciaio.
ǛPer l’installazione utilizzare solo gli strumenti elencati nel manuale.
ǛIndossare indumenti protettivi durante l’installazione: guanti da lavoro, occhiali di sicurezza e indumenti
che coprano gli arti.
ǛIndossare sempre occhiali di sicurezza e seguire le istruzioni per l’uso degli utensili elettrici.
ǛPulire il rifugio con acqua pulita e detergente. È inoltre possibile utilizzare una spazzola non abrasiva e
non sgrassante. I prodotti per la pulizia contenenti olio o acetone possono macchiare o danneggiare il
rifugio.
ǛNon conservare nel rifugio oggetti caldi, come griglie o torce usate di recente, o sostanze chimiche
volatili.
ǛPer evitare la deformazione del rifugio, non appoggiare oggetti pesanti contro le pareti.
ǛIn caso di neve, pulire il tetto.
ǛAssicurarsi che il rifugio sia sufficientemente ventilato per evitare la formazione di muffa.
ǛLa direzione del vento è un fattore importante, evitare di esporre il rifugio e soprattutto le porte ad una
zona molto ventosa. Tenere sempre le porte chiuse quando il rifugio non è in uso per evitare danni.
ǛVi raccomandiamo di contattare il vostro comune per avere informazioni sull’autorizzazione al montaggio
della casetta.

11
GARDEN
I
REF. PARTI DESCRIZIONE QTÀ ZONA*
Grondaia del tetto
133x91 L = 3650mm 1 B
Adattatore per grondaia 1 C
Uscita grondaie 1
Morsetti di
collegamento 3
Tubi di scarico delle
grondaie L=2000mm 1
Raccordo 3
Viti M4x32 3
18
M
N
*Per facilitare il montaggio, le componenti sono separate e identificate in 3 parti.
A:prima parte dell’installazione; B : seconda parte dell’installazione ; C : ultima parte dell’installazione

12
GARDEN
POLSKI
ZALECENIA
Przed rozpoczęciem instalacji należy upewnić się, że wszystkie części niezbędne do montażu zostały
dostarczone i są nieuszkodzone.
Należy dokładnie przeczytać instrukcję montażu i zwrócić uwagę, aby nie pomijać żadnego z kroków.
Należy obchodzić się ostrożnie z panelami ściennymi - nie należy kłaść na nich żadnych przedmiotów oraz
należy uważać, aby nie nadepnąć na nie podczas instalacji.
Do montażu domku potrzebne będą przynajmniej dwie osoby.
Pozostaw więcej przestrzeni wokół miejsca, w którym zdecydujesz się postawić domek tak, by móc
swobodnie poruszać się podczas jego instalacji.
Wyjmij wszystkie elementy z kartonów i umieść je na czystej, suchej powierzchni, grupując je według sfer
A,B i C.
Ze względu na wykorzystanie drewna do produkcji domku, poszczególne elementy mogą różnić się
odcieniem oraz zmieniać go w trakcie użytkowania. Nie oznacza to, że te elementy wymagają specjalnej
konserwacji oraz nie wpływa to negatywnie na trwałość konstrukcji domku.
Jeśli chciałbyś pomalować domek, zwróć się o radę do profesjonalnego wykonawcy.
Do czyszczenia domku nie należy stosować żadnych żrących lub silnie działających środków czyszczących,
które mogłyby uszkodzić strukturę domku.
OSTRZEŻENIA
ǛDomek nie może być wykorzystywany do celów mieszkalnych.
ǛFundament domku musi być płaski, silny i solidny- zalecamy fundament typu płyta betonowa.
ǛNie należy instalować w czasie deszczu lub podczas silnego wiatru.
ǛNależy obchodzić się ostrożnie z częściami o stalowych krawędziach.
ǛDo instalacji należy używaćć wyłącznie narzędzi wymienionych w instrukcji obsługi.
ǛPodczas instalacji należy nosić odzież ochronną: rękawice robocze, okulary ochronne i odzież
zakrywającą kończyny.
ǛPodczas używania elektronarzędzi należy zawsze nosić okulary ochronne i postępować zgodnie z
instrukcjami.
ǛDomek należy czyścić wodą z mydłem. Możesz również użyć delikatnej szczotki. Nie używaj środków
zawierających aceton lub olej, mogą one trwale zabrudzić lub uszkodzić domek.
ǛW domku nie należy przechowywać gorących przedmiotów, takich jak świeżo używany grill, nagrzana
latarka czy lotne substancje chemiczne.
ǛAby zapobiec defomacji domku, nie należy opierać ciężkich przedmiotów o ściany.
ǛW przypadku śniegu, należy regularnie oczyszczać dach.
ǛAby uniknąć pleśni, należy upewnić się, czy pomieszczenie jest odpowiednio wentylowane.
ǛNależy unikać ustawiania domku na bardzo otwartej przestrzeni, narażonej na działanie wiatru. Gdy
domek nie jest używany, drzwi powinny być zamknięte i zakluczone, aby uniknąć uszkodzeń.
ǛSkontaktuj się z lokalnymi władzami, by mieć pewność, że nie potrzebujesz pozwolenia na postawienie
domku.

13
GARDEN
REF. CZĘŚCI OPIS ILOŚĆ STREFA*
Rynna dachowa
133x91 L = 3650mm 1 B
Zakończenie rynny 1 C
Wyloty rynien 1
Zaciski przyłączeniowe 3
Rury spustowe do rynien
Długość = 2000 mm 1
Kolanko 3
Śruba M4x32 3
18
M
N
*Dla ułatwienia montażu, części podzielono na 3 etapy i oznaczono według nich.
A : Pierwsza część instalacji; B : Druga część instalacji; C : Trzecia i ostatnia część instalacji

14
GARDEN
WOODLIFE GARDEN 3X3
EN Position the gutters and insert the corner into the spacing between the panel and the exterior roof frame. Place
the last row of screws and the exterior side of the roof frame into the panels. Position the gutter end and seal
with glue using the caulking gun and the cover.
FR Positionnez les gouttières et insérez les coins dans l’espace entre le panneau et le cadre extérieur de toit.
Placez dans les panneaux la dernière rangée de vis sur le cadre de toit latéral extérieur. Positionnez les
embouts de gouttière à l’aide d’un pistolet à colle.
DE Positionieren Sie die Dachrinnen und fügen Sie die Ecke in den Zwischenraum zwischen der Platte und dem
äußeren Dachrahmen ein. Setzen Sie die letzte Schraubenreihe am äußeren seitlichen Dachrahmen in die
Paneele ein. Befestigen Sie die Rinnenendstücke mit Klebstoff.
ES Coloca las canaletas e inserta la esquina en el espacio entre el panel y el marco exterior del techo. Coloca la
última fila de tornillos en los paneles en el marco del techo lateral exterior. Coloca las tapas de los extremos de
la canaleta con pegamento.
IT Posizionare le grondaie e inserire l’angolo nello spazio tra il pannello e il telaio esterno del tetto. Inserire
l’ultima fila di viti sul telaio laterale esterno del tetto nei pannelli. Posizionare i tappi di chiusura della grondaia
con la colla.
PL Zamontuj rynny i umieść część zakończeniową rynny w przestrzeń pomiędzy panelem a zewnętrzną ramą
dachu. Umieść ostatni rząd śrub w panelach na zewnętrznej ramie bocznej dachu. Przymocuj zakończenia
rynien za pomocą kleju.

15
GARDEN
100mm
350mm 1358mm
M4 Twist Dril
EN Use a saw to cut the drain pipe into 3 pieces according to the length shown above. Before attaching the
connection clamps, place the 3 pieces of cut drain pipe and elbows as shown in the picture above, then
determine the position of the screws that will be used to anchor the connection clamps to the wall, and drill
the holes. Next, remove the drain pipe and elbows, and attach the connection clamps to the wall with screws.
Replace the downpipe and elbows and secure them with the connection clamps. Finally, use sealant to seal the
gutter outlet.
FR À l’aide d’une scie, coupez le tuyau de descente de gouttières en 3 parties en respectant la longueur indiquée
ci-dessus. Avant de fixer les colliers de connexion, placez les 3 parties de la descente coupée et les coudes
comme sur la photo ci-dessus, puis établissez la position des vis qui serviront à ancrer les colliers de
connexion sur le mur, et percez les trous. Ensuite, retirez la descente et les coudes, puis fixez les colliers de
connexions au mur à l’aide de vis. Remettez le tuyau de descente et les coudes en place et fixez-les avec les
colliers de connexions. Enfin, utilisez le mastic pour sceller la sortie de la gouttière.
DE Schneiden Sie das Fallrohr mit einer Säge in drei Teile, indem Sie die oben angegebene Länge einhalten. Bevor
Sie die Rohrmuffen befestigen, legen Sie die drei Teile des zugeschnittenen Fallrohrs und die Fallrohrbögen
wie oben abgebildet aneinander. Legen Sie anschließend die Position der Schrauben fest, mit denen die
Rohrmuffen an der Wand verankert werden sollen, und bohren Sie die Löcher. Entfernen Sie dann das Fallrohr
und die Fallrohrbögen und befestigen Sie die Rohrmuffen mit Schrauben an der Wand. Bringen Sie das Fallrohr
und die Fallrohrbögen wieder an und befestigen Sie sie mit den Rohrmuffen. Versiegeln Sie schließlich mithilfe
von Kitt die Rinnenstutze.
100mm 350mm 1358mm

16
GARDEN
WOODLIFE GARDEN 3X3
ES Con una sierra, corte el bajante en 3 partes según la longitud indicada anteriormente. Antes de fijar las
abrazaderas de conexión, coloque las 3 partes de la bajante cortada y los codos como se muestra en la foto de
arriba, luego establezca la posición de los tornillos que se utilizarán para anclar las abrazaderas de conexión
a la pared, y perfore los agujeros. A continuación, retire el tubo de bajada y los tubos y fije las abrazaderas de
conexión a la pared con tornillos. Vuelva a colocar el tubo de bajada y los tubos y fíjelos con las abrazaderas de
conexión. Por último, utilice el sellador para sellar la salida del canalón.
IT Con l’aiuto di una sega, tagliate il tubo della grondaia in 3 parti, rispettando la lunghezza sopra indicata. Prima
di fissare i morsetti di collegamento, posizionate le 3 parti del tubo tagliato e i raccordi come nella foto sopra,
quindi stabilite la posizione delle viti che serviranno ad ancorare i morsetti di collegamento al muro, e praticate
i fori. Quindi rimuovete il tubo e i raccordi, dopodiché fissate i morsetti di collegamento alla parete mediante
viti. Riposizionate il tubo e i raccordi e fissateli con i morsetti di collegamento. Infine, utilizzare il mastice per
sigillare l’uscita della grondaia.
PL Za pomocą piły przetnij rurę spustową na 3 części, zgodnie z długością podaną powyżej. Przed zamocowaniem
zacisków przyłączeniowych należy umieścić 3 części przyciętej rury spustowej i kolanka w sposób pokazany
na zdjęciu powyżej, a następnie ustalić położenie śrub, które będą używane do zakotwienia zacisków
przyłączeniowych do ściany i wywiercić otwory. Następnie należy zdjąć rurę spustową i kolanka, a zaciski
przyłączeniowe przymocować do ściany za pomocą śrub. Załóż rurę spustową i kolanka i zamocuj je za pomocą
zacisków łączących. Na koniec należy użyć masy uszczelniającej do uszczelnienia wylotu rynny.

GARDEN
Table of contents
Languages:
Other WoodLife Garden Outdoor Storage manuals
Popular Outdoor Storage manuals by other brands

Absco
Absco J30082S Assembly instructions

Arrow Storage Products
Arrow Storage Products EG1216AB owner's manual

SmartStore
SmartStore SM2520 Assembly instructions

Absco Industries
Absco Industries 1208WSK manual

Asgard
Asgard GLADIATOR PLUS 2 manual

Rowlinson Garden Products
Rowlinson Garden Products SHPOT Assembly instructions

Asgard
Asgard GLADIATOR PLUS 1 manual

Forest garden
Forest garden FGCLGSTHD instructions

Royalcraft
Royalcraft ASCOT 2 Assembly instructions

Arrow
Arrow CLP104CC Owner's manual & assembly guide

Mercia Garden Products
Mercia Garden Products SHIPLAP 01DTSHRAX1008SDFW-V1 General instructions

Lifetime
Lifetime 1034594 Assembly instructions