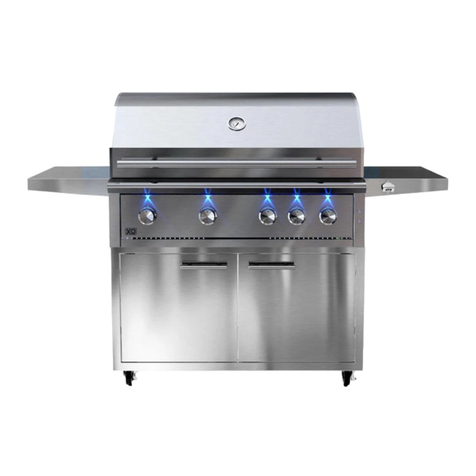
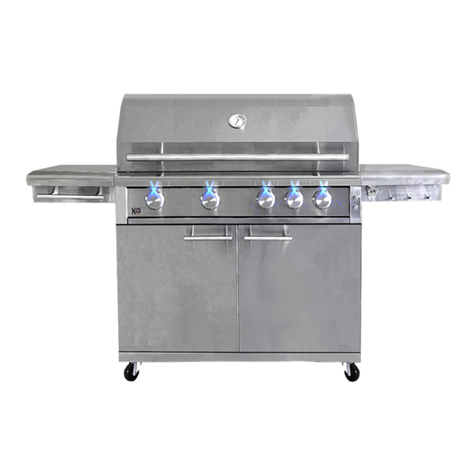
Xo XOGRILL40XLT User manual

MODELS XOGRILL32XLT | XOGRILL40XLT
CARE & USE / INSTALLATION
RESIDENTIAL USE ONLY / HOMEOWNERS COPY
everything you need to know
about your
PERFORMANCE XLT
GAS GRILL

14
2
APPLIANCE
When buying any XO appliance
you can be confident you have chosen a
high quality, innovative and stylish product
from a company that cares about you!
If you require service or have questions,
Help is only a phone call away -
call: 973-403-8900
Talk to one of our appliance experts.
www.xoappliance.com/register-your-product/
CONGRATULATIONS
on purchasing your XO.
Before you proceed, take just a
moment to register your XO at:
REGISTRATION HELPS YOU BY -
Ensuring warranty coverage should you need service
Providing ownership veri cation for insurance purposes
XO can notify you in the event of product changes or recalls.
Or simply scan here to be taken
to the registration page...

model and serial number
You may require service or parts one day -
take a minute to locate and record some important info about your grill.
• Model number
• Date of purchase
• Proof of purchase by the original owner
• Serial number
The serial number can be located on the rating plate which is located on the left side of the
grill or on the pull-out drip tray lighting instructions and also on the underside of the drip tray.
DRIP TRAY
RATING PLATE
3


CAUTION
5
1. Massachusetts requires all gas be installed using a plumber or gas fitter carrying th
Massachusetts license.
e appropriate
2. All permanently-installed natural gas or propane installations require a “T” handletype manual gas
manual gas valve be installed in the gas supply line to this appliance.
3. This does not apply to portable propane installations using a 20 pound cylinder.
WARNING! CALIFORNIA PROPOSITION 65
The burning of gas cooking fuel generates some by-products which are on the
list of substances which are known by the State of California to cause cancer or
reproductive harm.
California law requires businesses to warn customers of potential exposure to such
substances. To minimize exposure to the substances, always operate this unit
according to the use and care instructions found in this manual. Be certain to provide
adequate ventilation when cooking.
Warning: Handling the brass material on this product exposes you to lead, a chemical
known to the state of California to cause cancer, birth defects or other reproductive
harm. (Wash hands after handling this product.)
For more information go to this website
www.P65warnings.ca.gov
notice: commonwealth of massachusetts
• Never leave children unsupervised around the XO grill.
• Pre-heating for more than 15 minutes may overheat and cause damage to the grill.
• Never cover slots, holes, or passages in the grill fire box or cover an entire rack with material
such as aluminum foil. Doing so blocks air flow through the oven and may cause carbon
monoxide poisoning. Aluminum foil linings may trap heat causing a fire hazard.
• Do not leave the grill unattended.

800-966-8300 www.xoappliance.com
Warning: Heavy Weight Hazard!
THIS INSTRUCTION MANUAL CONTAINS IMPORTANT INFORMATION NECESSARY FOR THE PROPER
ASSEMBLY AND SAFE USE OF THE APPLIANCE. READ AND FOLLOW ALL INSTRUCTIONS AND
WARNINGS BEFORE ASSEMBLING AND USING THE APPLIANCE. FOLLOW ALL WARNINGS AND
INSTRUCTIONS WHEN USING THE APPLIANCE. FAILURE TO INSTALL AND OPERATE THIS UNIT
IN ACCORDANCE WITH THESE INSTRUCTIONS CAN CAUSE PROPERTY DAMAGE, INJURY OR DEATH.
6
STOP
THANK YOU FOR CHOOSING XO
As you unbox your new grill, please take a moment to make certain all the
parts are included and there was no damage in shipping.
Please recycle when you dispose of the packing materials.
One of the fastest and easiest
ways to get help is to visit
our YouTube Channel
which has lots of useful
How To videos -
Just scan the QR Code or go to
https://www.youtube.com/channel/UCT-Ip-dM9hoPydpxZfrZzRA

This manual covers the following XO products:
NOTE TO I N S T A L L E R
This manual must remain with grill. Check your local building codes for proper method of
installation. In the absence of local codes, this unit should be installed in accordance with National
Fuel Gas Code No. ANSI Z21.58D-2002 USA or CAN/CGA-B149.1/.2 Natural Gas/Propane
Code. (Canada) latest edition or the National Electrical Code ANSI/NFPA No. 70 or the Canadian
Electrical Code CGA 1.6b2005 or latest edition.
Please note: Pictures and Information may change without notice.
installation, care and use of your
xo perfomance cooking product
THIS MANUAL MUST REMAIN WITH THE PRODUCT OWNER FOR FUTURE REFERENCE.
40
CART (CART) 40CART (CART) SIDEB (SIDE BURNER CART)
7

where things are
Product Registration....................................................................................................................
Warnings...................................................................................................................................
Models.........................................................................................................................................
Specifications.............................................................................................................................
Dimensions............................................................................................................................
Safety.........................................................................................................................................
Grill Location - Clearances.........................................................................................................
Factoring in Wind Direction........................................................................................................
Overhead Construction..............................................................................................................
Outdoor Rated Hoods................................................................................................................
Cutout Dimensions.....................................................................................................................
Insulated Jacket Installation.......................................................................................................
Outdoor Island Venting..............................................................................................................
Electrical Hook Up......................................................................................................................
Before your Gas Hook Up...................................................................................................
Natural Gas Installation.......................................................................................................
Propane Tank Installation...................................................................................................
Lighting your grill safely......................................................................................................
Grilling Safety.............................................................................................................................
Cooking and Grilling Tips...........................................................................................................
Cleaning and Maintenance.................................................................................................
Trouble Shooting................................................................................................................
Wiring and Lightbulb Replacement.....................................................................................
Parts and Obtaining Service...............................................................................................
Warranty.....................................................................................................................................
2
5
Link - How To Videos................................................................................................................... 6
Product Features......................................................................................................................... 9
10
11-12
13
14
15
16
17
18
19
20
21
22 - 23
24 - 25
26 - 27
28 - 30
31
32
33 - 38
39 - 40
41 - 43
44 - 46
47
8
7

4
unique features and benefits
The XO gas grill has some of the most unique grilling features
that will enhance your grilling experience and make you that
Stainless Steel Grills,
unique full coverage flame tamers to create even heat and
minimize flair-ups, heavy duty stainless steel tube burners
to enhance the overall searing of your food.
Performance series stainless steel square cooking grates
enable cooking with greater speed and control.
The heavy duty grates heat up evenly and sear the natural
juices into the food.
The unique design of XO’s stainless steel flame tamers provide
superior protection to the burners and even temperature distribution
while vaporizing drippings to add flavor and ensuring rapid heat up.
Your XO grill
accessory with an adjustable temperature range from 400 to
1000 degrees.
an optional infrared burner available as an
9
meet your xo
The performance series stainless U-Style XLT burner is used
in this XO gas grill. This new burner has even heat distribution
that enables rapid heating throughout the cooking area.

Description
Main Cooking Area Sq. In.
Warming Rack Sq. In.
Total Cooking Area Sq. In.
Gas Type (specify)
Orifices Main Burners NG
Orifices Main Burners LP
Orifices Rear Burner NG
Orifices Rear Burner LP
Main Burners
Main Burner BTUs (each / total)
Cooking Grates
Warming Rack
Flame Tamers
Heat Zone Dividers
Rear Burner
Rear Burner BTUs
Rotisserie Kit
Hood Assembly
Spring Counter Balanced
Control Panel
Drip Tray
Ignition
Temperature Gauge
Control panel Lighting
Interior Work Lighting
Grill Cutout Dimensions
XOGRILL32XLT XOGRILL40XLT
please read and follow all safety instructions
10
530
172
702
NG or LP
1.98 mm
1.18 mm
1.5 mm
1.1 mm
(3) Tubular SS
17,000 / 51,000
(4)18” x 7 3/8” SS
Tilt and Store SS
(3) Full Coverage SS
(2)Removable SS
Ceramic InfraRed
10,000
Optional
Welded Stainless
Yes
Welded Stainless
Welded Stainless
Reliable Flame Thrower
Hood Mounted
12v Blue LED
12v Halogen (2)
8 1/2” x 21 1/4” x 30 5/8”
662
210
872
NG or LP
1.98 mm
1.18 mm
1.5 mm
1.1 mm
(4) Tubular SS
17,000 / 68,000
(5)18” x 7 3/8” SS
Tilt and Store SS
(4) Full Coverage SS
(3)Removable SS
Ceramic InfraRed
10,000
Optional
Welded Stainless
Yes
Welded Stainless
Welded Stainless
Reliable Flame Thrower
Hood Mounted
12v Blue LED
12v Halogen (2)
8 1/2” x 21 1/4” x 38 3/8”
product specifications

11
product specifications
MODEL XOGRILL32XLT
Total Area
Cutout Width
Cutout Depth
Cutout Height
Square inch
”
21 ”
”
Details
Material
Primary Burner BTU
Rotisserie Burner
Fuel Type
Total Power Output
Stainless Steel
17,000 BTUs x 3
10,000 BTUs
Natural gas
BTUs
61,000
TOP VIEW
FRONT VIEW
SIDE VIEW

12
product specification
MODEL XOGRILL40XLT
Total Area 829 Square inch
Cutout Width 38 3/8”
Cutout Depth 21 1/4”
Cutout Height 8 1/2”
Material
Primary Burner BTU
Rotisserie Burner
Fuel Type
Total Power Output
Stainless Steel
17,000 BTUs x
10 00 BTUs
Natural gas
78,000 BTUs
Details
TOP VIEW
FRONT VIEW
SIDE VIEW

fire, burn
hazard or other injury and to ensure proper installation and servicing.
empty propane
cylinders in the grill cabinet or in the vicinity of this or any other gas or electrical appliance. Do not
store propane cylinders indoors or on their sides for gas may escape. Gas cylinders are highly
flammable
No Children should ever be left alone or unattended in an area where a grill is located. Place your
grill well away from areas where children play. Do not store items that may interest children in or
around the grill, in the cart or in the enclosure or Island.
cause severe
burns.
designed for
outdoor use only. Never use in a garage, building, shed, breezeway or other enclosed area. Do not
use this grill under any unprotected overhead combustible construction. Combustible material
exposed to heat will catch on fire
n a recreational
vehicle, portable trailer, boat or any other moving installation including commercial use.
e with water
or other liquids.
outdoors
in a well-ventilated area away from heat and away from where children may tamper with it. Always
leave tank outdoors.
Keep any electrical supply cord and the fuel supply hose away from any heated surfaces. Electrical
cords should be placed away from walkways to avoid tripping hazard.
Do not repair or replace any part of the grill unless recommended in this manual. Other
service should be performed by a certified and qualified BBQ technician.
you where
your gas supply shut-off is located. All gas lines must have a shut-off that is readily and easily
accessible. If you smell gas, check for gas leaks immediately. Check only with a soap and water
solution. Never check for gas leaks with an open flame
excessive
abrasion or wear, or the hose is cut, it must be replaced before using the grill.
disconnected from the
gas supply piping system during any pressure testing of that system at test pressures in excess of
0.5 psi (3.5 kPa).
safety matters
13

location of your grill | clearances
14"
Distance Minimum
16" 16"
Combustible
Materials
ISLAND INSTALLATIONS | NON-COMBUSTIBLECONSTRUCTION
The XO Built in grills are designed for easy installation
into a non-combustible masonry island.
In installations of this type non-combustible materials
like brick, stone or cement board completely surround
the appliances supported by block or metal framing.
No materials shall be used within 12” of the unit that will burn or be affected by the high heat the
unit can produce.
The grill slides into the cutout opening of the island and is supported by the flanges that surround
the grill sides and rear. Do not grout the unit in place so that it can be removed for maintenance.
In addition to a 12“ non-combustible materials clearance in all diretions; proper hood operation
requires a 7” clear space minimum behind the unit.
ISLAND INSTALLATIONS | COMBUSTIBLE CONSTRUCTION
Island construction which employs some combustible materials is permitted providing certain
additional requirements are met.
Combustible materials include any surface or framing materials which may ignite, burn, support
combustion, emit smoke or melt when exposed to heat.
An approved, insulated jacket designed to shield each gas appliance must be used.
All minimum clearances to adjacent combustible construction must be increased to 14” on the sides
and 16” to the rear of the grill.
NEVER INSTALL OR USE YOUR GRILL IN ANY ENCLOSED SPACE SUCH AS, BUT NOT
LIMITED TO, GARAGES, PORCHES OR BREEZEWAYS.
NEVER USE YOUR GRILL ON ELEVATED PATIOS OR DECKS.
NEVER INSTALL OR USE UNDERNEATH UNPROTECTED OVERHEAD CONSTRUCTION.
Hood
Clearance
7"
14

grill location
WHERE IS THE WIND COMING FROM?
When
traffic patterns.
If you have a free standing grill, position it so the prevailing wind blows toward the front control panel
(at your back when grilling). This will support the proper front to rear of airflow required for proper
operation of your grill.
Built-in grills located in areas with prevailing winds should be protected by a wind barrier positioned
behind the appliance. All clearances must be observed for safe operation.
FAILURE TO COMPENSATE FOR PREVAILING WIND CAN RESULT IN EXCESSIVE
HEAT BUILD UP AND RESULT IN DAMAGE TO THE APPLIANCE AND RISK OF
FIRE, PROPERTY DAMAGE OR PERSONAL INJURY.
If you suspect the grill is overheating, using an heat resistant mitt, open the hood. After first checking
the control knobs for excessive temperature, turn them down to a lower setting.
If you have a freestanding grill - turn it OFF, and after allowing it to cool, reposition the grill based on
prevailing wind patterns as described above.
OR - install a wind break to prevent the wind from interfering with the correct front to back exchange
of air.
On windy days, do not operate the grill on high with the hood closed for more than 15 minutes.
Never leave your grill unattended while operating.
Your XO Grill must draw air in from the front and exhaust heated air from the rear in order to operate.
Position your grill so that smoke and exhaust will not gain access to the house through open
windows, doors or ventilation.
selecting a suitable location, consider important factors such as exposure to the wind and foot-
WIND
BREAK
REQUIRED
CORRECT
WIND
DIRECTION
WIND BREAK
15

overhead construction
•
If installed under any combustible construction the area above the cooking surface of the
grill must be covered with an approved exhaust hood.
•
It is highly recommended the hood be sized with a minimum 3” overhang on all exposed sides.
•
The exhaust hood shall provide no less than 1,200 CFM of proper exhaust ventilation.
•
The exhaust hood must be approved for outdoor installation and used with a dedicated
GFCI branch circuit.
7”
min. 30” to 36”
We recommend oversizing the hood by 3" on
each side to maximize efficiency and capture
space
For example;
A 36" Grill would require a 42" Hood
NON-COMBUSTIBLE
REAR WALL
OVERHEAD CONSTRUCTION
TYPICAL EXHAUST HOOD INSTALLATION
OBSERVE ALL MINIMUM CLEARANCES
Non-Combustible Construction
Sides 12” Back 7”
Combustible Construction
Sides 14” Back 16”
Combustible Overhead Construction
Must Be Protected By An Approved Hood
Use Of An Approved Hood Is Highly
Recommended With Non-Combustible
Overhead Construction
60”
Minimum above
cooking surface to
non-combustible
overhead.
16

17
outdoor rated exhaust hoods
AVAILABLE IN THREE SIZES
All Models:
33” Deep
18” High to the top of the Canopy
10” Dia. Exhaust Top or Rear
All Models have the following features:
Top or Rear Venting
304 Stainless Steel Construction
Professional Stainless Steel Baffle Filters
Four LED Lamps
Rotary Controls
Two High Velocity Blowers capable
of exhausting up to 1,200 CFM
Matching SS Top Duct Cover
13 1/2”
18”
36”
10” Dia.
33”
7 7/16”
MODEL: XOGV36S
36” Wide - use with XOGRILL30 & XOGRIDDLE30
MODEL: XOGV42S
42” Wide - use with XOGRILL36
MODEL: XOGV48S
48” Wide - use with XOGRILL42

outdoor kitchen dimensions - cutouts
CUTOUTS FOR GRILL
NON COMBUSTIBLE CONSTRUCTION
CUTOUTS FOR INSULATED JACKET
COMBUSTIBLE CONSTRUCTION
Use of an Insulated Jacket is Required
Must conform with local codes or, in the absence of local codes, with either the National Fuel
Gas Code, ANSI Z223.1/NFPA 54, or the Natural Gas and Propane Installation Code, CSA
B149.1, or the Propane Storage and Handling Code, CSA B149.2, or the Standard for
Recreational Vehicles, ANSI A119.2/NFPA 1192, and CSA Z240 RV Series, Recreational
Vehicle Code, as applicable
XOGRILL32XLT XOGRILL40XLT
DIM A
DIM B
DIM C
DIM D
DIM E
DIM F
8 1/2”
21 1/4”
30 5/8”
2 3/4“
2 3/4”
2 3/4”
8 1/2”
21 1/4”
38 3/8”
2 3/4“
2 3/4”
2 3/4”
XOG32JACKETXLT XOG40JACKETXLT
DIM A
DIM B
DIM C
DIM D
DIM E
DIM F
9 1/2”
21 7/8”
33 1/2”
3“
3”
3 5/8”
9 1/2”
21 7/8”
40 3/4”
3“
3”
3 5/8”
A
B
C
E
D
F
Dimensions D, E and Fdefine the center lines
for 4” x 4” openings for the gas and electrical
utilities to be brought in.
18
7/8”
Notch Detail
when countertop
is overhung

9
insulated jacket installation
IMPORTANT: Before you build the frame, you must take into account the total weight of the
liner, grill, other appliances, countertop and all other finishing materials.
XO Outdoor cooking appliances operate at very HIGH TEMPERATURES. It is absolutely essential
to install an insulated jacket whenever combustible materials are used in the construction of your
outdoor kitchen. Failure to isolate the cooking appliances within an approved insulated jacket can
result in fire, property damage, personal injury or death. Combustible materials include anything
which will burn, emit smoke, melt or support combustion.
Refer to the table on page 18 for the correct dimensions to nstall the insulated jacket..
Determine the entry point for your gas and electrical connections. Create your 4” x 4” rear or bottom
utility access based on location requirements.
Use a carpenter’s level to ensure the framing is level both side to side and front to back.
NEVER under any circumstances run the gas line or electrical wiring between the grill and the
insulated jacket. All excess electrical wire leads must be pulled out beyond the insulated
jacket. Never attempt to install the transformer between the liner and grill.
LINER INSTALLATION
Position the liner in the frame. No part of the combustible construction can protrude above the top or
beyond the front surface face of the liner. Shim the liner as necessary.
APPLIANCE INSTALLATION - CAUTION HEAVY LIFT
Remove the grates from the grill to reduce its weight and using two people, place the grill into the liner.
The side and rear flanges of the grill are desiged to rest on top of the stainless flanges of the liner
without additional fasteners. The grill must be able to be removed for maintenance and service, do not
grout the grill in place.
FINISHING
If desired the gap, if any, between the liner and the counter may be filled with non-combustible sealant.
• Never install this product into a structure built using combustible materials without an
insulated jacket. Doing so risks Fire, Property Damage, Injury or Death.
Observe and follow ALL set backs and clearances set forth in this manual.
For outdoor installation only - Never install or operate in an enclosed space.
Observe and follow ALL overhead clearances set forth in this manual.
• Installation must conform with local codes or, in the absence of local codes, with either the
National Fuel Gas Code, ANSI Z223.1/NFPA 54, Natural Gas and propane Installation Code,
CSA B149.1, or Propane Storage and Handling Code, B149.2, in Canada.
WARNING

outdoor kitchen venting
REQUIRED FOR ALL OUTDOOR KITCHEN INSTALLATIONS
Proper venting is essential for all installations regardless of the materials of construction.
1. Correctly installed venting helps ensure adequate airflow necessary for combustion to take
place safely.
2. AND properly installed cross ventilation helps ensure that, in the event of a leak, gas is not
trapped within the enclosed space inside.
Gas leakage within a confined space poses an extreme danger of fire and/or explosion.
Adequate cross ventilation is absolutely essential.
NON-COMBUSTIBLE MATERIAL
MINIMUM 20 SQ IN
OF VENTILATION
REQUIRED ON EACH END OF
CABINET.
MINIMUM 10 SQ IN
OF VENTILATION REQUIRED ON
EACH END OF CABINET.
5"
MAXIMUM
5"
MAXIMUM
1"
MAXIMUM
Min 7"
E
X
TRE
M
E DANGER
Natural Gas is lighter than air.
Vents should be placed 10” below
the countertop.
Propane is heavier than air.
Vents should be placed 1” minimum
above ground level.
10”
1”
A minimum of three 10 in² (65 cm²) of
ventilation openings must be provided
at the bottom of the back, left and right
sides of your enclosure (island).
A minimum of three 20 in² (130 cm²)
of ventilation openings must be provided
at the top of both left, right and back sides
of your enclosure (island) where the top
of the opening aligns with the bottom of
the grill cut-out.
These openings are required to safely
dissipate gas vapors if there is a leak
in your enclosure.
EXAMPLE
20
This manual suits for next models
5
Table of contents
Other Xo Grill manuals