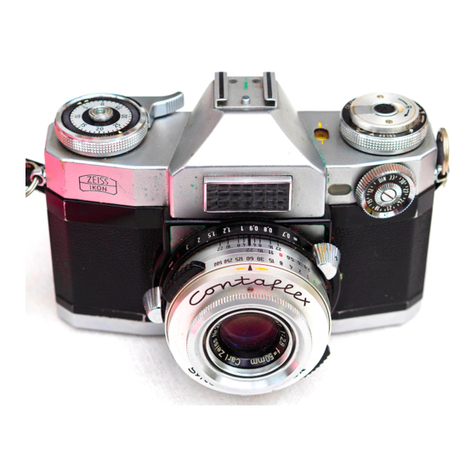
ZEISS IKON IKOFLEX 1c User manual

Ic'
ZEISS IKON AG
-. .',-r,,.-,,,::i
-",:,i-'
BOOK
STUTTGART
STRUCTION
aJ
:.
'*
!
www.orphancameras.com

The IKOFLEX Ic
madeby ZEISS
IKONAG.STuficART is a twin-lens
mirror reflex camera with built-in exposure
meter
taking twelve2r/qX2r/n
ins.
exposures
on 120
roll ftlm
in blacl<
and
whiteor colour.
The viewing
lens
projects
an unusually
sharpand brilliant image
of the-su6ject
on to a -bright ground glass screen.
The readings
derivedfrom the exposure
meter can be seenon-a
scale
clearly visible at the front of the ground glass
screen.
Sinceboth the viewing and taking lenses,
which have equal focal lengths and speids, are
coupled,
the IKoFLEX canbe qui&ly adjustedwith
the useof only onehand. This permitsrapid opera-
tion andaccuratefocusing,
allowingthephotographer
to concentrate
on the composition.
Both the taking
and viewinglenseshavean anti-reflection
coatingto
prevent internal reflectionsand flares. The taking
lens is excellentlycolour-corrected,
ensuringcoloui
photographs
as well as blacl<
and white picturesof
superb deffnition. The thoroughly reliable ground
glassfocusingmechanism
allows the quality of the
high-speed
lens of the IKOFLEX to be utilised
to the full. The IKoFLEX Ic has a fullv svn-
chronised
shutter and an automatic fflm trinsport
lockto prevent
doubleexposures
and blanks.
Before
insertinQ
tbefirst film into your TKIFLEX
rc,
tbe operations described in this instruction book
sbould
be
practised
carefully.lf youtaketbis
trouble,
you will be
rewarded
by goodpictures
from tbeoery
beginning
and
your rKoFLEx will be
a neoer-ending
source
of pleasure
to you,
F"
F;
F
F
F
I
k
www.orphancameras.com

The IKOFLEX Ic
madeby ZEISS
IKONAG.STuTTGART
is a twin-lens
mirror reflex camera with built-in exposure
meter
taking
twelve
2r/aX2rlnins.
exposures
ontZOrollftlm
in black
and
whiteor colour.
The viewing
lens
projects
an unusually
sharpand brilliant image
of thesu6ject
on to a -bright ground glass screen.
The readings
derived
from the exposure
metercan be seenon1
scale
clearly visible at the front of the ground glass
screen.
Sinceboth the viewing and taking lenses,
which have equal focal lengths and speeds,
are
coupled,
the IKoFLEX canbe quicJdy
adjusted
with
the useof only onehand. This permitsrapid opera-
tion andaccuratefocusing,
allowing
thephotographer
to concentrate
on the composition.
Both the taking
and viewinglenseshavean anti-reflectioncoatingto
prevent internal reflectionsand flares. The taking
lens is excellentlycolour-corrected,
ensuringcolour
photographs
as well as black and white picturesof
superb deffnition. The thoroughly reliable ground
glassfocusingmechanism
allows the quality of the
high-speed
lens of the IKoFLEx to be utilised
to the full. The IKOFLEX Ic has a fullv svn-
chronised
shutter and an automatic ftlm trinsport
lockto prevent
doubleexposures
and blanks.
Before
inserting
tbefirst.filminto your TK)FLEX
rc,
tbe operations described in tltis instruction book
sbould
be
practised
carefully,lf youtaketbis
trouble,
you will berewarded
by goodpictures
from tbeoery
beginning
andyour TKoFLEX
will be
a neoer-endin-g
source
of pleasure
to you.
www.orphancameras.com

1
2
3
4
6
7
8
9
10
t1
t7
l8
www.orphancameras.com

COMPONENTS
AND CONTROLS
I
2
3
4
5
6
7
8
9
10
11
Finder
hood
Threadfor cablerelease ':
Eyeletfor carryingstrap :
Automatic framecounter
Film wind knob with fflmtype indicator
Notchedwheel
for setting
theframe counter
Shutter
tensioninglever
Diaphragm
control
window
Flash
contact
Body
sl-rutterrelease
Settingleverfor flash
synchronisation
ancl
delayed
action
(self-timer)
Focusing
magnifter
Central
front panel
of ftnder
hood
Frameof front panel
of finderhood
Coverflapof exposuremeter
Viewinglens
Shutter
speedcontrolwindow
Diaphragm
setting
lever
Taking lens
Shutterspeed
setting
ring
Upper fflm spool
holder
Depth-of-ffeld
scale
Focusing
knobwith distance
scale
Exposuremeter
computerdisk
Lowerftlm spool
holder
Lockingcatch
for cameraback
Locking
pin for ftnder
hood
Film window I
r;ilJ'il;h ) see
Page22
Frame
ffnder
eyepiece
l2
13
l4
r5
t6
17
18
l9
20
21
22
23
24
25
26
27
28
29
30
www.orphancameras.com

OPENING
AND CLOSING
THE FINDER
HOOD
To open
the
ffnder
hood,
depress
thelocking
pin(27);the
hood will then open automatically.For critically sharp
focusing,
swing
up the focusing
magnifter
(12) which
is
fftted
inside
thefront of theffnder
hood
(1).To close
the
hood,
ffrst fold backthe magnifter,
and thenthe front of
thehood
itself.ln this
waytheffnder
hood
will foldup flat.
FOCU
S
I
NG
The special
feature
of theIKoFLEx is its reflex
viewing
system,
by whichtheviewing
lensshows
an exact
replica
of the subject
to be taken.This viewing lens,
whichhas
the samefocal length and speed
as the taking lens,
projects,
via an inclined
mirror, a brilliant upright image
on to a ground glassscreen.
The ftnal picture will be
depictedsharply on the ftlm when it appearssharply
focused
on the screen.
On account of the high light-
www.orphancameras.com

transmission of the viewffnder system, the ground glass
is evenly illuminated right into the corners, so that the
franring is indicated exactly and the deftnition can be
judged rvith precision.
For focusing, turn the focusing knob (23); by turning
through 130o all distance settingsfrom 3 feet to inftnity
(-) can be covered.
As the focusing knob is turned, ob-
jects lying at varying distances
from the camera can be
seen
coming into sharp focus one after another. Thanks
to the ground glass
screen
focusingsystem,
the IKoFLE x
makesit easy
to find the critical point of sharpness.
Even
when the diaphragm of the taking lens is stoppeddown,
Tocttsirtg tl:e uiew-
firrder itttnlJe
by
ttrrtritt! tbc distatrce
scttitrg Ivrol.;
www.orphancameras.com

theimage
depicted
by theviewing
lens
will always
retain
itsfull brightness.
The depthof fteld
of thestopped-down
taking lens
caneasily
be readofi from the depth-of-fteld
scale
(22).
To facilitatereally critical focusing,
the magnifter
(12)
can be swunginto positionby pressing
gently against
the centralpanelof the ftnderhood front (13). Vhen
using
thefocusing
magnifter,
the eye
must
bebrought
as
close
as possibleand directly abovethe centreof the
magnifter.
To assist
the avoidance
of converging
lines
andotherdistortions,
the ground
glassscreen
is divided
into
squares.
Vtagnifier
tor
pin-point
f
oasing
www.orphancameras.com

DEPTH-OF-FIELD SCALE
The depth-of-fteld
scale (22) surroundsthe focusing
knob(23).
The divisions
on thedepth-of-fteld
scaleindi-
cate
thezone
of sharpdeftnition
for each
individual
dia-
phragm
stop(aperture
setting);
the ftguresrepresenting
theactualdiaphagmsettings.
The extentof the zoneof
sharp
deffnition
at any givendiaphragm
settingcanbe
read off from the distance
scaleby means
of the dia-
phragm
ftgures
to the right andleft of the distance
set-
ting mark. If, for instance,the distance
settingmark is
set
to the reddot (see
page
16)
anda diaphragmsetting
of f
tS has beenchosen,
everything
between
12 and 45
feet
will be recorded
sharply.
If stopf
/16 is used,
the
zoneof sharpdeftnitionwill extendfrom 9 feet to @,
whereaswhenthelargeststopI/3.5 is used
(denoted
by
thestrokes
on either
side
of the setting
mark),the zone
will only extendfrom 18to 36 feet.
In this way the ex-
tent of the depth-of-fteld
range can always be deter-
minedat a glance.For exactdepth-of-fteldvalues,
see
tableonpage
1
3.
Aulctttttttic
deptb-c,i-lield
scale
www.orphancameras.com

EXPOSURE
COMPUTER
f
/ll, 2seconds
(a
green ffgure)
i if
f
/16
shouldbe
re-
quired an expo-
sure
time
of 4 se-
conds (green
ftgure) will be
necessary.
Conrputer
disk
lor
the expoxtremeter
www.orphancameras.com

lf
, at any particular
setting,
the triangular
mark is set
to any
figgre between
12and 16(whit; ftgure,on 6t"*
ground),
thggree.n
ftgur.es
also
appearing
6n the seconds
scale
snoutcl
not beused
under
any circumstances.
If the
can'rera
isloaded
with a ftlmrated
at 24/t0o
DIN
(80 ASA). and if lh.. exposure
meter on th. fo.*ing
screen
scale
shows
14,
an e-xposure
canonly b. -iJe at
f
/16, ll:,rg
s€c..;
the green ftgures 30 and 60-
*iii.ri or.
arso
vtstDte
wlll result
in over-exposure.
Basic
rule
:
If lhg.
triangular mark A, points to figuresbetween
2
and.t
I (blad<-ftgures
onwhiteground),lti "itr.r',tt*n
on theseconds
scale
can
beusEd. "
If the triangularmark A pointsto ftgures
between12
and 16
(white ftgures
on blbckground)]the gr..r, ",hoi.
second
ftgures
will always risult in'excessiveover-
exposure
and should
not be used.
For
exposures
withftlters
the
ftlter)
lhould be setinsteadftlter
factor,
e.
g.2
x (yellow
of thetriarrgular
mark A
against
theftgure
indicated
by-the
exposure
meter.
Conrputer
disk
lor
tbe exposure
meter
www.orphancameras.com

APERTU
I{E SETTINC
Lever (18) is used for setting the diaphragm to the cor-
rect lens aperture, which can be read off from the little
window (8). The larger the aperture ftgure, the smaller
isthe actualdiaphragm opening,which necessitates
longer
exposuretimes but also provides a larger depth-of-fteld
zone. "stopping dorvn" (making the lens aperture smal-
ler) will extend the zone of sharp deftnition further.
However, you should avoid stopping down to such an
extent that over-long exposuretimes become necessary,
for rvhichthe canlera can no longer be safely employed
without tripod. Since
the focusing
screen
of the IKOFLEX
perntits continuous focusing control, it is better to use
shorter exposure
times with larger
lens
apertures.
I) ialtl
ttitr/rrr
-rclI
irr
g/
i pdlrtes Crnr ltc read
c,If fr()nl
l/)crlirtr[rrrr)
www.orphancameras.com

It
\ \ \ \ nn
i@rtf OF.l.
8 8
hA'a\Lhir
ttT|| ltl
ttttu::3
ht\t 0o rn.(r m co m
\ll\\\
.!|r
C) O\O'+ O
8
8S:'o'e-
lltl||tl I
v\\r\i-;s
^^^a
$S-*^*--
\
t-.rr4-.
{rfOCl@-
g g$l,aoio++,
|||tl \\t
r;\.rtini
3tn orro *.+ m cb
\\\\\!!
o6ltr\o{60r
9bhbiohi io
tTttt t.t
I
t\\ti";ii.
GNolcorrr'+mm
\
-.
1Irru1
o.t * o\o-
g
3a"Iiil,+il
l|l||l \s\
tt\rx3p:
F ol Q Nkt.<tr m co
\\
rrrrl4l
aocr.q\ovctoo
q i-h bQoil! 1?n
rTl l l
\\
r;rtritn
R coc.r
oOh'.+ m Co
F
tn
N
ll
oo
C)
(t
I
rrl
J
f
t-
J
g.l
rI
I
fr
I
F
EI
o
www.orphancameras.com

SHUl'TER
The I
KoF
LE
x.
r
c is equipped
with a fully sy'chronised
Prontor
svs shutter
with self-timer.
The
-sh,ltte,
,p...1,
range
from l/soo
sec.
to I second
and are setby nr.un,
of the setting
ring (20). Furthermore,
time .*p6ruresof
any lengths
are alsopossible.
The speed
to whichthe
shutter
is
set
can
be
seen
inthewindow
(lz).The ftg.rr.,
appearing
here
represent
fractions
of seconds;
e.g; "
j,'
means
1A
sec.,
"I00" means
r/roo
sec.,
etc.
If the
required
exposure
time
exceeds
1second,
the
shut-
tershould
beset
to "8", with theresult
that t'he
shutter
remains
open
aslong
as
the
shutter
release
isdepressecl.
Fortime exposures
it is strongly
recommended
io wo.l.
with a cable
release
to eliminiteany danger
of camera
shake;
the use
of a tripodor other
ffrm support
is also
advised.
Thebuilt-in
self-tinr
er clnnof
be
ut.a when
the
shutter
is
set
to "8".
Shutter
spced
settrttg
(unlues can be reatl
oft lrotn tlte *1rrr1r',rr,',
www.orphancameras.com

THE ZEISS IKON CABLE RELEASE
isequippedwith
a plunger catch, making longer time exposures much
more convenient to take. The cable release is screwed
into the thread (Z) on the camera body. For all instan-
taneous and short time exposures,
press the small plate
"8" towards the sleevettC" and turn it slightly, where-
upon it will remain in this position. For longer time ex-
posures the plate
"B" shouldnot be
pressed against
ttCt'. In this case
a gentle pressure
on the plunger
tt
A" will lock it in
the depressed
po-
sition until a se-
cond pressure on
plate "B" releases
it. This plunger
catch allows time
exposures
of any
duration to be
madewithouthav-
ing to keep the
{inger
on
theplun-
ger all the time.
www.orphancameras.com

RED
DOT SETT'ING
One way of beneftting
from the large depth of fteld
provided
by small taking lensapertures
can be parti-
cularly usefulwhen the lighting conditions
are good.
By
setting
thediaphragmsetting
lever(18) andthefocusing
knob(23)to the red dots,
i.e.,
at approximately
25feet
and between
f/8 andf/11, everything
beyond
approxi-
mately 13 feet will be rendered
sharply without further
focusing.
Framingand composition
can be done
on the
ground
glass
screen,
whilstfast actionshots
will bemade
much
easier
by using
the
direct
vision
frame
ftnder.
Using
a ftlmrated
at l7/1}o DIN (16
ASA), an exposure
time
of l/soo
sec.
will be correct
if thelighting conditions
are
excellent;
use l/roosec.
if the light is only reasonably
good,
and 1/z;
sec.
if it is ratherpoor.
.Rcrl1)ot
Scllirr4
Jor
srrn/r.sirol.s.
Dislarrce
appr0x.25
Jt
diapl:tra
jttt
bctueetr
ls aud
llrr
www.orphancameras.com

FRAME FINDER
For taking Pictures
at eye
level,
there
is
a
built-in
frame
ftnder.
Press
thefront Panel
' of the ftnder
hood
(13) in-
wards
so
that
it folds
uP.The
frontframe
of the
hood
(14)
can then be usedtogether
with
the
eye
Piece
(30)
atthe
rear as a frame ftnder. Correct framing is ensured
when
the edges
of the eye piece coincidewith the inner edges
of the front frame. Focusing can either be done in ad-
vance on the ground glass screenor by using the "Red
Dot Setting". This direct viewftnder
is especially
suitable
for takirrg sportsevents
and rapid actiorr
srrapshots.
jr,tttrc lrrrtlcr lor
crllrrlirlsl,,rlr rlltrl
lrtrl rlc
lt,'lt /tic
ltncs
:/r1r1ls
Ct't'ttls
T
www.orphancameras.com

LOADINC THE CAMERA
Before loading the camera, ffrst make sure that the
automatic ftlm lock is released.
It will be unlod<ed
if the
last ftlm used has already been advanced beyond the
twelfth frame No. 12 showing in the frame counter (4),
as then the film rvind knob (5) can be turned indeftnitely
without encounteringfurther resistance.
lf
, for sornereasons, the ftlm lock is still engaged, the
ftlm rvind knob must be rvound on until the ftg. 12 has
passed the frame counter window. To do this, tension
the shutter, release
it and while keeping the release
knob
depressed
turn the fflm wind knob until frg.12 appears
in the frame counter window. As soon as the ftg. 12 has
passedthe rvindow, the ftlm lock will be automatically
released.
Open the canrera back by pushing the locking catch (26)
in the direction of the arrow; then hinge the back down-
wards and pull out the upper ftlm spool holder (21),
turningit so
that
it islocked
in the
rvithdrawn posi-
tion. The empty
take-up spool is
theninserted
into
hscrtinj tbe
etttitty
take-upspoolintotbe
ttlt
l'se
r spool (barrtbe
r
www.orphancameras.com

the upper spool clrartrber
so that the prot)g of the ftlnl
wind knob (5) engages
the slot in the spool.
Turn back
the upper {ilnr spool holder (21) and allow the pivot to
snap
into the holeof the spool,
which can now be rotated
easily
by meansof the ftlm wind knob (5).
In exactly the same
wtY, the new spoolof ftlm is insertecl
into the lorver spool chamber (25); tear the seal and
thread the tongue of the backing paper into the long slit
cf the enrpty take-up spool by pulling it across the ftlm
rvindow.Turn ftlm wind knob (5) until the paper is tight
and winds evenly on to the tal<e-up
spool.
Then close
the
canlera back and wind on the {ilm until the figure 1
appears in the ftlm window (28). The camera is no\v
correctly loaded and ready for the ftrst exposure.
Close
the ftlm windorv, depress the notched wheel (6) of the
frame counter (4) and turn it in an anti-clockwise
direc-
tion until it locks.
The window of the frame counterwill
now also indicate
No. 1; from now on it is only neces-
saryto consult
the frantecotttrter.
I-oading the ca-
nrcrais best done
in subdued light,
n
e\rer in bright
sunlight
!
T
t
tllttettttttl
ll'e tl,rctdetl
r,,rcl.'
ilr
tl lttt!tg7
www.orphancameras.com
Table of contents
Other ZEISS IKON Film Camera manuals

ZEISS IKON
ZEISS IKON CONTAFLEX III User manual

ZEISS IKON
ZEISS IKON Contessa 35 User manual

ZEISS IKON
ZEISS IKON Icarex 35 S User manual

ZEISS IKON
ZEISS IKON Contina LK User manual

ZEISS IKON
ZEISS IKON SUPER IKONTA User manual

ZEISS IKON
ZEISS IKON Contaflex Super User manual

ZEISS IKON
ZEISS IKON CONTINA IIA User manual