○
When using with a mirrorless camera from various manufacturers
〔 Preparation〕
When using a camera without an M mount, an M mount adapter that is
compatible with the camera is required (sold separately by various
manufacturers).
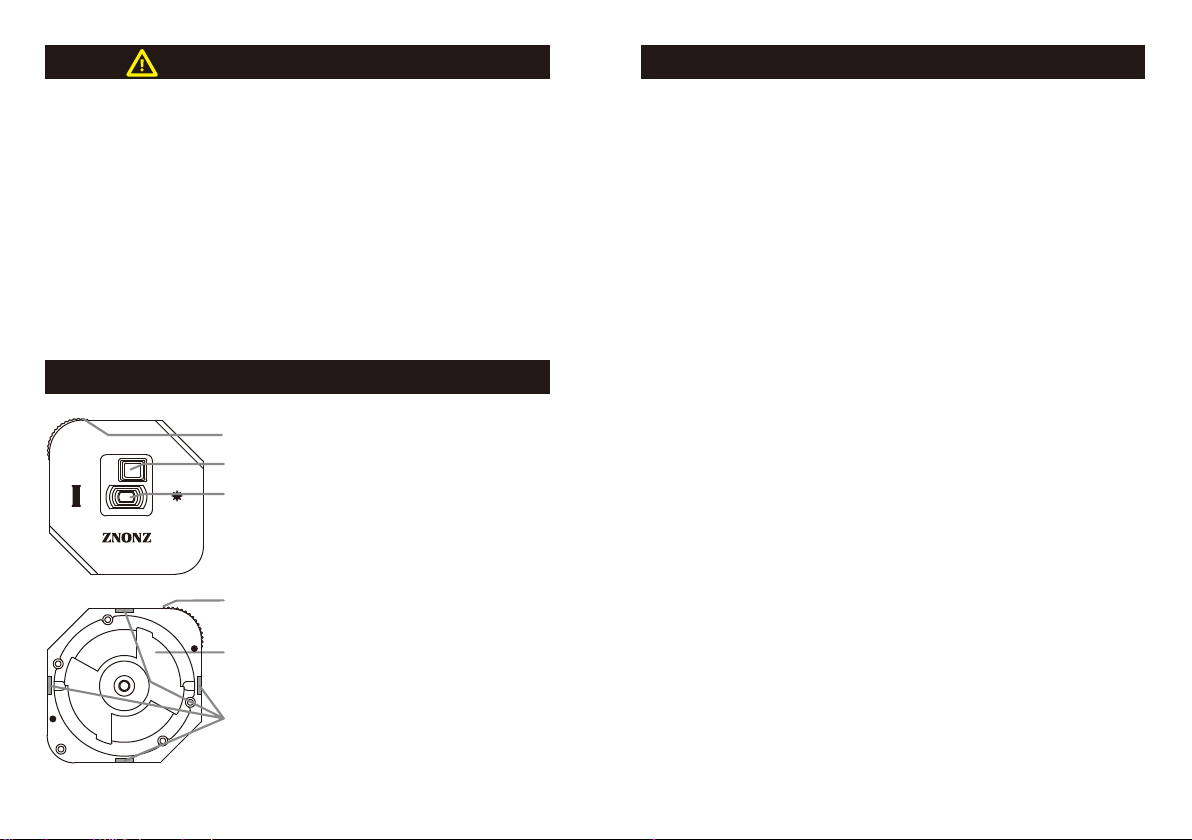
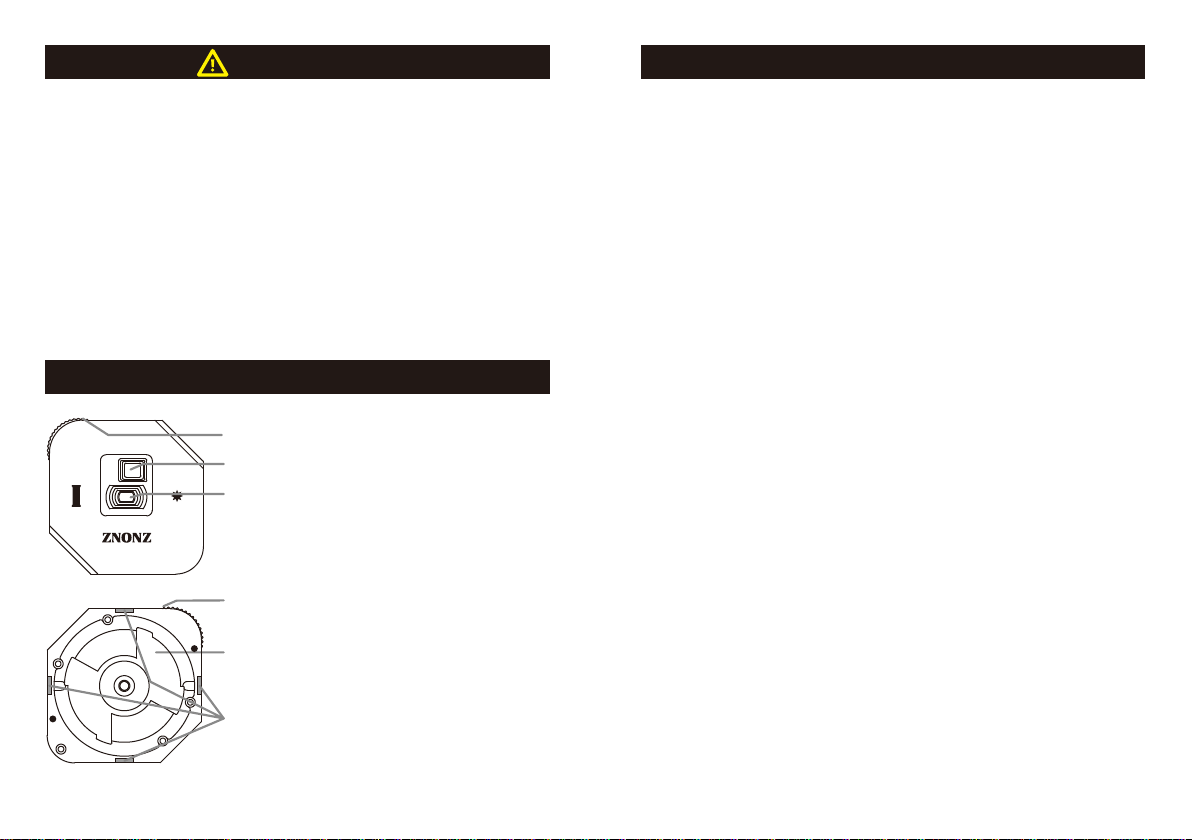
•Attach the unit to the camera (on the mount adapter) using the white dot
markings as a guide.
•There are white dot markings in two places. Either can be used. Since the
attachment position will be upside down, select a dial position that allows
for easy operation.
•Turn the turret dial to select the optical element to be used. Refer to the
included optical element cards for information on the features of each
element.
•The dial can be turned in either direction. One full rotation switches to the
next element. Make sure to turn it until it reaches the click stop position.
〔 Photography〕
Use your camera's menu to make the following settings:
①Set focus adjustment to manual focus.
②Set ISO sensitivity to at least 6400. 12800 or higher is recommended.
(Using as high a sensitivity as possible is recommended, though the
appropriate level of sensitivity may vary depending on the camera model.)
③Set the exposure mode to A (aperture priority).
④Set the camera to release even without a lens (i.e., when the shutter
release button is pressed, the shutter is activated even when no lens is
attached).
⑤Use an air blower or similar device to remove dust and debris from the
surface of the camera's CMOS element (i.e., the image pickup panel inside
the camera, which is visible when the lens is removed).
•Handle the image pickup element carefully as it is easily scratched.
⑥Depending on the camera model, the viewfinder or rear LCD screen
may be dark, making it difficult to compose the image. If this is the case,
use of an external 28 mm viewfinder (sold separately by various
manufacturers) is recommended.
•If the exposure time is longer than 1/60, use of a tripod is recommended.
•No focus adjustment is required.
The company names, unit names, etc. mentioned in this instruction manual are generally registered trademarks
or registered designs of the companies concerned.
○
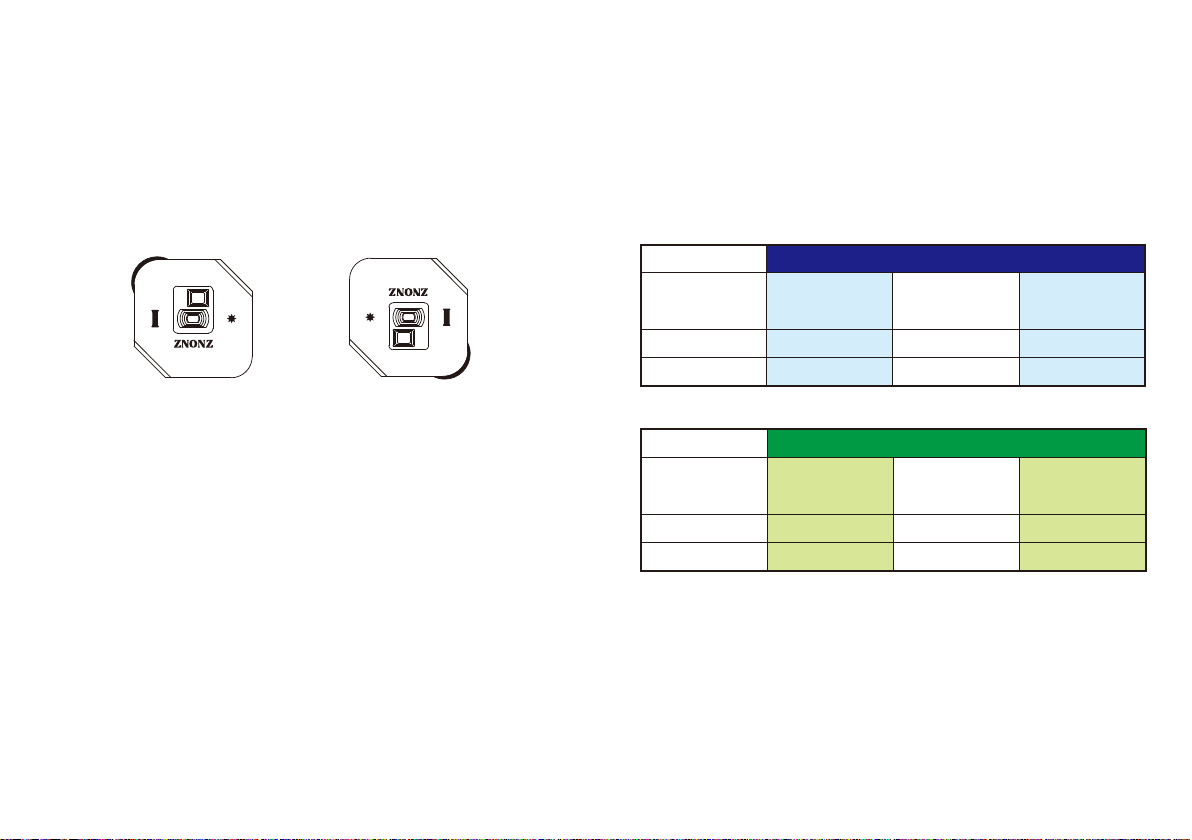
Camera model compatibility chart
35-mmfilmcamera
Range finder type SLR Fixed lens
compact
M mount Yes No No
Other than M mount
No No No
Digital cameras
Mirror Less SLR Fixed lens
compact
M mount Yes N/A No
No
Other than M mount
Yes* No
*RequiresanMmountadapter(soldseparately).
LEICA M mount is a registered trademark of Leica Microsystems IR GmbH.
(any screen size)
18
○
When using with a mirrorless camera from various manufacturers
〔 Preparation〕
When using a camera without an M mount, an M mount adapter that is
compatible with the camera is required (sold separately by various
manufacturers).
•Attach the unit to the camera (on the mount adapter) using the white dot
markings as a guide.
•There are white dot markings in two places. Either can be used. Since the
attachment position will be upside down, select a dial position that allows
for easy operation.
•Turn the turret dial to select the optical element to be used. Refer to the
included optical element cards for information on the features of each
element.
•The dial can be turned in either direction. One full rotation switches to the
next element. Make sure to turn it until it reaches the click stop position.
〔 Photography〕
Use your camera's menu to make the following settings:
①Set focus adjustment to manual focus.
②Set ISO sensitivity to at least 6400. 12800 or higher is recommended.
(Using as high a sensitivity as possible is recommended, though the
appropriate level of sensitivity may vary depending on the camera model.)
③Set the exposure mode to A (aperture priority).
④Set the camera to release even without a lens (i.e., when the shutter
release button is pressed, the shutter is activated even when no lens is
attached).
⑤Use an air blower or similar device to remove dust and debris from the
surface of the camera's CMOS element (i.e., the image pickup panel inside
the camera, which is visible when the lens is removed).
•Handle the image pickup element carefully as it is easily scratched.
⑥Depending on the camera model, the viewfinder or rear LCD screen
may be dark, making it difficult to compose the image. If this is the case,
use of an external 28 mm viewfinder (sold separately by various
manufacturers) is recommended.
•If the exposure time is longer than 1/60, use of a tripod is recommended.
•No focus adjustment is required.
Upper dial Lower dial
17