ZyXEL Communications NAS540 Supplement

1
NAS540
Application Notes
Version 1.00
Oct, 2014

2
Contents
1. NAS Starter Utility .............................................................................................................. 4
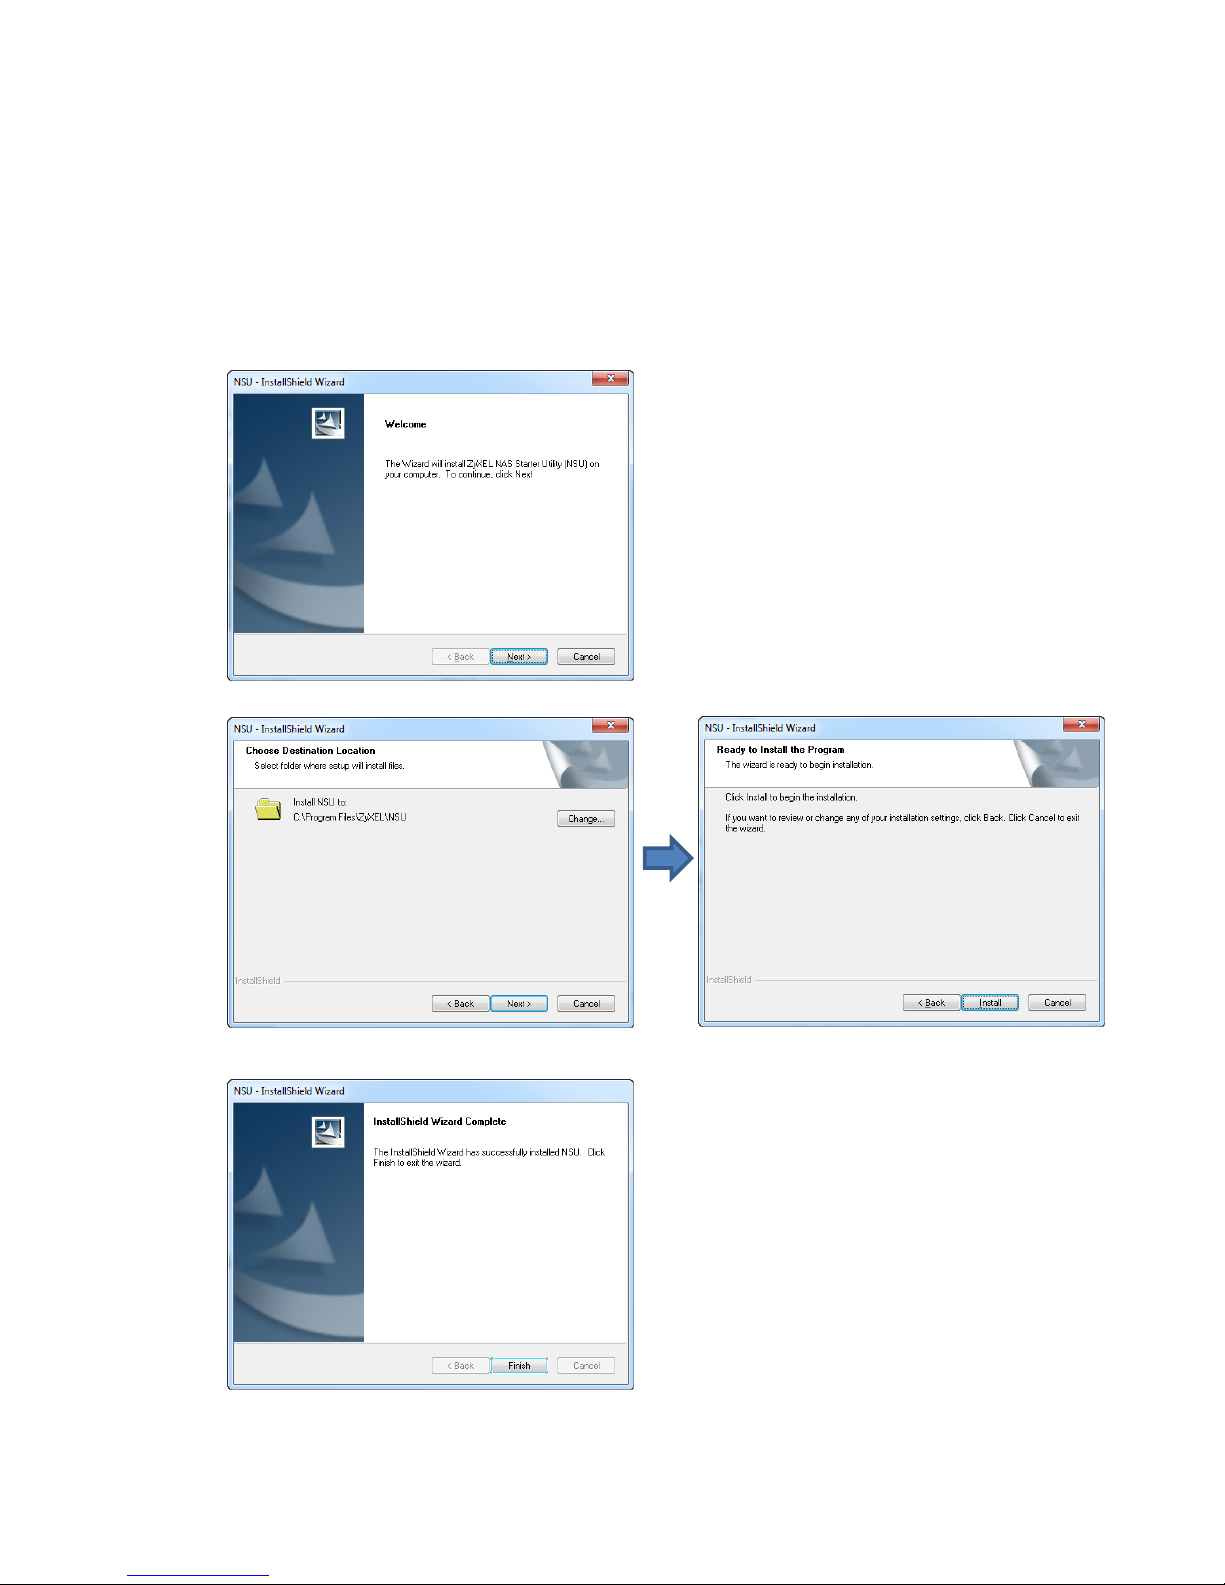
1.1 NAS Starter Utility Installation.................................................................................... 4
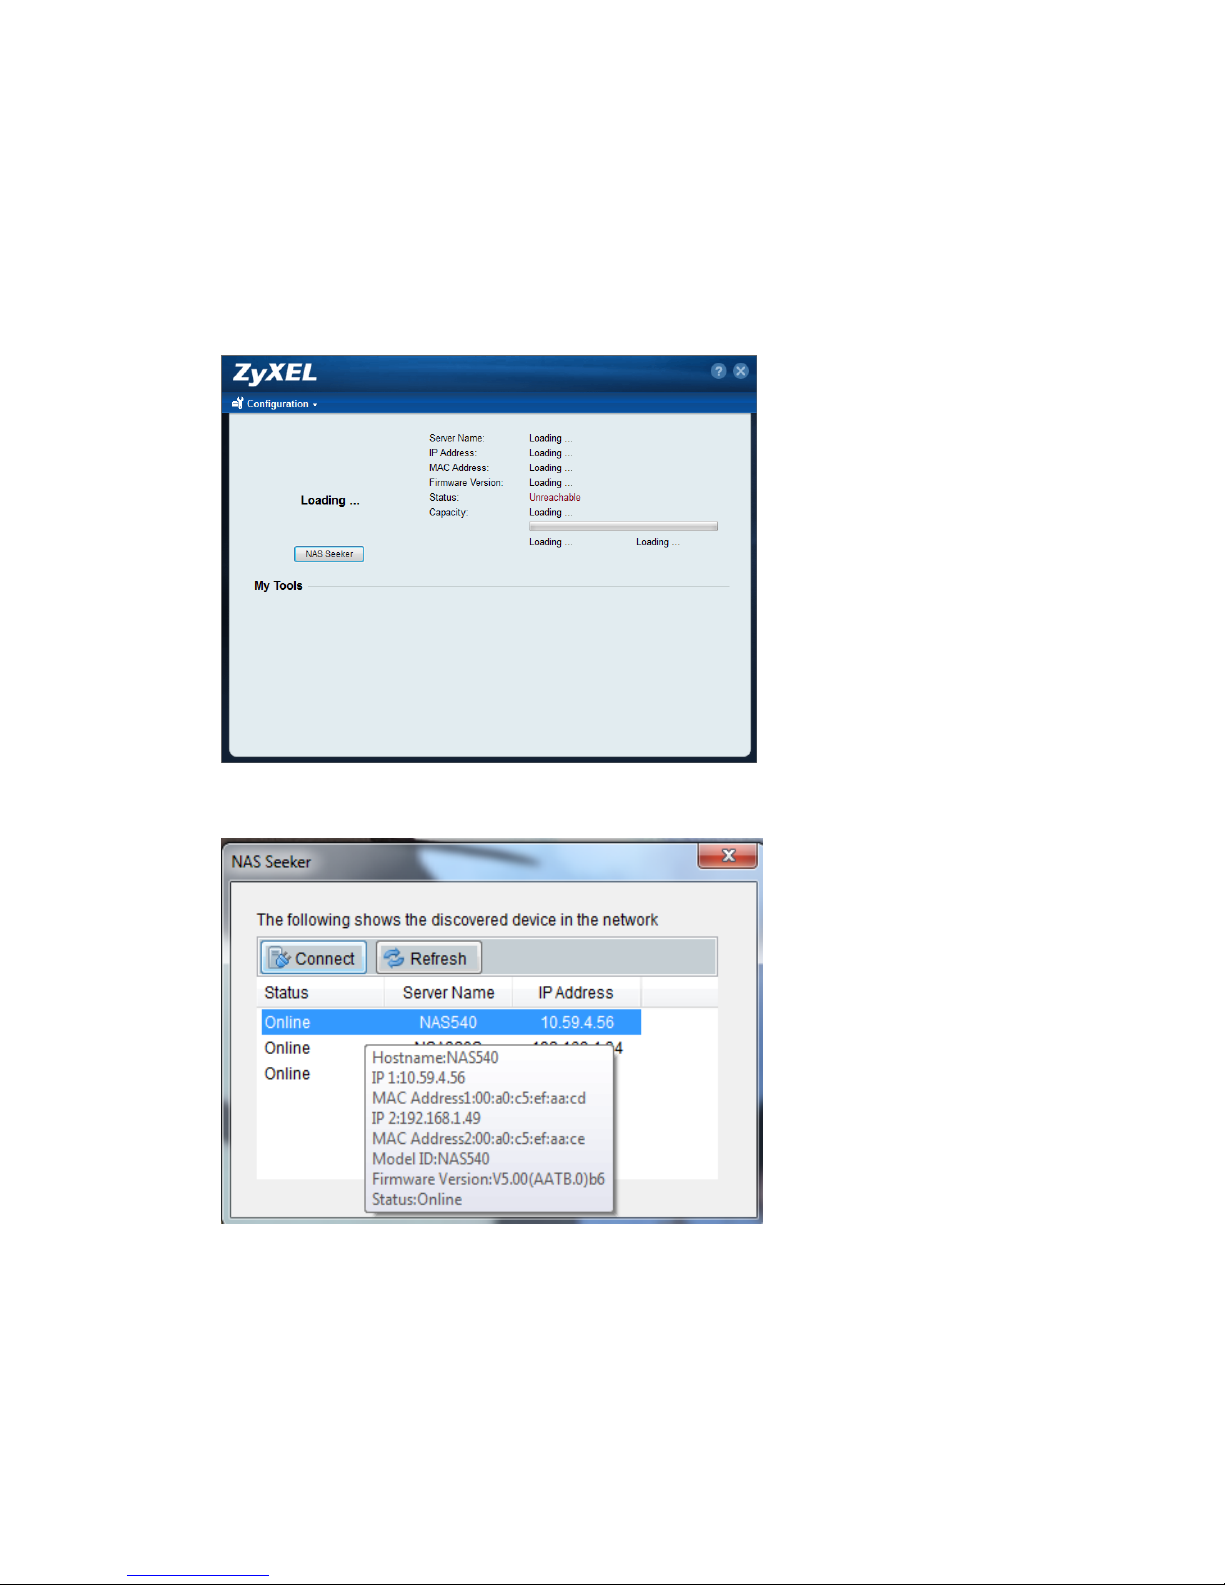
1.2 NAS540 Initialization ................................................................................................... 5
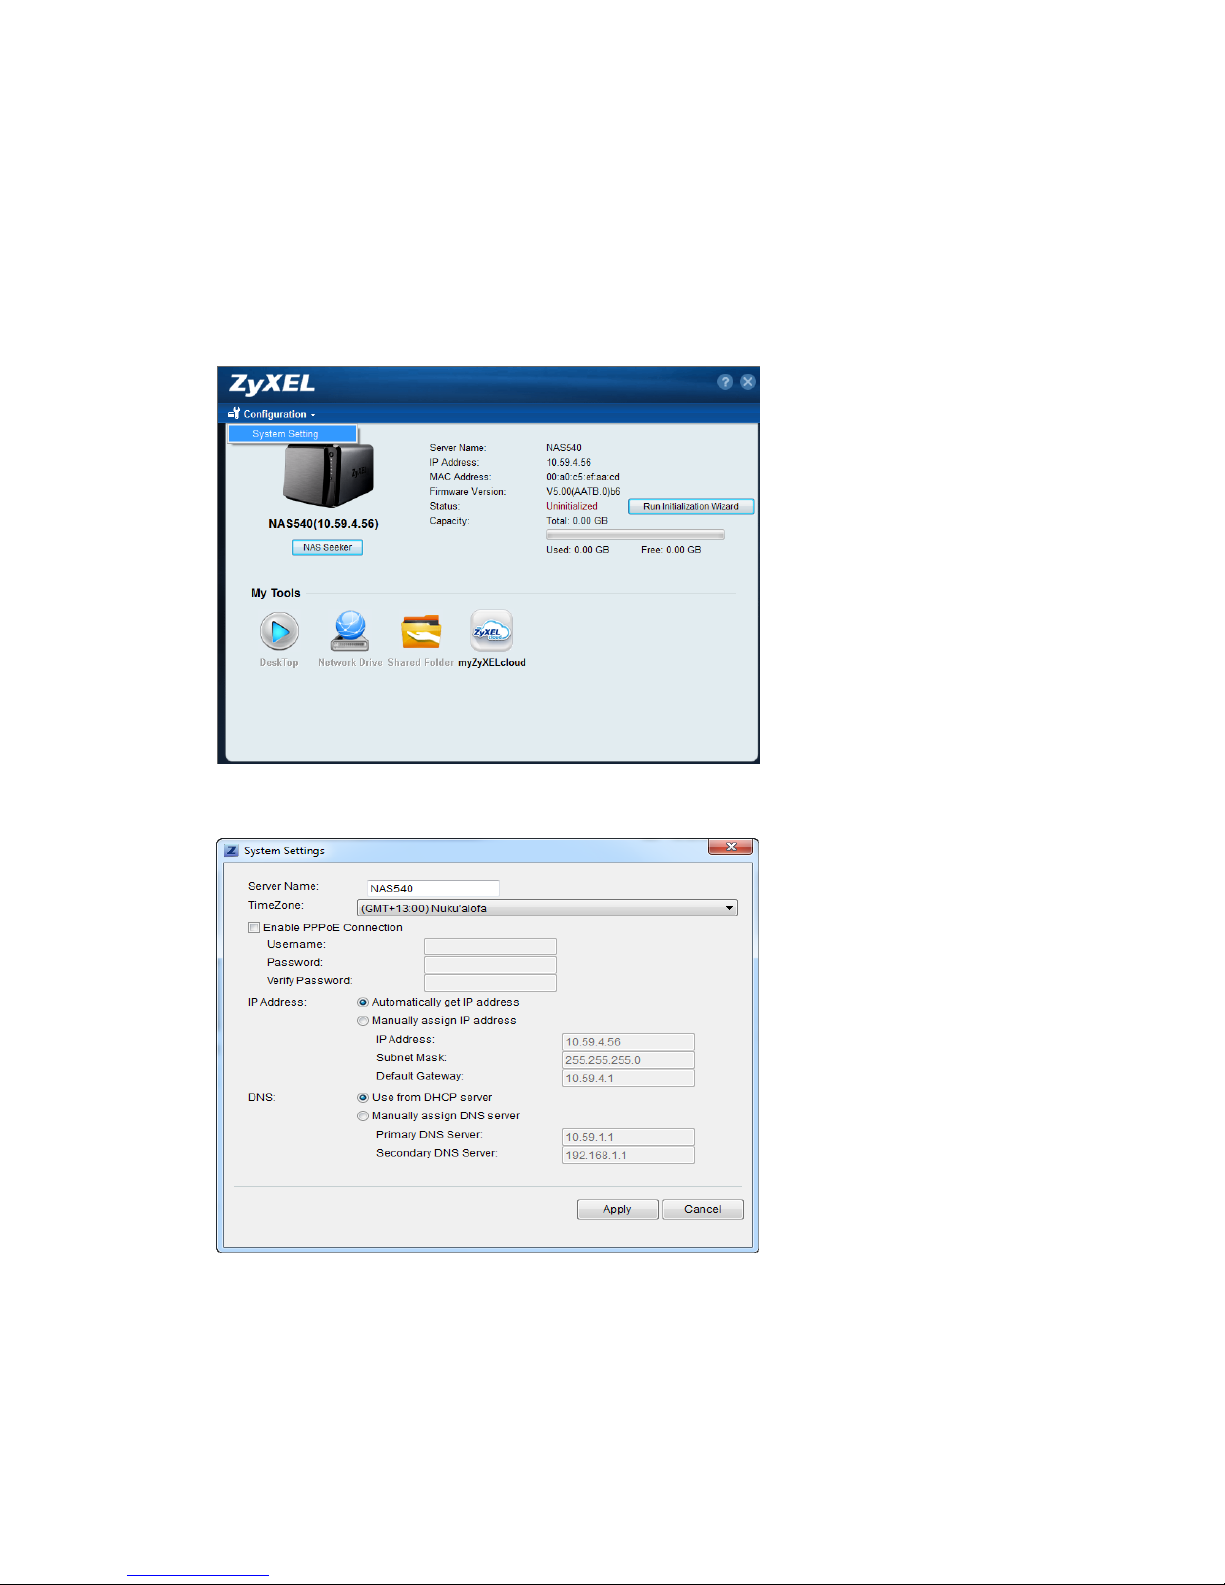
1.3 Network Setting............................................................................................................ 6
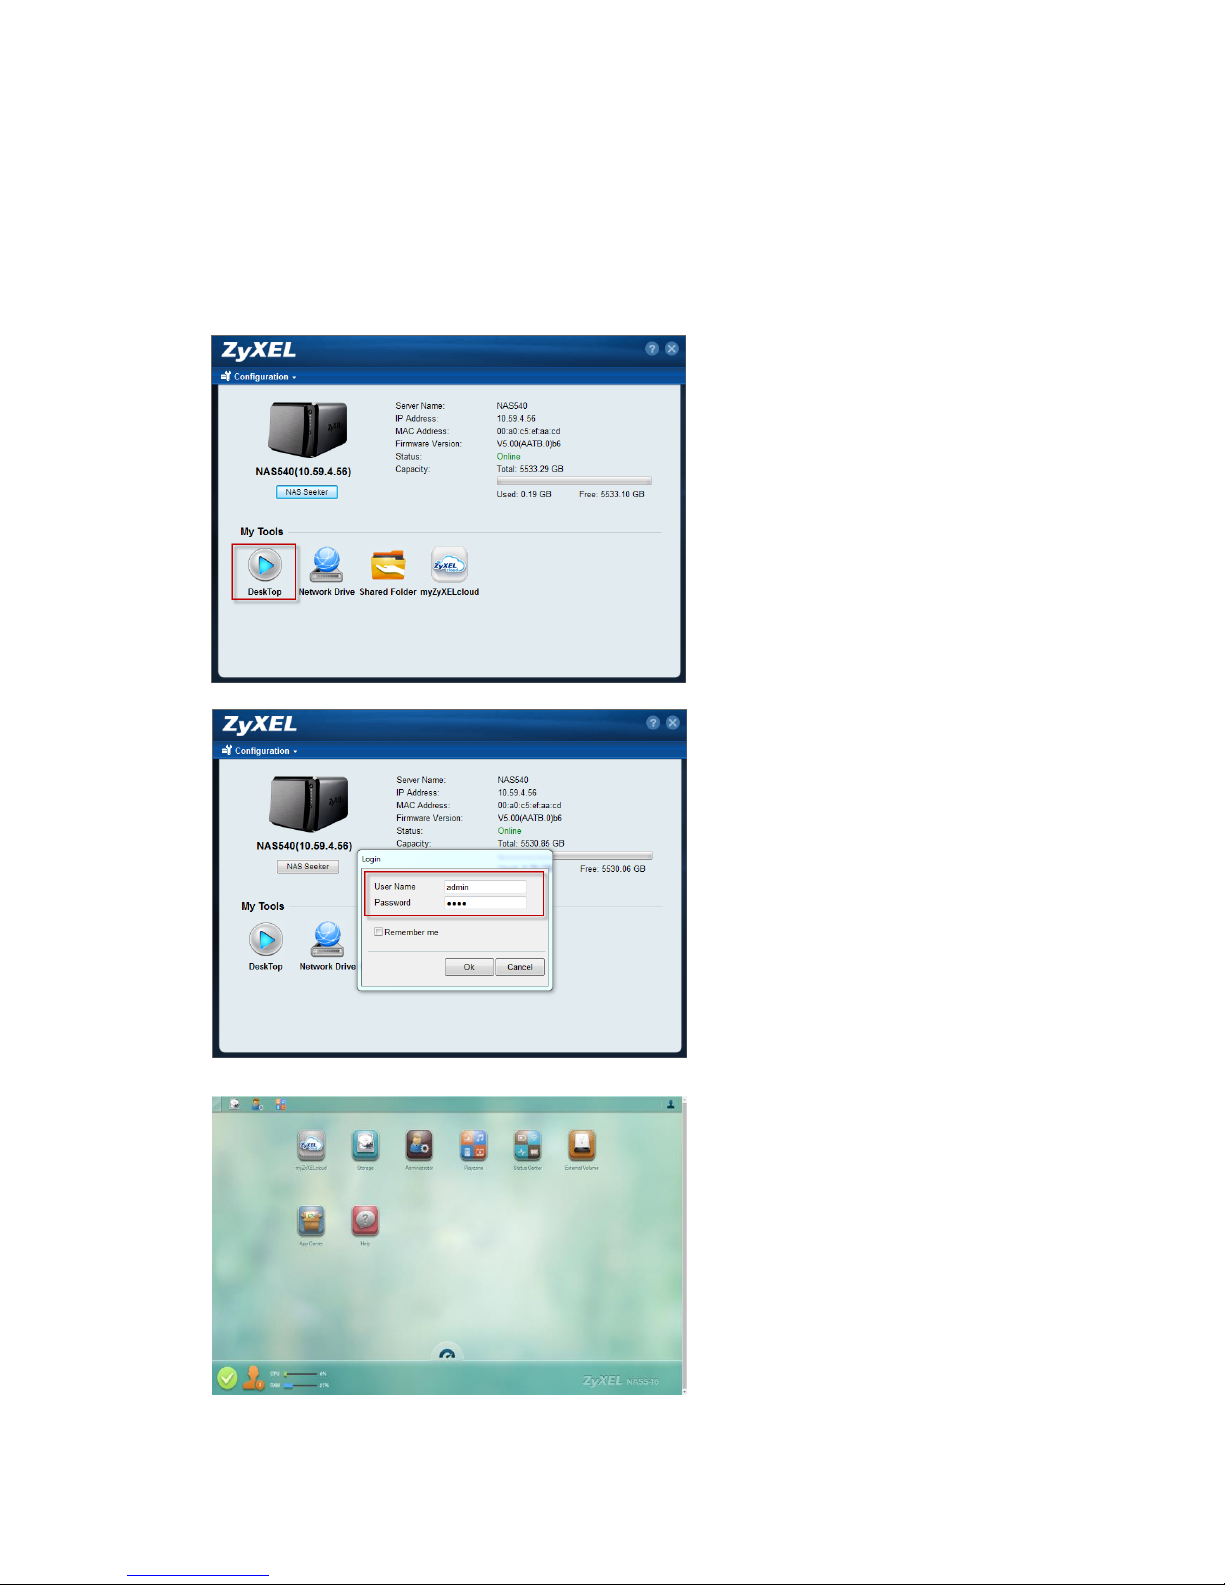
1.4 DeskTop........................................................................................................................ 7
1.5 Network Drive............................................................................................................... 8
1.6 Shared Folder............................................................................................................. 10
1.7 myZyXELcloud ........................................................................................................... 11
1.8 Run the Initialization Wizard..................................................................................... 12
2. myZyXELcloud-Agent...................................................................................................... 13
2.1 Sign in.......................................................................................................................... 13
2.1.1 Sign in with Facebook........................................................................................ 13
2.1.2 Sign in with Google............................................................................................. 15
2.1.3 Sign up ................................................................................................................. 16
2.2 Pair NAS540............................................................................................................... 17
2.3 Unpair NAS540........................................................................................................... 21
3. Storage............................................................................................................................... 23
3.1 Create Volume............................................................................................................ 24
3.1.1 Create single volume on RAID......................................................................... 24
3.1.2 Create Disk Group.............................................................................................. 26
3.2 Repair volume............................................................................................................. 29
3.3 Delete Volume............................................................................................................ 31
4. Administrator..................................................................................................................... 32
4.1 Network........................................................................................................................ 33
4.2 Auto-upload Service .................................................................................................. 36
4.3 Dropbox....................................................................................................................... 42
4.4 Using the zDownload Folder.................................................................................... 47
4.5 WebDAV...................................................................................................................... 48
4.6 Media Server............................................................................................................... 51
5. PlayZone............................................................................................................................ 54
5.1 File Browser................................................................................................................ 55
5.2 Application Zone......................................................................................................... 56

3
5.3 Playzone Settings...................................................................................................... 57
5.4 Music............................................................................................................................ 58
5.5 Photo............................................................................................................................ 59
5.6 Video............................................................................................................................ 60
6. Status Center.................................................................................................................... 62
7. External Volume............................................................................................................... 63
8. APP Center ....................................................................................................................... 65
8.1 Gallery
.......................................................................................................................... 68
8.3 NFS.............................................................................................................................. 74
9. Help.................................................................................................................................... 78
9.1FAQ
................................................................................................................................ 79

4
1. NAS Starter Utility
1.1 NAS Starter Utility Installation
After you install a new hard drive on the NAS540, please use the NAS
Starter Utility to discover and access the NAS540 to assign an IP address
by the DHCP server or a static option. The steps are shown below:
Double-click setup.exe.
NSU_2.10_build_1061then click “Next” to
begin the installation
Select install folder
Finish Installation

5
1.2 NAS540 Initialization
After a successful installation, click on the NAS Starter Utility. The first
screen of the NSU will attempt to discover the NAS devices. Click on NAS
Seeker, and then choose the devices that you want to connect.
The default username is admin and the password is 1234.
Discover NAS devices
Select NAS540

6
1.3 Network Setting
After successful initialization, go back to the NSU main menu and click
Configuration > System Setting to start configuring. You can assign a new
hostname for this NAS540, set the TimeZone and PPPoE connection
information as well as an IP address.
Click System Setting
Setting Server Name,
TimeZone and network

7
1.4 DeskTop
Click on DeskTop and enter the admin’s username and password to access
the NAS540’s GUI. Then the administrator can manage the device and
change the configurations.
Click DeskTop
Type User Name and Password
DeskTop screen

8
1.5 Network Drive
In the main NAS Starter Utility screen click Network Drive to add the NAS as
a network drive in your computer’s Windows Explorer.
Click Network Drive
Type user name and password
Select shared folder

9
Check the Network map drive
Map the shared folder via Guest
Select shared folder

10
Check the Network map drive
1.6 Shared Folder
Click this to log into the NAS’s file directory in Windows Explorer.
Select the Shared Folder
Type user name and password

11
Check NAS’s file directory in Windows
Explorer
1.7 myZyXELcloud
Click this to go to mycloud.zyxel.com to setup a free DDNS hostname for the
NAS so you can connect to it easily from the Internet.
Click the myZyXELcloud
myZyXELcloud screen

12
1.8 Run the Initialization Wizard
Then click Run Initialization Wizard to create volume for NAS540, and enter
the user name and password on the DeskTop page.
Run Initialization
DeskTop screen

13
2. myZyXELcloud-Agent
Provide a solution for remote application management and access your
ZyXEL network storage accessory.
DeskTop -> myZyXELcloud
2.1 Sign in
2.1.1 Sign in with Facebook
Click on the Facebook button

14
Login to Facebook with your account
Confirm myZyXELcloud will receive
some information
Confirm the Terms

15
2.1.2 Sign in with Google
Click on the Google button and login with your Google account.
Click on the Google button
Confirm that myZyXELcloud will receive some information as well as the
terms.
Confirm terms

16
2.1.3 Sign up
Click on sign up.
Sign up in this screen
Fill-in the fields on this page.
Sign up screen

17
Confirm the Terms
2.2 Pair NAS540
myZyXELcloud will search for the NAS540 in the network.
Click on the Pairing button

18
Confirm to pair with this NAS540.
Press the confirm button
Click on the copy/sync button
within 10 minutes

19
Successfully paired. Click on the Confirm button to setup DDNS and UPnP.
Successfully paired
Fill-in the host name that you want.
Submit

20
DDNS settings have been completed successfully.
Confirm your DDNS
Setup the UPnP setting.
UPnP Setting screen
Other manuals for NAS540
1
Table of contents
Other ZyXEL Communications Network Storage Server manuals
Popular Network Storage Server manuals by other brands

Dell
Dell XC720xd owner's manual

Seagate
Seagate ST320005SHA10G-RK - BlackArmor NAS 420... user guide

Buffalo
Buffalo HD-RQSSU2/R5 user guide

HP
HP EX495 - 1.5TB Mediasmart Home Server Warranty and Support Guide

MAXDATA
MAXDATA SR 1202 quick guide

HP
HP AK373A - StorageWorks All-in-One Storage System 1200r 5.4TB SAS Model NAS... Release notes