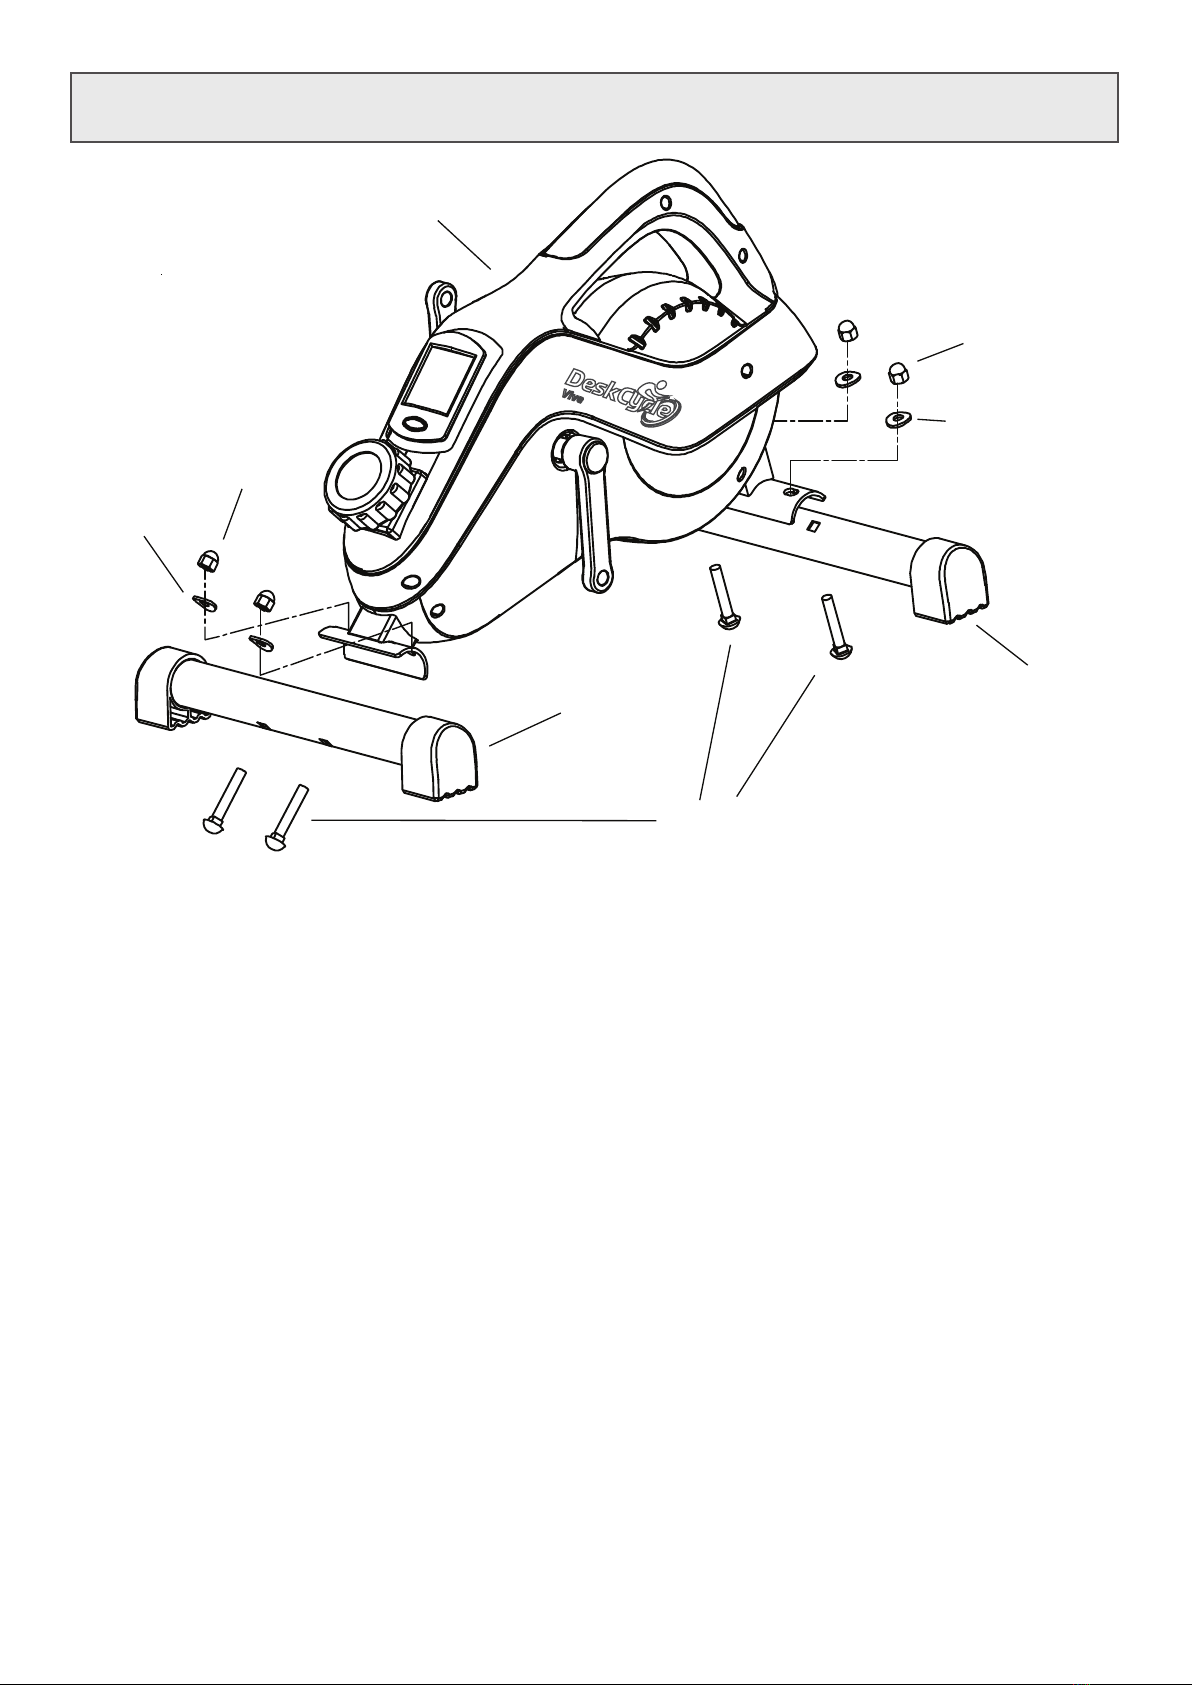
3D innovations DeskCycle Vive User manual

Visit us at DeskCycle.com for:
• Usage Tips
• Calorie Calculator
• Accessories
• And More
USER’S MANUAL
®
Order# _____________________
Serial# _____________________
The serial number is on the bottom of
the DeskCycle.
QUESTIONS / PROBLEMS
Support and Contact:
DeskCycle.com/support
Phone (US customers):
877-426-3292
®
DeskCycle
Vive

Precautions
Failure to observe these warnings could result in physical injury or damage to the DeskCycle.
• Do not stand on the pedals! Use the DeskCycle only while sitting. Standing on the pedals
can damage the bike.
• Use the DeskCycle indoors on a level surface. Keep the DeskCycle away from moisture and dust.
• Make sure that the pedals are screwed in as tightly as possible. Loose pedals will slowly come
undone. Using the bike with loose pedals can damage the threads in the pedal arms.
• Do not subject the bike to heavy shock or treat it excessively. Do not disassemble or modify it.
Doing so will void the warranty.
• The DeskCycle has sealed bearings and is maintenance free. Lubricants are not necessary and can
actually damage the bike.
• Do not place the bike in a location where it will be in contact with direct sunlight or where it will be
exposed to high temperatures or excessive humidity.
Safety
Warning! To reduce the risk of serious injury, please read the following safety precautions before using
the DeskCycle.
• Read all instructions in this manual before using the DeskCycle. Use the DeskCycle only as
described.
• It is the responsibility of the owner to ensure that all users of the DeskCycle are adequately
informed of all precautions.
• Do not stand on the pedals! Use the DeskCycle only while sitting.
• Do not place this device in a location where it may cause an obstruction.
Consult Your Physician
It is always important to consult your physician before starting an exercise program. This is
particularly true if any of the following apply to your current medical condition:
• Chest pain or pain in the neck and/or arm
• Shortness of breath
• A diagnosed heart condition
• Joint and/or bone problems
• Currently taking cardiac and/or blood pressure medications
• Have not previously been physically active
• Dizziness or blurred vision
• Those with physical handicaps should use this device only under supervision.
If none of these apply to you then start gradually and sensibly. However, if you feel any of the physical
symptoms listed above when you start your exercise program, contact your physician right away. If
one or more of the statements listed above applies for you, see your physician before beginning an
exercise program. An exercise-stress test may be used to help plan your exercise program.
Precautions And Safety

Table Of Contents
Assembly
Using the DeskCycle
Adjusting the Resistance
Support
Care and Maintenance
Using the Display
Free Online Calorie Calculator / Logger
Optional Bluetooth Sensor for iPhone App
Free iPhone App
Optional Sit-Brake Casters
Full One Year Warranty
2
4
5
9
6
7
8
8
9
9
9

2
Assembly
Install the Legs
The front leg is longer than the rear leg. See the drawing above.
1. Place the bike on a at surface.
2. Attach each leg to the bike with 2 bolts, 2 washers and 2 nuts as shown in the diagram.
3. Tighten all 4 nuts by hand.
4. Make sure all 4 feet sit at on the surface. Rotate the feet if necessary.
5. Finish tightening the nuts using the provided wrench.
Rear Leg Front Leg
Bolts
Nut
Nut
Washer
Washer
Bike

3
Assembly (continued)
Right Pedal
The letter Ris marked on
the end of the pedal shaft.
Left Pedal
The letter Lis marked on
the end of the pedal shaft.
Tips for Installing the Pedals:
1. Make sure the pedal is straight when you screw it in.
2. Rotate the shaft with your ngers to get the threads
started.
3. If you can’t get the threads started with your ngers
then it is cross threaded. Unscrew the pedal, make sure
the pedal is straight, and then try again.
• Screw the Left Pedal into the Left Pedal Arm COUNTER-CLOCKWISE.
• Screw the Right Pedal into the Right Pedal Arm CLOCKWISE.
Install the Pedals
There is a Left Pedal and a Right Pedal. They are marked with an L for Left or an R for Right on the end
of the pedal shaft.
Insert the Batteries into the Display
The display snaps into the bike. It’s connected to the bike by a
wire at the bottom of the display.
1. Carefully pry the top of the display out using your ngers.
2. Install two AAA batteries into the back of the display. Pay
attention to the polarity. The battery holder shows the proper
polarity.
3. Press the display back into the bike.

4
Using the DeskCycle
The Proper Technique for Using Under-Desk Bikes
Using the DeskCycle correctly will keep your upper body still, keep your chair from swiveling, and
prevent you from pushing the bike away from you. For best results, practice using the DeskCycle as
described in the steps below at the minimum resistance. Do this for a week before you increase the
resistance to 2. Then use it at 2 for at least a week before increasing to 3.
Step 2. Keep Your Upper Body Still. Pedal with Your Legs, Not Your Body.
Keeping your upper body still makes it easy to focus on your work. Your body should not move from
side to side and your chair should not swivel when pedaling the bike.
• Pedal with your legs, not your body.
• Don’t rock from side to side.
• Pedal downward.
Keep the Resistance Low (3 or less) When Working at Your Desk
Most people should not exceed the resistance setting of 3 when working at their desk.
Higher resistances can be distracting. However, some people do just ne on level 4. The key is to train
yourself using the proper technique at the lower resistances. See the previous sections for details.
Step 1. Pedal Downward
The most important advice we can give you is to pedal
downward. This will keep the bike in place.
If the bike moves away from you then you are not
pedaling downward.
1. Begin pushing on the pedal when the pedal arm is
around the 2 o’clock position. See the image to the
right.
2. Pedal downward as the arrow indicates.
Step 3. Keep Your Feet Level on the
Downward Stroke
When pedaling downward, point your toes
forward so that your feet are level to the
ground. This will prevent your heel from hitting
the ground or the rear bar. See the picture to
the right for reference.
Press down on the pedal

5
Using the DeskCycle (continued)
Getting Cardio Workout with the DeskCycle
The following steps demonstrate how to do this.
1. Set the pedal resistance to 4.
2. Sit in a taller chair so that you pedal downward on the pedals.
3. Pedal the bike at a speed of at least 30 mph.
Within a few minutes your legs will burn and your heart rate will quickly elevate. Most people won’t
be able to maintain 30 mph for more than a few minutes.
Note, this is for demonstration purposes only!
For actual workout suggestions, go to DeskCycle.com/exercise-suggestions.
Other Times to Use the DeskCycle
Use the DeskCycle while:
• Working at your desk
• Watching television
• Playing video games
• Reading a book
• Using your phone
• Other times when you’re sitting and your legs are free
Ergonomic Considerations
1. Keep your Back Supported
If your chair seat is too deep, you may need to sit towards the front of your chair in order to use the
bike. In this case you should place a lumbar cushion behind your back for support.
2. Sit up Straight
Don’t slouch. Sitting up straight while using the DeskCycle will help strengthen your core. It’s also
good for your spine.
For more details go to DeskCycle.com/how-to-use.
Exercise Your Arms
For an excellent arm workout, place the DeskCycle on top of your desk and pedal with your arms.
Adjusting the Resistance
Adjusting the Pedal Resistance
• There are 8 tension settings.
• The arrow points to the current tension setting.
• The higher the number, the higher the pedal resistance.

6
Using the Display
There are two numbers on the display; one on the top and one on the bottom. See the image below.
• The Top Number always displays an estimate of your pedal speed in miles per hour.
• The Bottom Number displays Distance, Calories, Odometer, Revolutions Per Minute and Time.
The Display Button
Press the button on the display to select which value the
bottom number displays. The arrow will point to what
the bottom number is displaying.
For example, in the picture the arrow points to TIME so
the bottom number is displaying time.
Press the button until the arrow points to what you want
the bottom number to display.
How to Reset DISTANCE, Time and Calories
Time, Distance and Calories are accumulated as you pedal. To reset these all to zero, simply press and
hold the display button for about 4 seconds. Note that the Odometer value does not reset.
How to Turn the Display On and O
The display automatically turns on when you pedal the bike. You can also turn the display on by
pressing the display button. The display automatically turns o a few minutes after you stop pedaling.
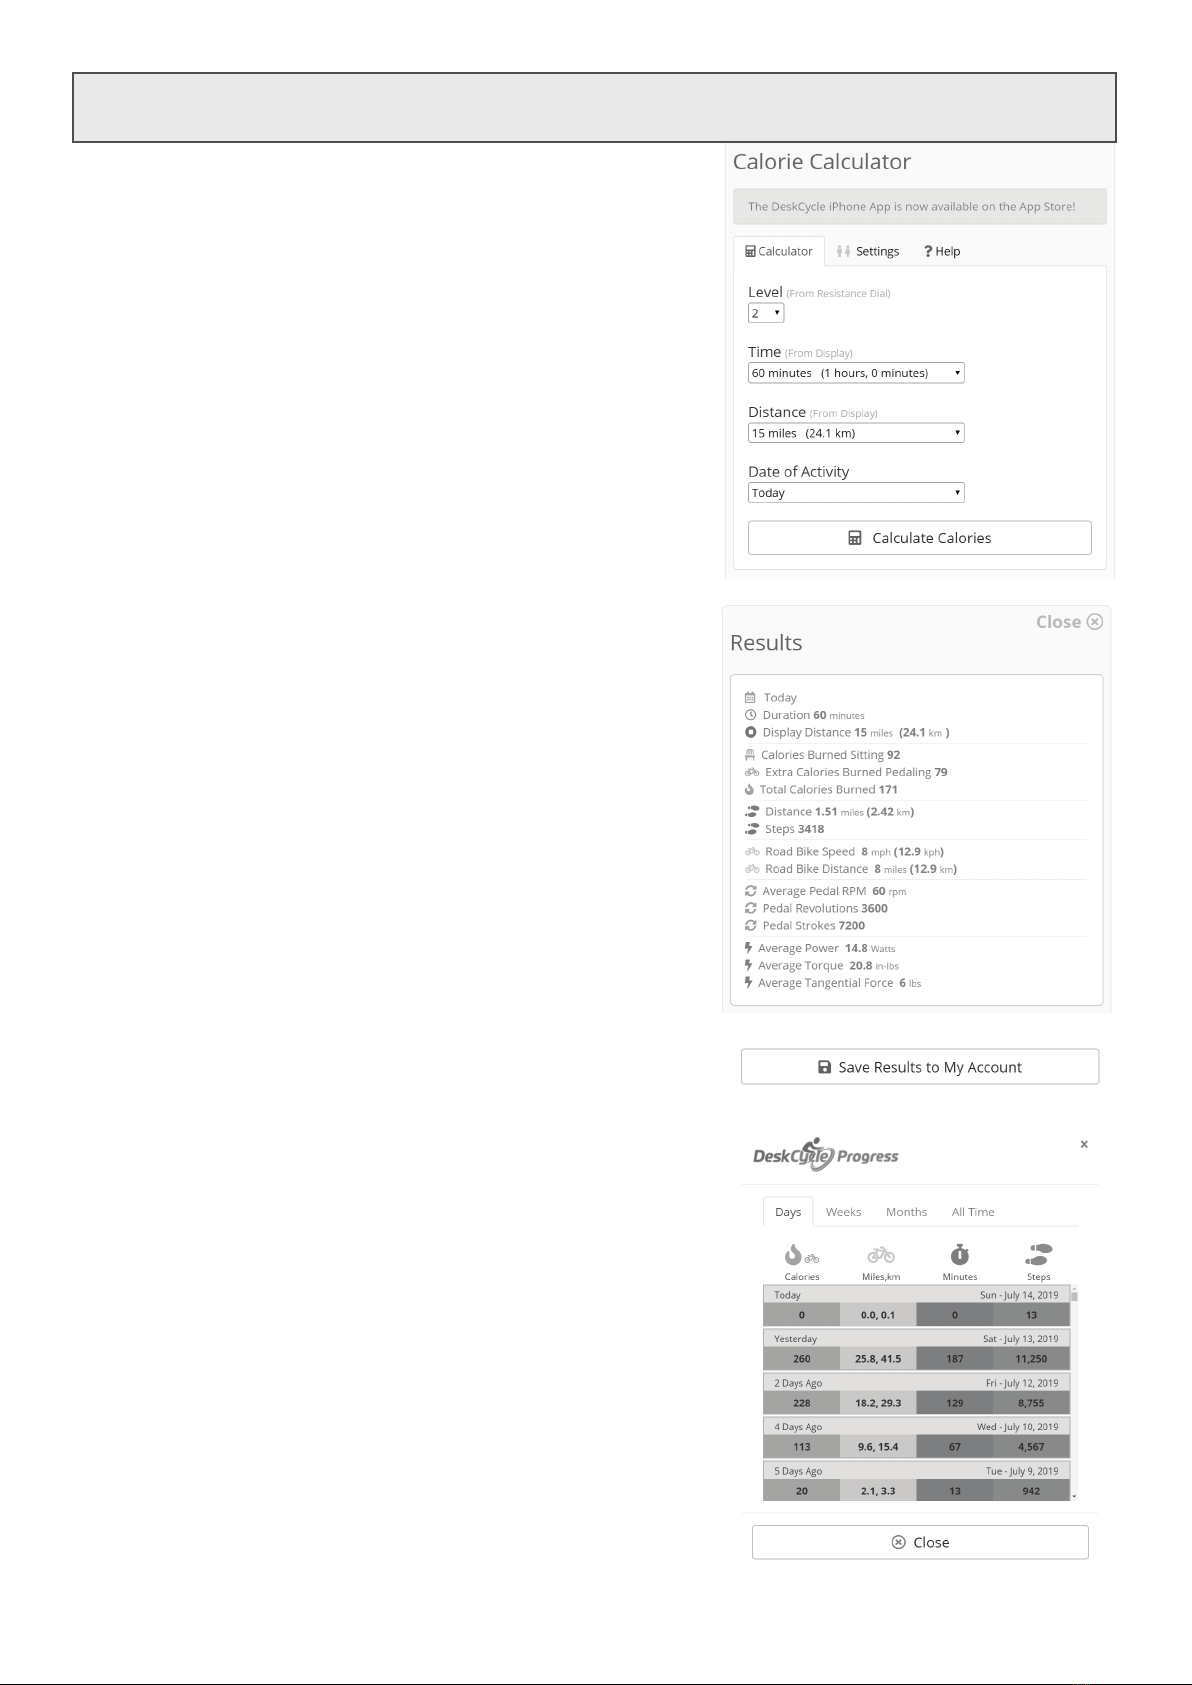
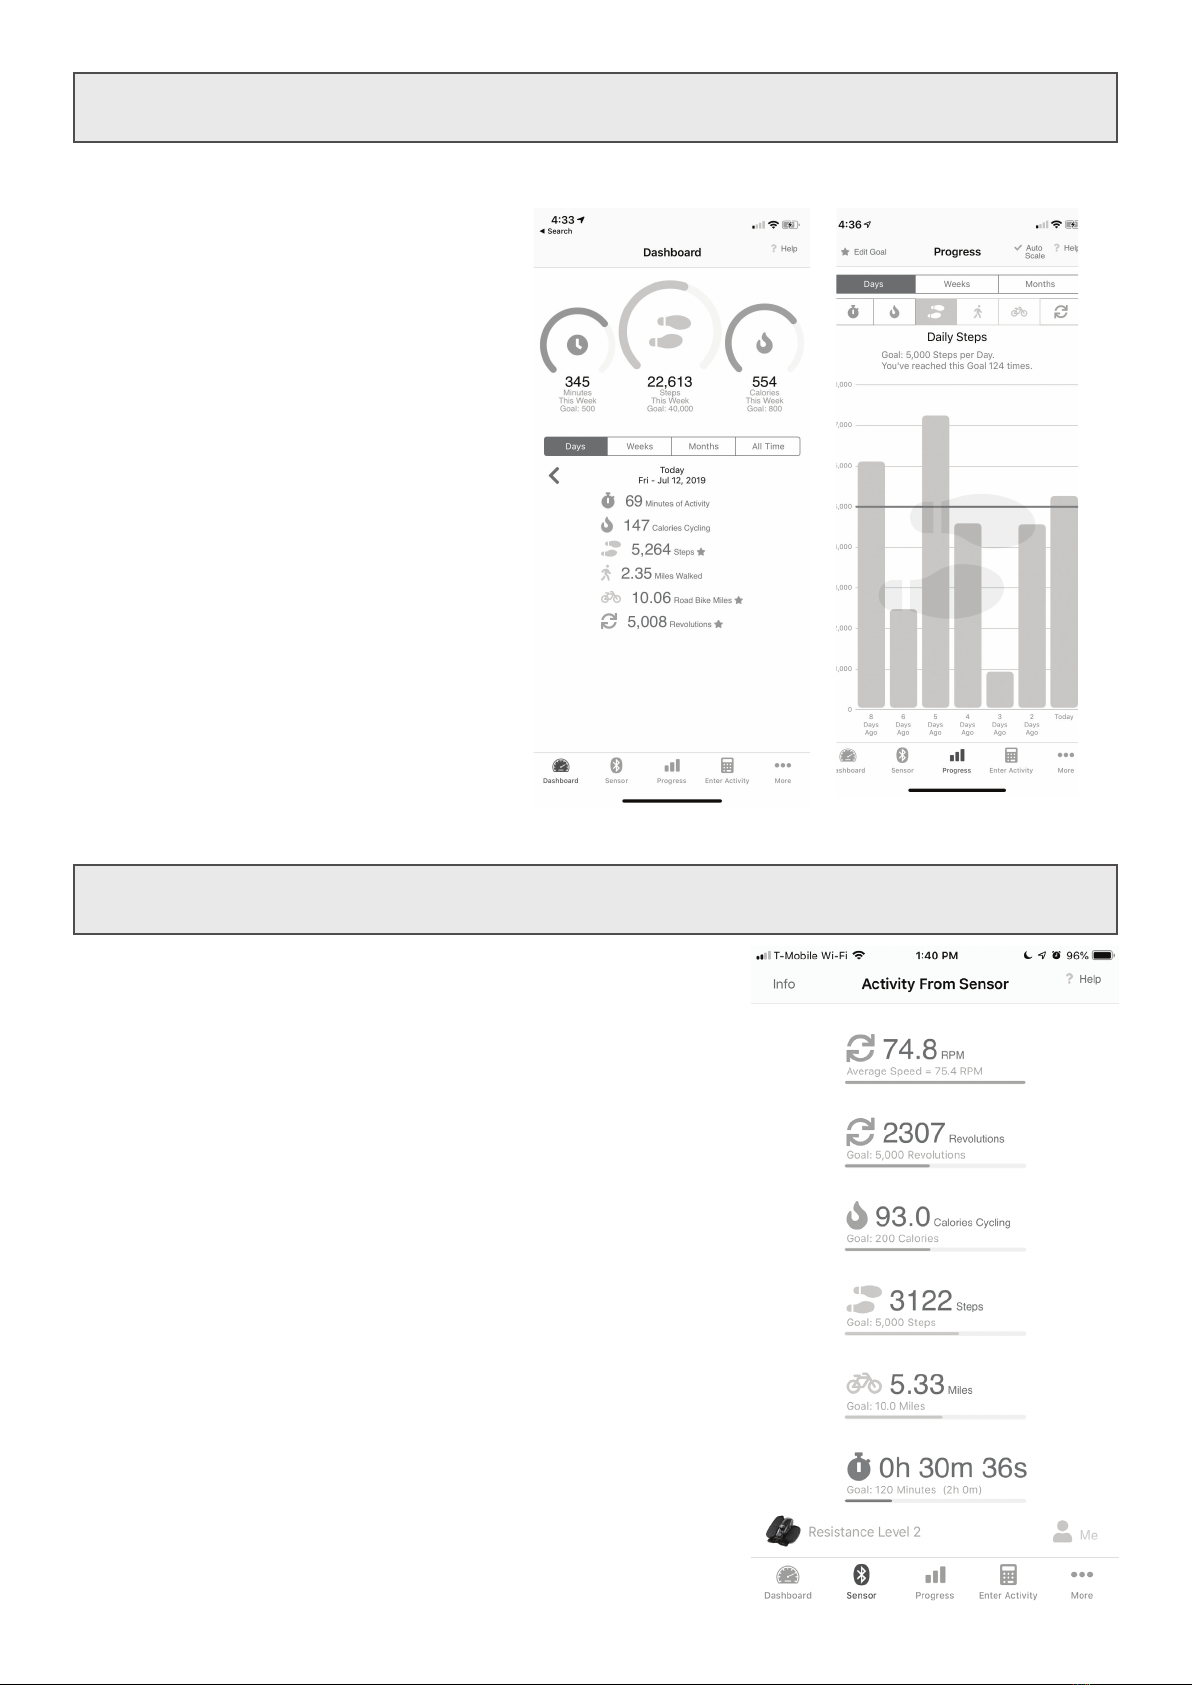
CAL (Calories)
When an arrow points to CAL, the bottom number
displays an estimate of the number of calories burned
since the display was last reset. For a more accurate
calorie estimate, use the online software or our iPhone
app. See the next two pages.
TIME (Minutes and Seconds)
When an arrow points to TIME, the bottom number displays the total number of minutes and seconds
you’ve used the bike since the display was last reset.
DIST (Distance)
When an arrow points to DIST, the bottom number
displays an estimate of the total number of miles you’ve
pedaled since the display was last reset. For a more
accurate distance estimate, use the online software or our
iPhone app. See the next two pages.
ODO (Odometer)
When an arrow points to ODO, the bottom number displays an estimate of the total number of miles
you’ve pedaled. Note that ODO is not resettable. It’s like the odometer on your car. For a more
accurate distance estimate, use the online software or our iPhone app. See the next two pages.
RPM (Revolutions Per Minute)
When an arrow points to RPM, the bottom number displays your average pedal speed in Revolutions
Per Minute.
SCAN (Cycle Through All Values)
SCAN is special. If an arrow points to SCAN, the bottom number will change what is displayed every 5
seconds. A second arrow will point to the value that is currently being displayed.

7
Free Online Calorie Calculator / Logger
Results
The Calorie Calculator provides the following results:
• Calories burned
• Equivalent Footsteps
• Equivalent Distance walked
• Equivalent Miles Ridden on a road bike
• Revolutions, RPM and Pedal Strokes
• Power, Torque and Force
Activity Logging
After you calculate the calories above, simply press the Save
Results to My Account button to log your results to the server.
Viewing Your Progress
You can view your progress for any Day, Week and month
that you logged your activity.
Save Footsteps to your Fitbit® Account
Your equivalent footstep count can be automatically
uploaded to your Fitbit® account.
A Much more Accurate Calorie, Speed and Distance
Estimate
Only very expensive ergometers measure power. Power
measurement is required for a decent Calorie speed and
distance estimate. However most true ergometers don’t take
into account the physical characteristics of the person using the
bike. Without these, the Calorie estimate can be o by more
than 100%.
Our online Calorie Calculator calculates the power and includes
the persons physical characteristics to improve the Calorie
estimate.
The Calorie Calculator and Logger is free and is located at
DeskCycle.com/calorie-calculator.

8
Optional Bluetooth Sensor for iPhone App
Automatically Logs your Activity
When used with the iPhone app your activity will be
automatically uploaded to your account. Your Fitbit and Apple
Health accounts are also updated if they are enabled.
Real-Time Display
The real-time display (shown on the right) keeps track of your
sensor activity for the current day.
There are six results displayed. Each result is congurable. There
are 14 dierent values to choose from. You can also hide any of
the results.
Goal Progress Bar
Some of the results can have a goal associated with them. In
this case if the goal is set, a progress bar will be displayed below
the result.
The Bluetooth sensor is available at DeskCycle.com.
iPhone App Features
The iPhone app has more features than
the online Calorie Calculator. Search for
DeskCycle in the App Store.
Features:
• View 18 dierent progress graphs
• Set up to 18 dierent goals
• Keep track of your favorite 3 goals on
the Dashboard.
• View your activity for any Day, Week or
Month that you’ve used the bike.
• Upload your activity to your Fitbit®
account.
• Upload your activity to your Apple
Health® account
You can enter data manually or you can
get the optional Bluetooth® sensor to
automatically log your activity for you.
Free iPhone App

9
Optional Sit-Brake Casters
Sit-Brake Casters
If using the DeskCycle on a smooth oor with wheels on your chair, it may
roll away from the bike. If your chair doesn’t already have them you can get
locking casters for your chair and lock the wheels when you use the bike.
An alternative is to replace the casters on your chair with sit-brake casters.
These keep your chair in place when you are sitting down, and allow the
chair to roll when you are not sitting on your chair. These are available at
DeskCycle.com.
Full One Year Warranty
We stand behind our products. The DeskCycle and its accessories are covered by a full one-year
warranty on all parts and labor. This warranty is for US customers only. Outside of the US, the
warranty depends on your local distributor. The support contact link for your country can be found on
the Contact Us page at DeskCycle.com.
What Is Covered?
We warrant the DeskCycle against defects in material or workmanship for a full year from the date of
purchase.
• Parts: All parts are covered under this warranty.
• Labor: All labor is covered under this warranty.
• Shipping: All shipping is covered by this warranty.
What Is Not Covered?
This warranty does not cover damage caused by neglect, abuse or misuse.
How do I get Service?
Contact us through 3DInnovations.com, DeskCycle.com or contact the store that you purchased it
from.
No Need to Register for the Warranty
We don’t put our customers through the hassle of registering for their warranty. If you purchased the
bike in the US and use it in the US, you are automatically covered.
Care and Maintenance
Care
Do not stand on the pedals! The DeskCycle was not designed to be used while standing.
Maintenance
The DeskCycle requires no maintenance.
Support
For answers and support go to DeskCycle.com.

®
3DInnovations.com
© 2019 3D Innovations, LLC
All Rights Reserved
Table of contents
Other 3D innovations Exercise Bike manuals
Popular Exercise Bike manuals by other brands

Orbit Fitness
Orbit Fitness BM-3253 owner's manual

CAPITAL SPORTS
CAPITAL SPORTS Strike Bike manual

Domyos
Domyos VM150 EDITION operating instructions

Spirit
Spirit Johnny G JB950 CONSOLE OPERATION

SCIFIT
SCIFIT ISO1000R User's operation manual

Stages cycling
Stages cycling StagesBike Assembly and Start Up Guide