3G Audio KO2300 User manual

KO2300
备注:
1、说明书实物为12页,普通书写纸打印,骑马钉装订,
DSP Karaoke Power Amplifier
Karaoke series
User Manual English
英文说明书
卡拉OK功放
É
Éş
ɲ
×
ÉČĆ
°± µ1 12
ÎŁÍŁ
±
Č»ÓË
103.05.0009.00832
三基/3GAudio/KO2300
C
OEE12-D0197

1
Attention
Thank you for your patronage of our products. Please read through this user manual to ensure you know
how to use this device properly.
After you have read this manual, please keep it in a safe place for future references.
High voltage inside, please do not open the cover and contact professionals for maintenance;
Please do not place the device in the rain or humid places;
The device must work in a well-ventilated environment;
Please note the local power supply must be consistent with the voltage of the device;
Unplug the power plug when unused for a long time;
Please follow the instructions stated in this user manual when matching the load of the device, do not let
the device run in overload for long time.
Before this device is connected to the power outlet, please first determine the local power grid voltage is
the same as the voltage indication behind the rear plate of this device. When connecting the device to the
power socket, make sure the socket and the power cord are not damaged. Please pull out the power plug
after turning off the power.

2
性能指标
Contents
Introduction 3
3
4
5
Features
Signal cables
Rear/front panel instruction
Remote control instruction
Installation Method 6
6
Pre-connection
System connection
Usage 7
Method of use
Performance Indicators 8
Performance indicators
Additional Instructions 10
Safety use

3
Introduction
This chapter describes the characteristics of the amplifier
Please read the user manual in detail before using this device, and preserve the user manual for future references.
Characteristics
Thank you for choosing our comprehensive karaoke power amplifier, this product condensed the valuable
design concept of our company in the field of professional power amplifiers and karaoke processors for
over 20 years. With excellent audio performance, special vocal processing technology, and high reliability
to ensure the quality of this product.
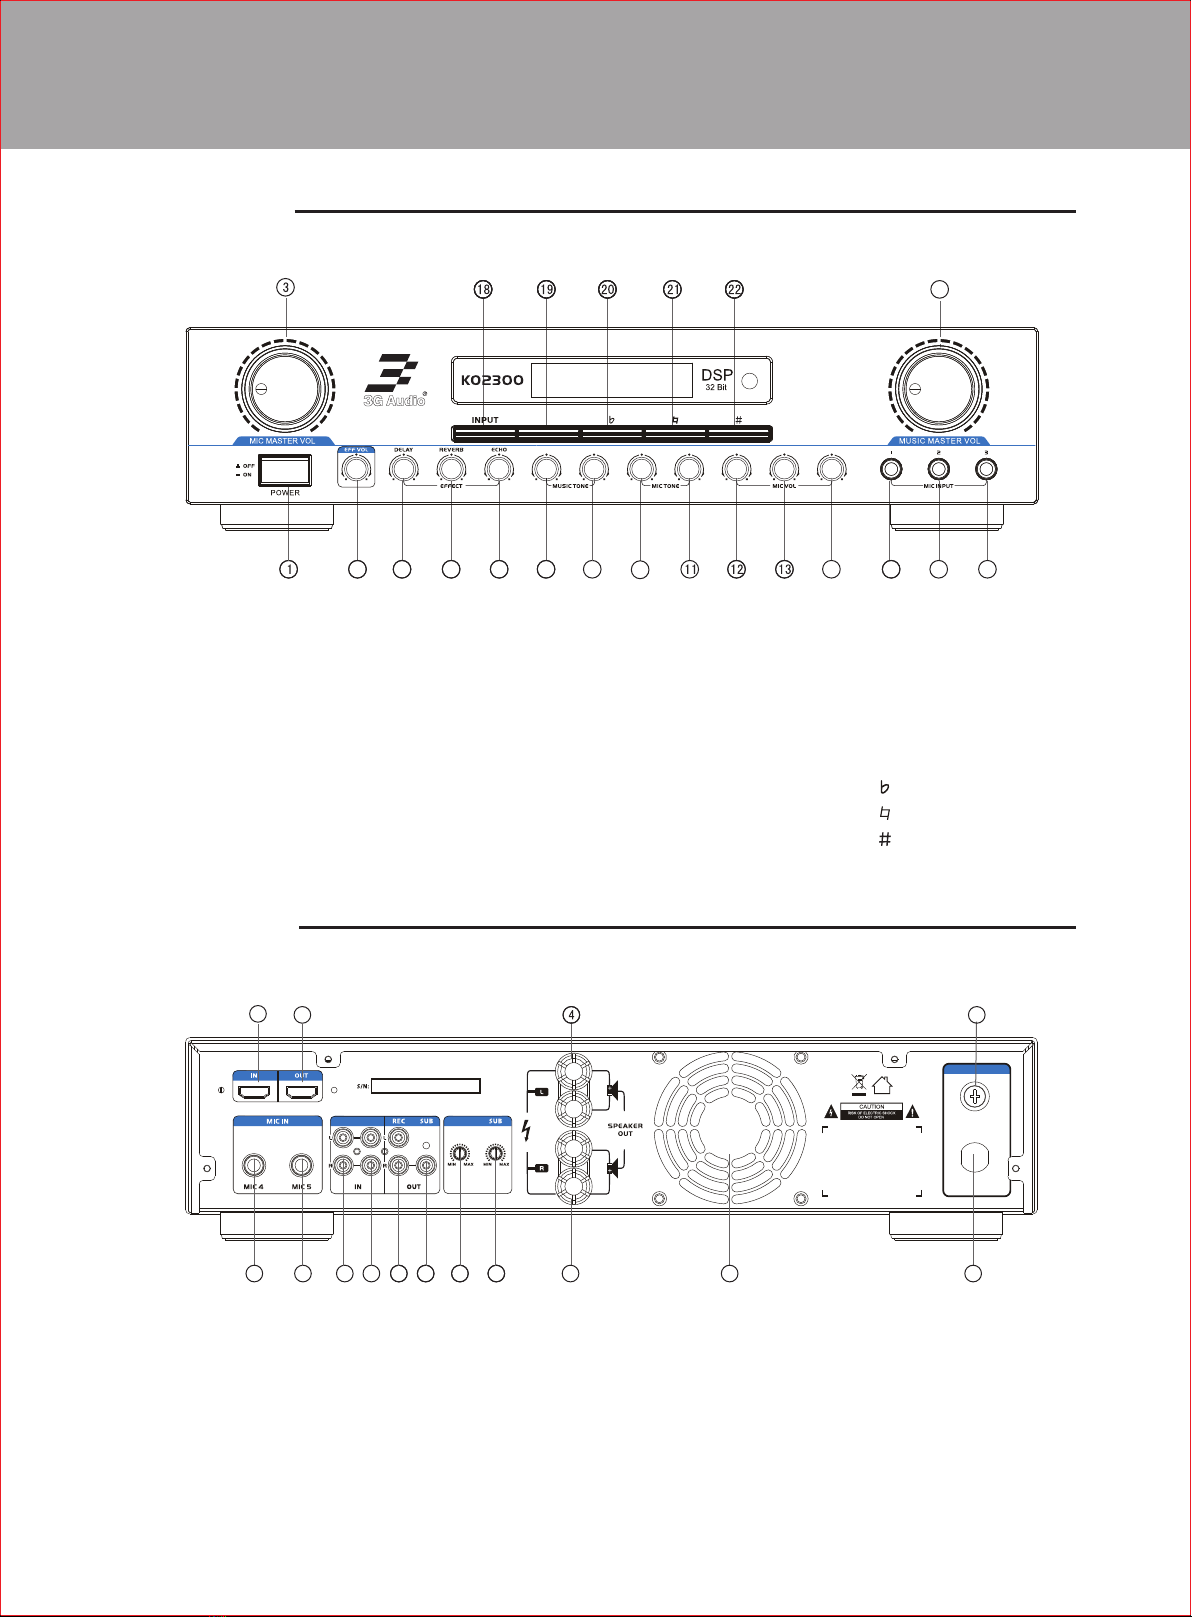
Audio processing uses the 32bit high-performance dual core DSP processor;
The parametric equalization is adjustable through the music channels, with high and low two tones;
The parametric equalization is adjustable through the microphone channels, with high and low two tones;
Microphones have four levels of feedback suppression, including vocal excitement, virtual surround sound,
and other features;
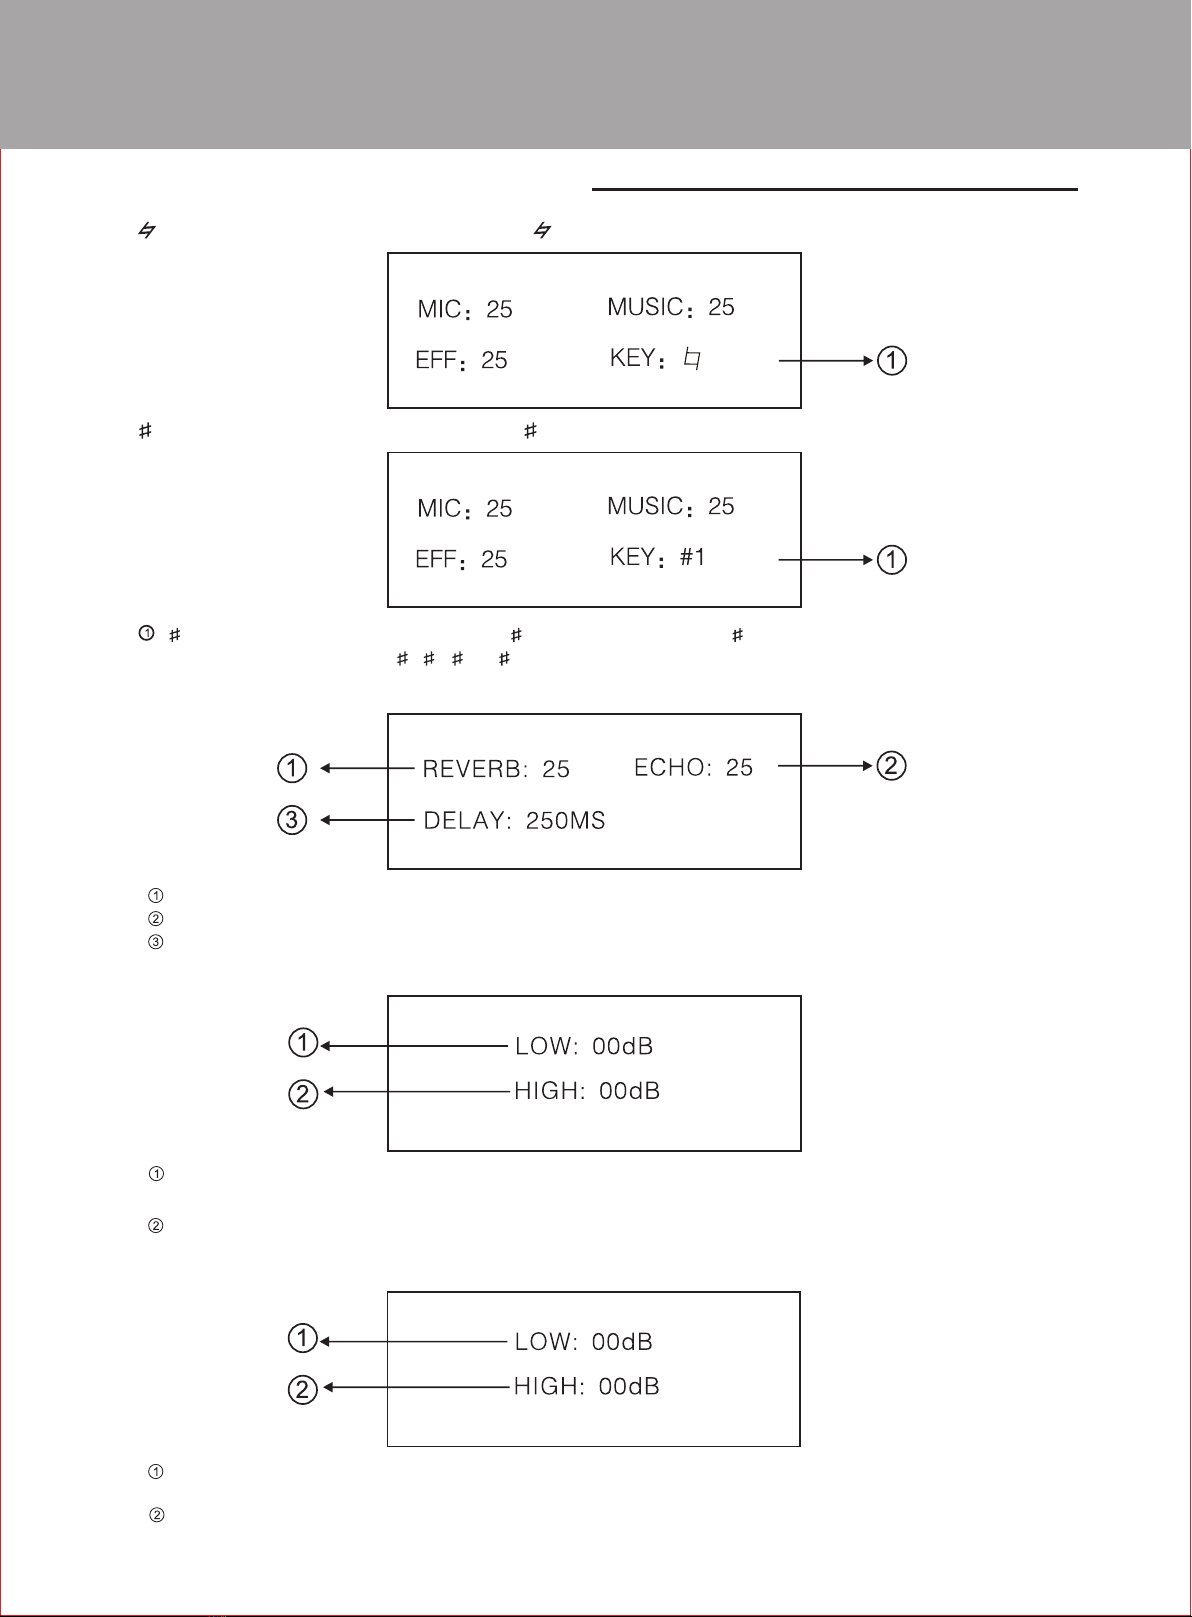
Microphones have adjustable audio effects: delay, reverb, echo;
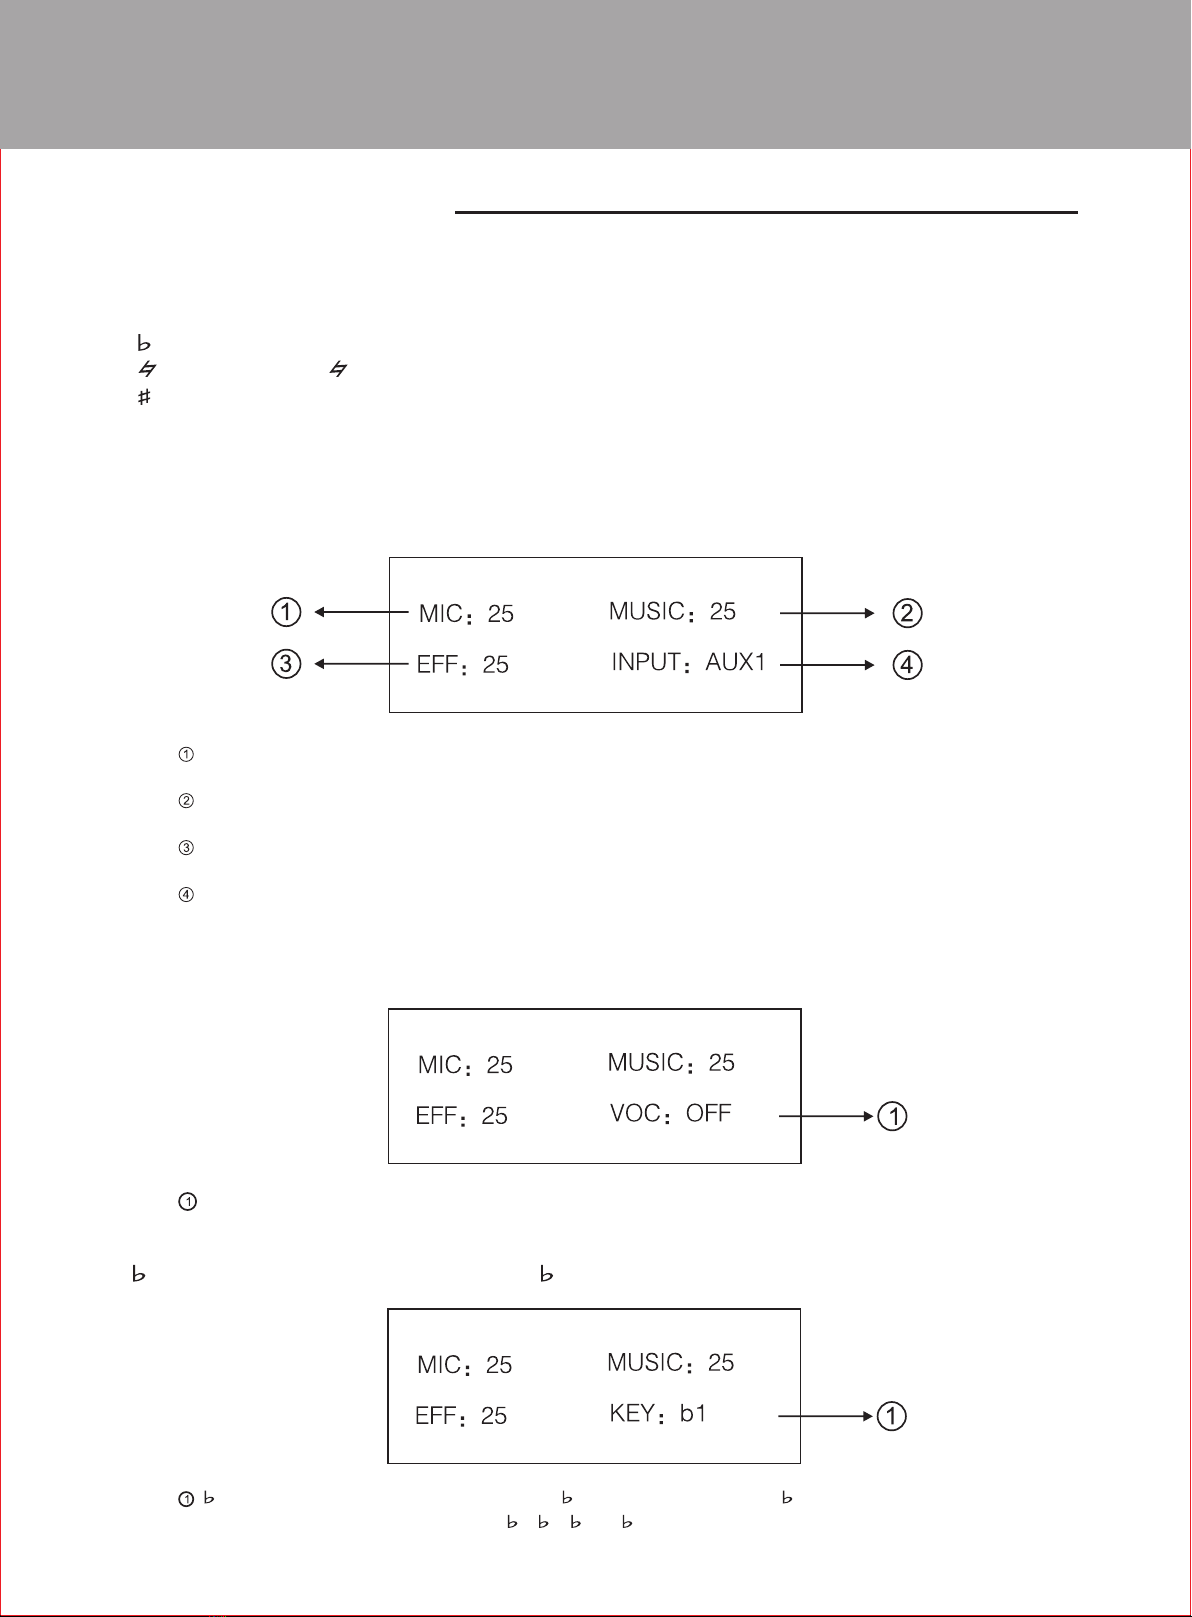
Music has adjustable audio effects: original sound elimination; key modulation has four rising mode: #1, #2,
#3, and #4, and original key; four decreasing modeb1, b2, b3, and b4;
Multifunctional input and output Supports PCM.
The power supply of the amplifier adopts active power factor correction technology to achieve
higher power factor and wide operating voltage range;
The amplifier module uses the Class D amplification technology, its small in size and lightweight;
Comprehensive protective functions: patented adaptive temperature management system, power
over-voltage/ under-voltage/ over-current protection, power inrush current limit, power release shutdown
noise suppression, output short-circuit, direct current protection, and others.
Signal Cables
Red
White
When connecting the RCA plug, make sure to
insert the red plug in the red socket, and insert
the white plug in the white socket.

4
1
2
9
10
8 11 12
13 14
17
16
15 4 5
6
7
21
18
19
22 20
AUX 1 AUX 2
AC IN: 220-240Vˇ
50Hz 90W
AUX
FUSE :T 6.3AH
5
6
7
8 9
10
11
12 3
15
1
2
14
13
4
MIC 1/5 MIC 2/4 MIC 3
S T E R E O M I X I N G K A R AO K E A M P L I F I E R
LOW L O W
H I G H H I G H
VOCAL CANCEL
Various Parts and Their Functions
Introduction of the rear/front panel and its functions
Front Panel
8. Music parametric equalization low tone
9. Music parametric equalization high tone
10. Microphone parametric equalization
low tone
11. Microphone parametric
equalization high tone
12. MIC 1/5 volume
13. MIC 2/4 volume
14. MIC 3 volume
15. MIC 1 input
16. MIC 2 input
17. MIC 3 input
18. Input selection
19. Vocal cancellation
20. Lower key
21. Original key
22. Raise key
1. Power switch
2. Music master volume
3. Microphone master
4. Microphone effects
volume
5. Delay
6. Reverb
7. Echo
Rear Panel
1. Power cable
2. Fuse holder
3. Right channel speaker output
4. Left channel speaker output
5. SUB output volume
6. AUX input volume
7. SUB output
8. REC output
9. AUX2 input
10. AUX1 input
11. MIC 5 input
12. MIC 4 input
13. Multifunctional input
14. Multifunctional output
15. Heat vent

1. Mute
2. Lower key
3. Increase MIC volume
4. Decrease MIC volume
5. Vocal cancellation
6. Input selection
7. Original key
8. Raise key
9. Increase music volume
10. Decrease music volume
机后面板
10
1 6
5
7
2 8
3 9
4
5
Various Parts and Their Functions
Remote Control Instruction
Introduction of Remote Control Functions

6
Connection
Pre-connection
Speaker cable connection
1. Turn the bolt on the binding post counterclockwise,
and insert the wire into the hole from the side.
2. Turn the bolt on the binding post clockwise to
tighten the wire.
Before connecting, select the appropriate speaker cable and connect the speaker from the shortest distance.
This device provides the connection of a set of speakers. Pay attention to whether the phase is correct,
if the cables are not connected correctly, the sound quality will become unnatural and it will lack low
frequency.
Attention: The end of the cord cannot touch its
neighboring cord.
System Connection
TV
Channel 1 Channel 2 Recording or sound
reinforcement device
Sound reinforcement
device
FUSE :T 6. 3AH
AC IN: 220-240Vˇ
50Hz 90W

Input selection: audio input mode selection can be selected between channel 1/channel 2/multifunctional.
Voice cancellation: select on or off.
Key lowering: select between four modes: b1, b2, b3, and b4.
Original key: select original key.
Key rising: select between four modes: #1, #2, #3, and #4.
7
Method of Use
Panel Features Description
1.Buttons and their basic definitions
2.Operation Interface Description
Main interface menu: displays the statuses of all main features of the system, this interface will be displayed when
the device is turned on, and all submenus that are unused for 10 seconds will return to this main interface.
MIC master volume: displays the current master volume of the microphone, adjust the volume by turning
the MIC master volume knob, volume range is 00-50 .
Music master volume: displays the current master volume of music playing, adjust the volume by turning
the MUSIC master volume knob, volume range is 00-50 .
Effect master volume: displays the current master volume of microphone effects, adjust the volume by
turning the EFFECT master volume knob, volume range is 00-50 .
Input selection: displays the current input mode for the audio source, lightly press the INPUT
button on the panel to select the audio source.
Voice cancellation main menu: lightly press the Voice Cancellation button on the panel to display
the interface.
Voice cancellation selection: displays the current voice cancellation mode: lightly press the Voice
Cancellation button on the panel to turn on or turn off the mode.
Key lowering main menu: lightly press the Lower Key button on the panel to display the interface.
Key lowering selection: displays the current 1 mode, lightly press the button on the panel to select
between the four key changing modes: 1, 2, 3, or 4.

8
Method of Use
Front Panel Features Description
Original key main menu: lightly press the Original Key button on the panel to display the interface.
Key raising main menu: lightly press the Key Raising button on the panel to display the interface.
Key raising selection: displays the current 1 mode, lightly press the button on the panel to select between
the four key changing modes: 1, 2, 3, or 4.
Microphone effects main menu: to display this interface, turn the delay , reverb , and echo knobs.
Reverb: adjust the reverb volume by turning the REVERB knob, volume range is 00-50 .
Echo: adjust the echo volume by turning the ECHO knob, volume range is 00-50 .
Delay: adjust the delay volume by turning the DELAY knob, time range is 000-500MS .
usic parametric EQ main menu: turn the LOW FREQUENCY and the HIGH FREQUENCY knobs to
display this interface.
Low frequency: adjust the low frequency parametric EQ by turning the LOW FREQUENCY knob,
parametric EQ range is -12dB-+12dB.
High frequency: adjust the high frequency parametric EQ by turning the HIGH FREQUENCY knob,
parametric EQ range is -12dB-+12dB.
Microphone parametric EQ main menu: turn the LOW FREQUENCY and HIGH FREQUENCY
knobs to display this interface.
Low frequency: adjust the low frequency parametric EQ by turning the LOW FREQUENCY knob, parametric EQ range
is -12dB-+12dB.
High frequency: adjust the high frequency parametric EQ by turning the HIGH FREQUENCY knob, parametric EQ
range is -12dB-+12dB.

9
Performance Indicators
Performance Indicator Description
Model
Rated Power
Rated Source EMF
SNR
THD
Frequency Response
Resolution
Intermodulation
Distortion
Input Impedance
Power Supply
Requirements
Environment
Tempurature
Net Weight
Dimensions
KO2300
300W
L
R
MIC1-5
MIC1-5
AUX1
AUX1
AUX2
AUX2
300W
20mv
260mv
260mv
85dB
90dB
90dB
<0.03% @8¦,20Hz-20kHz
<0.05% @8¦,60Hz/7kHz 4:1
20 Hz-20 kHz (0.5dB)
>75dB 1kHz @8¦Rated Power
Unbalanced Input >10k¦ Balanced Input >20k¦
AC 220-240V 50Hz
5.7kg
430mm334mm89mm
Operating temperature -10Ў~40Ў
Storage and transportation temperature -25Ў~80Ў

10
Additional Instructions
Technical Specifications/Attachments/Maintenance
Safety Regulations
Abnormal Phenomena
Please turn off the power and pull out the cord if the device has
any unusual sound or smell during operation.
Power Cord Protection
Power plug contact and separation sock must be handled
properly. Do not touch the power cord with wet hands to avoid
electric shock. Do not put the power cord in crowded places.
Keep away from water and sundries
Do not drop in or place metal materials on the device, such
as nails, metal coil, or flammable materials, or else it would
cause the risk of fire hazard or electric shock. Do not spill
water on the amplifier. Do not place any liquid containers
on the amplifier.
Do not open the cover of the device
High pressure inside the device, do not open
the cover without professional guidance.
If unused for a long time
For safety reasons, unplug the power plug
to prevent the risk of fire hazard.

DSP Karaoke Power Amplifier
Other 3G Audio Karaoke System manuals
Popular Karaoke System manuals by other brands

Marantz
Marantz PM580A Service manual

808 Audio Singsation
808 Audio Singsation SPKA10 Quick start up guide

The Singing Machine
The Singing Machine iSM-1028 N instruction manual

The Singing Machine
The Singing Machine STVG-520 instruction manual

Tiger
Tiger Karaoke Player Instruction

The Singing Machine
The Singing Machine STVG-519 instruction manual