3nStar TR0702A User manual

!
!
I!
Reference
Manual
New 3NSTAR RUGGED TABLE®
PADSeries Data Collection Terminal
New 3NSTAR RUGGED TABLEproduct user
manual
!!!!!!!!!!!!!!!!!!!!!!Version 1.0

!
!
I
I!
Directory
1!Chapter one Usage notes!.....................................................................................................!1!
1.1!Attentions of laser scan engine!.....................................................................................!1!
1.2!Safety notice!.................................................................................................................!1!
1.3!Maintenance notice!.......................................................................................................!1!
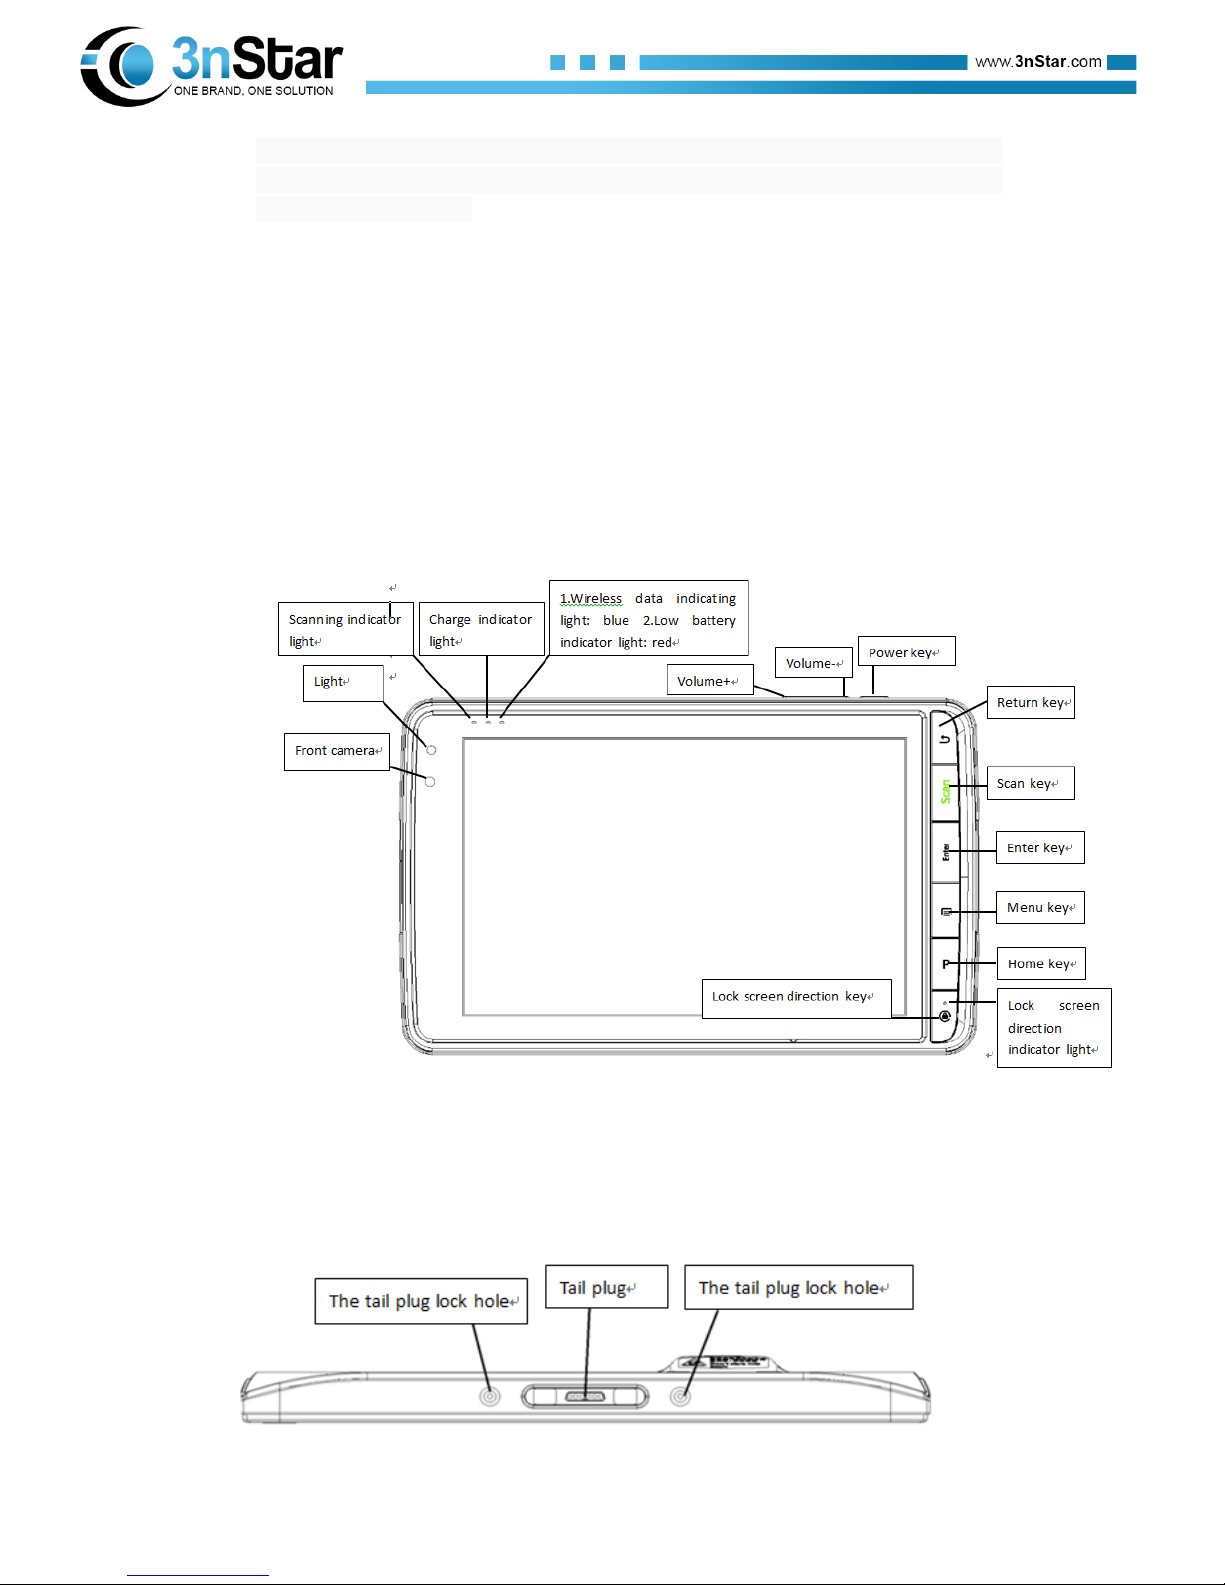
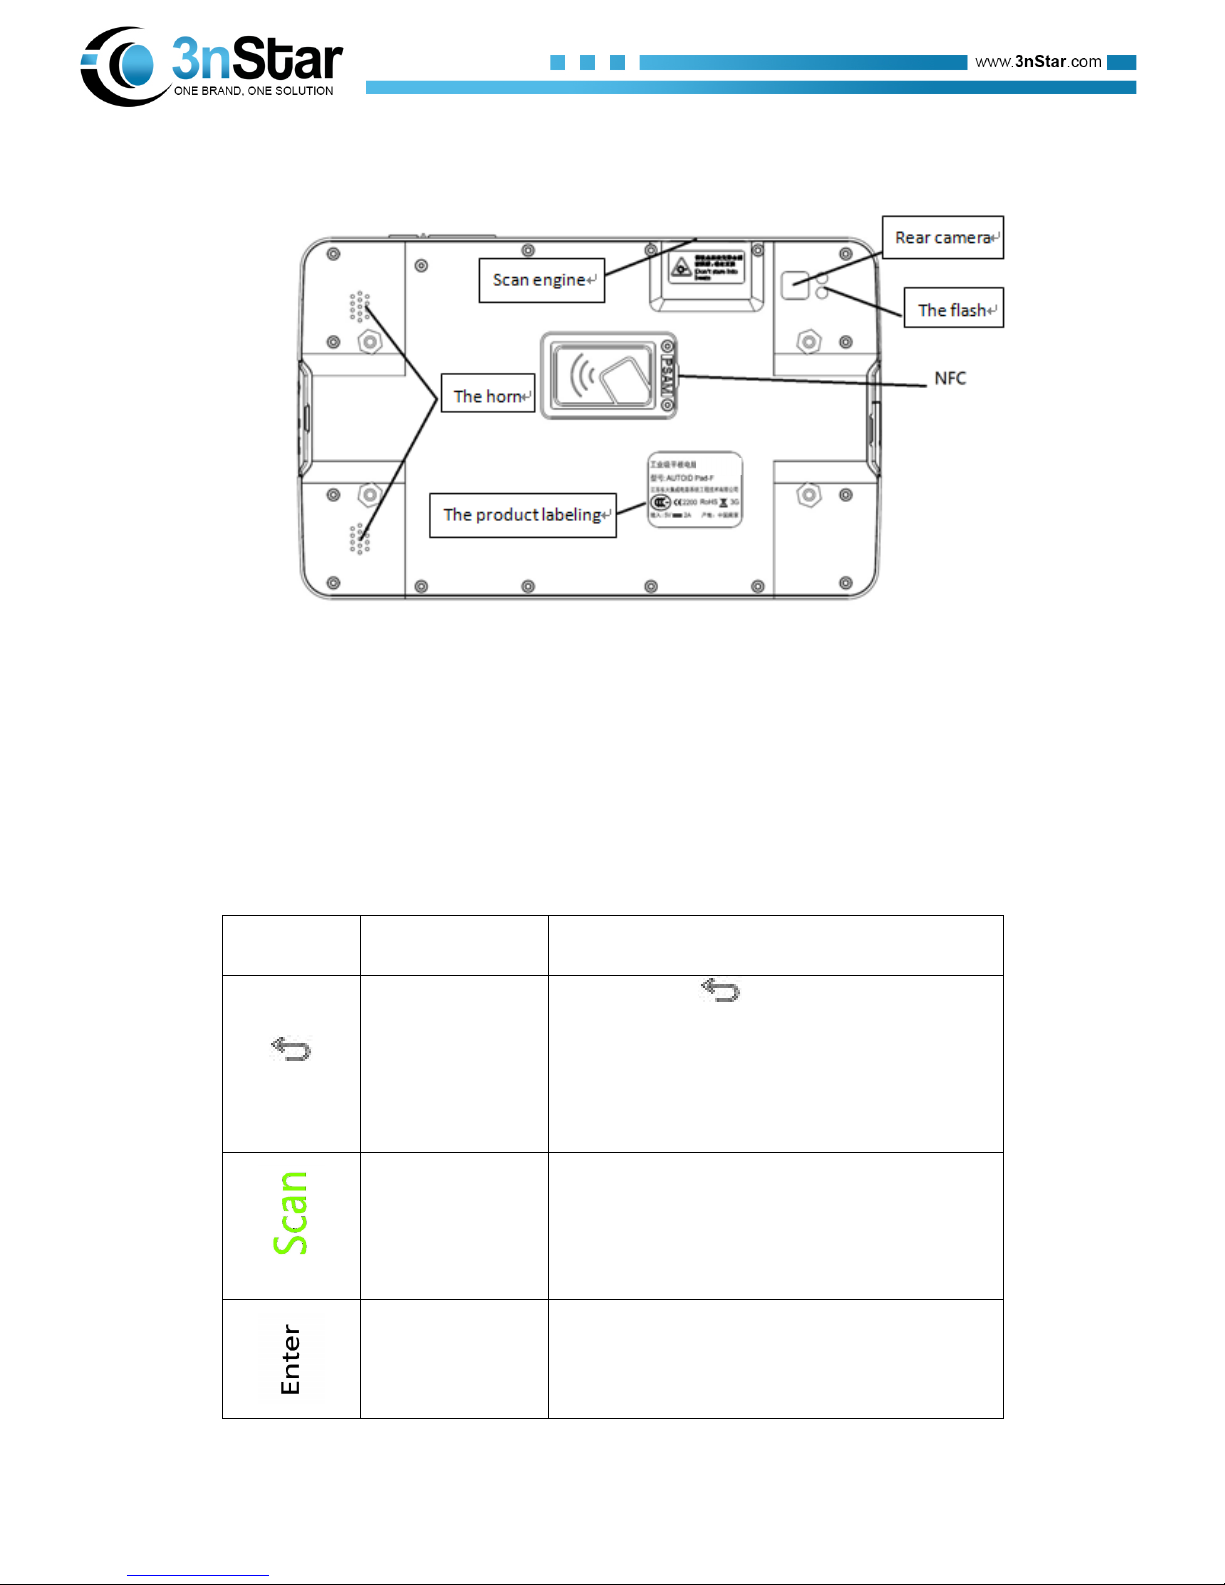
2!Chapter two Appearance instructions !................................................................................!2!
3!Chapter three Keyboard!.......................................................................................................!3!
4!Chapter four Quick use!........................................................................................................!4!
4.1!First time!.......................................................................................................................!4!
4.2!Start up!..........................................................................................................................!5!
4.3!Turn off your machine!..................................................................................................!5!
4.4!Restart!...........................................................................................................................!5!
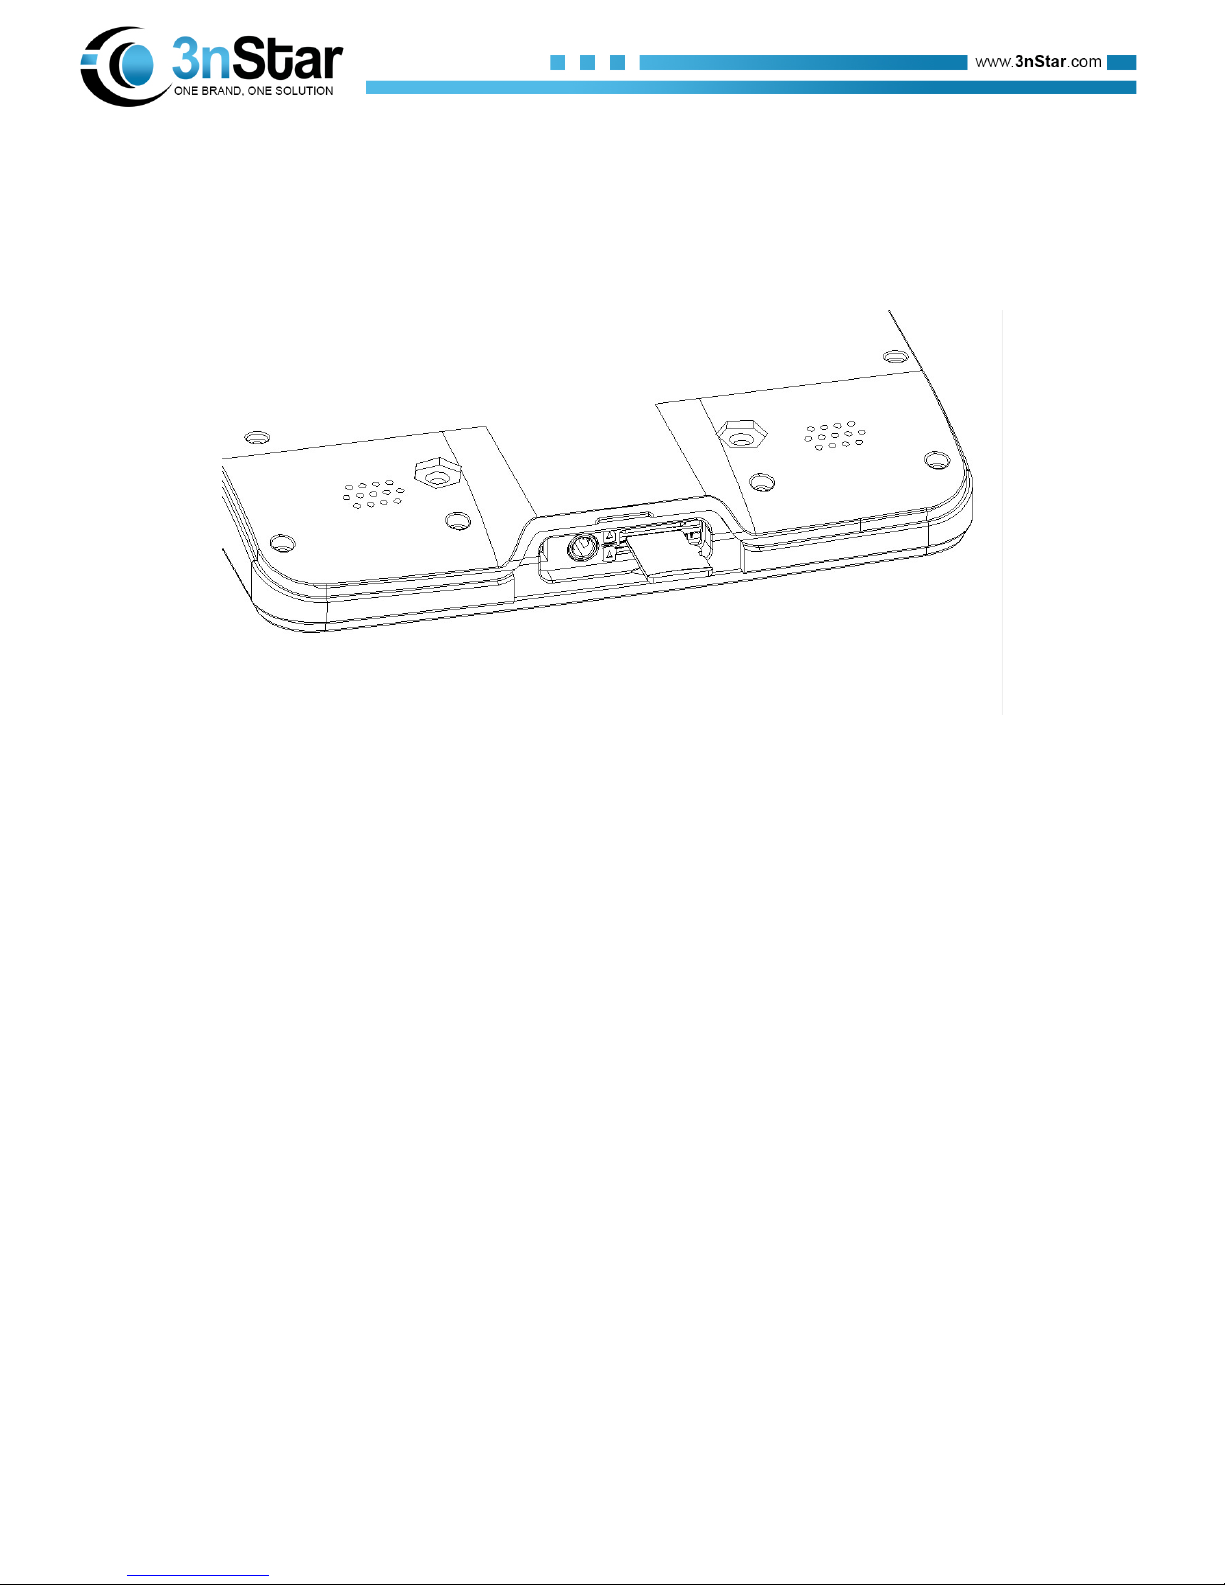
4.5!Install SIM card!............................................................................................................!5!
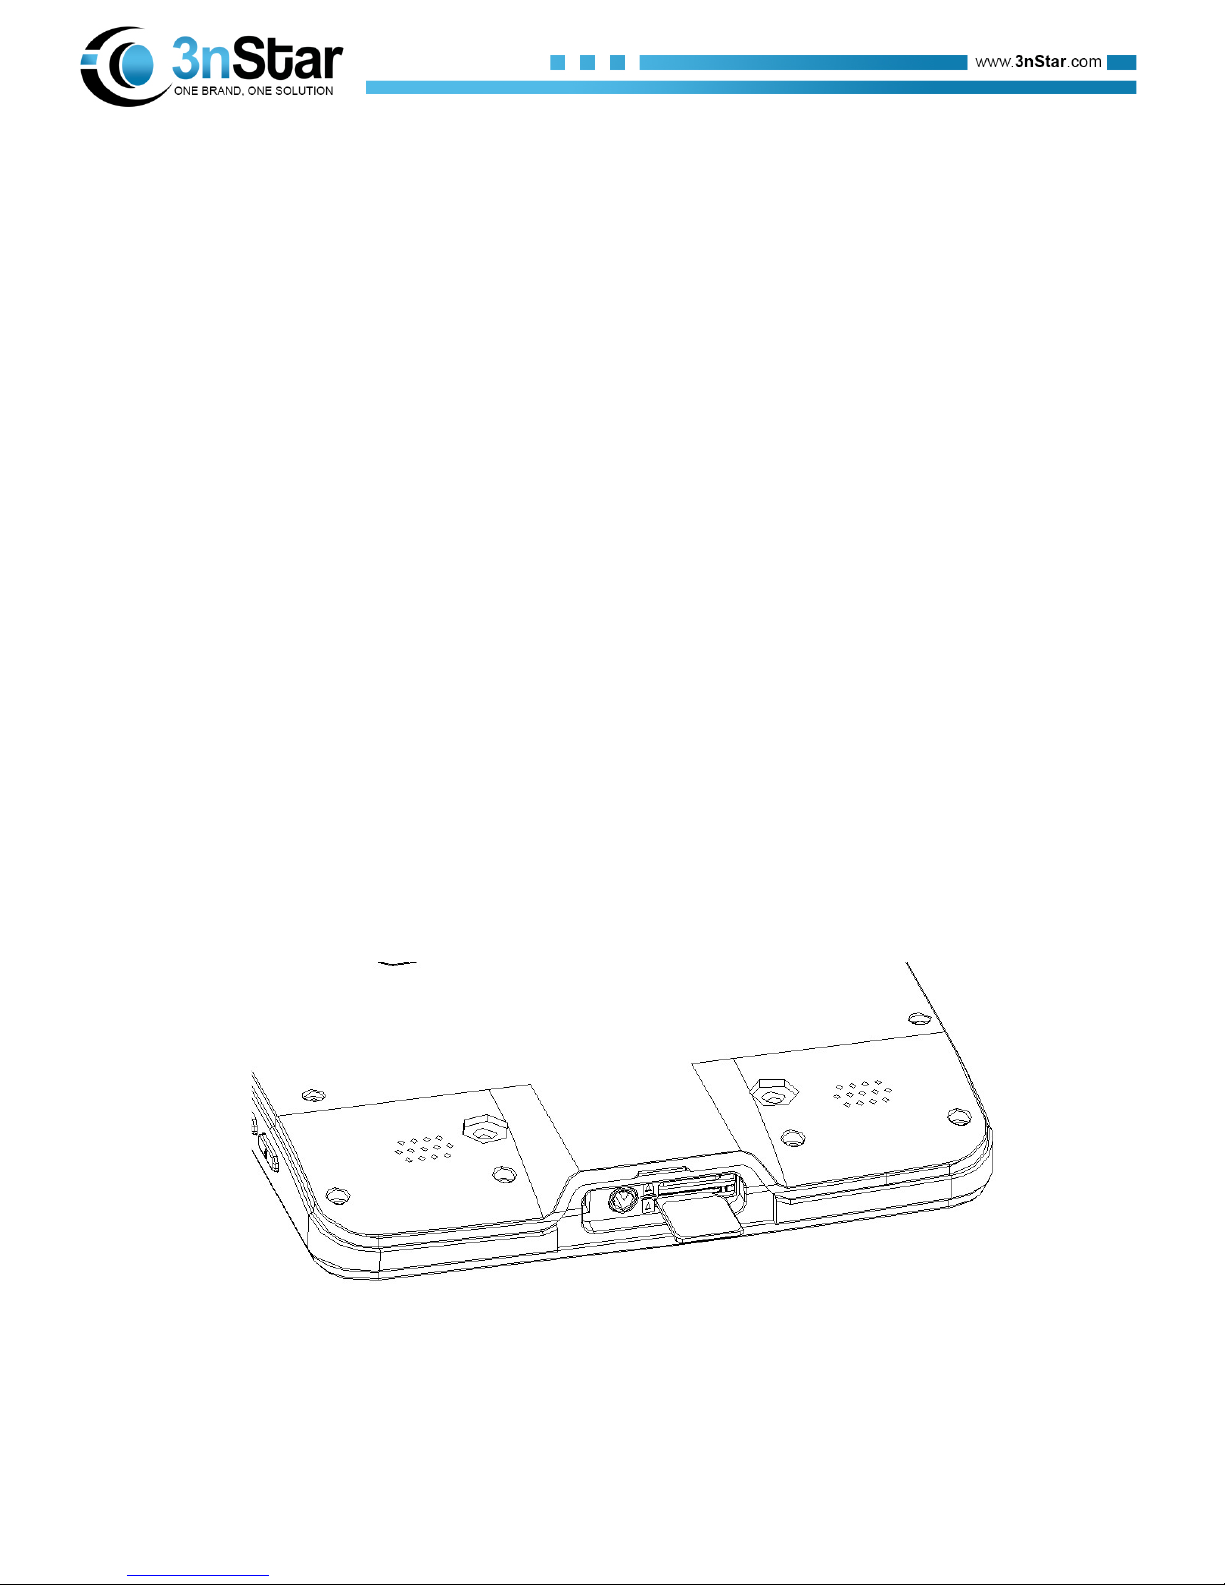
4.6!Install SD card!..............................................................................................................!6!
5!Chapter five Charger!...........................................................................................................!7!
5.1!Charging time!...............................................................................................................!7!
5.2!Charging temperature!...................................................................................................!7!
5.3!Battery power supply!....................................................................................................!7!
5.4!Attentions for using batteries!........................................................................................!7!
5.5!LED indicator lamp!......................................................................................................!8!
6!Chapter six Main screen!......................................................................................................!9!
6.1!Status bar icon!..............................................................................................................!9!
7!Chapter seven Set up!...........................................................................................................!10!
7.1!WLAN!........................................................................................................................!10!
7.2!Bluetooth!....................................................................................................................!17!
7.3!Flow usage!..................................................................................................................!20!
7.4!More!...........................................................................................................................!21!
7.4.1!Airplane mode!................................................................................................!22!
7.4.2!VPN!................................................................................................................!22!
7.4.3!NFC!................................................................................................................!23!
7.4.4!Portable hot spot!.............................................................................................!24!
7.4.5!Mobile Data!....................................................................................................!25!
7.5!Buttons!........................................................................................................................!26!
7.6!Home screen!...............................................................................................................!27!
7.7!Status bar!....................................................................................................................!28!
7.8!Display!........................................................................................................................!29!
7.9!Prompt note and notification!.......................................................................................!32!
7.10!Storage!........................................................................................................................!32!
7.11!Battery!........................................................................................................................!33!
7.12!Application!.................................................................................................................!34!
7.13!System profiles!...........................................................................................................!35!
7.14!Location!......................................................................................................................!37!
7.15!Security!.......................................................................................................................!37!

!
!
I
I
7.16!Accounts!.....................................................................................................................!38!
7.17!Language and input method!........................................................................................!39!
7.18!Backup &reset!............................................................................................................!40!
7.19!Date and time!..............................................................................................................!40!
7.20!Scheduled power on and off!.......................................................................................!41!
7.21!Accessibility!...............................................................................................................!42!
7.22!Developer!...................................................................................................................!42!
7.23!About phone!...............................................................................................................!43!
8!Chapter eight Typical application!......................................................................................!46!
8.1!Scan tool!.....................................................................................................................!46!
8.2!Import APK automatically!..........................................................................................!50!
8.3!System upgrade!...........................................................................................................!52!
8.4!Mobile Butler!..............................................................................................................!54!
8.5!Hot key settings!..........................................................................................................!60!
8.6!Quick configuration!....................................................................................................!63!
8.6.1!Import!.............................................................................................................!64!
8.6.2!Export!.............................................................................................................!67!
8.6.3!User configuration!..........................................................................................!69!
8.7!Feature Settings!..........................................................................................................!70!
8.7.1!Prohibit drop-down menu!...............................................................................!70!
8.7.2!Disable HOME Key!........................................................................................!71!
8.7.3!Restart does not allow unknown sources!........................................................!71!
8.8!Certificate Whitelist!....................................................................................................!71!
9!Chapter nine Troubleshooting!................................................................................................!74!

!
!
1!
1 Chapter one Usage notes
1.1 Attentions of laser scan engine
Laser radiation, please do not look directly at the laser
beam.
1.2 Safety notice
§Your devices can only use the battery and charger specified by the company. Any
other products may cause the battery leakage, overheating, burst and fire.
§Charger short circuit is forbidden, otherwise it will cause electric shock, smoke
and charger damage.
§Please do not use the charger when it is damaged in case of power line, otherwise
it will cause fire and electric shock.
§Please do not disassemble or modify the charger, otherwise it will lead to personal
injury, electric shock, fire and charger damage.
§Seize the charger when pull the plug, pull the power cord will damage the power
line, causing electric shock and fire.
§Clean equipment, batteries and chargers with a soft dry cloth.
§Please do not use alcohol, thinner, benzene or other solution to wipe the device.
1.3 Maintenance notice
§This product is waterproof and dust proof, but it still should be kept away from
operating in the environment of extremely high or low temperature. Please refer to
the product specifications of the temperature and humidity standards.
§Press the screen hard may damage it. Please do not use resistive screen touching
pan to avoid the scratch or damage to the screen. To clean the screen, please send
a small amount of the commercial LCD spray cleaner on a soft cloth instead of
spraying cleaner directly on the screen.
§Do not use any chemical cleaning agent to clean the LCD screen.
§Keep the scanning window form clean, stay away from sharp objects.

!
!
2!
§For a long time not to use this product, please be sure to download the data to the
computer store, and remove the battery. Please separate machine and battery
packaging after storage.
§The battery will take a long time to compete the charge when it is the first time to
work or recovery from storage.
§In case of machine failure, please note the situation and information and contact
with maintenance.
2Chapter) two) Appearance) instructions)
)
2-1 front view

!
!
3!
Picture2-2 side view
Picture2-3 back view
3Chapter three Keyboard
The new 3nStar Rugged Tablet has 6 keys on the keyboard with 3 keys on the side.
Instructions:
Key
Function
Function instructions
Back key
oclick ,to return to a higher level or
exit application.
oIn the text input interface, click this
button to close the screen keyboard
Scan key
1.In general, as the scan key, scan bar code.
2.In the camera interface (comes with the camera), as
the camera button.
Enter key
1. click on this button to enter the application
2. In the camera interface (comes with the camera), as
the camera button.

!
!
4!
Menu key
1. Click this button to open the menu for the current
interface
2. Default short press this button to open / close
menu function,!long press this key to no effect.
Home key
1. Click this button to return to the main screen
2. Long press this button to open the default recently
used application switcher,!double click this button
to have no effect
Screen direction
lock key
(With indicator
light)
Click on this button, can lock the screen direction, so
that the screen cannot automatically rotate
Volume + key
Click this button to increase the volume
Volume - key
Click this button to lower the volume
Power key
1. Long press Power button to pop up the
"shutdown" and other options menu
2. In the system working state, short press Power
key, the device will enter the sleep state
3. In a dormant state, short press Power key system
will wake up and light up the screen
4Chapter four Quick use
4.1 First time
Long press the power button to start. In the system working state, short press Power
key, the device will enter the dormancy state, in the dormant state, short press Power
key system will wake up and light up the screen.

!
!
5!
4.2 Start up
Long press the power button until the device vibrates, the screen light up. In the
deep sleep mode, press the power button, can wake up the system
4.3 Turn off your machine
When the machine is turned on, long press the power button 2s under Non dormant
state, open the options menu, select the shutdown, click on the confirmation, then the
normal shutdown.
4.4 Restart
When the machine is turned on, long press the power button 2s under Non dormant
state, open the options menu, select restart, click on the confirmation, then the normal
shutdown restart.
4.5 Install SIM card
Please install the SIM card for the following instructions:
Insert the SIM card in the direction of the icon.
Picture4-1 Insert the SIM card
Note:!This device does not support hot plug SIM card,!after plugging SIM card need
to restart the machine

!
!
6!
4.6 Install SD card
Please install the SD card for the following instructions:
Insert the SD card (microSD or microSDHC) in the direction of the icon.
Picture4-2 Insert the SD card
Note : This device supports SD card hot plug

!
!
7!
5Chapter five Charger
Due to the battery in the factory has only a small amount of electricity used for test,
when you receive the machine you must charging before use. Connect the device to
the adapter for charging directly. At the same time, the New 3NSTAR RUGGED
TABLEseries also have optional base for charging.
5.1 Charging time
Battery: through the adapter, the battery’s first charge time is about 5 hours, the
LED lamp shows red represents charging, power is full when it is green.
5.2 Charging temperature
§The best operating temperature is room temperature 18~250C.
§The battery will not charge if the temperature less than-200C or more than 500C.
5.3 Battery power supply
§If you turn on the wireless network service or data acquisition program, the
battery power will be substantial loss. Please turn off these procedures to save
electricity when these functions are not required.
§In order to avoid the battery power shortage, it is recommended that you work
with a battery of electric power, or connect the external power supply.
Tip: if you do not use the product for a long time, please charge at least once every
two months.
5.4 Attentions for using batteries
§If the battery is depleted, it may not be immediately switched on, which is a
normal phenomenon. Please continue charging for a while before turning on
devices.

!
!
8!
§Batteries can be charged repeatedly, but the battery is a consumable product,
please replace a new battery if you find the device's standby time is greatly
reduced.
§Battery charging time change with temperature and battery usage, please charge at
a reasonable temperature range.
§When the battery is in low power, the device will give low - power warnings.
When the battery power is too low, the device will automatically shut down.
5.5 LED indicator lamp
§When LED indicator light is in the middle of the top right of the machine, it
indicates the status of the battery and the charging state according to different
colors:
§Without the insertion of USB, charging adapter, red light flashing shows the
battery power is low, Please charge as soon as possible.
§Insert USB cable, charge adapter, long bright red means that the battery is
charging.
§Insert USB cable, charging adapter, the long bright green represents the battery is
full of electricity.
§If the LED indicator light which is on the right side of the machine flash blue just
like the breathing light, it means that there’s a message for reading, please check
in time.
§When the LED indicator light is scanned into the bar code, the light flash red once.
When the bar code is not scanned, no light flash.
Note: when the system is in charge, the blue indicator light will not be prompted.

!
!
9!
6Chapter six Main screen
New 3NSTAR RUGGED TABLE series devices are a total of five main screens,
sliding screen to the left or right can be switched on each other. In the application of
the main screen display, click any application icon, you can open the program.
Picture6-1 main screen
Table6-1 main screen
①Status bar: display notifications and status icons.
②Display area: used to place the application icon, desktop folder, and window widget.
③Shortcut: Click to enter the application.
④Application tray: Click to view all of the programs.
6.1 Status bar icon
Status icon and notification bar icon is located at the top of the screen status bar, it
display device status information and notification, as follows.
Table6-2 Status icon and notification bar icon
Icon
Introduction
Icon
Introduction
Detection of available WLAN
networks
Signal strength
①)
②)
③)
④)

!
!
1
0!
Connected WLAN network
Not inserted SIM card
Portable WLAN
Mobile network has been
connected
Silent mode
Airplane mode
Vibration mode
Scan
Missed calls
Battery charge
New messages
Battery power is full
Capture screen
Battery power is low
The alarm clock
Multiple notification icons,
beyond the display range
Prepare for microSD card
Insert headset
Bluetooth
GPS is positioning
Uploading data
Downloading data
USB debugging
USB connect
7Chapter seven Set up
7.1 WLAN
Find this icon:
Settings

!
!
1
1!
Wireless and Network
WLAN
2.4G Wi-Fi provides the most remote 450 feet (150m), 5G provides the farthest 300
feet (100m) wireless network access range (note, industrial grade AP, open area). To
use the Wi-Fi on your device, you must connect to a wireless access point or hot spot.
Note: the availability of the Wi-Fi signal is determined by the amount of the required
number, the infrastructure, and the object to which the signal is penetrated.
Open Wi-Fi and connect to a wireless network
1.Click WLAN to close / open the button to open the Wi-Fi. Automatic scanning
available wireless networks
2.Then the Wi-Fi network list will show the network name and security settings of the
Wi-Fi network to be found (open network or encrypted network)
3.Touch one of the Wi-Fi networks to make a connection. When you select an open
network, it will automatically connect to the network. If you choose a network, you
must enter the appropriate password first, and then touch the connection.
Picture7-1 Wi-Fi menu
4.Set the WLAN band ([advanced] (short press menu to entry) ---- > [WLAN band]),
Click!to!connect!to!the!network!
Click!to!open!and!search!the!network!!!!!!!!!!!

!
!
1
2!
choose to use only the 5GHz band can only search to 5GHz band of AP.
! !
Picture7-2 WLAN Frequency band
5.Wi-Fi roaming trigger, delta can be through the advanced settings according to
customer demand for their own set ( in the Wi- Fi search interface short press menu
button ---- > Advanced).
Picture7-3 WLAN Roaming settings
(1)Roaming trigger: when the connected AP (Note: the premise is in roaming
environment) signal value is lower than the set trigger, roaming mechanism will be
triggered, as shown in figure will go on a tour of the threshold setting is -65dBm.
When below this value when roaming is triggered.

!
!
1
3!
Picture7-4 Roaming trigger
(2)Roaming delta: when the difference between the two AP signal value reaches the
set value, roaming connected to the signal value better AP, such as when two AP
between signal value difference is greater than 5 dBm (to meet the standards of the
roaming trigger), then the normal roaming.
Picture7-5 Roaming delta
6.WIFI work mode configuration, support the module to configure the fixed mode of
operation(a/b/g/n),the default is 802.11AUTO;

!
!
1
4!
Picture7-6 Wi-Fi work mode configuration
7.WIFI DATA RATE:!support rate control, the default is!Data Rate AUTO.

!
!
1
5!
Picture7-7 WIFI DATA RATE
8. WIFI AGC MODE. AGC RX control functions to adapt to the noisy environment,!
reception inefficiency problem,!to reduce interference, the default is MODE OFF.
!
Picture7-8 WIFI AGC MODE
9. About Wi-Fi status information, you can view the relevant information through the
Wi-Fi status information, click stats Refresh, such as: Wi-Fi state, the connection of
AP, signal value, MAC address, etc., as shown in figure:

!
!
1
6!
Picture7-9 Wi-Fi status information
Note: when the device is connected to a wireless network, the status bar will display the Wi-Fi
icon ( ), and display a roughly the amount of the signal intensity (light from the bar). If the
touch device is currently connected to the wireless network, it will show the Wi-Fi network name,
state, speed, signal strength, security information and IP address.
If you want to remove the wireless network settings on the device, long time to click on the
connection of the AP, choose not to save the network, then the AP will be deleted, as shown on
the right:
Picture7-10 Delete or modify the network

!
!
1
7!
Note: after the Wi-Fi switch, the device must be connected to the previously connected encrypted
wireless network, you do not need to reenter the appropriate password. Wi-Fi network will search
for themselves, that is, the device does not need to perform additional steps can be connected to
the Wi-Fi network.
Connect to other Wi-Fi networks
§Open interface in wireless Wi-Fi, touch scan. Find the Wi-Fi network will be
displayed in the Wi-Fi network list.
§Touch other Wi-Fi network, you can connect to the network.
7.2 Bluetooth
Find this icon:!
üSettings
üWireless and Network
üBluetooth
1. Point on the blue / open button, open and search for other Bluetooth devices
2. In the search for the device list, click on the device to connect to the device
3. After the input PIN code is entered in the pop-up dialog box, click the connection
device
Click! to! open! and! search! for!
Bluetooth!
Table of contents
Other 3nStar Tablet manuals