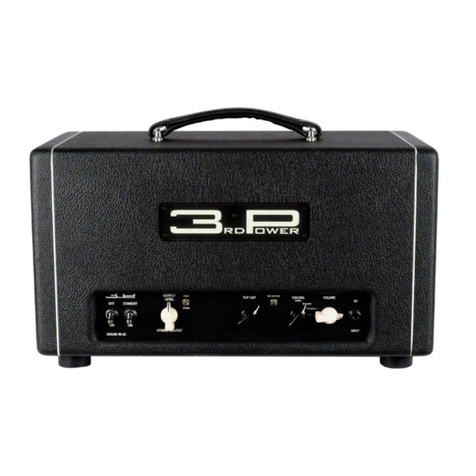
3rd Power CLEAN SINK MKII User manual

USER’S GUIDE
GUITAR AMPLIFIER
™
CLEAN SINK MKII
™

2
Your 3RD POWER Amplifier is a professional musical instrument amplifier. The information
contained herein is current at the time of publication. However, specifications are subject to
change without prior notice.
PRECAUTIONS & WARNINGS
• READ THESE INSTRUCTIONS.
• KEEP THESE INSTRUCTIONS.
• HEED ALL WARNINGS.
• FOLLOW ALL INSTRUCTIONS.
• YOUR AMPLIFIER IS LOUD!
EXPOSURE TO HIGH SOUND VOLUMES MAY CAUSE PERMANENT HEARING DAMAGE !
Practice “safe listening.”
• No user serviceable parts inside. Refer service to qualified personnel. Always unplug AC
power before removing chassis.
• IF YOU INTEND ON OPERATING THIS EQUIPMENT OUTSIDE OF THE USA: Always insure
that unit is wired for proper voltage. Make certain all connections and grounding con-
forms with local standards. Make certain that you have obtained authorization to operate
prior to connecting to power supply.
• WARNING: Vacuum tube amplifiers generate heat. To insure proper ventilation always
make certain there is at least four inches (100mm) of space behind the rear of the amplifi-
er cabinet.
• Keep away from curtains or any flammable objects.
• WARNING: Do not block any ventilation openings on the rear or top of the amplifier. Do
not impede ventilation by placing objects on top of the amplifier which extend past the
rear edge of its cabinet.
• WARNING: Do not expose the amplifier to rain, moisture, dripping or splashing water. Do
not place objects filled with liquids on or nearby the amplifier.
• WARNING: Always make certain proper load is connected before operating the amplifier.
Failure to do so could pose a shock hazard and may result in damage to the amplifier.
• Do not expose amplifier to direct sunlight or extremely high temperatures.
• Always insure that amplifier is properly grounded. Always unplug AC power cord before
changing fuse or any tubes. When replacing fuse, use only same type and rating.
• Avoid direct contact with heated tubes. Keep amplifier away from children.
• Be sure to connect to an AC power supply that meets the power supply specifications
listed on the rear of the unit. Remove the power plug from the AC mains socket if the unit
is to be stored for an extended period of time. If there is any danger of lightning occurring
nearby, remove the power plug from the wall socket in advance.
• To avoid damaging your speakers and other music equipment, turn off the power of all
related equipment before making the connections.
• Do not use excessive force in handling control buttons, switches and controls. Do not
use solvents such as benzene or paint thinner to clean the unit. Wipe off the exterior with
soft cloth.

3
™
Thank you for choosing the WOOLY COATS
EXTRA SPANKY 6VEL by 3RD POWER as an
integral component of your musical journey.
Music is a thrilling blend of tone, attitude and
technique.When the right combination occurs,
magic happens and it’s experienced by every-
one.
I’ve had the extraordinary privilege of per-
forming music for over 30 years on stage and in the studio.As the principal visionary of the company,
every product we design reflects my energy, attitude and life experiences.
Each amplifier we create is designed to help you tell your musical story - IN 3D!!!
Rock on!
- Dylana Nova Scott
MOVING FORWARD... IN 3D
™

4
Special Features of the CLEAN SINK MKII™:
• Hand-made in the USA
• Point-to-point turret board construction
• Blendable preamp voices, mid-60’s black-panel American and British AC
• Dual AC voice switch (Normal or Top Boost)
• Studio-quality all-tube spring reverb
• Enhanced 112 Combo enclosure design
• Patented HybridMASTER™ volume control
• 2 x JJ 6V6S power tubes 20W (variable down to under 1W with Hybrid-MASTER)
• 8 and 4 ohm speaker outputs
Accessories:
A high-quality slip cover is available.
Dimensions & Weights:
Subject to change anytime. Please measure your amp carefully if a custom case is being made. These
measurements do not include handle and rubber feet.
112 Combo: Dimensions (WxHxD): 19.875 x 16 x 9.5 in
Weight: 31 lb.

5
Preparing to Operate your CLEAN SINK MKII™
Make certain that all connections are made prior to operating your CLEAN SINK MKII Amplifier in-
cluding power cable, speaker connection, instrument cable and instrument connection. Make certain
that all tubes are installed.
Power Switch (1)
The POWER switch, when placed in the UP position, provides AC wall power to the amplifier.
Standby Switch (2)
The STANDBY switch, when placed in the DOWN position, puts the amplifier in ‘standby mode’ allow-
ing the tubes to warm up.When this switch is place in the UP position, the tube circuitry is fully func-
tional and ready to amplify your guitar signal.
Hybrid-MASTER™ Control (3)
The Hybrid-MASTER control allows you to set the overall volume level of the amplifier without
changing the tone or feel of the amplifier. Hybrid-MASTER is a patented by 3rd Power.
Treble Damping Control (4)
The global TREBLE DAMPING control allows you to adjust the character or your high frequencies in-
dependent from your preamp section. Low settings are brighter. Rotating clockwise, ‘darker’ tones
tones will be achieved. This is important when considering that the Treble control in the preamp
dramatically affects the response (quickness or edge) of the preamplifier. When driving the amplifier
tones to edge of breakup, higher TREBLE DAMPING settings will make the amplifier smoother and
more vintage or silky sounding.
Reverb Control (5)
The REVERB control is used to add/blend in the perfect amount of ambience to your sound.The re-
verb effect in this amplifier features pure Class A vacuum tube drive and recovery circuitry to deliver
an authentic, vintage sounding spring reverb effect.
Front Panel (section one):
1
2
3
4
5

6
Input Jack (1)
The INPUT jack is where you connect instrument level signals.
AC Voice Switch (2)
The AC VOICE Switch allows you to choose between AC NORMAL and TOP BOOST modes. This
switch allows you to increase the gain and brightness character of the British AC tones only and
has no effect on the American voicing.
Volume Control (3)
The VOLUME control allows you to adjust the signal level as well as the temperament and over-
all character of your instrument’s sound, from clean to edge of breakup.
Voice Control (4)
The VOICE control allows you to select or blend the preamp voicing of your tone. When rotated fully
clock-wise, you will hear a pleasing mid-60’s black-panel American tone. when rotated fully counter
clock-wise, you will hear the distinct chime of a mid-60’s British tone. All other knob positions are
available to you to explore and create your own unique blended preamp tones.
Treble Control (5)
The TREBLE control allows you to adjust the character of the higher frequency range.
Bass Control (6)
The BASS control allows you to adjust the depth of your lower frequencies.
Front Panel (section two):
3
2
1
4
5
6

7
AC Fused Input (1)
The AC FUSED INPUT socket (TYPE IEC Grounded) is a required connection for operating your CLEAN
SINK MKII at 120V (standard USA household electrical power).The MAINS FUSE requires a 1.25 AMP
slow blow fuse.This fuse protects your amplifier from voltage peaks from your power outlet.
H.T. Fuse (2)
The H.T. FUSE requires a 0.25 AMP (250 milliamp) slow-blow fuse.The H.T. FUSE usually blows if your
power tubes are bad to protect the circuit from being damaged.
SAFETY NOTES:
• Always plug your amp into a properly grounded 3 prong AC outlet.
• Never plug your amp into an ungrounded outlet.
• Never remove or break off the 3rd prong safety ground pin from the power cord.
• Never use a damaged or ungrounded power cord.
• Always use the proper value and type fuse according to the rear-panel markings.
• Never attempt to replace the fuse while the amplifier is still plugged into the power source.The
fuse should only be replaced when the power cord has been disconnected from its power source.
Back Panel:
1
2

8
8-OHM Speaker Outputs (3)
The 8-OHM SPEAKER OUTPUT is connected to the internal speaker via a short patch cable.
4-OHM Speaker Outputs (4)
The 4-OHM SPEAKER OUTPUTS are wired in parallel.They are provided for connecting your amplifier
to a single 4-OHM speaker, or two 8-OHM speaker cabinets.
OPERATIONAL NOTES:
• When operating an external 8-ohm cabinet along WITH the internal speaker, you will need to
remove the internal speaker patch cable from the 8-ohm jack and insert it into one of the 4-ohm
jacks and then connect the external cabinet to the remaining 4-ohm jack.
• REMEMBER to be sure and reconnect the internal speaker patch cable to the 8-ohm jack when
you return to operating only the internal speaker.
SAFETY NOTES:
• Never operate your amplifier without a connected speaker cabinet.This will damage your tubes
or transformers - or both.
• Always operate your amplifier with the proper impedance output that matches your speaker cab-
inet(s).
• In all cases, always use a good quality heavy gauge speaker cable (not a shielded instrument ca-
ble) to connect your CLEAN SINK to external speaker cabinet(s).
Back Panel (continued):
4
3

9
Tube Layout:
Tube Layout and Requirements:
V1: JJ ECC83S (Preamp, American and AC Voices)
V2: JJ ECC83S (Mix-down and Post EQ)
V3: Sovtek 12AX7LPS (Reverb)
V4: Sovtek 12AX7LPS (Phase Inverter)
V5 -V6: JJ 6V6S (Power Amp)
Bias Adjustment
Your CLEAN SINK MKII comes from the factory biased for JJ 6V6S tubes with an idle current draw of
~25ma. Bias adjustments are not intended to be user-serviceable. Attempting to adjust the bias your-
self will expose you to very dangerous high-voltage electricity that can kill you. Special test equip-
ment and knowledge of amp circuits and tubes are required to perform this function. DO NOT AT-
TEMPT TO DO THIS YOURSELF.
Tube Replacement
WE RECOMMEND TAKING YOUR AMPLIFIER TO A QUALIFIED TECHNICIAN FOR SERVICING YOUR
TUBES. Make certain the amplifier is turned off and has been allowed ample time to cool down. Be
very careful when you remove the tubes as they might still be very hot! Do not touch tube sockets
with fingers! Even after turning your amp off and unplugging it from the power outlet there could be
enough voltage stored in the capacitors to give you a lethal electrical shock.
WARNING:
• Do not remove the back panel.
• Do not attempt to check or replace tubes yourself. Refer to an authorized service center.
• Never touch the tubes while the amplifier is turned on or has recently been turned ON.You can
severely burn your fingers and hands.
POWER
TRANSFORMER
OUTPUT
TRANSFORMER
CHOKE
REVERB
CAN
CAPACITOR V1V2
V3V4
V5
V6

10
LIMITED LIFETIME WARRANTY
Thank you for choosing 3RD POWER Amplification. 3RD POWER takes great pride in producing high-quality tube
amplifiers and speaker cabinets. Each product is thoroughly tested prior to shipment.
Your amplifier is warranted to the original purchaser to be free from defects in material and workmanship for as
long as you own it. An original sales receipt will establish coverage under this warranty. This warranty does not
cover service or parts to repair damage caused by accident, neglect, abuse, normal wear, disaster, misuse, over-
powering, negligence, inadequate packing or shipping procedures and service, repair or modifications to the
product which have not been authorized by 3RD POWER. If this product is defective in materials or workmanship
as warranted above,your sole remedy shall be repair or replacement as provided below.
Tubes: 3RD POWER warrants the original purchaser that the tubes used in the unit will be free from defects in
material and workmanship for a period of 30 days from the original purchase date. A dated sales receipt will es-
tablish coverage under this warranty. This warranty is in lieu of all other expressed warranties. If tubes fail with-
in the initial 30 day period your sole remedy shall be the replacement of tubes as provided below.
Return Procedures: In the unlikely event that a defect should occur, follow the procedure outlined below. Defec-
tive products must be shipped, together with proof of purchase, freight pre-paid and insured directly to 3RD
POWER. A Return Authorization Number must be obtained prior to shipping the product. Contact 3RD POWER to
obtain this RA number. Products must be shipped in their original packaging or equivalent. In any case, the risk
of loss or damage in transit is borne by the purchaser. The RA number must appear in large print directly below
the shipping address. Always include a brief description of the defect, along with your correct return address and
telephone number.
When calling to inquire about a returned product, always refer to the RA number. If 3RD POWER determines that
the unit was defective in materials or workmanship at any time during the warranty period, 3RD POWER has the
option of repairing or replacing the product at no additional charge, except as set forth below. All replaced parts
become property of 3RD POWER. Products replaced or repaired under this warranty will be returned via ground
shipping within the United States, freight prepaid. 3RD POWER is not responsible for costs associated with expe-
dited shipping, either to 3RD POWER or returned of the product to the customer.
Incidental or Consequential Damage: In no event will 3RD POWER be liable for any incidental or consequential
damages arising out of the use or inability to use any 3RD POWER product, even if a 3RD POWER dealer has been
advised of the possibility of such damages or any other claim by any other party. Some states do not allow the
exclusion or limitation of consequential damages, so the above limitation and exclusion may not apply to you.
This warranty gives you specific legal rights and you may also have other rights which may vary from state to
state.
For your protection: Please complete and mail the Purchase Information Card within (10) ten days of the date of
purchase so that we may contact you directly in the event a safety notification issued in the accordance with the
1972 Consumer Product Safety Act.
Customer Support: Our dedicated staff is ready to assist you should you have any questions with regard to your
product. Please call: (615) 945-3393 (9:00 AM to 5:00 PM Monday through Friday, Central Standard Time).

Table of contents
Other 3rd Power Musical Instrument Amplifier manuals

3rd Power
3rd Power Kitchen Sink 6VEL User manual

3rd Power
3rd Power BRITISH DREAM MKII User manual

3rd Power
3rd Power WOOLY COATS EXTRA SPANKY User manual

3rd Power
3rd Power Kitchen Sink 6VEL User manual

3rd Power
3rd Power KITCHEN SINK User manual

3rd Power
3rd Power Dream 40 American User manual

3rd Power
3rd Power AMERICAN DREAM MKII User manual

3rd Power
3rd Power Wooly Coats Spanky MKII User manual