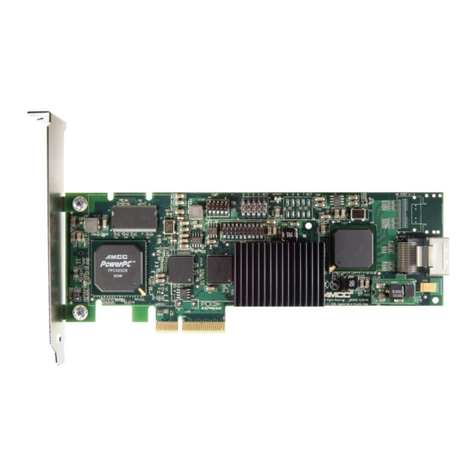
3Ware 7000-2 - Escalade RAID Controller User manual

ATA RAID Controller
Supports the 7000 and 8000 series
PN 900-0020-00, Revision A
April 23, 2003
EscaladeTM
User Guide

Copyright
©2002 3ware, Inc. All rights reserved. No part of this publication may be
reproduced, stored in a retrieval system, or transmitted in any form by any
means, electronic, mechanical, photocopying, recording or otherwise,
without the proper written consent of 3ware, Inc., 455 West Maude Ave.,
Sunnyvale, CA 94085.
Trademarks
3ware, the 3ware logo, Palisade, Escalade, StorSwitch, TwinStor, R5
Fusion and 3DM are all registered trademarks of 3ware, Inc. All other
trademarks herein are property of their respective owners.
Disclaimer
3ware, Inc. assumes no responsibility for errors or omissions in this docu-
ment, nor does 3ware, Inc. make any commitment to update the informa-
tion contained herein.

iii
Before You Begin . . . . . . . . . . . . . . . . . . . . . . . . . . . . . . . . . . . 13
Features . . . . . . . . . . . . . . . . . . . . . . . . . . . . . . . . . . . . . . . . . . . 13
Escalade 7000 Parallel ATA Family (includes 7000-2,
7500-4, 7500-4LP, 7500-8, 7500-12) . . . . . . . . . . . . . . . . 13
Escalade 8000 Serial ATA Family (includes 8500-4,
8500-8, 8500-12) . . . . . . . . . . . . . . . . . . . . . . . . . . . . . . . 14
Package Contents . . . . . . . . . . . . . . . . . . . . . . . . . . . . . . . . . . . 15
Escalade 7000 series Parallel ATA RAID Controller . . . . . .15
Escalade 8000 series Serial ATA RAID Controller . . . . . . . 15
CBL-P-SATA (Parallel to Serial Drive Converter Kit) . . . . . 16
Tools Required . . . . . . . . . . . . . . . . . . . . . . . . . . . . . . . . . . . . . 16
System Requirements . . . . . . . . . . . . . . . . . . . . . . . . . . . . . . . . 16
Personal Safety . . . . . . . . . . . . . . . . . . . . . . . . . . . . . . . . . . . . . 17
Protecting Equipment and Data . . . . . . . . . . . . . . . . . . . . . . . . 17
ESD Precautions . . . . . . . . . . . . . . . . . . . . . . . . . . . . . . . . . . . . 17
Mechanical Concerns . . . . . . . . . . . . . . . . . . . . . . . . . . . . . . . . 18
Introduction . . . . . . . . . . . . . . . . . . . . . . . . . . . . . . . . . . . . . . . . 19
Unmatched reliability and performance . . . . . . . . . . . . . . . . . . 19
Escalade Serial ATA Controller . . . . . . . . . . . . . . . . . . . . . . . . 20
RAID increases performance and adds redundancy . . . . . . . . . 20
Raid 0 arrays maximize performance and capacity . . . . . . . . . 21
Raid 1 arrays offer fault tolerance . . . . . . . . . . . . . . . . . . . . . . 21
TwinStorTM Technology adds performance to 3ware’s
mirrored disk arrays . . . . . . . . . . . . . . . . . . . . . . . . . . . . . . . 22
Raid 10 arrays maximize performance and fault tolerance . . . 22
Raid 5 arrays optimize performance, fault tolerance, high
capacity and storage efficiency . . . . . . . . . . . . . . . . . . . . . . 23
R5 FusionTM Technology significantly improves RAID 5
write performance . . . . . . . . . . . . . . . . . . . . . . . . . . . . . . . . 24
Configure and manage your disk arrays . . . . . . . . . . . . . . . . . . 25
Background media scan and dynamic sector repair enhance
data integrity . . . . . . . . . . . . . . . . . . . . . . . . . . . . . . . . . . . . 26
Quick Installation Guide . . . . . . . . . . . . . . . . . . . . . . . . . . . . . . 29
Step 1. Install the Escalade ATA RAID Controller . . . . . . . . . 30
Step 2. Create arrays . . . . . . . . . . . . . . . . . . . . . . . . . . . . . . . . . 30
Contents
7000UGTOC.fm Page iii Wednesday, April 23, 2003 1:02 PM

3ware Escalade ATA RAID Controller User Guide
iv
Step 3. Install system drivers . . . . . . . . . . . . . . . . . . . . . . . . . . 30
Step 4. Install 3DM . . . . . . . . . . . . . . . . . . . . . . . . . . . . . . . . . 31
Hardware Installation . . . . . . . . . . . . . . . . . . . . . . . . . . . . . . . . 33
To remove an existing Escalade ATA RAID Controller . . . . . 33
Installing a Parallel ATA RAID Controller . . . . . . . . . . . . . . . 34
Connect the interface cables to the Escalade ATA RAID
Controller . . . . . . . . . . . . . . . . . . . . . . . . . . . . . . . . . . . . . 34
Install the Escalade ATA RAID Controller in the computer 35
Connect the drives to the interface cables . . . . . . . . . . . . . . . 36
Installing a Serial ATA RAID Controller . . . . . . . . . . . . . . . . 38
Connect the interface cables to the Escalade Serial ATA
RAID Controller . . . . . . . . . . . . . . . . . . . . . . . . . . . . . . . 38
Connect the drives to the interface cables . . . . . . . . . . . . . . . 40
Check your installation and close the case . . . . . . . . . . . . . . . . 42
Check motherboard boot sequence . . . . . . . . . . . . . . . . . . . . . 42
3ware Disk Array Configuration Utility . . . . . . . . . . . . . . . . . . 43
Hot spare and hot swap . . . . . . . . . . . . . . . . . . . . . . . . . . . . . . 43
BIOS Screen . . . . . . . . . . . . . . . . . . . . . . . . . . . . . . . . . . . . . 43
3DM Configure Page . . . . . . . . . . . . . . . . . . . . . . . . . . . . . . 44
Invoking the 3ware BIOS tool . . . . . . . . . . . . . . . . . . . . . . . . . 44
Exiting the 3ware BIOS tool . . . . . . . . . . . . . . . . . . . . . . . . . . 45
Determining your configuration . . . . . . . . . . . . . . . . . . . . . . . . 46
Displaying advance details . . . . . . . . . . . . . . . . . . . . . . . . . . . . 48
Creating a disk array . . . . . . . . . . . . . . . . . . . . . . . . . . . . . . . . 48
Determining your configuration . . . . . . . . . . . . . . . . . . . . . . . . 50
Specifying a Hot Spare . . . . . . . . . . . . . . . . . . . . . . . . . . . . . . 54
Changing an existing configuration . . . . . . . . . . . . . . . . . . . . . 55
Modifying a disk array . . . . . . . . . . . . . . . . . . . . . . . . . . . . . . . 55
Deleting a disk array . . . . . . . . . . . . . . . . . . . . . . . . . . . . . . . . 55
How to maintain or verify a disk array . . . . . . . . . . . . . . . . . . 56
Rebuilding a mirrored disk array . . . . . . . . . . . . . . . . . . . . . . . 57
Rebuilding a RAID 5 disk array . . . . . . . . . . . . . . . . . . . . . . . 59
Windows Installation . . . . . . . . . . . . . . . . . . . . . . . . . . . . . . . . 67
Windows NT®4.0 Installation . . . . . . . . . . . . . . . . . . . . . . . . . 68
7000UGTOC.fm Page iv Wednesday, April 23, 2003 1:02 PM

v
Adding drives to an existing ATA RAID controller . . . . . . . . . 69
Boot the machine . . . . . . . . . . . . . . . . . . . . . . . . . . . . . . . . . . 69
Installing the ATA RAID controller and Windows NT 4.0 . . . 70
Create disk arrays . . . . . . . . . . . . . . . . . . . . . . . . . . . . . . . . .70
Has your boot drive been partitioned? . . . . . . . . . . . . . . . . . . 70
Boot the system . . . . . . . . . . . . . . . . . . . . . . . . . . . . . . . . . . . 70
Continue with Windows NT 4.0 installation . . . . . . . . . . . . .71
Install the driver using the diskette . . . . . . . . . . . . . . . . . . . . 71
Partition device 0 to create a boot area . . . . . . . . . . . . . . . . . 71
Follow display instructions to complete Windows NT 4.0
Installation . . . . . . . . . . . . . . . . . . . . . . . . . . . . . . . . . . . . 72
RAID array initialization . . . . . . . . . . . . . . . . . . . . . . . . . . . . 72
Install the 3DM disk management utility . . . . . . . . . . . . . . .73
Installing the ATA RAID controller on systems that boot from
a different device . . . . . . . . . . . . . . . . . . . . . . . . . . . . . . . . . 74
Create disk arrays . . . . . . . . . . . . . . . . . . . . . . . . . . . . . . . . .74
Install the 3ware driver . . . . . . . . . . . . . . . . . . . . . . . . . . . . . 74
Reboot the machine . . . . . . . . . . . . . . . . . . . . . . . . . . . . . . . . 74
RAID array initialization . . . . . . . . . . . . . . . . . . . . . . . . . . . . 75
Install the 3DM disk management utility . . . . . . . . . . . . . . .75
Replacing an existing ATA RAID controller with a new
version of the controller . . . . . . . . . . . . . . . . . . . . . . . . . . . . . .76
Upgrade the 3ware driver . . . . . . . . . . . . . . . . . . . . . . . . . . . 76
Install/Upgrade the 3ware driver . . . . . . . . . . . . . . . . . . . . . . 77
Remove the existing Escalade ATA RAID Controller and
install the new Escalade ATA RAID Controller . . . . . . . 80
Reboot the machine . . . . . . . . . . . . . . . . . . . . . . . . . . . . . . . . 80
RAID array initialization . . . . . . . . . . . . . . . . . . . . . . . . . . . . 81
Install the 3DM disk management utility . . . . . . . . . . . . . . .81
Windows® 98/ME Installation . . . . . . . . . . . . . . . . . . . . . . . . . 82
Adding a drive to an existing ATA RAID controller . . . . . . . . 84
Partition and format new drive . . . . . . . . . . . . . . . . . . . . . . .84
Installing the ATA RAID controller while installing
Windows 98/ME . . . . . . . . . . . . . . . . . . . . . . . . . . . . . . . . . . 85
Create disk arrays . . . . . . . . . . . . . . . . . . . . . . . . . . . . . . . . .85
7000UGTOC.fm Page v Wednesday, April 23, 2003 1:02 PM

3ware Escalade ATA RAID Controller User Guide
vi
Boot the system from the Windows 98/ME diskette . . . . . . 85
Partition the boot device using fdisk . . . . . . . . . . . . . . . . . . . 85
Restart the machine and format the boot device . . . . . . . . . . 86
Continue the standard Windows 98/ME installation . . . . . . 86
Partition and format other devices . . . . . . . . . . . . . . . . . . . . 87
RAID array initialization . . . . . . . . . . . . . . . . . . . . . . . . . . . 87
Install the 3DM Disk Management Utility. . . . . . . . . . . . . . 88
Installing the ATA RAID controller on systems that boot
from a different device . . . . . . . . . . . . . . . . . . . . . . . . . . . . . . . 89
Create disk arrays . . . . . . . . . . . . . . . . . . . . . . . . . . . . . . . . . 89
Install the 3ware driver . . . . . . . . . . . . . . . . . . . . . . . . . . . . . 89
Partition and format units on ATA RAID controller . . . . . . 90
RAID array initialization . . . . . . . . . . . . . . . . . . . . . . . . . . . 91
Install the 3DM disk management utility . . . . . . . . . . . . . . . 91
Replacing an existing ATA RAID controller with a new version
of the controller . . . . . . . . . . . . . . . . . . . . . . . . . . . . . . . . . . 92
Upgrade the 3ware driver . . . . . . . . . . . . . . . . . . . . . . . . . . . 92
Install/Upgrade the 3ware driver . . . . . . . . . . . . . . . . . . . . . 94
Remove the existing Escalade ATA RAID Controller and
install the new Escalade ATA RAID Controller . . . . . . . 98
Reboot the machine . . . . . . . . . . . . . . . . . . . . . . . . . . . . . . . . 98
Windows® 2000 or Windows XP Installation . . . . . . . . . . . . . 99
Installing a drive to an existing ATA RAID controller . . . . . 101
Boot the machine . . . . . . . . . . . . . . . . . . . . . . . . . . . . . . . . 101
Installing the ATA RAID controller while installing
Windows 2000 or Windows XP . . . . . . . . . . . . . . . . . . . . . . . 102
Create disk arrays . . . . . . . . . . . . . . . . . . . . . . . . . . . . . . . . 102
Installing with the Initial Operating System Build . . . . . . . 102
Continue with Windows 2000 or XP installation . . . . . . . . 102
Reboot the machine . . . . . . . . . . . . . . . . . . . . . . . . . . . . . . . 103
RAID array initialization . . . . . . . . . . . . . . . . . . . . . . . . . . 104
Install the 3DM disk management utility . . . . . . . . . . . . . . 104
Installing the ATA RAID controller on systems that boot
from a different device . . . . . . . . . . . . . . . . . . . . . . . . . . . . . . 105
Create disk arrays . . . . . . . . . . . . . . . . . . . . . . . . . . . . . . . . 105
7000UGTOC.fm Page vi Wednesday, April 23, 2003 1:02 PM

vii
Install the 3ware driver . . . . . . . . . . . . . . . . . . . . . . . . . . . . 105
Reboot the machine . . . . . . . . . . . . . . . . . . . . . . . . . . . . . . . 106
RAID array initialization . . . . . . . . . . . . . . . . . . . . . . . . . . . 107
Install the 3DM disk management utility . . . . . . . . . . . . . .108
Replacing an existing ATA RAID controller with a new
version of the controller . . . . . . . . . . . . . . . . . . . . . . . . . . . . . 109
Updating the 3ware driver . . . . . . . . . . . . . . . . . . . . . . . . . . 109
Installing/Upgrading the 3ware driver . . . . . . . . . . . . . . . . . 112
Remove the existing Escalade ATA RAID Controller and
install the new Escalade ATA RAID Controller . . . . . . 118
Reboot the machine . . . . . . . . . . . . . . . . . . . . . . . . . . . . . . . 118
Install the 3DM disk management utility . . . . . . . . . . . . . .119
Linux Installation . . . . . . . . . . . . . . . . . . . . . . . . . . . . . . . . . . 121
Red Hat® Linux Installation . . . . . . . . . . . . . . . . . . . . . . . . . . 123
Installing the ATA RAID controller while installing Red Hat
Linux . . . . . . . . . . . . . . . . . . . . . . . . . . . . . . . . . . . . . . . . . . . . 124
Create disk arrays . . . . . . . . . . . . . . . . . . . . . . . . . . . . . . . .124
Boot with the Red Hat CD-ROM or diskette . . . . . . . . . . . . 124
Install the driver . . . . . . . . . . . . . . . . . . . . . . . . . . . . . . . . . .125
RAID array initialization . . . . . . . . . . . . . . . . . . . . . . . . . . . 125
Install and run 3DM disk management utility . . . . . . . . . . .126
Installing the ATA RAID controller on systems that boot
from a different device . . . . . . . . . . . . . . . . . . . . . . . . . . . . . . 127
Create disk arrays . . . . . . . . . . . . . . . . . . . . . . . . . . . . . . . .127
Install the 3ware driver . . . . . . . . . . . . . . . . . . . . . . . . . . . . 127
Compiling the Driver (For experts only) . . . . . . . . . . . . . . . 132
RAID array initialization . . . . . . . . . . . . . . . . . . . . . . . . . . . 132
Install and run 3DM disk management utility . . . . . . . . . . .133
SuSE® Linux Installation . . . . . . . . . . . . . . . . . . . . . . . . . . . . 134
Installing the ATA RAID controller while installing
SuSE Linux with YaST2 . . . . . . . . . . . . . . . . . . . . . . . . . . . . .135
Materials required . . . . . . . . . . . . . . . . . . . . . . . . . . . . . . . . 135
Create disk arrays . . . . . . . . . . . . . . . . . . . . . . . . . . . . . . . .135
Boot with the SuSE CD/DVD . . . . . . . . . . . . . . . . . . . . . . .135
7000UGTOC.fm Page vii Wednesday, April 23, 2003 1:02 PM

3ware Escalade ATA RAID Controller User Guide
viii
RAID array initialization . . . . . . . . . . . . . . . . . . . . . . . . . . 137
Install and run 3DM disk management utility . . . . . . . . . . 138
Installing the ATA RAID controller on systems that boot
from a different device . . . . . . . . . . . . . . . . . . . . . . . . . . . . . . 139
Create disk arrays . . . . . . . . . . . . . . . . . . . . . . . . . . . . . . . . 139
Install the 3ware driver . . . . . . . . . . . . . . . . . . . . . . . . . . . . 139
Compiling the Driver (For experts only) . . . . . . . . . . . . . . . . 142
Install and run 3DM disk management utility . . . . . . . . . . 142
3DM Disk Management Utility . . . . . . . . . . . . . . . . . . . . . . . .143
Windows Installation . . . . . . . . . . . . . . . . . . . . . . . . . . . . . . . 144
Installing 3DM for Windows NT, Windows 98/ME,
Windows 2000, Windows XP . . . . . . . . . . . . . . . . . . . . . . . . 144
Linux Installation . . . . . . . . . . . . . . . . . . . . . . . . . . . . . . . . . . 147
Installing 3DM for Red Hat Linux or SuSE Linux . . . . . . . . 147
Starting 3DM . . . . . . . . . . . . . . . . . . . . . . . . . . . . . . . . . . . . . 149
Uninstalling 3DM . . . . . . . . . . . . . . . . . . . . . . . . . . . . . . . . . 149
Checking Array Status . . . . . . . . . . . . . . . . . . . . . . . . . . . . . . 151
View status using your standard browser . . . . . . . . . . . . . . . 151
Password setup . . . . . . . . . . . . . . . . . . . . . . . . . . . . . . . . . . . . 160
Enable/disable password protection . . . . . . . . . . . . . . . . . . . . 162
Selecting background task rate . . . . . . . . . . . . . . . . . . . . . . . 163
Selecting remote access . . . . . . . . . . . . . . . . . . . . . . . . . . . . . 163
Selecting cache options . . . . . . . . . . . . . . . . . . . . . . . . . . . . . 163
Event notification via e-mail . . . . . . . . . . . . . . . . . . . . . . . . . 163
Configuration and Array Maintenance Settings . . . . . . . . . 164
Specifying a hot spare . . . . . . . . . . . . . . . . . . . . . . . . . . . . . . 166
Auto rebuild of a redundant array . . . . . . . . . . . . . . . . . . . . 166
Rebuilding a redundant array with a hot swap drive . . . . . . . 166
Selecting Force Continue . . . . . . . . . . . . . . . . . . . . . . . . . . 167
Scheduling background tasks . . . . . . . . . . . . . . . . . . . . . . . . . 167
Background Task Features . . . . . . . . . . . . . . . . . . . . . . . . . 168
Examples of Background Task Priorities . . . . . . . . . . . . . . 168
Troubleshooting: Problems and Solutions . . . . . . . . . . . . . 171
7000UGTOC.fm Page viii Wednesday, April 23, 2003 1:02 PM

ix
Hardware installation . . . . . . . . . . . . . . . . . . . . . . . . . . . . . . . 171
Software installation . . . . . . . . . . . . . . . . . . . . . . . . . . . . . . . . 172
Screen display messages . . . . . . . . . . . . . . . . . . . . . . . . . . . . .175
AEN Messages . . . . . . . . . . . . . . . . . . . . . . . . . . . . . . . . . . . 177
Appendix A
Compliance and Conformity Statements . . . . . . . . . . . . . . . 189
Federal Communications Commission Radio Frequency
Interference Statement . . . . . . . . . . . . . . . . . . . . . . . . . . . . 189
Microsoft Windows Hardware Quality Lab (WHQL) . . . . . . 190
European Community Conformity Statement . . . . . . . . . . . . 190
Appendix B
Warranty, Technical Support and Service . . . . . . . . . . . . . . 191
Limited Warranty . . . . . . . . . . . . . . . . . . . . . . . . . . . . . . . . . . 191
Exclusions . . . . . . . . . . . . . . . . . . . . . . . . . . . . . . . . . . . . . . . . 191
State Law Provisions . . . . . . . . . . . . . . . . . . . . . . . . . . . . . . . 192
Obtaining Warranty Protection . . . . . . . . . . . . . . . . . . . . . . . . 192
3ware Technical Support and Services . . . . . . . . . . . . . . . . . . 192
Sales and ordering information . . . . . . . . . . . . . . . . . . . . . . . . 193
Feedback on this manual . . . . . . . . . . . . . . . . . . . . . . . . . . . . .193
7000UGTOC.fm Page ix Wednesday, April 23, 2003 1:02 PM

3ware Escalade ATA RAID Controller User Guide
x
7000UGTOC.fm Page x Wednesday, April 23, 2003 1:02 PM

xi
Figure 1. RAID 0 Configuration Example . . . . . . . . . . . . . . . 21
Figure 2. RAID 1 Configuration Example . . . . . . . . . . . . . . . . 22
Figure 3. RAID 10 Configuration Example . . . . . . . . . . . . . . . 23
Figure 4. RAID 5 Configuration Example . . . . . . . . . . . . . . . . 24
Figure 5. 8-Port Escalade 7500-8 ATA RAID Controller
Layout 34
Figure 6. 12-Port Escalade 8500-12 Serial ATA RAID
Controller with CBL-P-SATA (Parallel to
Serial ATA Converter) 38
Figure 7. Parallel ATA Drive with Serial ATA Converter
Installed . . . . . . . . . . . . . . . . . . . . . . . . . . . . . . . . . . . 42
Figure 8. 3ware BIOS Tool . . . . . . . . . . . . . . . . . . . . . . . . . . . 45
Figure 9. Disk Array Configuration Main Display,
RAID 1 Example 47
Figure 10. Disk Array Advance Details Screen . . . . . . . . . . . . . 48
Figure 11. Selecting Drives for a Mirrored Array . . . . . . . . . . . 49
Figure 12. Create Disk Array Display, RAID 0 Example . . . . . 50
Figure 13. Create Disk Array Display, RAID 5 Example . . . . . 51
Figure 14. BIOS Initialization Screen for RAID 5 . . . . . . . . . . 52
Figure 15. Delete Disk Array Display . . . . . . . . . . . . . . . . . . . . 56
Figure 16. Maintain Disk Array Display . . . . . . . . . . . . . . . . . . 57
Figure 17. Degraded RAID 1 Array Drive When Not in Use . . 58
Figure 18. Degraded RAID 10 Array Drive When Not in Use . 59
Figure 19. Degraded RAID 5 Array Drive When Not in Use . . 60
Figure 20. Select Available Drive to Replace Faulted Drive,
RAID 1 Example . . . . . . . . . . . . . . . . . . . . . . . . . . . . 62
Figure 21. Rebuild Array Status Display, RAID 1 Example . . . 63
Figure 22. Rebuild Confirmation Display . . . . . . . . . . . . . . . . . 64
Figure 23. Installation Complete Notification . . . . . . . . . . . . . . 72
Figure 24. Remove Current Driver . . . . . . . . . . . . . . . . . . . . . . . 77
Figure 25. Install Driver . . . . . . . . . . . . . . . . . . . . . . . . . . . . . . . 78
Figure 26. Install from Disk . . . . . . . . . . . . . . . . . . . . . . . . . . . . 79
Figure 27. Install Driver . . . . . . . . . . . . . . . . . . . . . . . . . . . . . . . 80
Figure 28. Found New Hardware Wizard . . . . . . . . . . . . . . . . . 90
Figure 29. 3ware ATA RAID Controller Properties Display . . . 93
Figure 30. Install Hardware Device Drivers . . . . . . . . . . . . . . . 94
List of Figures
7000UGLOF.fm Page xi Wednesday, April 23, 2003 1:04 PM

3ware Escalade ATA RAID Controller User Guide
xii
Figure 31. Select a Device Driver Display . . . . . . . . . . . . . . . . 95
Figure 32. Install from Disk . . . . . . . . . . . . . . . . . . . . . . . . . . . . 96
Figure 33. Upgrade Device Driver . . . . . . . . . . . . . . . . . . . . . . 96
Figure 34. Final driver installation screen . . . . . . . . . . . . . . . . . 97
Figure 35. Installation Complete Notification . . . . . . . . . . . . . . 98
Figure 36. Installation Complete Notification . . . . . . . . . . . . . 103
Figure 37. Found New Hardware Wizard . . . . . . . . . . . . . . . . 106
Figure 38. 3ware ATA RAID Controller Properties Display . 110
Figure 39. Upgrade driver welcome screen . . . . . . . . . . . . . . . 111
Figure 40. Upgrade/Install device driver . . . . . . . . . . . . . . . . 112
Figure 41. Select a Device Driver . . . . . . . . . . . . . . . . . . . . . . 113
Figure 42. Install From Disk . . . . . . . . . . . . . . . . . . . . . . . . . . 114
Figure 43. Select a Device Driver . . . . . . . . . . . . . . . . . . . . . . 115
Figure 44. Start Device Driver Installation . . . . . . . . . . . . . . . 116
Figure 45. Digital Signature Not Found . . . . . . . . . . . . . . . . . 117
Figure 46. Final driver installation screen . . . . . . . . . . . . . . . . 118
Figure 47. 3DM Remote Monitoring and Security
Configuration Display 145
Figure 48. 3DM E-mail Notification Preferences . . . . . . . . . . 146
Figure 49. 3DM Home Display . . . . . . . . . . . . . . . . . . . . . . . . 153
Figure 50. 3DM Details Display . . . . . . . . . . . . . . . . . . . . . . . 155
Figure 51. 3DM Monitor Display . . . . . . . . . . . . . . . . . . . . . . 156
Figure 52. 3DM Alarms Display . . . . . . . . . . . . . . . . . . . . . . . 158
Figure 53. 3DM Settings Display . . . . . . . . . . . . . . . . . . . . . . 159
Figure 54. 3DM Administrator Login Display . . . . . . . . . . . . 161
Figure 55. 3DM User Login Display . . . . . . . . . . . . . . . . . . . . 162
Figure 56. 3DM Configure Display . . . . . . . . . . . . . . . . . . . . 165
Figure 57. 3DM Help Display . . . . . . . . . . . . . . . . . . . . . . . . . 170
Figure 58. Installation or Removal Dialog Box . . . . . . . . . . . . 175
Figure 59. A Warning for All Software Removal Requests . . 176
Figure 60. Confirmation of Successful Software Removal . . . 176
Figure 61. Administrator Privileges Required Warning . . . . . 176
Figure 62. Firmware Upgrade Requirement Warning . . . . . . . 177
Figure 63. System Reboot Request . . . . . . . . . . . . . . . . . . . . . 177
7000UGLOF.fm Page xii Wednesday, April 23, 2003 1:04 PM

Before you Begin
www.3ware.com 13
Before You Begin
Congratulations on selecting the Escalade ATA RAID Controller
as your RAID data storage and management system. This user
guide gives simple, step-by-step instructions for installing and
configuring your Escalade ATA RAID Controller. To ensure your
personal safety and protect your equipment and data, carefully
read the information that follows the Features list before you
begin installing.
Features
Escalade 7000 Parallel ATA Family (includes 7000-2,
7500-4, 7500-4LP, 7500-8, 7500-12)
The information in this manual also supports the following legacy
products: 7410, 7810, 7450 (now 7500-4), 7850 (now 7500-8),
and 7210.
•True Hardware RAID. Low CPU Utilization
•RAID Support. RAID 0, 1, 5, 10 and JBOD (7000-2 does not
support RAID 5)
•Drive Support. Parallel UltraDMA 133, 100, 66, 33
•Bus Type. PCI 64 bit / 33 Mhz (7000-2 is PCI 32 bit / 33 Mhz)
•Management. 3DM Disk Management Utility or 3ware Com-
mand Line Interface
•BIOS. PC99, PnP, BBS Compliant
•Windows Support. W98SE, WME, WinNT4 with SP6, Win2k
with SP2, and WinXP
•Linux Support. Redhat, SuSE. (Drivers available in Open
Source.)
•Performance. Twinstor, Command Queuing, Elevator Seeking,
R5Fusion (R5Fusion is not available on 7000-2)

3ware Escalade ATA RAID Controller User Guide
14
www.3ware.com
•Field Upgrades. Field Upgradeable Firmware, BIOS, 3DM and
Drivers
•Data Integrity. ATA Command Readback, SMART Monitoring,
Dynamic Sector Repair, Rebuild Pacing, Rebuild Scheduling,
Background Media Scan, Hot Swap, Hot Spare, Hardware
Health Monitoring, Scheduled Verify
Escalade 8000 SerialATA Family (includes 8500-4, 8500-
8, 8500-12)
•True Hardware RAID. Low CPU utilization
•RAID Support. RAID 0, 1, 5, 10 and JBOD
•Drive Support. Serial ATA 150 (SATA I) drives. Parallel
UltraDMA 133 and UltraDMA 100 drives are also supported
when using 3ware's Parallel to Serial (CBL-P-SATA) Converter.
•Bus Type. PCI 64 bit / 33 Mhz
•Management. 3DM Disk Management Utility or 3ware Com-
mand Line Interface
•BIOS. PC99, PnP, BBS Compliant
•Windows Support. W98SE, WME, WinNT4 with SP6, Win2k
with SP2, and WinXP
•Linux Support. Redhat, SuSE. (Drivers available in Open
Source.)
•Performance. Twinstor, Command Queuing, Elevator Seeking,
R5Fusion
•Field Upgrades. Field Upgradeable Firmware, BIOS, 3DM and
Drivers
•Data Integrity. ATA Command Readback, SMART Monitor-
ing, Dynamic Sector Repair, Rebuild Pacing, Rebuild Schedul-
ing, Background Media Scan, Hot Swap, Hot Spare, Hardware
Health Monitoring, Background Verify
Preface.fm Page 14 Wednesday, April 23, 2003 1:12 PM

Before you Begin
www.3ware.com 15
Note: The Escalade Serial ATA controller can be used with
either serial or parallel drives. If using the controller with
parallel drives the CBL-P-SATA (Parallel to Serial Driver
Converter) must be used in conjunction.
The advantage of using the Escalade Serial ATA Controller
with parallel drives is the simpler, longer cable and
increased airflow.
Package Contents
If your package is missing any of the items listed below, contact
3ware before proceeding with installation (disk drives and disk
mounting brackets are not included):
Escalade 7000 series Parallel ATA RAID Controller
• Escalade Parallel ATA RAID Controller in an ESD-protective
bag
• ATA interface cables (one per port)
• 3ware installation media with the following: 3DM, Drivers and
Escalade User Guide (.pdf format)
• 3ware Release Notes
• 3ware Installation Guide
Escalade 8000 series Serial ATA RAID Controller
• Escalade Serial ATA RAID Controller in an ESD-protective bag
• Serial ATA interface cables (one per port)
• 3ware installation media with the following: 3DM, Drivers and
Escalade User Guide (.pdf format)
• 3ware Release Notes
• 3ware Installation Guide

3ware Escalade ATA RAID Controller User Guide
16 www.3ware.com
CBL-P-SATA (Parallel to Serial Drive Converter Kit)
• Escalade CBL-P-SATA (one per port)
• Power Converter Adapter (one per port)
• Jumper(s) for converter (if not already installed)
• 3ware Installation Guide
Tools Required
• An ESD grounding strap or mat
• Standard hand tools to open your system’s case and install the
Escalade ATA RAID Controller into an available PCI expansion
slot.
System Requirements
The Escalade ATA RAID Controller requires a workstation-class
or server-class CPU whose bus complies with PCI 2.2 standards,
and a PCI slot that meets the Plug and Play and PC99 specifica-
tions. The ATA RAID Controller may be connected to up to two,
four, eight, or twelve IDE/ATA drives by the supplied interface
cables.
Note: It is recommended that the Escalade 7000 or 8000
card be installed in the 64-bit PCI slot whenever possible
for the best performance. The controllers fit in both 32-bit
and 64-bit PCI slots with 5V as well as 3.3V. The 12-port
7000 board requires one full size PCI slot.
.
Drives must meet UltraATA-133, UltraATA-100, UltraATA-66 or
UltraATA-33 standards (8000 family does not support UltraDMA-
66 or UltraDMA-33 standards), but may be of any capacity or phys-
ical form factor. Length of unshielded interface cables may not

17
exceed 36” (91.4 cm) for parallel ATA controllers and 1M (39”) for
serial ATA controllers.
Personal Safety
Warning! High voltages may be found inside computer
equipment. Before installing any of the hardware in this
package or removing the protective covers of any com-
puter equipment, turn off power switches and disconnect
power cords. Do not reconnect the power cords until you
have replaced the covers.
Protecting Equipment and Data
Back up your data! Creating or deleting disk arrays
destroys existing files on the member drives. If your
drives contain valuable data, back them up and save data
elsewhere before changing your array configuration.
ESD Precautions
Standard electrostatic discharge (ESD) precautions must be fol-
lowed to avoid damaging computer components and accessories
when installing or removing the Escalade ATA RAID Controller.
• When the case of your computer is open and its internal parts are
exposed, don’t touch any internal part unnecessarily.
• Always wear a grounded strap or work on an ESD-protective
mat.
• Don’t remove the ATA RAID Controller from its protective bag
until you are properly grounded.

3ware Escalade ATA RAID Controller User Guide
18 www.3ware.com
• Handle the ATA RAID Controller by its edges or by the black
rail and metal bracket at its two ends.
• Don’t touch any pin, contact, lead or component on the ATA
RAID Controller.
Mechanical Concerns
Be careful when installing the Escalade ATA RAID Controller into
your system. Excessive force can damage the board, the cables,
your drives or your system.
• Be sure the board is aligned with its slot on the motherboard
before installing. Do not flex the board excessively.
• Interface cable connectors must be mated carefully without
bending any pins. The connectors provided are keyed to prevent
you from inserting them upside-down.
• Interface cables are fragile and must not be crimped or pinched.
Ensure that they do not impede the flow of cooling air from fans
or heat sinks in the system case.

Introduction
www.3ware.com 19
Introduction
Unmatched reliability and performance
The Escalade 7000 and 8000 series of ATA RAID Controllers bring
new levels of reliability to ATA RAID through a patented switched
architecture that exceeds the reliability of SCSI shared-bus storage
systems. The shared bus architecture of SCSI has inherent perfor-
mance limitations due to arbitration latency and only one drive may
use the bus at any given time. Further, a single drive failure can
bring the entire storage system down. In this scenario, SCSI RAID
features fail to make the data available.
The Escalade 7000 and 8000 series uses a non-blocking switched
architecture to isolate the drives from one another. Any drive failure
makes that drive unavailable and the rest of the storage system
remains undisturbed. In addition, 3ware has implemented
Advanced Data Protection (ADP) features that further protect data
from loss. In ADP Level-1, all drive commands are checked to
ensure that no command corruption has taken place over the entire
data path, guaranteeing that the command and data reach the drive
correctly. 3ware’s 3DM™, a web-based storage management util-
ity, sends notification of drive failures via email and audible alerts,
providing the system administrator with local and remote asynchro-
nous event reporting of array activities. Some of the Escalade fea-
tures and benefits include:
• Non-blocking switch technology with RAID 5 parity
• On-board processor minimizes host CPU overhead
• SCSI device driver for O/S compatibility and easy installation
• Browser-based 3ware Disk Manager (3DM) utility with pass-
word security for network management of 3ware storage arrays
• SMTP support for email/pager notification of events
• Easy-to-configure arrays from BIOS
• BIOS supports booting from the array

3ware Escalade ATA RAID Controller User Guide
20 www.3ware.com
• Multiple logical volumes and RAID levels can exist on one card
• Multiple card support within a system for very large storage
requirements
• Hot swap and hot spare support for data availability
• Dynamic sector repair for robust data protection
• S.M.A.R.T. disk drive monitoring for reliability
• R5 Fusion technology for accelerated RAID 5 writes (only
available on 7500 and 8500 models)
Escalade Serial ATA Controller
The Escalade 8500 series of Serial ATA RAID cards are the most
advanced controllers available, supporting from 4 to 12 Serial ATA
drives. These cards provide the highest level of RAID 5 perfor-
mance and scalability, traditionally seen only with a SCSI array.
Based on 3ware's 4th generation network switched architecture, the
8500 series are the only Serial ATA controllers that unleash the
point-to-point performance benefits of Serial ATA.
Teamed with a mature suite of software and firmware management
tools, the Escalade 8500 series of RAID controllers provide a pow-
erful, affordable alternative to SCSI.
RAID increases performance and adds
redundancy
Escalade ATA RAID Controllers use a Redundant Array of Inex-
pensive Disks (RAID) to increase your storage system’s perfor-
mance and provide fault tolerance. The ATA RAID Controllers
offer RAID 0 variable striped arrays for performance; RAID 1 mir-
rored arrays for fault tolerance; variable striped mirrored RAID 10
arrays for fault tolerance and performance; and RAID 5 arrays for
fault tolerance, high capacity and storage efficiency.
Other manuals for 7000-2 - Escalade RAID Controller
1
This manual suits for next models
2
Table of contents
Other 3Ware Computer Hardware manuals

