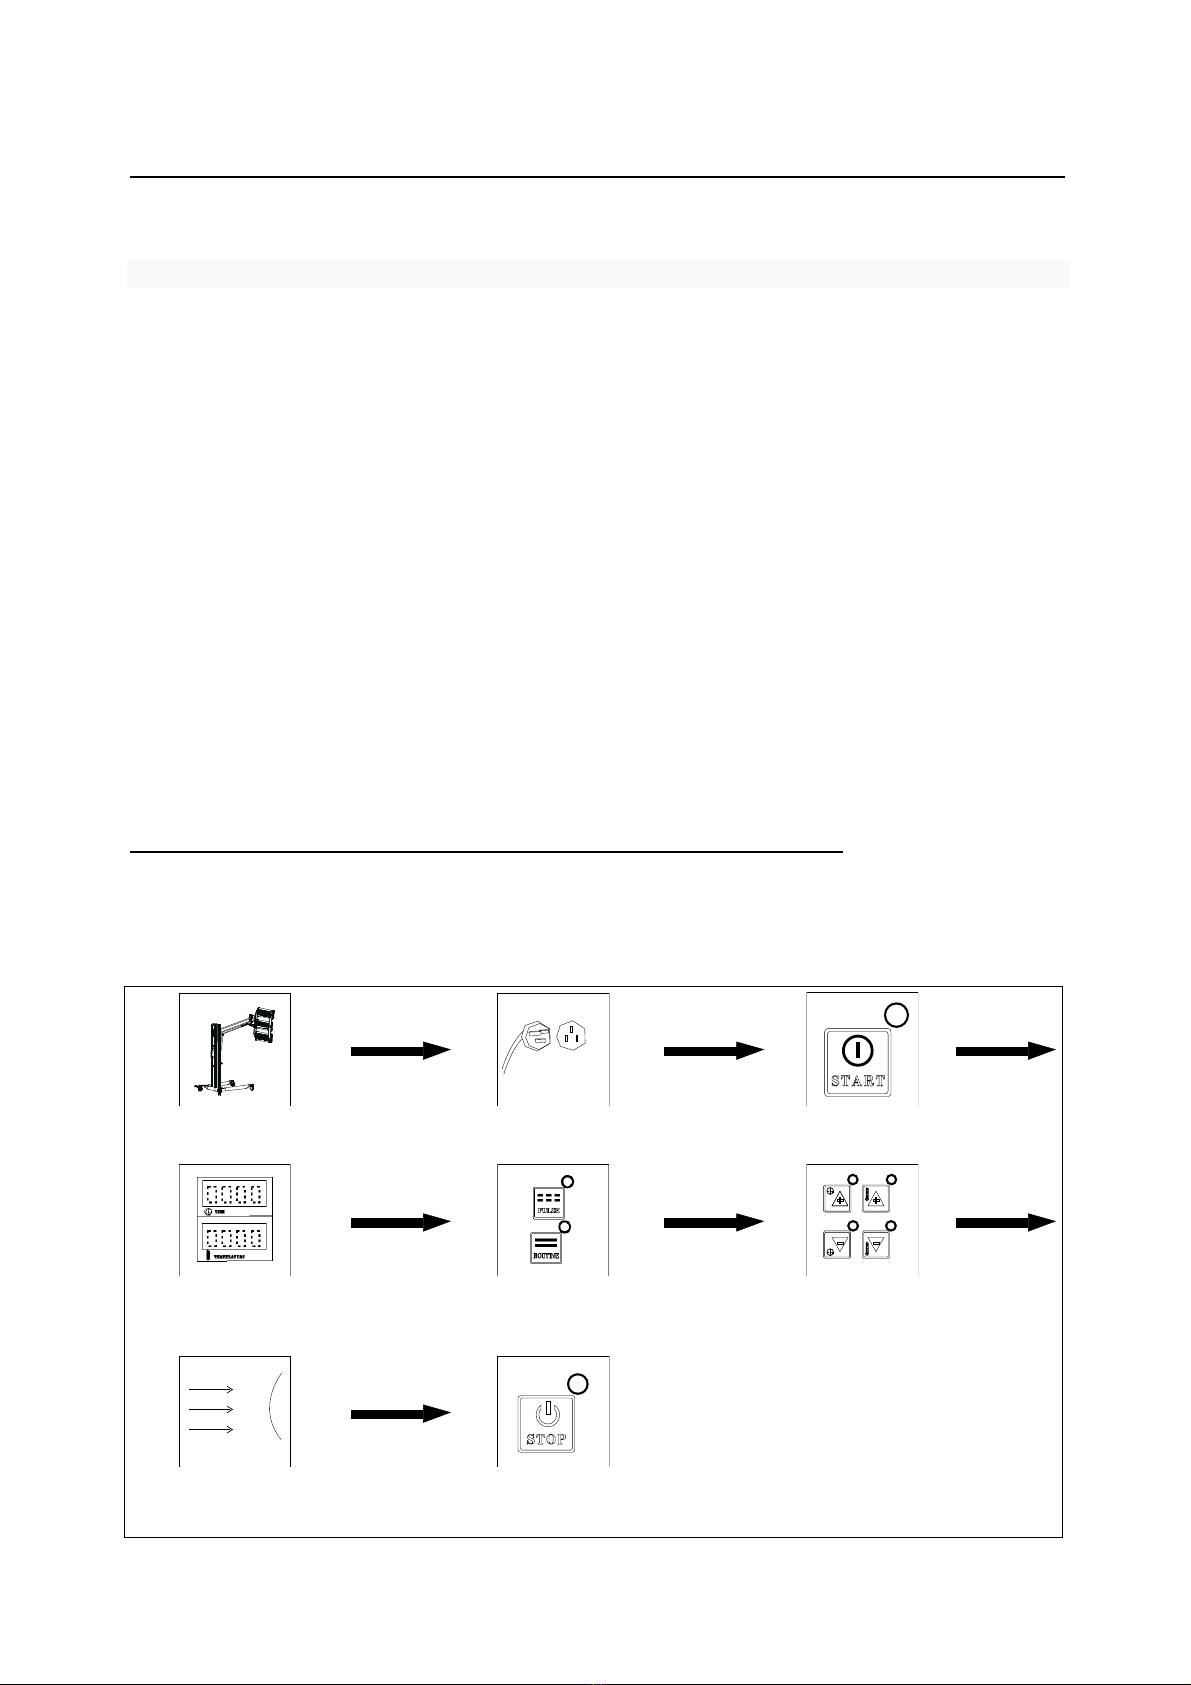
4CR ECO IR 3 User manual

car refinish
6.9752.0003
ECO IR 3
Infrared dryer

Content
1. Precaution 1
2. Technical specifications 2
3. Control panel 3
4. Installation 4
5. Operation 5
6. Trouble shooting 6
7. Light tubes exchange 7
8. Circuit diagram 8

1. Precaution
1. Read this manual carefully before installing or using the device.
2.
Before first use, check / unscrew connections of the fluorescent tubes. If
the screw connection is too strong, the arc tube will break due to
temperature induced expansion.
3.
Attention! Device becomes hot, risk of injury and fire!
4.
This device is intended for paint drying applications. Set the correct
temperature and keep the minimum safe distance from the heat source during
operation. Improper use can lead to surface damage.
5. Installation and maintenance must be performed by a qualified installer
or service company.
6.
The system is designed for easy installation, low operating costs and
minimal maintenance. The warranty does not cover damage to the
fluorescent tube caused by incorrect handling or incorrect operation.
7.
The warranty does not cover damage caused by improper use.
8.
Disconnect the power source when the unit is not going to be used for a
long time.
9. The tubes should not be perpendicular to the ground when the device is
turned on. Otherwise, the life of the arc tube is shortened.
10.
Before use, make sure the cartridge connector is firmly connected.
1

2. Technical specifications
Model
ECO IRE3
Input voltage
230V 50/60Hz Single phase
Total power
3 x 1100W
Curing area
1200 x 1000mm
Temperature
40°C - 100°C adjustable
Timer
0 Min – 99 Min adjustable
Light intensity
10%-100%
2
1
3
4
5
6
7
2
Attention!
Check if the
plugs are
connected
1. Cassette
2. Support arm
3. Lifter / damper
4. Column
5. Lifting handle
6. Substructur
7. Roll / brakes

3. Control panel
3
1. Time display
2. Temperature display
3. Pulse drying
4. Permanent drying
5. Time setting
6. Temperature setting
7. Turn ON
8. Turn OFF
9. Lamp 1 switch
10. Lamp 2 switch
11. Lamp 3 switch

4. Installation
1. Installation of the substructure:
a. Remove the substructure from the packaging.
b. Place the substructure on the ground.
c. Attach the four wheels to the base and tighten the screws.
d. Make sure the rollers with brakes are mounted on the back of the substructure.
2. Installation of the column:
a. Remove the column from the packaging.
b. Place the column vertically on the base and screw it together.
c. Connect the support arm with the column.
d. Connect the lifter / damper with the column and the support arm to control the up and
down movement of the support arm.
Installation of the lamp bracket:
a. Remove the lamp bracket from the packaging.
b. Screw the lamp bracket to the support arm.
c. Connect the control cables and adjust the angle of the lamp bracket.
Further information can be found on page 2.
4

5. Operation
1. Connect the electricity. The supply cable must be at least 4mm² at 230V.
Make sure the supply
voltage and frequency are as specified correspond to the type
plate of the device.
2. Switch on the device, symbols are displayed.
3. Set the distance between the device and the workpiece. Usually a distance of 30 – 60
cm is to be kept.
4. Select drying mode. (Pulse drying achieves a better gloss)
5. Set time and temperature according to the manufacturer’s specifications of the
applied materials to achieve the desired result .
Watch out! Device heats up during use. Injury and fire hazard!
Switch off the appliance after use. Store the device in a safe place to avoid
damage.
5
Mount device
Connect power
supply
Turn on
Digital display
Choose a drying
mode
Set temperature
and time
Place the heat source at
a distance of 30 – 60 cm
parallel to the surface
Turn off
30 - 60 c m

6. Trouble shooting
Error
Reason
Solution
Light tube doesn’t work
• Light tube
defective
• Not connected
• SRC defective
• Check the light
tube / if necessary
exchange
• Check connections
• Check SRC / if
necessary swap*
Lamps in continuous
operation
• SRC defective
• Check SRC / if
necessary swap*
Digital display does not
show everything or
incorrectly
• Flat cable not
connected
• Digital display
defective
• Check cable
• Check the display
panel for damage
Time and temperature
can not be adjusted
• Wrong switch
position
• Keyboard
incorrectly
connected or
defective
• Check installation
of the switch
• Check connections
/ if necessary
swap*
*Exchange may only be carried out by qualified and trained service personnel.
6

7. Light tubes exchange
1. Remove cassette for tube replacement
2. Remove protective grille
3. Remove both holder plates from the sides of the
cassette
4. Remove the fixed plates from both ends of the
cassette
5. Disconnect cable connections and screws.
Subsequently the arc tube can be exchanged
6. Follow the reverse order of assembling the
cassette
7

8. Circuit diagram
8

This manual suits for next models
1
Table of contents
Other 4CR Dryer manuals