DO NOT use cr eam
cleaners or bleach.
These substances are
abra siv e.
Regularlyclean with
mildliquid deter g e n t
or soap and w a t e r.
DO NOT use cleaning
pads with abra siv e
surfaces as this may
scra t ch the materia l .
INSTA LLATION GUIDE
This product must be installed by a licensed tradesperson.
This is a general installation guide - there are many factors that are involved that can alter the installation method. This product
install must comply with the standards in your respective country and must be adhered to by your licensed tradesperson.
90
Note: This product must be installed by a licensed tradesperson.
Th is is a gen e ral i nstallation guid e - there are many factors that ar e
inv olve d that can alter the installation method.
INS TA L L ATION GUIDE
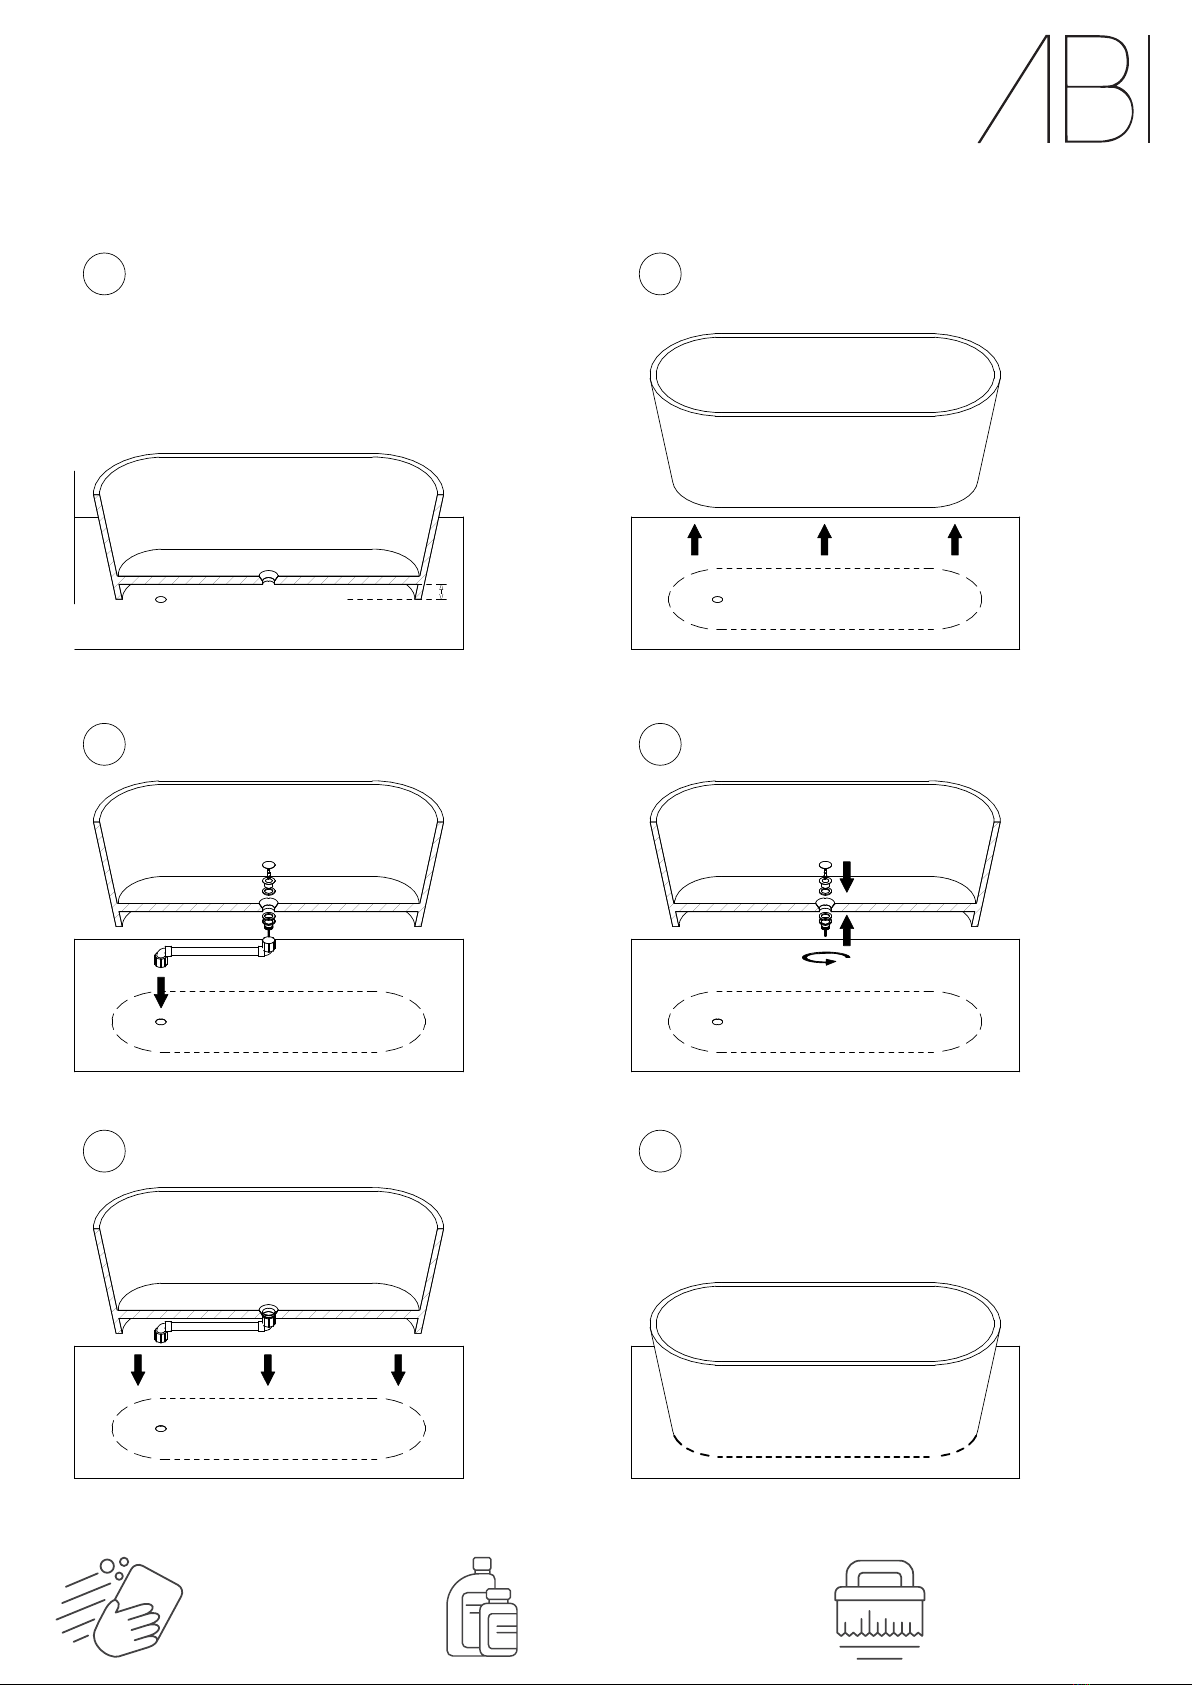
1Allow for90mm cleara nce fr o m t he underside
of bathto floor. 2Mark posi t i o n of bathto determi n e lengthof
drainage fr o m floor waste to batho utlet.
3Plan out drainage connection to floor waste&
alter if necessar y. 4Fit plug waste into bathoutlet, seal& tighten
as required.
5Fit out dra i nage c o n nection to underside of bath .
Positionbath& connect dra i nage to floorwaste.6Silico n e around baseof bath i f necessar y.


