© ACADEMIA FURNITURE INDUSTRIES, LLC, 2013
www.AcademiaFurniture.com
MODEL # SCTL2436
SINGLE STUDY CARREL ASSEMBLY INSTRUCTIONS
IllustratIon #1
HARDWARE LIST
Part Drawing Description Qty
A Bolt 4
B Nut 4
C Washer 4
D Wrench 1
E Upper Leg Screws 8
F Leg Insert Screws 6
G Glide 4
H 2" Screws 13
I 2 ½" Screws 8
LIST OF PARTS
Part Drawing Description Qty
P1 36x24 Table Top 1
P2 17x21 Partition 2
P3 10x29 Shelf 1
P4 17x36 Back Piece 1
P5 Upper Leg 2
P6 Leg Insert 2
P7 Stretcher Bar 1
a
F
EG
G
P5
P6
P6
P1
CB
P7
F
B
C
a
E
P5
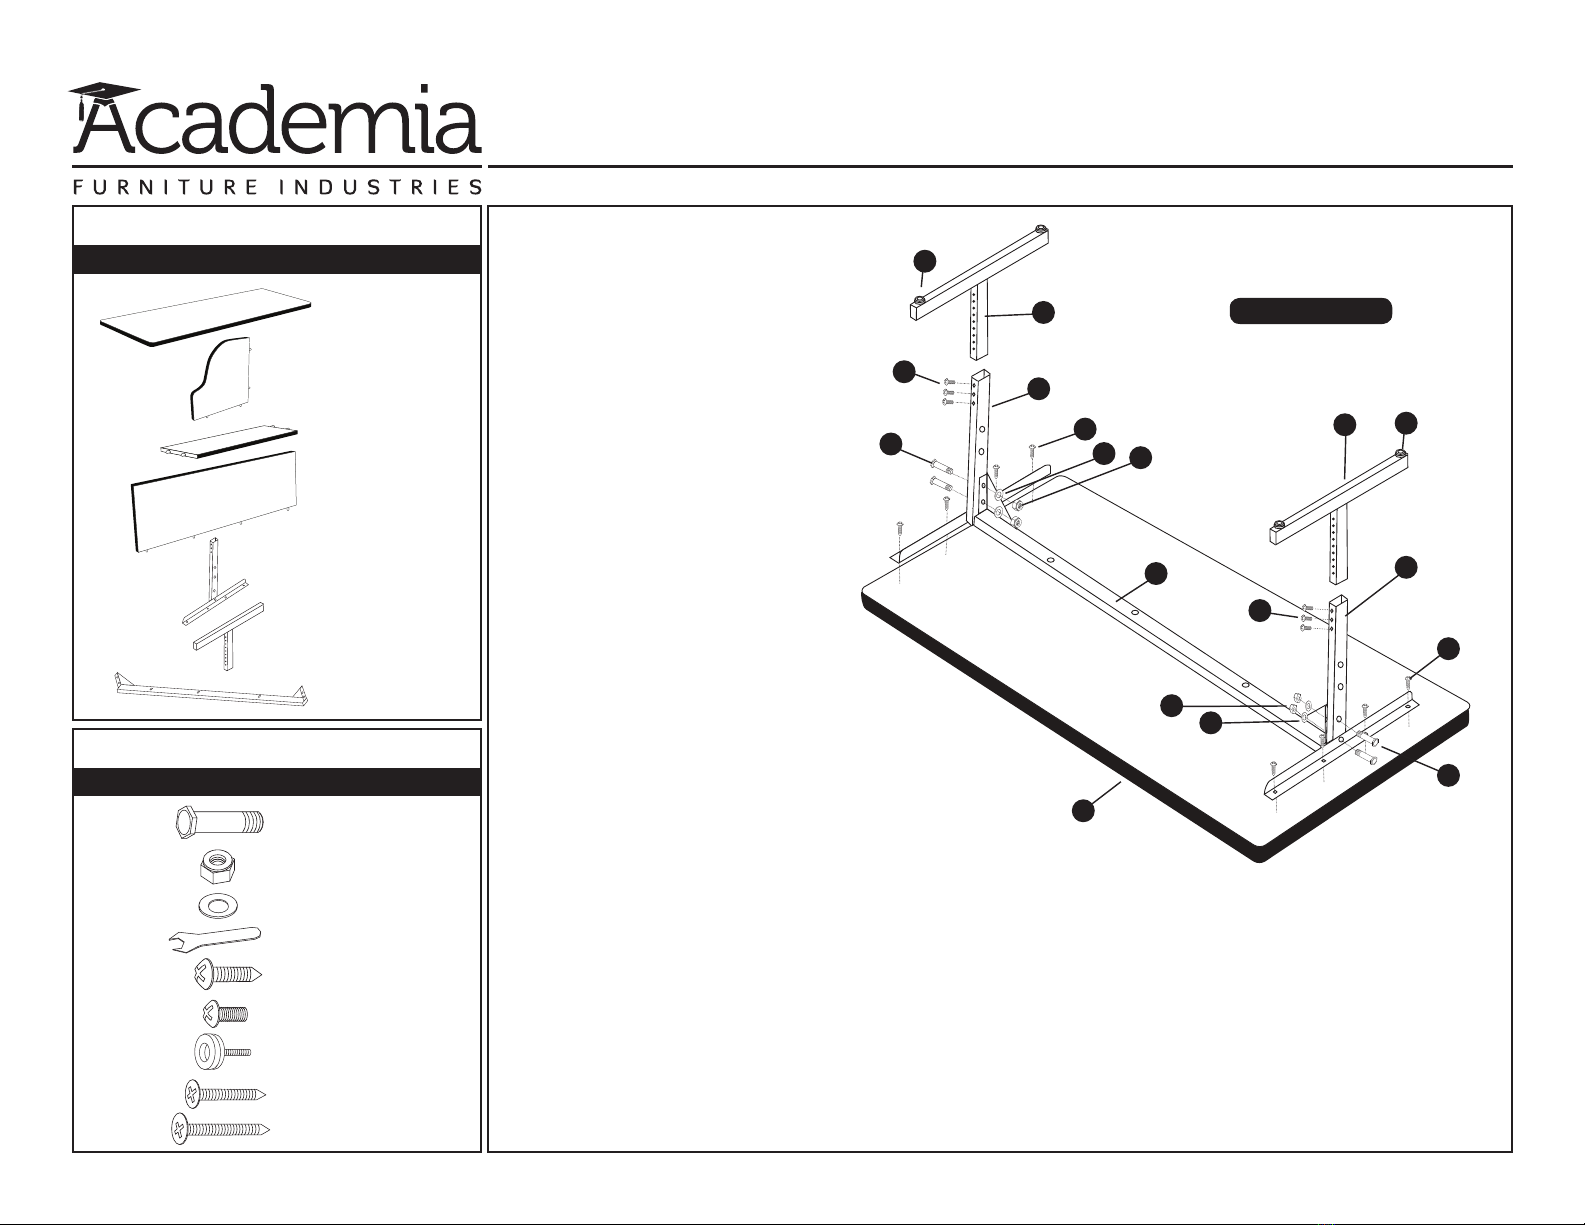
TO ASSEMBLE:
We suggest that 2 people assemble
this Carrel. The assembly for this carrel
is quick and extremely easy, thanks to
our dowel pin method.
1. Identify and separate all the parts and hardware.
2. Place the 36x24 table top [P1] upside down on a at
surface. Attach the [P5] upper legs with the [P7] stretcher bar.
First line up the holes of the upper leg with the 2 holes
in the stretcher bar's bracket, as shown in Illustration #1.
Insert the [A] bolt from the outside of the leg and place the [C] washer and
[B] nut inside, once the bolt is through the leg. Tighten the [B] nut. Repeat on
the other side.
3. Properly align the upper leg bracket in the center of the table's width. There
are locator marks for assembly ease. Use 4 [E] screws to attach each upper leg
to the underside of the table top. See Illustration #1
4. Install the [P6] leg inserts into the [P5] upper legs, as shown in Illustration
#1. The holes in the legs are 1" apart. Set at desired height and tighten
using 3 [F] screws per leg. Screw the [G] glide on the bottom of the T-legs.


