Acadia LIVING User manual

1. Open shutter panels and position the light block on the window sill. The front of the light block
should be flush with the front of the left and right frames. Make sure magnets on panels will latch
onto the magnet catches on the light block.
Install the plugs into the frames’ pre-drilled plug holes to
complete the look of your shutters.
Shutter Installation Instructions
Z Frame Inside Mount 2 Sides Cafe Shutters
Installation Video
Scan the QR code with
your smartphone to
follow along with video
instructions.
CONGRATULATIONS
on purchasing the finest shutters in the market.
You can take pride that your purchase will enhance the function and beauty of your home.
IMPORTANT: Do not mix panels or frames from other windows. Install one shutter at a time.
Getting Started
Remove the shutter from the package. Do not discard any of the packaging material until the
shutter operates to your satisfaction. Check the diagram below to make sure you have the
necessary parts.
Version 37103-65200
Step 3: Secure the Light Block
Step 4: Install the Plugs
Once aligned properly, secure the light block with the light block screws provided through each
pre-drilled hole.
2.
Light Block
Step 1: Assemble Frame
Getting Started
Step 2: Attach the Panels
Step 3: Secure the Light Block
Step 4: Install the Plugs
INSTALLATION OVERVIEW
Light Block
Z Frame
Z Frame Inside Mount 2 Sides Cafe Shutter
Shutter
Panel
Hinge
Pins
Hinge
Pins
Tension
Adjuster
+
+
Customer Service
Phone: 855.667.6261
Email: [email protected]
Adjust the Tension System
If over a period of time the louvers on your shutters should loosen or not
function properly, a built-in tension system can be adjusted. Simply open the
panels fully and find the tension adjuster screw hole on the side of each panel.
Use a screwdriver to gently turn the screw on each side of the panel to your
desired resistance level. Repeat process for other panel(s) if necessary.
Lifetime Limited Warranty
All Acadia Living shutters have a lifetime limited warranty and will be free from defects in materials or
workmanship for as long as the original retail purchaser owns the shutters, provided that such products
were properly installed in residential dwelling; and such products were made or assembled exclusively
from original materials and components. Any resale or other transfer of the product and/or materials
voids this warranty.
For a complete copy of this warranty, please contact customer service by phone or email.
Maintain Your Shutters
Use a clean dry cloth, feather duster or vacuum with brush attachment to gently remove dust and debris.
To ensure thorough cleaning, wipe the louvers in the open and closed positions.
Do not immerse the product in water and do not use harsh chemicals to clean. This may cause
discoloration and the wood to warp. Ultrasonic cleaning is not recommended. For best results on
Composite Shutters,use a cotton cloth dampened with water. Polyester cloths tend to create static,
which can attract dust.
L Bracket (30mm)
for T-post without top/bottom
frame (if applicable)
Hinge Screws
Screws for L bracket
(30mm) (if applicable)
Hinge Pins
Frame Screws
Hinge Spacers
Light Block Screws
Screws for L bracket
(30mm) (if applicable)
Plug
63.5mm [2 1/2"]
38mm [1 1/2"]
18.5mm [3/4"]
Hinge Screws for
1" T-post with panel
folds include RTL
(if applicable)
11mm [7/16"]

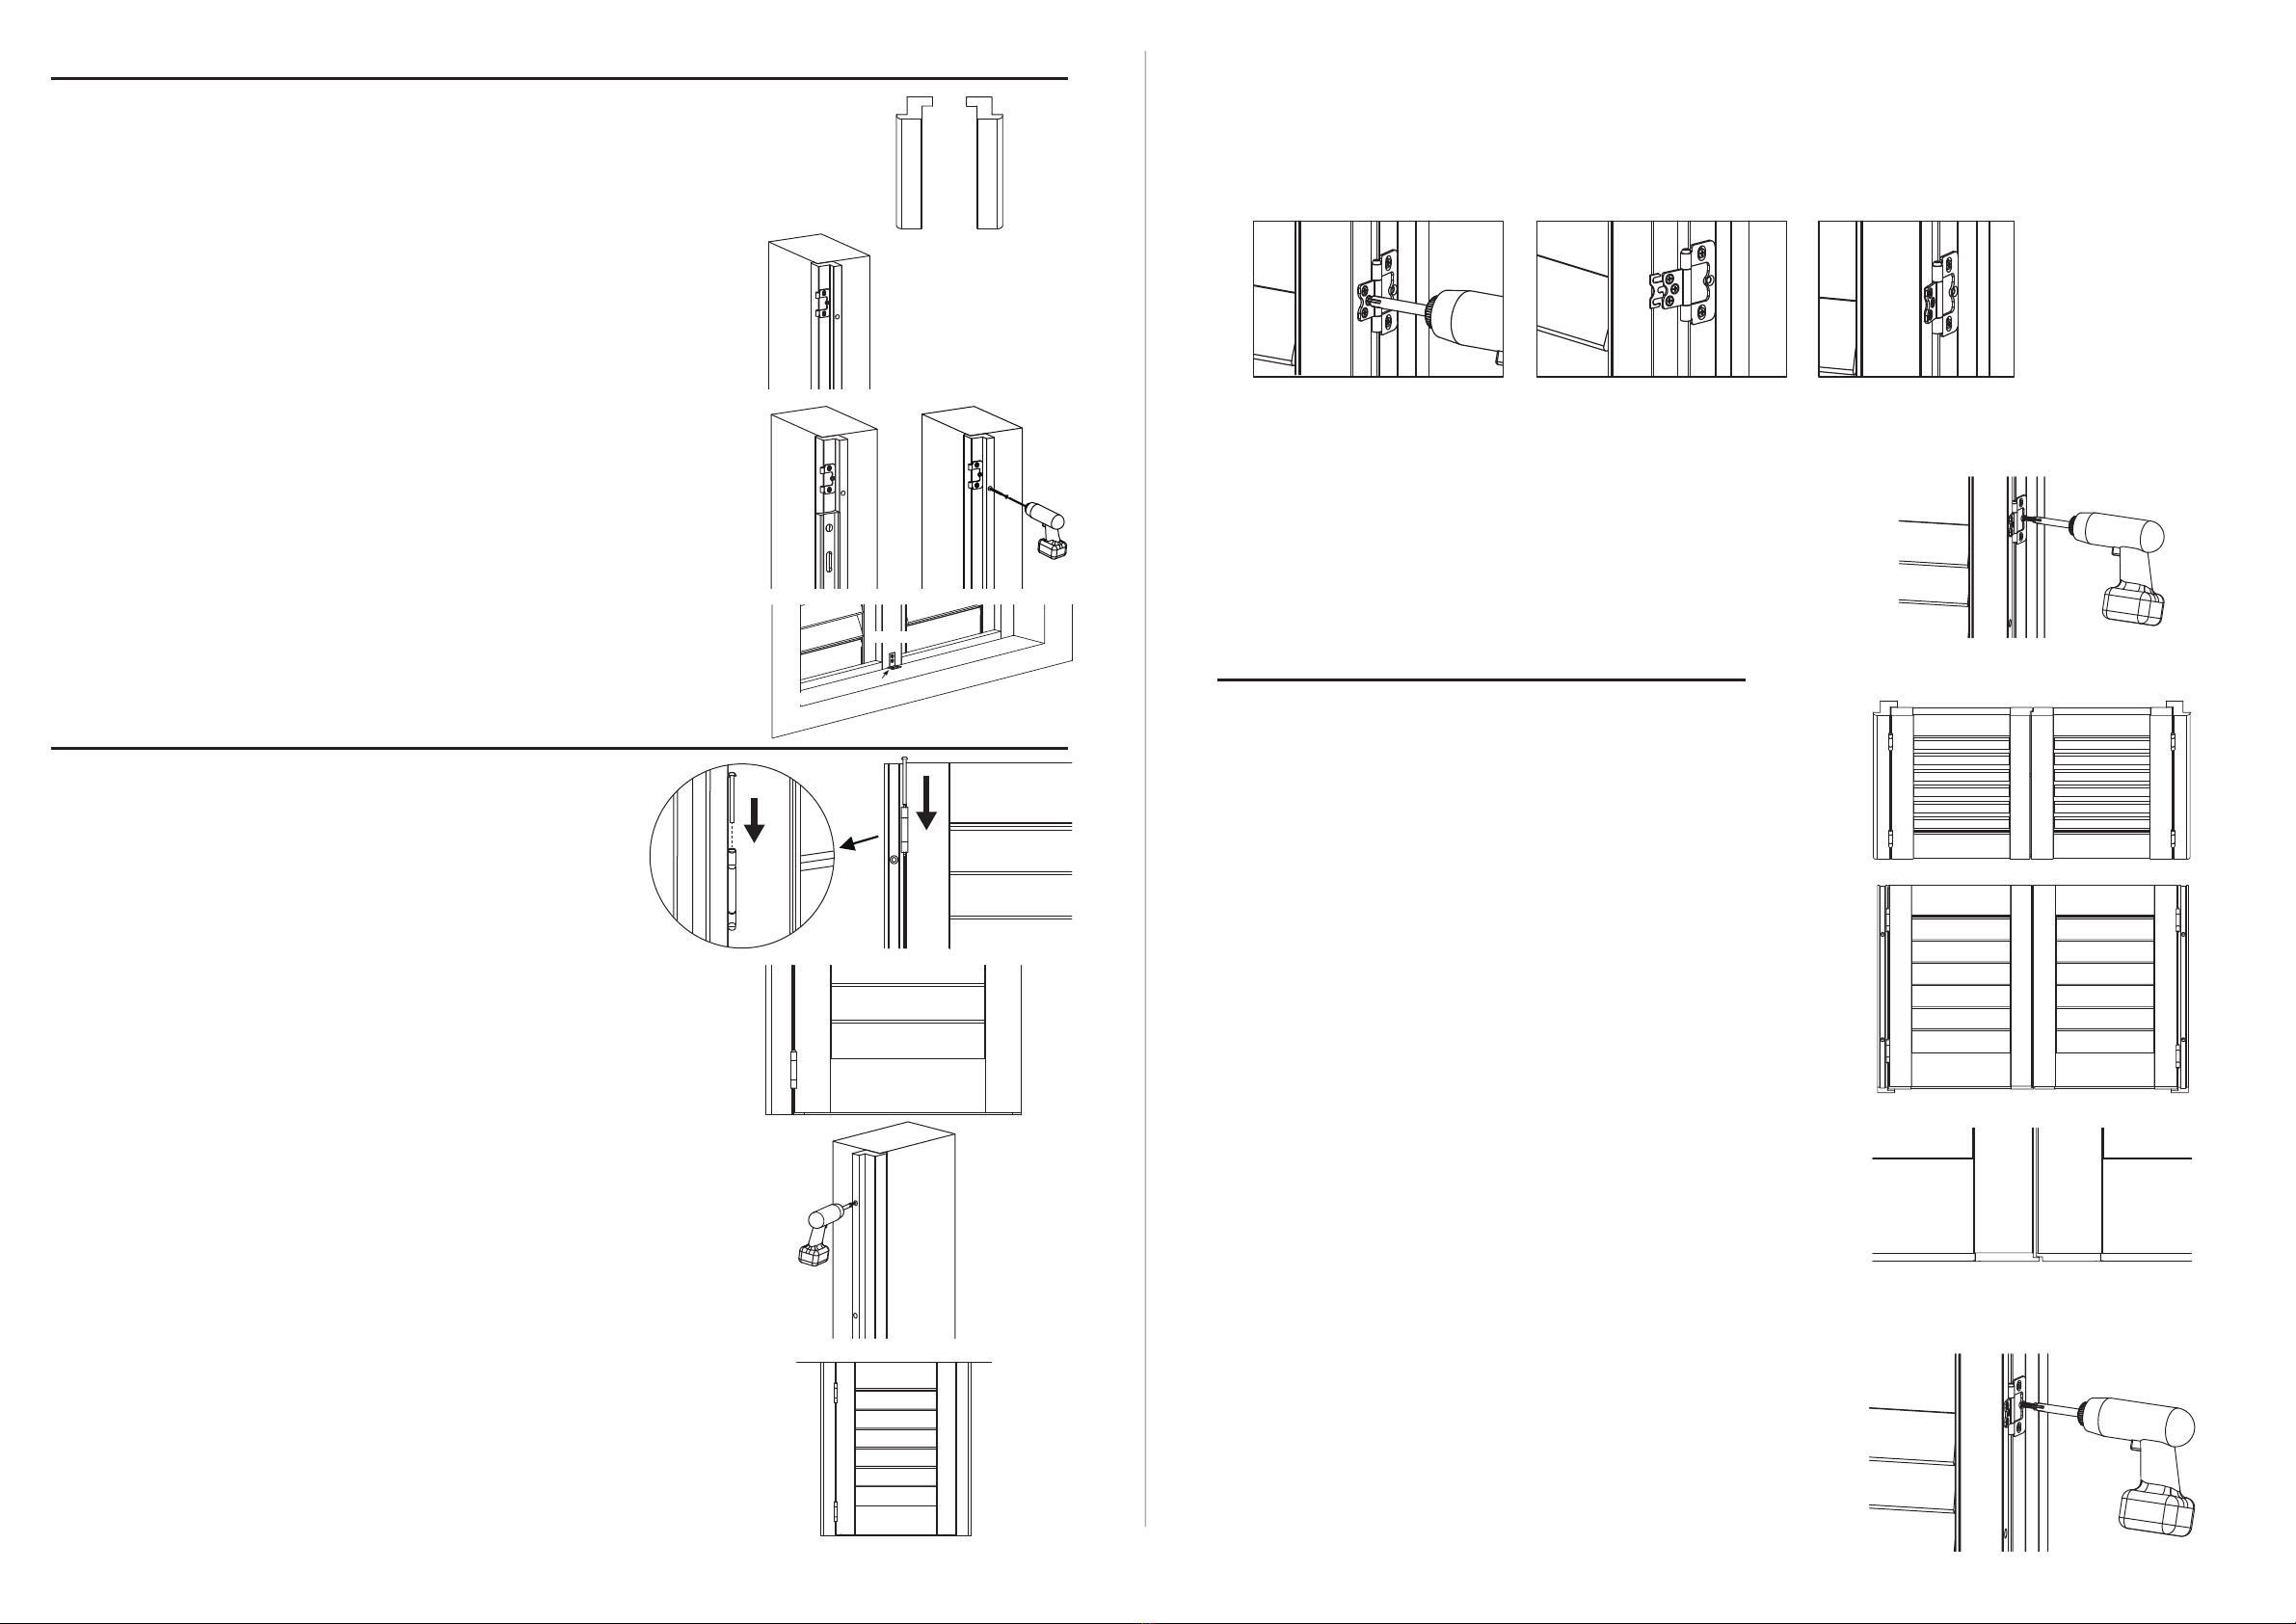
Multiple panels – hinged on both frames
1. Temporarily install both left and right frames using
directions in Step 1, #3.
2.
3. Close the left and right panel sections and check
center spacing. Adjust frames using shims or
hinge spacers to achieve even spacing where
the center panels come together.
4. Once desired spacing has been achieved, secure
frames with remaining screws.
5.
Fasten the deadlock screw for all hinges.
Step 1: Assemble Frame
Step 2: Attach the Panels
5. Secure both frames using shims if necessary to maintain spacing.
Open & close panel and make any final adjustments. Use provided hinge spacers
to adjust spacing if necessary.
Once desired spacing has been achieved, secure frames with remaining screws.
6.
Fasten the deadlock screw for all hinges.
1. Carefully remove panels and frames from the packaging.
Do not mix panels or frames from other windows.
Frame pieces are labeled (left and right).
4. If installing with T-post, use L bracket (30mm) to secure
the T-post. Fasten the T-post with additional nails if necessary.
If not installing with T-post, skip to the next step.
2. Place the frame side that has the pre-installed hinges into
the correct side of the window opening.
3. Using a level, ensure the frame is straight up and down.
Temporarily secure to the opening with a screw at the
top and bottom of the frame. Use shims if necessary to
keep frame straight up and down.
Version 37103-65200
Single panel or hinged on 1 side only
1.
2. Operate the panel to ensure it opens and closes
freely. The hinges may be adjusted up or down to
increase or decrease bottom spacing.
3. Make sure frame is straight up and down with the level
and temporarily secure with screws for non-hinged frame.
4. Close panel against the non-hinged frame and check
to see there is approximately 1/8"of space between
the panel and frame. Adjust as necessary to achieve
even spacing.
Loosen hinge screws
on the panel
Insert spacer behind
hinge, tighten screws
Spacer installed
WALL
Insert the shutter panel into the frame hinges and
secure the hinges with supplied hinge pins.
If you have bi-fold panels, start by securing this first
panel to the frame. Then join the hinges of the panels
labeled P1 and P2 and insert the hinge pins.
Insert panels into both the left and right frames and
secure with hinge pins.
If you have bi-fold panels, after attaching the far left and/or
far right panels to the frame, you will need to join the hinges
of the panels labeled P1 and P2 and insert hinge pins.
Repeat for panels labeled P3 and P4 if you have these.
Proper order of panels from left to right is P1, P2, P3, P4.
WALL
WALL
Left Right
WALL
back side of shutter
T-post
L bracket (30mm)
Popular Indoor Furnishing manuals by other brands

Regency
Regency LWMS3015 Assembly instructions

Furniture of America
Furniture of America CM7751C Assembly instructions

Safavieh Furniture
Safavieh Furniture Estella CNS5731 manual

PLACES OF STYLE
PLACES OF STYLE Ovalfuss Assembly instruction

Trasman
Trasman 1138 Bo1 Assembly manual

Costway
Costway JV10856 manual