ACOUSTIC SOLUTIONS Pop Idol KS-3 User manual

INTRODUCTION
Congratulations on purchasing this Pop Idol DVD/CD+G karaoke machine
from Acoustic Solutions. We strongly suggest that you carefully study these
instructions before attempting to operate the system, and that you note all
the listed precautions.
Because of the features built into this product, the KS-3 is ideal for the
following applications:
Karaoke
DVD Movies
Disco
General PA applications
We trust that this product will give you hours of entertainment, and provide
years of unparalleled performance. As with any new electrical product
please be patient and allow at least 36 hours use before all components
have acclimatized themselves with your surroundings, and found their
optimum working temperature.
CONTENTS
1 Introduction
2 Safety instructions
3 Disc handling and maintenance
4 Control locations: Front panel
5 Connection locations: Rear panel
6 Connecting to external equipment
7 Remote control
8 Remote control features
9 Using the microphone features
10 Using the microphone
11 Using the microphone controls
12 Using the CD+G/DVD player
14 Understanding multiplex
15 KS-3 setup
16 Troubleshooting
Care and maintenance
17 Specications
Contact details
$6$#$'
+!2!/+%-!#().%
1

SAFETY INSTRUCTIONS
IMPORTANT SAFETY INSTRUCTIONS
CAUTION: To reduce the risk of electric shock, do not remove any cover.
NO USER-SERVICEABLE PARTS INSIDE, REFER ANY SERVICING TO
QUALIFIED SERVICE PERSONNEL.
• Read and keep these instructions available for future reference.
• For indoor use only.
• The unit must only be connected to a suitable mains power supply using
the mains power lead provided.
• Toreducetheriskofreorelectricalshock,donotexposethisunitto
rain or moisture.
• Unplug the unit from the wall socket during lightning storms and when it
is not going to be used for a long period of time.
• Take care that foreign objects do not enter, or liquids are not spilled,
into the enclosure through any openings. If this should happen, refer to
qualiedservicepersonnelbeforeattemptingtouse.
• Ensure adequate ventilation - do not cover this unit with curtains, etc.
• Do not install near any heat source, such as radiators, or other equipment
that produces heat.
• Protect the mains power cable from being damaged.
• This apparatus shall not be exposed to dripping and splashing and that
noobjectslledwithliquids,suchasvases,shallbeplacedon
the apparatus.
NOTE: The KS-3 is not completely isolated from the mains power when the
mains switch is turned off.
EXPLANATION OF SYMBOLS
Thelightningashsymbolwiththearrowheadwithinanequilateraltriangle
is intended to alert the user to the presence of uninsulated ‘dangerous
voltage’withintheproduct’senclosurethatmaybesufcienttoconstitutea
risk of electric shock to persons.
The exclamation point within an equilateral triangle is intended to alert the
user of important operating and maintenance instructions in the service
literature relevant to this appliance.
UK MAINS PLUG DETAILS
Foryourconvenienceamainsplugwithafuse(3Amp)hasbeenttedto
this appliance. For your safety please observe the following information.
• The KS-3 will operate on a AC mains supply of 230 volts, 50Hz.
• The wires in the mains lead are coloured in accordance with the
following code:
BLUE - NEUTRAL
BROWN - LIVE
• Under no circumstances should the Neutral or Live wires be connected
to the ‘E’ (Earth) terminal.
CAUTION
RISK OF ELECTRIC SHOCK
DO NOT OPEN
CAUTION: TO REDUCE THE RISK OF
ELECTRIC SHOCK, DO NOT REMOVE
COVER OR BACK. NO USER SEVICEABLE
PARTS INSIDE. REFER SERVICING TO
QUALIFIED PERSONNEL.
2

DISC HANDLING AND MAINTENANCE
HANDLING PRECAUTIONS
Holdthediscbytheedgessothesurfacewillnotbesoiledbyngerprints.
(A) Fingerprints, dirt and scratches can cause skipping and distortion. Do not
write on the label side with a ball-point pen or other writing instruments. Do
not use record cleaning spray, benzine, thinners, static electricity prevention
liquids or any other solvents. Be careful not to drop or bend the disc. Do not
install more than one disc on the disc tray.
Do not try to close the disc tray when the disc is not installed properly (B).
Be sure to store the disc in its case when not in use.
If the surface is soiled (C) Wipe gently with a soft, damp (water only) cloth.
When wiping discs, always move the cloth from the centre hole towards the
outer edge. (if you wipe the disc using a circular motion, circular scratches
are likely to occur, which will cause noise).
GENERAL MAINTENANCE
• Be sure to turn the unit off and disconnect the AC power cord before
doing any maintenance on the unit.
• Wipe with a dry soft cloth.
• If the surfaces are extremely dirty, wipe clean with a cloth which has been
dipped in a weak soap-and-water solution and wrung out thoroughly, and
then wipe again with a dry cloth.
• Neverusealcohol,benzine,thinners,cleaninguidsorotherchemicals.
• Do not use compressed air to remove dust.
REGION CODING
Since DVD movies are released at different times around the world, all DVD
discs are “region coded” and will only play in a DVD player of the same
region. If you try and play a different region disc an error message will be
displayed on the TV screen.
Theworldisdividedinto6mainregions,andthediscsareidentiedbythe
region number superimposed on a world globe:
Please contact your hardware retailer or manufacturer for further information
on region codes or RCE - Regional Coding Enhancement.
(B) (C)
If the disc is brought from a cold to a warm environment, moisture may form
on the disc. Wipe the moisture off with a soft, dry, lint-free cloth before using
the disc.
IMPROPER DISC STORAGE
You can damage discs if you store them in the following places:
• Areas exposed to direct sunlight.
• Humid or dusty areas.
• Areas directly exposed to a heat outlet or heating appliance.
DISCS WHICH CANNOT BE PLAYED ON THIS PLAYER
Some rewritable DVDs. Region 1, 3, 4, 5, 6 discs.
Region 1 Canada, USA, US Territories.
Region 2 Europe, Middle East (including Egypt).
Region 3 Southeast Asia, East Asia (including Hong Kong).
Region 4 Central America, South America, Mexico, Australia, New
Zealand,PacicIslands,Caribbean.
Region 5 Russian Federation, Africa (not Egypt), North Korea,
Mongolia.
Region 6 China.
(A)
3

CONTROL LOCATIONS: FRONT PANEL
AUDIO
STANDBY
MIC VOLUME MUSIC VOLUME
ECHO AUTO VOICE
MIC 1 MIC 2
LOUDNESS
ON
OFF
MIN MAX MIN MAX
MIN MAX LO HI
SKIP UPSKIP DN
REPEAT PLAY/PAUSE
SENSOR
STOP
1
2
3
4
5
6
7
8
9
10
11
12
13
14
15
161718
1. STANDBY.
Turn the KS-3 system on or off.
2. AUDIO.
Switch between vocal/instrument track when playing a CD+G vocal track.
3. SKIP DN.
Press to skip to the previous track/chapter on a CD+G/CD/DVD.
4. MIC VOLUME.
Control the volume of MIC1 and MIC2 inputs.
5. MIC 1.
Connect microphone.
6. ECHO.
Add echo to the microphone signal.
7. LOUDSPEAKER.
Outputs sound from the KS-3.
8. AVC. (Auto Voice Cut)
Set the level of AVC when playing a vocal track on multiplex CD+G discs.
9. MIC 2.
Connect microphone.
10. MUSIC VOLUME.
Adjust the volume of the CD+G/CD/DVD playback.
11. SKIP UP.
Press to skip to the next track/chapter on a CD+G/CD/DVD disc.
12. STOP.
Stops CD+G/CD/DVD playback.
13. REPEAT.
Press to repeat.
14. PLAY/PAUSE
Toggle between playback and pause mode.
15. LOUDNESS ON/OFF.
Select on to enhance bass performance.
16. SENSOR.
Point remote control at this sensor to operate unit remotely.
17. LED DISPLAY.
Displays current track/chapter being played.
18 DVDCD/CDG LOADING TRAY.
Use to load your CD/CD+G/DVD discs into the KS-3.
4

CONNECTION LOCATIONS - REAR PANEL
1. AUX output to external AMP.
2. Video output for television.
5

CONNECTING TO EXTERNAL EQUIPMENT
You can connect the KS-3 to external equipment in order to display lyrics
fromaCD+Gdiscandtoprovidefurtheramplication.
CONNECTING TO A TELEVISION
Provided you are playing a CD+G disc, you will be able to connect the KS-3
to a television to display the song lyrics. Connect the supplied video cable
from the VIDEO OUT socket on the back of the KS-3 to the ‘VIDEO IN’
socket on your television (this is normally located on the front or side of
your television. If you do not have a VIDEO IN socket on your television, it
is possible to use a phono/scart adapter and use an available scart socket
on the rear of your television). You will then need to select the AV channel
on your television in order to view the lyrics.
CONNECTING TO AN EXTERNAL AMPLIFIER
You can connect the KS-3 to an external amplier to further amplify the
sound. To do this, connect a pair of phono jacks (not supplied) from the
AUX OUTPUT sockets on the rear of the KV-1 to the AUX INPUT on your
amplier(Seebelow).
!58/54054 6)$%//54
2,
EXTERNAL AMPLIFIER
TV
KS-3
6

REMOTE CONTROL
Please insert 2 x AA 1.5V batteries as shown.
V
O
L
U
M
E
TITLE
SUBTITLE
PROGRAM
LANGUAGE ANGLE SEARCH
MUTE OSD
1 2 3
4 5 6
7 8 9
0 10+
SETUP MENU
STOP ZOOM
SLOW
RESUME
A-B
REPEAT L/R
RETURN
RANDOM
PAUSE
STOP SELECT
1
2
3
4
5
6
7
8
9
10
11
12
13
14 15
16
17
18
19
20
21
22
23
24
25
26
27
28
29
30
7

REMOTE CONTROL FEATURES
1. TITLE. Return to the top menu when playing a DVD disc.
2. LANGUAGE. Change the DVD audio soundtrack language. This de-
pends on whether the DVD disc contains multiple languages.
3. ANGLE. When a disc contains multiple viewing angles, press to view
these different angles.
4. NUMERIC KEYS. Use to directly access certain tracks/chapters on a
disc.
5. SETUP. Access and exit setup menu screens.
6. NAVIGATION KEYS. Navigate setup menus and DVD menus.
7. STOP. Stop playback of a DVD/CD/CD+G track.
8. REW. Fast search backwards through a track/chapter (not CD+G).
9. STEP. Use to move through a DVD chapter frame by frame.
10. SLOW. Play a DVD disc in slow motion.
11. PREV. Press to skip back through chapters and tracks.
12. RESUME. Resume playback from stop mode.
13. A-B. Use to set start and end points for repeat mode.
14. REPEAT. Select repeat one chapter/track or all.
15. L/R. Toggle between the vocal or instrumental channels when playing
a CD+G vocal track.
16. RETURN. Use to step back a stage in DVD menus.
17. VOLUME +/-. Adjust the output volume of the KS-3.
18. RANDOM. Press to start a random track/chapter playlist.
19. NEXT. Press to jump to the next track or chapter.
20. PAUSE. Use to directly access certain tracks/chapters on a disc.
21. PLAY. Press to begin playback of a CD/DVD/CD+G disc.
22. ZOOM. Press to zoom. Furtherpressingchangesthemagnication.
23. FWD. Fast search through a track/chapter (not CD+G).
24. SELECT. Fast search backwards through a track/chapter.
25. MENU. Use to the menu screen on a DVD disc.
26. PROGRAM. Use to program a desired track/chapter play order.
27. SEARCH. Press this key. Then type the track or chapter number you
wish to access.
28. ANGLE. Some DVD discs have multiple viewing angles. Press to toggle
between available angles.
29. OSD. Press to turn on or off the on-screen display during disc play-
back.
30. MUTE. Use to mute the audio output of the KS-3.
8

There are generally two different formats of karaoke discs on the UK market.
CD and Graphics (CD+G) discs and more recently DVD karaoke discs. Both
types of karaoke discs will display lyrics on your television screen and both
are compatible with this system.
USING CD+G KARAOKE DISCS
CD+G karaoke discs work in a similar way to standard audio CDs in the way
that they are operated using the KS-3. When buying CD+G discs, look for
the CD+G logo shown above.
Follow the instructions below for details on how to use CD+G karaoke
discs.
1. Insert the CD+G disc into the disc drawer with the label side facing
upwards using the eject button on the remote control or on the front panel to
open the drawer. Close the drawer to begin playback.
2.TheKS-3willbeginplaybackfromthersttrackonthedisc.Youwillnow
see the song title follows by the song lyrics.
3. Skip between tracks on the CD+G disc using the NEXT and PREV buttons
on the remote control or the front panel.
4. The fast search up/down feature is disabled during CD+G playback as
this function is not available when playing this format of disc.
USING DVD KARAOKE DISCS
DVD karaoke discs work in a similar way to CD+G discs in that they display
the lyrics on your television. However, the advantages of DVD include
improved audio and video quality in addition to interactive menus. When
buying DVD karaoke discs, look for the DVD Karaoke logo shown above.
USING THE MICROPHONE FEATURES
Follow the instructions below for details of how to use DVD karaoke discs.
1. Insert the DVD karaoke disc into the disc drawer as described in the
section above.
2. After the DVD disc has registered in the player you will probably be
greeted with a menu screen.
3. From this menu screen you should choose which track you wish to play
or any other options which may be available.
4. You can navigate these menus using the navigation keys on the remote
control.
5. Make a selection from the menus using the SELECT key on the remote
control (24, page 7).
6. In most cases you can choose whether you wish to play vocal or
instrumental versions of a track from this menu.
7. You can return to the start-up menu screen at any time using the MENU
key on the remote control.
ADDITIONAL KARAOKE FEATURES
ECHO. You can add echo to the microphone signals using the ECHO control
knob on the front panel of the KS-3.
9

Before you switch on the system connect one or both of the supplied
microphones.
The supplied microphones are tted within a 6.35mm jack plug. Connect
the 6.35mm jack plug into one of the microphone inputs on the front of the
KS-3. Adjust the microphone volume to the minimum level before switching
on your equipment.
Once you have selected the desired track on your CD+G or DVD disc (see
pages 12 & 13), whether it be a vocal or instrumental version you can begin
to sing into the microphone by following the below instructions:
1. Adjust the microphone volume control on the front panel to a reasonable
level.
2. Switch the microphone on by moving the ON/OFF switch located on the
body of the microphone up to the ON position.
3. Hold the microphone approximately 15-20 cm away from your mouth.
4. Sing!
You may experience feedback when using the microphones. This is a loud
howling noise that emits from your speakers or television set. To avoid this
do one of the following:
1. Reduce the microphone volume level on the KS-3.
2. Move the microphone further away from the KS-3
USING THE MICROPHONE
HOLD MICROPHONE
APPROXIMATELY 15-20 CM
AWAY FROM MOUTH
/.
/&&
ON
OFF
PUSH SWITCH
TO ‘ON’ POSITION
10

The MIC VOLUME knob adjusts the microphone volume level only and
should be adjusted along with the MUSIC VOLUME (10, page 4) control
until the desired vocal/music mix is achieved.
The depth of echo which is applied to both microphone channels can be
adjusted by turning the ECHO knob (6, page 4) clockwise to increase
the depth of echo, or anti-clockwise to reduce down to ‘MIN’ if no echo is
required.
USING THE MICROPHONE CONTROLS
Plug a microphone into either
MIC1 or MIC2 sockets.
MIC 1
MIN MAX
Use the MIC VOLUME knob to
adjusts the microphone volume.
MIC VOLUME
MIC 1
MIN MAX
ECHO
MIC 1
MIN MAX
MIN MAX
Use The ECHO knob to adjusts
the depth of echo applied to both
mic channels.
Take care not to turn the MIC VOLUME too high when in close proximity to
the KS-3 or external loudspeakers, as feedback will occur.
11

USING THE CD+G/DVD PLAYER
TheKS-3isttedwithauniqueDVDplayer,thathasbeenenhancedwith
the ability to play CD+G karaoke discs. With this feature you can purchase
both DVD and CD+G karaoke discs.
LCD DISPLAY
The KS-3 is tted with an LED display (17, page 4) which, when a CD/
CD+Graphics disc is loaded, will show information including track number
and track time.
TO LOAD A CD/CD+G/DVD
Press the OPEN/CLOSE button on the loading tray door (18, page 4) to
open the disc drive. Place a disc into the disc drive with the label uppermost.
Once the CD lid is fully closed the CD will automatically load. You will then
hear the CD spinning as the disc is being read.
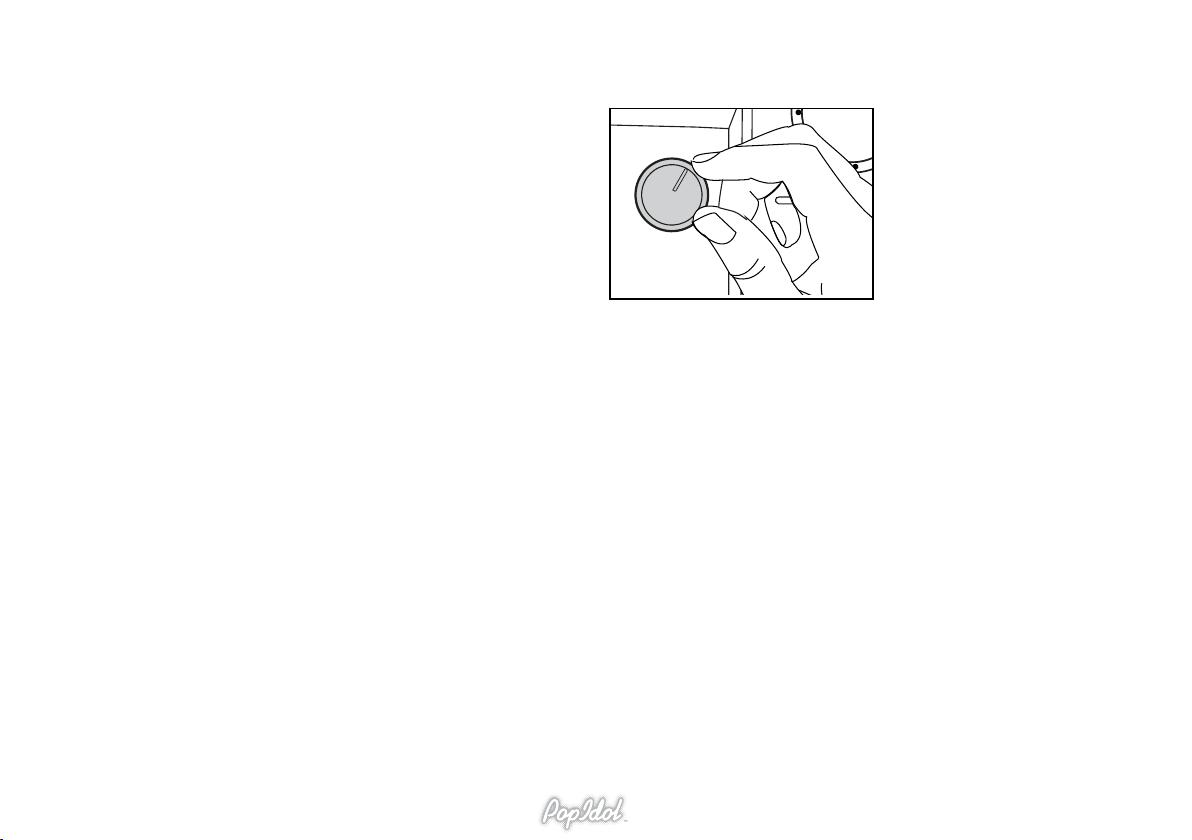
To load a disc, rst push the
OPEN/CLOSE button on top of
the disc lid.
Place a disc into the disc drive
with the label uppermost. Then
close the lid.
PROGRAM
SKIP UPSKIP DN
REPEAT PLAY/PAUSE
STOP
To play/pause a disc press the
PLAY/PAUSE button.
TO PLAY A CD/CD+G/DVD
To commence playing a CD, press the PLAY/PAUSE button (14, page 4)
once.Thiswillstartplayingthediscfromtherstavailabletrack.TheLED
display will now show the track number being played and the track timer will
commence. If you are using a DVD or CD+Graphics disc you will be able to
hear both audio and view the lyrics on an external television.
TO PAUSE A CD/CD+G/DVD
To pause a disc during playback, press the PLAY/PAUSE button. This will
temporarily stop the disc at this point. To recommence play, press the PLAY/
PAUSE button once again.
12

TO STOP A DVD/CD
To stop playing a DVD/CD, press the STOP button once. The LED display
will now show the total number of tracks on the DVD/CD and the total time.
Allfunctionswillbecancelled,toresumeplaybackfromtherstavailable
track on the DVD/CD press the PLAY/PAUSE button once.
PROGRAM
SKIP UPSKIP DN
REPEAT PLAY/PAUSE
STOP
PROGRAM
SKIP UPSKIP DN
REPEAT PLAY/PAUSE
STOP
PROGRAM
SKIP UPSKIP DN
REPEAT PLAY/PAUSE
STOP
To stop a DVD/CD, press the
STOP button.
To advance to the next track on
a DVD/CD, press the SKIP UP
button.
To select a previous track on the
DVD/CD, press SKIP DN.
TO SKIP TRACKS ON A DVD/CD
It is possible to change the track being played, either forwards of backwards
through the DVD/CD track listing. When searching a DVD/CD for a track,
the total time of each track will be displayed on the LED display. To advance
to the next track, press and release the SKIP UP button (11, page 4) once.
To advance the track again, repeatedly press and release the SKIP UP
button until the desired track is located. To select a previous track, press and
release the SKIP DN button (3, page 4) continuously until the desired track
is located. Pressing the SKIP DN button once during playback will return to
the beginning of the current playing track.
USING THE REPEAT BUTTON
You can use the repeat button to either continuously repeat a single track/
chapter or to repeat each track/chapter. Press once to repeat a single track.
Press again if you wish to repeat each track and press again to cancel the
repeat function. When connected to a television you can see what repeat
function you have selected.
13
Multiplex is a term used to describe the separation of the background music
from the vocal track. By recording the background music on the left channel
and the vocal track on the right, it is possible to mix the two to gain a vocal
version of a song, or play just the background music and you would normally
expect to hear on a karaoke track.
USING THE AVC (AUTO VOCAL CUT) CONTROL
Sometimes, when singing karaoke it is easy to loose your place or become
embarrassed. When playing the vocal track on a multiplex disc, it is possible
to replace the singers voice with your own as soon as you start singing
into the microphone by using the AVC control (8, page 4). If you then
subsequently stop singing, the singer on the recording will resume to pick
up where you left off.
It is also possible to adjust the amount the singers voice is reduced so that
it does not leave all of the singing to you..
Turning the AVC control clockwise will increase the amount the singers
voice is reduced. Turning the AVC control completed anti-clockwise to the
MIN position will turn this feature off resulting in the singers voice on the
track being at full volume along side your own singing voice.
The setting of this control is down to user preference and should be adjusted
until the desired level is achieved.
USING THE AUDIO BUTTON
You can use the AUDIO button on the front panel (2, page 4) to manually
select which channel of sound you wish to hear when playing a multiplex
disc. You can select MONO L (Left channel only), MONO R (Right channel
only - typical vocal channel) or STEREO (Both left and right channels).
UNDERSTANDING MULTIPLEX
AVC
MIC 2
MIN MAX
MIN MAX
Turning the AVC control clockwise
will increase the amount the singers
voice is reduced when you sing into
the microphone.
14

The KS-3 has very comprehensive setup menus with which you can adapt
the system to your personal preferences.
To access the setup menus press the SETUP button on the remote control
(5, page 7) . Pressing this button again will exit the setup menus.
Use the navigation keys on the remote control (6, page 7) to navigate the
setup menus and make a selection using the SELECT key on the remote
control (24, page 7) when your desired selection is highlighted.
NOTE: Some setup menus cannot be selected. This may be due to the type
of disc which is currently in the system and you have to take the disc out of
the disc drawer to access all options.
SYSTEM SETUP MENU
TV SYSTEM.
Choose the type of television you are connecting to. Either PAL or PAL60
(EU), NTSC (US) or AUTO.
SCREEN SAVER
If the SCREEN SAVER is set to ON and the unit is switched on without a
disc playing for several minutes, a moving picture (screen saver) appears.
TV TYPE
I. 4:3 PS. When the unit is connected to a normal 4:3 aspect television, a
wide-screen movie will be displayed as full screen. However, some of the
wide-screen image will be cut-off.
II. 4:3 LB. When the unit is connected to a normal 4:3 aspect television, a
wide-screen image is shown in full but black bars will appear at the top and
bottom of the screen.
III. 16:9. Select this option when you have connected the system to a wide-
screen television.
KS-3 SETUP
PASSWORD
Before you can make changes to the parental control level you must enter
the default password. The default password for the KS-3 is 0000.
PARENTAL CONTROL LEVEL
From this menu you can disable certain types of DVD disc from being
played on the KS-3. The levels range from 1 – 8 with level 1 being extremely
strict.
DEFAULT
Reset all menus on the KS-3 to their default factory settings.
LANGUAGE SETUP MENU
OSD LANG (ON SCREEN DISPLAY)
Select your preferred DVD display language from the options available.
AUDIO LANGUAGE
Change the language of the DVD audio soundtrack. This will be limited
to the number of languages available on the DVD disc. The LANGUAGE
button on the remote control (2, page 7) has the same function.
SUBTITLE LANGUAGE
Change the subtitle language of the DVD movie disc. As above, this menu
will be limited to the number of subtitle languages available on the disc.
The SUBTITLE button on the remote control (3, PAGE 7) has the same
function.
MENU LANGUAGE
Change the language of the DVD disc menu. This will be limited to the
number of languages available on the DVD disc.
VIDEO SETUP MENU
You can ne tune the visual appearance of the DVD video output. From
this menu you can adjust the values of brightness, contrast, colour hue and
colour saturation.
15

TROUBLE SHOOTING CARE AND MAINTENANCE
To clean the KS-3, wipe its case with a slightly moist lint-free cloth. Do not
useanycleaninguidscontainingalcohol,ammoniaorabrasives.Donot
spray aerosol on or near the CD/DVD loading tray.
Always use original packaging if it is necessary to transport the unit at any
time.
If this unit is used in dusty environments, it may be necessary to have the
unit serviced at your local dealer periodically. It is not advisable to allow
large deposits of dust to accumulate within this unit as it may prevent correct
cooling. Similarly dust deposit which become damp can sometimes lead
to electrical problems which may cause severe damage to the delicate
electronics within this unit.
PROBLEM POSSIBLE SOLUTION
No power when
switched on
• Mains socket not switched on, or faulty.
• Plug not fully inserted into wall socket.
• Mains fuse has blown inside plug.
• Mains fuse has blown inside unit, this will
needtobereplacedbyaqualiedservice
technician.
• Power cord has become faulty, this should
bereplacedimmediatelybyaqualied
service technician.
No Sound • Power not turned on
• Volume control set to ‘0’
• Microphones are not connected
The CD will not load • Check disc is not loaded upside down.
• Check disc is clean and not damaged.
The CD is skipping • Check that the disc is not scratched, dirty,
or damaged.
•EnsuretheKS-3isonarmlevelservice.
Microphone does not
work
• Microphone not switched on, or faulty.
• Microphone volume set too low.
• Master Volume set too low.
Loud Buzz or hum • Audio cables have become entangled with
mains cables, or faulty.
16

CONTACT DETAILS
We trust you are completely satised with this product from Acoustic
Solutions Limited, however please feel free to contact us if you experience
any difculties, or if you would like to express your views regarding our
products.
Please write to:
Acoustic Solutions Limited.
Grand Union Buildings
54 High Street
Weedon Bec
Northampton
NN7 4QD
United Kingdom
Telephone: 0871 230 7747
www.acousticsolutions.co.uk
email: [email protected]
Through the process of continuous improvement, Acoustic Solutions Limited
reserves the right to change or alter specications without prior notice.
E&OE.
SPECIFICATIONS
POWER SUPPLY
AC~230V 50Hz
POWER OUTPUT (THD 10%)
4W RMS
15W peak music power output
SPEAKER
4 inch speaker (8 ohm)
CD/CD+G/DVD PLAYER
8 & 12cm disc compatible
CD+G/DVD video output
AVC (Automatic Voice Control) with multiplex CD+G discs
Programmable memories
AUDIO CONTROL
Rotary volume control
Microphone volume control
Microphone echo
Microphone input
Stereo (L/R) audio output/input
DIMENSIONS
215 x 320 x 235
17
Table of contents
Other ACOUSTIC SOLUTIONS Karaoke System manuals


