ActiGraph ACTITRAINER User manual

ACTITRAINER
USERS MA N U A L
REV.F
Released 11/28/07

Table of Contents
GE TT IN G STARTED.................................................................................................................................................................................2
ActiTrainer Solution Contents..........................................................................................................................................................2
Quick Start Guide.............................................................................................................................................................................3
HAR DW ARE INTRODUCTION...................................................................................................................................................................4
Theory of Operation.........................................................................................................................................................................4
Display Contents..............................................................................................................................................................................5
Rechargeable Battery.......................................................................................................................................................................7
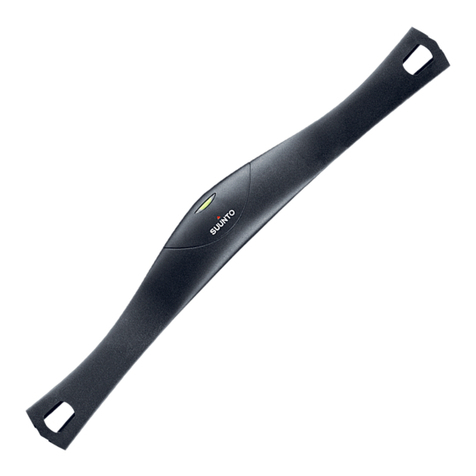
Polar Wearlink Heart Strap.............................................................................................................................................................7
SOFTWARE INTRODUCTION ....................................................................................................................................................................8
Installing ActiTrainer Software........................................................................................................................................................8
Using the Software.........................................................................................................................................................................10
WE AR IN G TH E ACTITRAINER...............................................................................................................................................................14
Modes of Operation........................................................................................................................................................................15
Polar Heart Strap...........................................................................................................................................................................17
Menu Navigation............................................................................................................................................................................18
CALIBRATING THE ACTITRAINER FOR DISTANCE ................................................................................................................................20
How Calibration Works..................................................................................................................................................................20
Initiating a Calibration ..................................................................................................................................................................20
Calibration Guidelines and Errors ................................................................................................................................................22
Calibration on the ActiTrainerClient............................................................................................................................................23
DAT A ANALYSIS WITH VIRTUAL TRAINER...........................................................................................................................................26
Virtual Trainer Interface................................................................................................................................................................26
Virtual Trainer Homepage.............................................................................................................................................................27
Day View........................................................................................................................................................................................30
Workout View.................................................................................................................................................................................31
Workouts Summary.........................................................................................................................................................................32
Meal Tracker..................................................................................................................................................................................34
SleepTracker...................................................................................................................................................................................37
ProgressTracker.............................................................................................................................................................................38
APPENDIX A-SP E C IF IC A TIO NS ............................................................................................................................................................41
Dimensions.....................................................................................................................................................................................41
Weight ............................................................................................................................................................................................41
Battery............................................................................................................................................................................................41
Memory ..........................................................................................................................................................................................41
EMI.................................................................................................................................................................................................41
APPENDIX B–ACTITRAINER ICON SUM MARY .....................................................................................................................................42
APPENDIX C–ACTITRAINER MENU OUTLINE .....................................................................................................................................43

Revision History
Revision
Date
Comments
Rev’d By
A
6/19/07
Initial Release
J. Wyatt
B
7/24/07
-Updated some grammar errors
-Updated screenshots of application to match latest
version
-Added details about MealTracker that have changed
since last revision
J. Wyatt
C
8/16/07
-Fixed typos
-Figure 14 alignment fixed
-Fixed page numbering
-Updated Figure 31
J. Wyatt
D
10/5/07
-Added Calibration Section
-Added AutoReset Section
J. Wyatt
E
10/17/07
-Added Table 2 to depict valid calibration steps-per-
minute ranges
-Added comment about minimum of 1 minute for
walk/run calibration
-Added note about updating firmware (must type
“UPGRADE”)
-Updated screen shots for the new virtual trainer
-Added note about calibration running or walking
for at least 1 minute
J. Wyatt
F
11/28/07
-Changed "3" to "several" when referring to the
number of times the Windows Logo testing screen
appears
-Updated Figure 21 to show the new upload
progress bar
J. Wyatt

2
Getting Started
Congratulations on your purchase of the ActiTrainer, the most accurate lifestyle activity monitor available today.
This manual will describe how to use your device as well as how to interface with Virtual Trainer, the online
companion that helps you determine your overall health profile and review your activity anytime.
ActiTrainer Solution Contents
The ActiTrainer Solution comes with everything you need to get started on the road to a healthy lifestyle. No
device in the commercial market today matches the ActiTrainer in caloric burn detection accuracy. We’re certain
you’ll love your ActiTrainer!!
The ActiTrainer comes with…
•The ActiTrainer Activity Monitor (available in pink, yellow, white or black)
•A Polar Wearlink® heart monitoring strap
•A durable elastic armband
•A holster
•One copy of the ActiTrainer client software

3
Quick Start Guide
1) Install the ActiTrainer Client software. Note: The latest software can be downloaded at
http://www.actitrainer.com. The install instructions are available in the “Software” section below.
2) Register for an account at http://www.actitrainer.com/register.asp
3) Open the ActiTrainer client software from the Start menu and log in using the username and password you
registered with
4) Once logged in, create a new user profile by selecting “Add New…” from the user’s box and filling in all
the blank fields for that user. Be sure to click “Save” when done.
5) Plug the ActiTrainer into the computer. If prompted, allow Windows to install the ActiTrainer drivers for
the device
6) Once the device is detected by the ActiTrainer software, choose the user you just created from the
dropdown list (should already be selected) and click “Initialize Device”. The progress bar at the bottom will
indicate when this process is complete
7) Unplug the trainer from the PC and wear it on the waist using the provided holster. Periodically, the data
log that the trainer generates should be uploaded to the Virtual Trainer using the software.
8) Enjoy accurate caloric, step and heart rate data from the ActiTrainer. The Virtual Trainer can be used to
give a minute-by-minute view of daily activity.

4
Hardware Introduction
The ActiTrainer provides a wealth of information. The diagram below outlines the hardware functionality.
Figure 1 – ActiTrainer Device Features
Physical specifications available in Appendix A
Theory of Operation
The ActiTrainer utilizes a +/- 5g, two-axis solid state accelerometer to interpret movement of the body to which it
is attached. Special algorithms are applied which accurately determine the amount of energy (calories) expended,
steps taken, distance traveled and walk or run speed of the user. Because the ActiTrainer is dependent on
movement for its measurements, it is vital that the device fit snugly against the waist or arm while in use.
The data collected while the ActiTrainer is worn is logged in the device’s internal memory which can store
approximately 64 days of consecutive data before being cleared. In addition, the activity parameters can be
reviewed at any time on the ActiTrainer’s built-in display.

5
Display Contents
Lifestyle View
As mentioned in the “Theory of Operation”, activity data is collected continuously by the ActiTrainer and can be
viewed at any time. The lifestyle mode displays this cumulative data and is turned on by default. Even when
lifestyle mode is manually turned off, data will continue to accumulate. When lifestyle mode is re-enabled, the data
shown will be a summary up to the current time. Figure 2 below summarizes the contents of the display for the
lifestyle mode.
Figure 2 – Lifestyle Mode View1
1) Vital Parameters - The ActiTrainer display will rotate 2 parameters in 3 second intervals. Parameters can
be added or removed from the rotation at anytime (see “Selecting Data to Display”). The parameters
include:
i) Heart Beats Per Minute (BPM)*
ii) Average BPM*
iii) Peak BPM*
iv) Calories (includes BMR for Lifestyle mode)
v) Steps
vi) Intensity Level
vii) Distance
viii) Miles per Hour
ix) Pace (Minutes per Mile)
See Section 3 for further explanation of all parameters
* User must wear the Polar WearLink® Heart Strap to see these parameters
For convenience, icons are used to quickly identify the category of the parameter on the
display. It is intended to help the user quickly identify the parameters at a glance. These
icons are summarized in Appendix Bof this manual.
1About The Display: The ActiTrainer utilizes the latest in display technology by incorporating an Organic Light Emitting Diode
(OLED) display for optimum contrast indoors or outside. The display provides information while the ActiTrainer is in either of its
two modes of operation (Lifestyle and Workout)

6
2) Battery Life – Displays remaining battery life. Battery life is approximately 1 week under normal usage
3) Mode Icons – Indicates what data the ActiTrainer is currently collecting (activity, heart, steps)
4) Current Time – Current time calibrated to the computer that initialized the ActiTrainer
Workout View
The display text increases 2-fold while in Workout mode, thus making it easier for the user to read the display while
active
Figure 3 – Workout Mode View
1) Vital Parameter – Same as Lifestyle mode. In workout mode, only one item is displayed at a time in large
font, making it easy to read while active. As in lifestyle mode, the items displayed can be customized.
2) Workout Timer – Total timer for the current workout (HH:MM:SS)
Menu Navigation
All features of the ActiTrainer discussed in this users’ manual can be accessed via the menu structure. Pressing
either button twice from an idle state will prompt the menu. The SCROLL button rotates the menu items upward
from the bottom (the active item is on top and highlighted). The SELECT button selects the active menu item.
Submenus are dictated by < > marks while items that perform a specific action have no delimiters.
Figure 4 – Menu Structure
Appendix C summarizes the menu structure and gives an explanation of each menu item.

7
Disabling the Display
The display can be put to sleep to preserve battery life or while sleeping to allow for complete darkness. Navigate
the menu structure to the Lifestyle submenu. Highlight “Display ON” and press the “Select” button. The menu
item will toggle to “Display OFF”. After a 10 second delay, the display will return to a default mode then shut
completely off. Repeat this process to turn the display back on.
NOTE: This does NOT turn off the Lifestyle mode. All buttons and modes still function as they would with the display still on.
Lifestyle data will continue to accumulate with the display turned off.
Rechargeable Battery
The ActiTrainer contains a rechargeable Lithium Ion battery. Under normal usage, the battery will last one week on
a full charge. The battery can be recharged by simply connecting the ActiTrainer to any USB 1.1 or 2.0 compatible
port or charger. A typical recharge time is 2.5 hours from a fully depleted state. When charging, the display flashes
the USB logo and the battery icon. When the battery is fully charged, the battery icon will remain constantly on
while the USB logo continues to flash.
Figure 5 – Recharging Battery
Polar Wearlink Heart Strap
The Polar Wearlink® chest strap can be worn when desired to collect and/or display heart rate information
important for monitoring target heart rates and for analyzing recovery (see “Virtual Trainer” section). The heart
strap is simple to use (see “Polar Heart Strap” for details) and doesn’t require that any special modes be enabled on
the trainer.
Figure 6 - Polar Heart Strap

8
Software Introduction
Installing ActiTrainer Software
Insert the ActiTrainer CD into your computer. (If the Installation Wizard does not start automatically, go to “Run”
under the START menu and browse to the CD-ROM drive and open. Select the file called
“ActiTrainerClientInstall.exe” and click Open.)
Figure 7 – Installing the ActiTrainer Client Software
Figure 8 – Install ActiTrainer Client Software Step 1

9
Figure 9 - Install ActiTrainer Client Software Step 1
Follow the Installation Wizard as the ActiTrainer Client application installs. Make sure to click “Install” when you
are asked to install the ActiTrainer Bridge Controller Driver.
Figure 10 – ActiTrainer Bridge Controller Driver Confirmation
During the installation, you will see the following screen several times. It is important that you select “Continue
Anyway” in order for the ActiTrainer software to install correctly.2
2At the time of the ActiTrainer’s release, Microsoft strongly encouraged companies to submit their hardware solutions for
certification. If a hardware device driver is not submitted, or does not qualify, for Microsoft certification, a warning message similar
to the one shown here appears. You may see the message a number of times while installing the ActiTrainer drivers. When you do, it
is safe to click the Continue Anyway button. ActiTrainer has tested this driver on Windows XP, and it does not impair or destabilize
your computer.

10
Figure 11 – Confirm Installation of Unsigned Driver
After the ActiTrainer Client application has finished installing, plug in your ActiTrainer into an available USB port. The Found New
Hardware Wizard will then pop up. Select “no, not at this time” and click Next. On the next screen, select “install the software
automatically” and click Next. During the installation, you will see the “Continue Anyway” screen.
*IMPORTANT*
*The ActiTrainer drivers install to the specific port that you originally use.
Therefore, you may need to reinstall the drivers in order to use a different port.
*Immediately following the completion of this installation, a second driver will begin
to install. Follow the same instructions as Step 4 to continue.
Using the Software
Registering a New Account
Open the ActiTrainer Console by navigating to it under “All
Programs” in the START bar. At the log in window, select
“Register for an account”. Your default web browser will open to
the appropriate page for registering for an account. Complete all
required fields and submit the registration form.3
Figure 12 – Login Screen for ActiTrainer Client Software
Software Outline
Figure 12 below describes the various areas of the ActiTrainer software.
3In order to use the ActiTrainer software or register for an account, an active internet connection is required. The
connection is required in all remaining steps of this section

11
Figure 13 – ActiTrainer Software Application Outline
Adding a User
After registering your device, return to the ActiTrainer Console and log in (see Figure 11). Choose “Remember
Me” if you want to avoid entering this data each time you use the ActiTrainer client. Before using the ActiTrainer,
you must create a new user by selecting “Add New…” from the user dropdown box in the ActiTrainer Client.
Select this option and fill in all the available fields If you do not wish to enter an emergency contact number or the
format does not match your telephone format (non-US), simply enter the default (555-555-5555). Choose “Save”
once this is completed to store the user information. Saving a user at this stage also creates a new user in the Virtual
Trainer web application (see “Virtual Trainer” section).

12
Initializing the ActiTrainer
Once a new user has been created and saved, the ActiTrainer can be initialized. Initialization should occur only
when the device in use has never been initialized, if the battery dies during use or if a user chooses to allow another
person in his account use his device with their parameters.
To initialize the ActiTrainer, plug the unit into the PC’s USB 1.1 or 2.0 port (if this has not been done already).
You may be prompted to complete the Windows driver initialization process. If so, see “Software” above. Upon
detecting the unit, the ActiTrainer software will indicate so with a green light in the lower left-hand corner. Press
the “Initialize Device” button to begin initialization. A warning message will appear indicating that any data that is
currently on the device will be deleted. The ActiTrainer client will inform you when the unit has been successfully
initialized. Remove the device from the USB port and replace the USB cap. Typically, the display on the unit will
indicate a countdown timer. Once this timer expires, the unit will begin collecting activity data in Lifestyle mode.
Initializing the device completes the activation of your account and starts your free trial to Virtual Trainer. At the
end of the trial, you will be forced to select a subscription package. Subscription package pricing can be found
online at http://www.actitrainer.com/default.asp?Movie=Subscriptions.swf. You are allowed unlimited users
during the trial period.
Congratulations! Your ActiTrainer is now ready for use!
Deleting Users
To remove users from your account, select the user that you would like to delete and press the delete button. You
must confirm this action. Doing so removes the user from your account completely and all data associated
Figure 14 – Adding a New User

13
with that user in the Virtual Trainer will be lost. Note: User data may be recovered for a small fee. Visit
http://www.actitrainer.com for more Tips & FAQs!
Software Updates
From time to time, ActiGraph will release software updates for both the ActiTrainer application software (Client
Application) and the ActiTrainer device itself (Firmware). Upon logging into the ActiTrainer application, you will
be informed if updates exist and will be given a choice to update the software.
Updating the application involves downloading the latest install file from our website. Note that all release notes
for the software applications are available on our download page. Once the latest install file has been downloaded
and executed, the old application will automatically be removed.
Updating the firmware is an automated process. It is important to note that an upload should be performed prior
to performing a firmware update as all data on the ActiTrainer will be deleted. To ensure that this does not
happen, the ActiTrainer client software will prompt the user with a special message. Users are required to type the
word “UPGRADE” in the box to confirm that they will indeed loose all data when this happens (see figure below).
If data has already been uploaded to the Virtual Trainer, this is okay.
Figure 15 - Upgrading Firmware
Software release notes are available on the ActiTrainer downloads page as shown in the figure below.
Figure 16 – Downloads Page with Release Notes

14
Wearing the ActiTrainer
The ActiTrainer is personalized to your biometrics and is designed to be worn 24 hours a day and provide feedback
on calories burned, steps taken, distance traveled and average, peak and instantaneous heart rate4. Additionally, the
ActiTrainer monitors sleep when worn on the wrist at night. When worn properly, the ActiTrainer will accurately
measure and log these vital parameters. This information is extremely useful for anyone interested in improving
their overall physical wellness.
The ActiTrainer can be worn on the upper arm or the waist. Caloric burn and distance calculations are more
accurate when the device is worn on the waist because the unit is closer to the center of mass of the body.
Parameter
Description
Comments
BPM
Instantaneous Beats per
Minute (Heart Rate)
Instantaneous Beats per
Minute (Heart Rate)
AVG BPM
Average Heart Beats Per
Minute
Averaged since the last
time the data was reset.
Applies to both Lifestyle
and Workout modes
PEAK BPM
Peak Beats Per Minute
The highest BPM
recorded since the data
was last reset
Calories
Total calories burned
Total calories burned
since data was last
reset. In Lifestyle mode,
this includes BMR. In
Workout mode, this is
only calories above BMR
Steps
Total Steps
Total steps since the
data was last reset
Intensity
Activity Intensity Level
Level of activity
intensity according to
ActiGraph’s proprietery
algorithm (Light,
Moderate, Hard or V.
Hard)
Distance
Total Distance
Distance traveled in
miles since data was
last reset. Functions in
Lifestyle and Workout
modes
Mi per Hr
Miles/Hour
Current speed in miles
per hour
Pace
MPM Pace
Current pace in minutes
per mile
Table 1 – All Optional Real-Time Display Parameters
The Polar® Wearlink heart strap must be worn to collect heart rate data.

15
Modes of Operation
Lifestyle Mode
Lifestyle mode is the devices’ primary mode of operation and is
always enabled. This mode constantly logs the users’ caloric
expenditure and other vital parameters and displays them (see Table 1
for options). The contiguous data that the ActiTrainer collects while
in Lifestyle mode is displayed on the ActiTrainer’s screen in pairs and
rotates every 3 seconds. Data parameters can be added or removed
from the display by navigating to the “Selections” menu (see “Menu Navigation” section below). All data that the
unit collects is logged regardless of whether it is displayed on the screen. The display can be completely turned off
while in Lifestyle mode and the ActiTrainer will continue to log data. Additionally, Lifestyle data also continues to
accumulate while the device is in workout mode. The user can view their parameters at any time by simply glancing
at the display and can also reset the values. Remember, the ActiTrainer is designed to be worn 24 hours a day and
adapt to your lifestyle!
Note: The total caloric burn data on the ActiTrainer display includes Basal Metabolic Rate calories (calories expended by the body at
rest). This data will continue to accumulate at all times, even when the ActiTrainer is not being worn or is charging while plugged
into a USB port.
Lifestyle AutoReset Feature
By default, the calories burned, steps taken, distance traveled and heart rate information displayed in Lifestyle mode
will accumulate indefinitely. To change this mode of operation, the user can select the AutoReset feature of the
ActiTrainer. When selected, all values displayed in the Lifestyle mode will be reset each night at midnight. This is
very useful when monitoring calories burned, steps taken and/or distance traveled on a daily basis.
To enable the AutoReset feature, browse the ActiTrainer menu structure to the Lifestyle submenu. Scroll down
until the Auto Reset option is highlighted. Press the Select button to toggle the Auto Reset mode. After exiting the
menu, the mode will be activated.

16
Workout Mode
Workout mode is used when running, exercising or just when
activity is expected to be above normal. This mode presents three
advantages: 1) The display text size is increased making it easier to
read while running, walking or working out, 2) a workout timer is
displayed so the user knows how long he or she has been engaged
in the “workout”, 3) data collected during the workout is logged
and can be reviewed at any time on the device after the workout is
complete and 4) provides a detailed view of activity in the Virtual Trainer after the data has been uploaded.
To turn Workout mode on, navigate the ActiTrainer device menu and select Start Workout. It will ask to confirm
start of Workout, and will then ask you to select whether you will wear the device on your Hip or on your Arm. By
Selecting where you are wearing it assures the accuracy of the data that is collected. Note that the ActiTrainer data
is more accurate when worn on the hip.
To turn Workout mode off, press either button on the device and select “Yes” when prompted to stop the
workout. Selecting “Menu” from this prompt will display the selections menu discussed below. This menu allows
the data parameters to be added or removed from the workout display. Workout mode is automatically stopped if
the device is plugged into the USB port of a PC for charging or uploading of data.
Similar to Lifestyle mode, data collected during the workout is scrolled through every 3 seconds. Table 1
summarizes the options available for display while in Workout mode. Items can be added to or removed from the
scrolling list (see “Selecting Data to Display” below). The default selections for real-time data display during
Workout Mode are Calories burned, Steps taken, Current Heart Rate, Pace (minutes per mile), and Distance
traveled.
It is important to note that the calories burned during a workout DO NOT INCLUDE BMR CALORIES but
rather just calories burned above the Basal Metabolic Rate. This differs from the Lifestyle mode, where the display
indicates total calories consumed by the user (includes BMR).
Sleep Monitoring
The ActiTrainer can be worn on the wrist at night to help determine sleep efficiency. There is no special mode
that the device must be placed in; it can simply continue to run in normal lifestyle mode. If desired, the display can
be turned off (See “Turning Off the Display” below) to reduce the light while sleeping. The unit will continue to
collect sleep data regardless of the state of the display.
Sleep data can be reviewed by uploading the data to the Virtual Trainer and entering in the “Time in Bed” and
“Time out of Bed” in the SleepTracker (see “Virtual Trainer” below). The SleepTracker will provide sleep
efficiency and total estimated time asleep as well as a graph of the entire sleep cycle.

17
Polar Heart Strap
Purpose
The ActiTrainer Solution comes with one Polar Wearlink® heart monitor strap. This strap can be worn when
desired to log heart rate activity data on the ActiTrainer. In normal lifestyle mode, heart rate data can be added to
the list of scroll parameters so that the user can see average, peak and instantaneous beats per minute while wearing
the heart strap. In workout mode, the same data is available. When uploading data to the Virtual Trainer (see
“Virtual Trainer” below), heart rate data shows up as a red line overlaid on the activity data. When viewing workout
data, this is very useful for determining heart rate recovery time and peak heart rate during the workout.
Wearing the Polar Chest Strap
1. Moisten the electrode areas of the strap under running water.
2. Attach the connector to the strap. Position the letter L on the
connector next to the word LEFT on the strap and snap the
fastener.
3. Adjust the strap length to fit snugly and comfortably. Secure the
strap around your chest, just below your chest muscles, and snap the
second fastener.
4. Check that the wet electrode areas are firmly against your skin and
that the Polar logo of the connector is in a central, upright position.

18
To ensure trouble-free heart rate monitoring, start your heart rate monitoring in a place with the fewest possible
electromagnetic disturbances (computers, mobile phones, other people using heart rate monitors, high voltage
power lines, cars, motor driven exercise equipment, etc.) before going out. After the chest strap has been securely
attached it will create a unique coded communication link with your ActiTrainer. This unique link will prevent heart
data generated by adjacent Polar chest straps from corrupting your data.
When you put your transmitter on, it starts to detect your heart rate, which is then transmitted to the ActiTrainer. If
you have selected any of the BPM options in the selections menu, your heart rate will appear within a maximum of
15 seconds
Note: If the unit does not display your heart rate, check that the transmitter electrodes are wet and that the strap is snug enough.
Menu Navigation
Turning Off the Display
The display can be turned completely off to preserve battery life or while sleeping to allow for complete darkness.
Navigate the menu structure to the Lifestyle submenu. Highlight “Display ON” and press the “Select” button. The
menu item will toggle to “Display OFF”. After a 10 second delay, the display will return to a default mode then
shut completely off. Repeat this process to turn the display back on.
*IMPORTANT*
Although the LifeStyle mode is turned off, the unit will continue to collect LifeStyle data. The data shown is cumulative since the
Trainer’s data was last reset manually.
Resetting Lifestyle Data
The data displayed on the screen while in Lifestyle mode can be reset at any time. This does not clear out the data
log and all data prior to the reset can still be uploaded and viewed in the online Virtual Trainer. To reset the
parameters on the display, select “<Reset>” from the Lifestyle menu and confirm that this action is correct. All
parameters will be reset to zero.
Selecting Data to Display
As mentioned previously, the ActiTrainer can display up to 9 vital data parameters at any given time. In Lifestyle
mode, these are displayed in pairs; in Workout mode, they are displayed one at a time using large font for easy
reading. Items can be added or removed from the list in either mode by selecting the “<Selections>” menu
associated with that mode. Use the Scroll button to highlight a parameter and press the Select button to toggle the
parameter on or off as shown below in Figure 14. An “x” indicates that the item will be included on the display.
Figure 17 – Selections Menu for Lifestyle and Workout Display
Table of contents
Other ActiGraph Heart Rate Monitor manuals
Popular Heart Rate Monitor manuals by other brands
Sigma
Sigma PC 3.11 quick start guide
Polar Electro
Polar Electro F4TM user manual
Mobile Action Technology
Mobile Action Technology Q-Band i-gatU Q-66 user manual
Garmin
Garmin HRM-Run Steps to Replace the Battery
Crivit
Crivit 1-LD4086 Usage and safety instructions
biovotion
biovotion Everion Instructions for use
