Acute 140 User manual

Acute Communication Services Pvt. Ltd.
User Manual
ACUTE-140_______________________________
Quality Never Compromised

Acute Communication Services Pvt. Ltd.
Contents
1. Introduction……….…………………………..…………………………………………3
1.1 Instruction Safety…………………………………………………………………...3
2. About the Document…………………………………………………………………....3
3. Basic Description………………….…………………………………………...............3
4. Content of the Package……………………………………………………….............3
5. 16 Pin Connector Wiring Diagram……………………………………………............4
6. Emergency Panic Button……………………………………………..........................5
7. Configuration & Troubleshooting Commands…………………………..…………...6
8. Basic Troubleshooting………………………………………………………………….7
8.1 Troubleshooting Steps……………………………………………………………..7
9. Device Installation Precautions………………………………………………………..8
10. Installation Procedure…………………………………………………………………..9
10.1 Power Connection in Commercial Vehicles……………………………………9
10.2 Power Connection in Personal Vehicles……………………………………….9
10.3 Connection to Ignition Output in the Vehicle…………………………………10
10.4Panic Button Installation………………………………………………………..11
10.5Device Placement in Vehicle…………………………………………………..12
11. Frequently Asked Questions………………………………………………………...13

Acute Communication Services Pvt. Ltd.
1Introduction
1.1 Instruction Safety
It contains information on how to operate ACUTE140 safely. Read the instructions carefully and
follow them strictly while operating the device.
➢
ACUTE140 device is designed to work in automotive environment with supply range between
+9V to
+36V DC power supply.
➢Device should be installed in the location in which it easily accessible to the vehicle operator.
2About the Document
This usermanual covers the various features of ACUTE140 and information about the terminologies &
configuration of the device.
3Basic Description
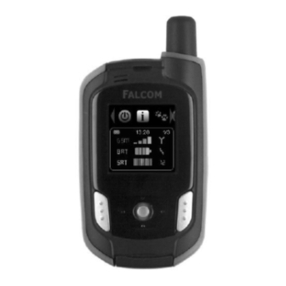
ACUTE140 is an electronic device which locates its position and sends it by using GPRS 2G network
along with I/O information. This device is suitable for the applications, where it needs the location of
remote asset. It is important to mention that ACUTE140 has Digital & Analog inputs/outputs and a
serial communication feature which will control and monitor other devices/status on remote asset. It
has a micro USB port for configuration of settings and the status log output of the device. The
ACUTE140 device is complied with AIS140 standards where in each operation can be detected
accurately and precisely. The device also supports for multiple Panic buttons which are used to
generate an emergency alert in emergency conditions. The device comes with built-in LED’s visible
to outside, wherein the features like GSM signal strengths, GPS signal, Processing of the device and
USB detection can be monitored easily by looking into the device.
4Contents of the package
Usually the ACUTE140 device is supplied to the customer in a cardboard box will have below contents.
➢
ACUTE140 device.
➢
Vehicle Harness Cable with 16 pin connectors.
➢
Cable ties for installation.
➢
Warranty card.

Acute Communication Services Pvt. Ltd.
5Connector 16 Pin wire harness Diagram
Table 1: Connector Pin
Table 2: Connector Pin out

Acute Communication Services Pvt. Ltd.
6Emergency/Panic Button
This is used for emergency purpose. If the button is being pressed, the device will send an
emergency alert to all the three servers with all the necessary fields like latitude, longitude,
their directions and other information described in AIS140 amendment. Device will send only
the emergency packets to server 3.
7Configuration & Troubleshooting Commands
1) PIP –Primary IP
To set Primary Server IP for sending data usage:
PIP:[IP/Domain]
e.g.:- [password,set PIP:gpssoftware.in]
or [password,set PIP:103.135.36.169]
2) PPT –Primary Port
To set Primary Server Port usage:
PPT:[Port Number]
e.g.: [password,set PPT:8000]
3) SIP –Secondary IP (Customer Server)
To set Secondary Server IP
e.g.:- [password,set SIP: 103.135.36.169]
4) SPT –Secondary Port (Customer Sever Port)
To set secondary server Port.
e.g.:- [password,set SPT: 8000]
5) EIP –Emergency IP
To set emergency server IP
e.g. [password,set EIP:emergencyIP]
6) EPT –Emergency Port
To set emergency Port
e.g. [password,set EPT:0000]
7) STG
To get the current device settings & get software information.
Response Format:-

Acute Communication Services Pvt. Ltd.
IM: <IMEI Number>
P: <Primary Server IP/URL>: <Primary Server Port>
S: <Secondary Server IP/URL>: <Secondary Server Port>
E: <Emergency Server IP/URL>: <Emergency Server Port>
SW: <Software Version>
8) TEST
To get the device runtime information.
Response Format:-
IM: <IMEI Number>
GP: <GPS Status>
MV: <Main Power Status>
BT: <Battery Voltage>
SIG: <Signal Strength>
PW: <Power Status>
BX: <Device Open/ Close>
IGN: <Ignition Status>
IO: <GPI or GPO Value>
AD: <Analog 1 Value>, <Analog 2 Value>
9) NWINFO
To get current Network Status of the Device.
Response Format:-
IM: <IMEI Number>
OP: <Operator Name>
GSM: <Signal Strength>, <CREG>,<CGREG>
APN: <Current APN>
CON: <Primary CON>, <Secondary CON>, <Emergency CON>
CEL: <MCC>, <MMC>, <LAC>, <CELL ID>
10) GPSINFO
To get current GPS Status of the Device.
Response Format:-
IM: <IMEI Number>
OP: <Operator Name>
GSM: <Signal Strength>, <CREG>,<CGREG>
APN: <Current APN>
CON: <Primary CON>, <Secondary CON>, <Emergency CON>
CEL: <MCC>, <MMC>, <LAC>, <CELL ID>
11) WHERE
To get Current Device Location information.
12)ODM –Set Odometer
This command is used to reset the Odometer or set Odometer to a value. The value is in
kilometer and can be floating point.
ODM:<value>
e.g.: ODM:123.45

Acute Communication Services Pvt. Ltd.
13)TZN –Change Packet time zone
This command us used to set packet timezone for secondary IP. Default timezone is UTC.
Primary IP must have UTC timezone as per AIS140 standard. So this command does not
affect Primary packet.
e.g.: TZN:IST
TZN:UTC
14)TBT –Turn by Turn Tracking
Enable turn by turn packet, useful when data rate is longer. Default on.
To Enable
TBT:1
To Disable
TBT:0
15)GPR –Reset GPS Chipset
This command is used to power reset GPS module. This command requires no parameter.
16)OFR –Clear Offline Data
This command is used to clear or reset offline storage.
OFR=<type>
1- Clear Primary Storage
2- Clear Secondary Storage
3- Clear both primary & Secondary Storage
17)REBOOT –Reboot Device
To reboot device using SET command. Can be sent at the end of all commands. Device will
reboot automatically after 10 Sec.
8Basic trouble shooting problem device doesn’t work
8.1 Trouble shooting steps
1.
Check Vehicle Battery voltage, if less than 9 volts or over 36 volts, replace vehicle battery
during the vehicle idle condition get the vehicle electrical systemrectified.
2.
Check for Power Connection (both +ve and -ve) and if it is loose or disconnected, then reconnect it.
3.
Check whether the power cable is connected to ignition which makes the external power ON
only when the ignition is ON. If it is connected to ignition remove from ignition and connect to
battery.
4.
Check FUSE, in case of blown off, replace it with 5A capsule Fuse
5.
Check FUSE Holder, in case if it is loose and/or broken, then replace the cable
If LED is OFF:

Acute Communication Services Pvt. Ltd.
1.
Check whether the device is in sleep mode. If yes, turn onthe ignition.
2.
Check if the vehicle is parked in a covered area and move the vehicle to an open area
3.
Check the location of device installation in the vehicle and follow instructions in this manual to
correct it
4.
Check if there is any metal above the device and if yes, change the location of the vehicle
where there is no metal surrounding the device.
5.
Check if any metal or item kept on the device and clear thesame.
If Processor LED is OFF:
1. Contact Acute Communication Customer Care
9Device installation Precautions
It is highly recommended that installation of ACUTE140 device and its accessories must be done by a
trained technician only.
Handle the device with care and do not place any heavyweights on the device. There is a Li-ion battery
inside.
It is recommended that the ACUTE140 device not be installed in the places prone to water and rain.
Remove ACUTE140 device during servicing to avoid accidental water splash and high voltages.

Acute Communication Services Pvt. Ltd.
10 Installation Steps of Device
10.1 Power Connection –Commercial Vehicles
➢
Remove the Ignition Key
➢
Run Red (+ve) and Black (-ve) wires from the battery till the location of the device placement.
Ensure that the wiring is done firmly and neatly without any hanging or sagging of wires. Use
self-adhesive cable Tie mounts and cable ties to do thewiring.
➢
Connect Red wire of ACUTE140 device power cable (Long Cable) to the +ve (Red) cable drawn
from the vehicle battery and ensure that the connection is firm.
➢
Connect the Black wire of the Bharat 101 device power cable (Long Cable) to the (-ve) Black
wire drawn from the vehicle battery and ensure that connection is firm.
➢
Check if the dash board is made of Metal or Plastic/ Fiber
➢
If the dash board is made of metal, install the device outside the dash board only
➢
If the dash board is made of Fiber or Plastic, Device can be installed inside the dash board
10.2 Power Connection –Personal Vehicles
➢
Remove the Ignition Key
➢
Identify the power line Positive (+) cable coming from the battery to the ignition switch by
measuring the voltage between each of the wire coming in to the ignition switch assembly.
➢
See if the metal conductor in the Connect or wire connection point at the ignition switch
is accessible; else peel off the skin from each of the wire.
➢
Firmly hold the (+) Red probe of the multi-meter to the wire conductor and (-) Black probe
of the multi-meter to the GND point (-) terminal of the vehicle battery or any screw / bolt
directly connected to metal body of the vehicle).
➢
Voltage at the (+) wire of the (Incoming supply line) ignition should be matching to the
battery voltage of the vehicle
➢
Check the voltage at the Ignition input pointat
o
Voltage OFF condition
o
Vehicle Ignition ON condition
o
Vehicle Engine start condition
o
Maximum acceleration at Neutral/Stationary
➢
In any condition, the voltage should not exceed 36V. Please do not install the device in
the vehicle if the voltage is beyond 36V

Acute Communication Services Pvt. Ltd.
➢
Connect Red wire of the ACUTE140 device power cable to the (+) Red cable at the vehicle
ignition input by removing the small portion of the PVC skin at least 2-Inch away from the
ignition switch (If already removed the skin for testing the voltage, use the same)
➢
Connect the Black wire of the ACUTE140 device power cable to the GND by connecting
the wire to the (-) terminal of the vehicle battery or to the point where GND wire of any of
the other accessories of the vehicle is connected and ensure that the connection is very
Firm/Tight.
➢
For all vehicles other than cars and SUVs, it is highly recommended to connect the (+) and
(-)of the device directly to the vehiclebattery.
10.3 Connection to Ignition Output in the Vehicle
➢
Take each wire other than the (+) wire connecting the ignition switch assembly and look
for a metal conductor/ connector pin of the wire at the switch end, if not found remove a
small portion of the PVC skin away from the switch end .
➢
Keep the Ignition Switch in OFF position and follow the switch below
➢
Firmly hold the Red probe of the multimeter at the skinned portion of each of the wire one
by- one and black probe of the multimeter to the GND (- terminal of the vehicle battery or
any screw /Bolt directly connected to metal body of the vehicle) and measure the voltage.
The voltage must be ZERO when the Ignition is in OFFposition.
➢
Keep the ignition switch in accessories position and follow the stepbelow.
➢
Firmly hold the Red probe of the multimeter at the skinned portion of each of the wire one
by- one and black probe of the multimeter to the GND (- terminal of the vehicle battery or
any screw /Bolt directly connected to metal body of the vehicle) and measure the
voltage. The voltage must be equal to the battery voltage when the ignition is in
accessories position at least one wire shows ZERO voltage when the ignition is
in accessories position.
➢
Keep the Ignition switch in ON position and follow the stepsbelow
➢
Take the wires that showed ZERO volts when the ignition at accessories position, firmly
hold the Red probe of the multimeter at the skinned portion of the wire and Black probe
of the multimeter to the GND (- terminal of the vehicle battery or any screw/ bolt directly
connected to metal body of the vehicle) and measure the voltage. The voltage must be
equal to the battery voltage when the Ignition is in ON position. Connect the ORANGE
wire of device wire cable to that wire it shows ZERO when the ignition switch is at
accessories and showed BATTERY VOLTAGE when the Ignition is at ON position.

Acute Communication Services Pvt. Ltd.
➢
Once the ignition wire is detected take the green color wire coming from the
ACUTE140 device and connect it to the ignition wire. Turn on the ignition and ensure
that ignition is connected properly.
10.4 Panic button installation
➢The panic button has to connect to the DIN2 of the device, so when the panic button
is pressed the emergency alert is triggered. Below are the connections for the panic
button installation.
➢During installation the red colour wire of panic will go for power and black will go for
Digital output of the device.
➢The green colour of the panic will be connected to the digital input of the device
(Purple colour) and the yellow colour wire will be connected to the ground. If the
number of panic buttons are more than one then the yellow colour will be connected
to the green colour of the next panic button.
➢The panic button has to connect before turning on the device.

Acute Communication Services Pvt. Ltd.
10.5 Device Placement in Vehicles:
Device placement location in Car & Heavy vehicles

Acute Communication Services Pvt. Ltd.
11 FAQ (Frequently Asked Questions)
1) How do I contact customer support?
Customer support can be reached via email: support@acutecommunication.in or
+91 9119118774
End.
Table of contents
