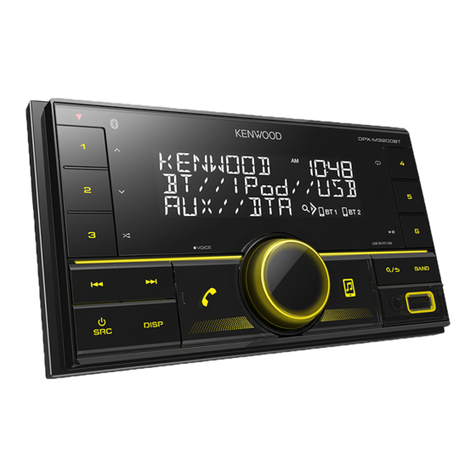
Adayo JRV9100 User manual

JRV9100
Operating Instructions
6.75” Double DIN Multimedia Receiver
Built-In BT Technology /
iPhone® - iPod® / MHL / HDMI / USB / AV In

2
JRV9100
Contents
FEATURES....................................4
CONTROLS AND INDICATORS......6
Basic Operations .........................7
Radio Mode .................................9
Playback Mode ..........................10
Bluetooth Mode .........................12
Apple CarPlay ............................14
Android Auto .............................14
Settings.....................................15
Other Modes..............................16
Specications ............................17
Wire Connections ......................18

3
JRV9100
FCC STATEMENT
This device complies with Part 15 of the FCC Rules. Operation is subject to the
following two conditions:
(1)This device may not cause harmful interference, and
(2)This device must accept any interference received, including interference that
may cause undesired operation.
Changes or modifications not expressly approved by the party responsible for
compliance could void the user’s authority to operate the equipment.
NOTE:
This equipment has been tested and found to comply with the limits for a Class
B digital device, pursuant to Part 15 of the FCC Rules. These limits are designed
to provide reasonable protection against harmful interference in a residential
installation.
This equipment generates uses and can radiate radio frequency energy and, if
not installed and used in accordance with the instructions, may cause harmful
interference to radio communications. However, there is no guarantee that
interference will not occur in a particular installation. If this equipment does cause
harmful interference to radio or television reception, which can be determined
by turning the equipment off and on, the user is encouraged to try to correct the
interference by one or more of the following measures:
• Reorientorrelocatethereceivingantenna.
• Increasetheseparationbetweentheequipmentandreceiver.
• Connecttheequipmentintoanoutletonacircuitdifferentfromthattowhichthe
receiver is connected.
• Consultthedealeroranexperiencedradio/TVtechnicianforhelp.
FCC Radiation Exposure Statement
This equipment complies with FCC radiation exposure limits set forth for an
uncontrolled environment. This equipment should be installed and operated with
minimum distance 20cm between the radiator & your body.
This unit supports only the following iPhone models:
iPhone X
iPhone 8 Plus
iPhone 8
iPhone 7 Plus
iPhone 7
iPhone SE
iPhone 6s Plus
iPhone 6s
iPhone 6 Plus
iPhone 6
iPhone 5s
“Made for iPod” and “Made for iPhone” mean that an electronic accessory has been
designedto connect specically to theiPodoriPhone, respectively,and has been
certiedbythedevelopertomeetAppleperformancestandards.
Appleisnotresponsiblefortheoperationofthisdeviceoritscompliancewithsafety
and regulatory standards. Please note that the use of this accessory with iPod or
iPhone may affect wireless performance.
iPodandiPhonearetrademarksof Apple Inc.,registeredintheU.S.andother
countries.

4
JRV9100
ThankyouforchoosingaASAproduct.Wehopeyouwillndtheinstructionsinthis
owner’s manual clear and easy to follow. If you take a few minutes to look through
it, you’ll learn how to use all the features of your new unit Multimedia Receiver for
maximum enjoyment. Please save this manual for future reference.
WerecommendhavingyourunitMultimediaReceiverinstalledbyareputable
installation shop.
FEATURES
MP3 / WMA
• ID3TagCompatible
• DirectorySearch(MP3/WMAOnly)
• Random,RepeatandIntro
• Play,Pause,Stop,NextTrackandPreviousTrack
AM-FM
• USA/EuropeanFrequencySpacing
• 30StationPresets(18FM/12AM)
• AutoStereo/Mono
• Local/Distance
• AutoStore/PreviewScan
iPod®/iPhone®
• iPod®iPhone®viaUSB
• HighSpeedDirectConnectInterfacetoAccessiPhone®and iPod®Playlists,Artists,
Albums
• PowerManagementChargesiPhone®/iPod®while Connected
Chassis
• FixedFrontPanel
• HighDenitionTFTLCD
General
• BeepToneConrmation(ON-OFFOption)
• BTHands-FreeoperationforsafetyandconvenienceandA2DPforstreaming
music from your smartphone.
• OneCompositeVideoOutputforAdditionalScreens
• FrontPanelAudio/VideoInput
• Front PanelUSB - Playback Music / Video FilesviaPortableHardDrives/USB
ashdrives
• Ten-BandGraphicEqualizer
• 6VRMSFront/Rear/SubwooferRCALineOutput
• TouchScreenCalibrationMode
• RotaryEncoderAudioControl
• HDMI/MHL Connectivity- See and control smartphone appson the larger TFT
screen. *Some apps may not be supported.
• USBChargingCurrent-2.1AmpSupport

5
JRV9100
WARNING! Never install this unit where operation and viewing could
interfere with safe driving conditions.
WARNING! To reduce the risk of a trafc accident (except when using for
rear view video camera) never use the video display function while driving
the vehicle. This is a violation of federal law.
WARNING! Never disassemble or adjust the unit.
WARNING! To prevent injury from shock or re, never expose this unit to
moisture or water.
WARNING! Using an improper fuse may cause damage to the unit and
result in re.

6
JRV9100
1
3
2
4
5
6
7
8
1. [ ] Button
Activatevoicecontrol
2. Remote sensor
3. [ ] Button
Show main menu
4. [ ] Button
Return to previous menu
5. [ ] Rotary/pushbutton
Switch on device
In operation:
Mute audio source (short press)
Increase/Decreasethevolume(rotate)
Switch off device (long press)
6. Reset Button
Reset the unit.
7. USB slot
8. AUX in Jack
CONTROLS AND INDICATORS

7
JRV9100
Parking Brake Inhibit
• Whenthe“BRAKE”cableisconnected
to the brake switch, the display on the
TFT monitor will display video only
when the vehicle is applied.
• Parkingbrakefunctionisoverridden
when the video source is set to
REVERSE.
• Whentheparkingbrakeinhibit
is active, the front monitor displays
“Warning!!!Itisillegal to view video
while driving or operating a motor
vehicle. Set parking brake to view
video.”, preventing the driver from
watching content while driving. Rear
video screens are not affected.
Mute
Press [ ] button to mute the
volume from the unit. Press again to
restore the volume.
Adjustingthevolumeorusing anyof
the audio setup features cancels the
mute function.
Power On / Off
Press the [ ] knob on the unit
to turn the unit on. The buttons on the
front of the unit light up for a moment
and the current mode status appears in
theLCD.
Press and hold the [ ] knob to
power off the unit.
Basic Operations
Playing Source Selection
Press the [ ] button on the front
panel to change between available
playing sources. The playing mode is
displayed on the screen.
6
135
2
77
1. Enter radio mode.
2. Enter music menu.
3.Showmainmenu
4. Enter bluetooth mode.
5. Enter setting menu.
6. Function icons
7. Clock
Volume Adjustment
To increase or decrease the volume
level, rotate the [ ] knob on the
front panel. The volume ranges from
“0”to “40”.

8
JRV9100
Equalizer
1. Enter the EQ setup mode
Touch the [ EQ ] icon in the user
interface and the EQ setup interface
will display on the screen.
2. Select EQ mode
Touch the desired EQ selection: [
User]/[Jazz]/[Pop]/[Classic]
/[Rock]/[Flat],andtheEQmode
will change.
Adjust EQ Parameters
To adjust EQ parameters, touch and
drag the parameters adjustment bar.
[User]:Setthedesiredaudioeffect.
[ Flat ]: Select the original audio effect.
[Reset]:Canceltheequalizerfunction
settings.
[Loudness:On/Off]:Whenlisteningto
music at low volumes, this featurewill
selectively boost certain bass and treble
frequencies.
Volume distribution (fader/
balance)
You can adjust the volume distribution
in the vehicle for all sources.
1. Press the [ ] button.The menu for
fader and balance is displayed.
2.Adjustfaderandbalancewith[ ]/
[ ] or [ ]/[ ].
Set Date /Time
1. Touch [ ].
2. Touch [ Time ].
Thedate/time setup menu is
displayed.
· Set Date
1.Touch[Date].
2. Touch the date information on the
screen.
Asubmenuisdisplayed.
3.Touch [ ] or [ ] to set year,
month and day.
· Set Clock Mode
Touch [12Hr] or [24Hr] to switch clock
mode.
· Set Time
1. Touch [ Time ].
2. Touch the time on the screen, a
submenu is displayed.
3.Touch[ ] or [ ] to set hour and
minute. Touch [ ] or [ ] to set
AM/PM(onlyfor12Hr).
Note:
Whendate/time is set, touch[ ] to
conrmor[ ] to exit.

9
JRV9100
Radio Mode
Radio Display
1 4 53
6
78 9 11
12
10
13 14
1. Preset radio station list
2. Current radio band indicator
3.Currentfrequency
4. Radio station informations
5. Clock
6. Enter Preset Station list
7. Band switch
8.Tune backward
Autotunebackward.(longpress)
9. Search stations automatically
10. Tune forward
Autotuneforward.(longpress)
11.Gotostationbyinputtingfrequency
12. Hide the second line of control
buttons
13.Storethecurrentstation
14.RDSsettingoptions
Select One Radio Band
Touch the [ ] icon on the user
interface to select one radio band
amongFM,AM.
Tune
Auto Tuning
Hold [ ] / [ ] icon on the user
interface more than 1 second to seek a
higher/lowerstation.
To stop searching, repeat the operation
above or press other buttons having
radio functions.
Note:
Whenastation is received, searching
stops and the station is played.
Manual Tuning
Method 1:
Duringmanualtuning, the frequency
will be changed in steps.
Touch the [ ]/[ ] icon on the
userinterfacetotune in a higher /
lower station.
Method 2:
1. Touch the numeric keypad icon [
]. Numeric keyboard is displayed,
touch number to input frequency.
2. Touch [ ] to delete the input
number step by step.
3.Touch[OK]toenter.
Preset Station
Differentmemorybandsand
wavebandsareavailableUpto 18 FM
and12AM stations can be storedin
each memory bank. hence the unit can
store30stationsintotal.

10
JRV9100
6. Next track
7. Repeat play
8. Show EQ menu
11
9 10
12
13
9. Show the audio folder list
10.Listwindow
Dragup/downtoscroll.
Touch an item to select.
11.Showaudiofolder/lelist
Touch a song to start play.
12.Showvideofolder/lelist
13.Showphotofolder/lelist
Play/Pause
Whenplaying,press[ ] button to
pause, and the sound will be mute.
Press [ ] button to play.
Previous/Next Track
Press [ ] or [ ] button to go to
previous or next track.
Folder/File List
Whenplayback,touch[ ] icon to
showfolder/lelist.
Video Playback
Select [ ] on the folder/file list
menu, the unit will playback all the
videolesonthestorages.
Duringplayback,touch the screen to
show control buttons.
Search Stations Automatically
Touch [ ] to search station and store
strongest stations in current band
automatically.
Manual Store
1. Tune to a station.
2. Touch [ ] to display the 2nd
menu.
3.Touch[ ].
Recalling a Station
1. Select a band .
3.Touch[ ] to select the
corresponding stored station.
Playback Mode
Connect a USB Device
InsertaUSBdeviceintotheUSBslot.
Whenconnectinga USB device, the
unitwillreadthelesautomatically.
Remove a USB Device
1. Select other source on the main
menu.
2.RemovetheUSBdevice.
Music Playback
Select [ ] of the screen, the unit will
playback all the music on the mobile
storages.
1
345678
1. Return to main menu
2.Displaythefolder/lelist.
3.ShufePlay.
4. Previous track
5.Play/Pause

11
JRV9100
1347
6
2
1.Showfolder/lelistmenu
2. Fast backward
3.Previousmovie
4.Play/Pause
5. Next movie
6. Fast forward
7. Show more control buttons
811
10
8. ShufePlay.
9. Repeat play
10.Show EQ menu
11.Show previous page of control
buttons
Gallery Operations
1. Select [ ]on the folder/file list
menu.
2. Touch a picture name to view it.
Dragleft/righttoscroll.

12
JRV9100
Bluetooth Mode
TheBluetoothallowsyoutoutilizeyour
car’sbuilt-inaudiosystemforhandsfree
wireless mobile phone or music
communication. Some Bluetooth mobile
phones have the audio features, and
some portable audio players support
Bluetooth feature. This system can play
audio data stored in a Bluetooth audio
device. The car stereo with Bluetooth
will be able to retrieve phonebook
contacts, received calls, dialed calls,
missed calls, incoming calls, outgoing
call and listen to music.
Notes:
• Thissystemwillnotoperateormay
operateimproperlywithsomeBluetooth
audioplayers.
• Theunitcannotguaranteethecompatibility
ofallmobilephonestogetherwiththeunit.
• Audioplayback will be set tothe
samevolume level as setduring
telephonecall. This can cause
problems,ifextremevolumelevel is
setduringthetelephonecall.
Touch [ ] on the main menu to enter
Bluetooth Phone mode.
[ ]:Establish a connection.
[ ]:Delete the Bluetooth® device from the
list.
1. Turn on Bluetooth function of your mobile
phone.
2. Search for new Bluetooth devices on
your phone. Select Device name from the
pairing list on the mobile phone, and enter
password.
Or touch [ ] button on the screen to
search mobile Bluetooth devices.
After connect successfully, the unit show
following menu.
Making a Call
• Dial Number
1. Input numbers by digit-keys on the screen.
Touch [ ] to clear the digits.
2. Touch [ ] button to dial out.
3. Touch [ ] button to terminate call.
• Answering a call
You can answer an incoming call by pressing
the [ ] button.
Touch [ ] button to reject an incoming
call.

13
JRV9100
[ ] Previous track
[ ]
Play/Pause
[ ] Next track
Adjust Bluetooth Settings
1. In Bluetooth menu, touch [ ].
The option menu is displayed.
2. Touch on the selected option to
change the setting.
∙ [BT Service]: Toturn on or off
“Bluetooth” function.
∙ [Autoconnect]: Toturnon or off
“Autoconnect”function.
∙ [Autoanswer]:Toturnonoroff“Auto
answer” function.
∙ [BTname]:ChangeBTdevicename.
∙ [PhoneBookSync]:Tosynchronize
the phone book from your mobile
phone to the unit.
Call from Phonebook
1. Touch [ ] button to show your phone
book.
2. Select a number to select and touch [ ]
button to dial out.
3. Touch
[ ] to search a contact name.
Call History
Access Call History by touching [ ] button.
Then select a number from Dialled/Missed/
Received calls.
Audio playback via Bluetooth
streaming
If an audio streaming device is
connected with the car sound system
via Bluetooth®, you can play back the
music via the car sound system and
control the playback.
Touch [ ] button to play music on your
mobile phone.

14
JRV9100
Apple CarPlay
Availableonselectcars, CarPlayis a
smarter, safer way to use your iPhone
in the car. CarPlay takes the things
you want to do with your iPhone while
driving and puts them right on your
car'sbuilt-indisplay.You can get
directions, make calls, send and receive
messages, and listen to audiobooks and
music, all in a way that allows you to
stay focused on the road.
How to enter CarPlay mode
1. Connect your iPhone to the CarPlay
connectorof the unit via theApple
DigitalCable.Theunit will enter
CarPlay mode automatically.
2. To exit CarPlay mode, touch [ ]
button on the front panel.
If you want to return to CarPlay
mode,touch[AppleCarPlay]onthe
main menu.
How to use CarPlay
CarPlay features and Siri voice control
is specially designed for driving
scenarios. It also works with your car’s
controls.Andtheappsyouwanttouse
in the car have been reimagined, so
you can use them while your eyes and
hands stay where they belong.
Touch
you can use the touch screen of the
unit to control CarPlay.
Android Auto
Android Auto brings the mostuseful
apps to your phone screen or your
compatible car display, in a format that
makes it easy for you to keep your main
focus on drving. You can control things
like navigation and maps, calls and text
messages, and music.
Prepare your phone
Make sure your phone is running
Android5.0 (Lollipop) and up.Forbest
performance,werecommendAndroid6.0
(Marshmallow) and up.
Downloadthe Android Auto app from
GooglePlay.
Make sure your phone has a strong and
fastnetworkconnection.Werecommend
runningAudroidAutoforthe first
timewithin Wi-Fi rangeforthe fastest
installation.
Audroid Auto on your phone
screen
1.
AnAndroidphone running Android
5.0(Lollipop)andupwithadataplan.
For best performance, we recommend
Android6.0(Marshmallow)andup.
2.
Acarmountfor yourphone (optional
but recommended).
3.
AUSBcable(optionalforcharging)
4.
TheAndroidAutoapp.
Audroid Auto on your car display
(with a USB cable)
1.An Android phone running Android
5.0(Lollipop)andupwithadataplan.
For best performance, we recommend
Android6.0(Marshmallow)andup.
2.A car stereo that’scompatiblewith
AndroidAuto.
3.Ahigh-qualityUSBcable.
4.TheAndroidAutoapp.

15
JRV9100
Settings
Basic settings
In the settings menu, you can adjust
the basic settings for the different
functions of the device to your
requirements.
In the main menu, press the [ ]
button. The settings menu is displayed,
theGeneralsubmenuisactivated.
1
The settings display features the following
functions and displays:
①Menu items
②Currently selected menu item
③Clock
④Submenu items
General settings
The following setting are possible:
Radio region- Select the reception
region for the radio reception.
Language-Select on-screen display
language.
Dimmer-Touchthe [Dimmer],there
5mode to select: Auto/Night/Sunset/
Normal/Bright.
Beep- Switchconfirmation beep on/
off.
Camera Configuration- Setup the
cameraconguration.
LOC-If LOCis on, only local stations
can be received.
Apple Device- Switch the using of
AppledevicetoCarplayoriPod.
Illumination- Select the backlighting
color.
Video settings
The following setting are possible:
Parking-If “Parking”isactivated,
video/pictureswill not be displayed
during driving. Please set according to
local laws.
Time settings
The following setting are possible:
Date-Setthedate.
Time-Setthetime.
Cloct mode-Selection between 12Hr
and 24Hr mode.
System settings
The following setting are possible:
∙ Toviewsoftwareversioninformation.
∙ Toupdatethesoftware.
∙ Restoretodefaultsettings.

16
JRV9100
Other Modes
Listen to Other Devices
You canconnectan external audio/
video device to the unit.
1. Connect the external device with the
suppliedAVcable.
2. Touch the upper left corner to display
the main menu.
3.Touch[AV In ] to access external
device.
Reset
Whentheunithangsup,youcanreset
it.
Press [ RESET] with a ball-point pen
or similar tool.
Note:
Whentheunithas been reset, all the
settings will return to default settings.
Replace a Fuse
If there is no power, the fuse may be
damaged and need to be replaced.
1. Take out the unit from dashbpard.
2. Check all electrical connections.
3.Buya fuse that matches the
amperage of the damaged fuse.
4. Replace the fuse while the units
power is disconnected.
Steering Wheel Control
Programming
1. Touch the [ ] button, the settings
menu is displayed.
2. Touch [ SWC ],theSWC menu will
display.
3.Adjust each key with a individual
function.
4. Touch [ Pair ] to program.

17
JRV9100
Specications
General
ReferenceSupplyVoltage.............................................. 12V(DC)
OperatingVoltageRange...................................10.5-15.8V(DC)
Max Operating Current.........................................................15A
Maximum Output Power................................................ 4X25W
GroundingSystem ............................... Car Battery Negative Pole
Dimensions(WXHXD) ...................................178×100×161.9 mm
Weight(mainunit) .......................................................... 1.38kg
FM
Signal Noise Ratio ...........................................................≥50dB
ResidualNoiseSensitivity(S/N=30dB)............................. 18dBμV
FrequencyResponse(±3dB)................................. 20Hz~12.5KHz
StationSeekingLevel .............................................. 20~28dBμV
Distortion...................................................................... ≤1.0%
StereoSeparation(1KHz).................................................≥25dB
AntennaImpedance ........................................................... 75Ω
AM
ResidualNoiseSensitivity(S/N=20dB)............................. 30dBμV
Selectivity(±9KHz) .........................................................≥50dB
LCD
Screensize .....................................................6.75 inchs (16:9)
Displayresolution ...............................................800 X 480 dots
Contrast ratio ................................................................ 4000:1
Brightness..................................................................280cd/m2
AUX IN
Distortion...................................................................... ≤0.8%
FrequencyResponse(±3dB)....................................20Hz~20KHz
AudioInputLevel......................................................... 0.5Vrms
Audio
AudioOutputImpedance................................................... 100Ω
AudioOutputLevel.................................................. 3Vrms(Max)
Video
NormalVideoInputLevel(CVBS) ..................................1.0±0.2V
VideoInputImpedance....................................................... 75Ω
Environment
Operating Temperature ....................................... -30°C~+70°C
Storing Temperature........................................... -40°C~+85°C
Operating Humidity ...............................................30%~95%RH
Storing Humidity...................................................30%~95%RH
Notice:
Whenthe unit is operated to extremes, such as with maximum power outputfor a
longtime,or the temperatureisover70°C,itwill enter heat protection mode, the
volume will be reduced automatically. This is normal.

18
JRV9100
Wire Connections

JRV9100
2602 Marina Drive, Elkhart, IN 46514
WWW.ASAELECTRONICS.COM
© 2019
Printed in China
JRV9100 Common Replacement Parts
Microphone (4M), mating harness 31914310B
Remote Control PXRV10REM
Wire Harness - Bulk Pack separately for ASA 30314310
Operation manuals and other material online at:
https://www.asaelectronics.com/manuals-guides
Table of contents
