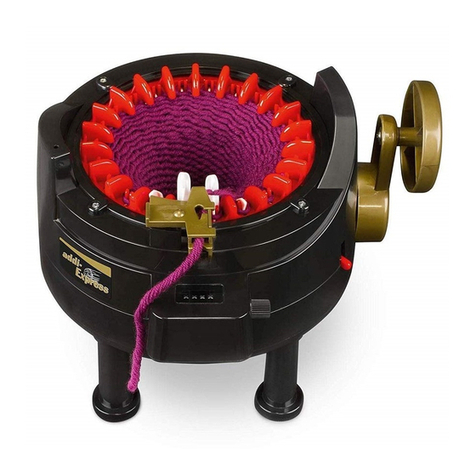
addi Express Kingsize User manual

New instructions for the
addiExpress Kingsize knitting machine.
Winding
INSTEAD OF

04 PREFACE
06 INTRODUCTION TO addiExpress Kingsize
10 TIPS + TRICKS
11 TROUBLESHOOTING
11 ABBREVIATIONS
74 LEGAL NOTICE
LIVING ACCESSORIES
18 LANTERN
24 FLOOR LAMP
26 TABLE LAMP
36 RUG
38 WASTEPAPER BIN
40 STOOL
42 ORGANISER
44 “AHOI” SEAT CUBE
75 “AHOI” SEAT CUBE - TEMPLATE
52 BEANBAG
62 BLANKET
66 TABLE LAMP
70 VASE
72 WALL CLOCK
KNITTED GARMENTS
12 SUMMER SWEATER
16 CASUAL BOXY SWEATER
20 BOXY SWEATER WITH PIPING
34 KNITTED SKIRT
46 CHILD'S CAPE
48 KIMONO SWEATER
50 KIMONO BOLERO
54 CARDIGAN # 1
58 CARDIGAN # 2
64 BOXY SWEATER
WITH V-NECK
68 CARDIGAN # 3
LEVEL OF DIFFICULTY
Very easy
Easy
Medium
Challenging
Very challenging
ACCESSORIES
14 SUMMER LOOP SCARF
22 HAT
28 HOODED SCARF
30 HOODED SCARF
WITH ROLLED EDGE
32 RIBBED HOODED SCARF
56 SCARF
60 BAG


23 CM 24 CM
24 CM
88 CM
Work in “Plain knitting” mode over
28 st.
Knit a few rows with a spare yarn
then knit 308 more r.
Work a few r with spare yarn, then
take off the knitted piece. Pick up the
last row on no. 4 needle and remove
the spare yarn.
Now on each side drop the 4th wale
down to the 1st r, then crochet it back
up on the reverse side as rib and pick
it up again with the circular needle.
Then do the same with the 5th wale.
Steam the scarf carefully and smooth
it out. This shows the ribbed edge to
its best advantage.
Cast off loosely with the no. 7 circu-
lar needle.
Pick up the st of the 1st r on the no.
4 circular needle, remove the spare
yarn and cast off loosely with no. 7
needle.
Make the hood part as follows:
work in “Plain knitting” mode over
28 st. Knit a few r in spare yarn, then
Hooded Scarf
knit 100 r, work a few r in spare yarn
then take off the knitted piece.
Pick up the st of the 1st r carefully
with the no. 4 circular needle, at the
same time removing the spare yarn,
and put the st to one side; do the same
with the last r.
Drop the 4th + 5th wales one after
the other, crochet back up on the
purl side as rib and pick up onto the
circular needle.
FINISHING
Steam the hood piece as well, then
fold in half and sew together on the
knit side in mattress stitch.
Then sew the the hood piece to the
scarf at the back from the centre
outwards in mattress stitch.
YOU NEED
» FANO (line 359) from ONline, 53%
virgin wool/47 % polyacrylic,
run length approx. 240 m/150 g:
2 balls col 09 Multicolour
» 1 coarse embroidery needle
» 1 addi crochet hook no. 7
» 2 addi circular needles no. 4, 60 cm
» 1 addi circular needle no. 7, 60 cm
LEVEL OF DIFFICULTY
TIME REQUIRED approx. 4.5 hours
28


Pick up the st of the last r of pattern
yarn with no. 4 needle, remove spare
yarn and put st aside. Do the same
with the 1st r in pattern yarn.
Sew all 4 rectangles together along
the long sides, fitting the stripes with
each other. Lift all 140 st per side onto
1 no. 4 needle.
SLEEVE
The sleeves are each knitted from 2
pieces which are later sewn together
in the middle.
RIGHT SLEEVE PIECE (2 X)
Knit a few rows over 16 st with spare
yarn to the left of the black needles,
then carry on in stripes:
2 r anthracite, 2 r white, 2 r
anthracite, 3 x (6 r white, 6 r
anthracite), 5 r white. Increase one st
at the side every 4th r until there are
27 st.
Knit a total of 48 r. Take off the knit-
ted piece, pick up the st of the last r
onto no. 4 needle and put to one side.
YOU NEED
» SUMERINO by SCHULANA,
100 % merino wool, extrafine,
run length approx. 85 m/50 g:
9 balls col 103 Anthracite
6 balls col 1 Ecru (white)
» 1 coarse embroidery needle
» 2 addi circular needles no. 4, 60 cm
» 1 addi circular needle no. 6, 80 cm
LEVEL OF DIFFICULTY
TIME REQUIRED approx. 12 hours
BODY
Knit 4 rectangles in “Plain knitting”
mode with a spare yarn over 35 st,
then continue in the pattern yarn in
stripes as follows:
6 r anthracite, 3 x (6 r white, 6 r an-
thracite), 2 r white, 2 r anthracite, 2 r
white, 6 r anthracite, 8 x (6 r white, 6 r
anthracite), 2 r white, 2 r anthracite, 2
r white, 6 r anthracite, 3 x (r 6 white, 6
r anthracite). Knit a few rounds with
spare yarn, then remove the knitted
piece.
LEFT SLEEVE PIECE (2 X)
Knit as right sleeve piece, but knit on
the white needles to the right of the
black needles.
Sew the right and left sleeve parts
together on the knit side in mattress
stitch; lift all 56 st per sleeve onto a
no. 4 needle.
Sew the sleeves to the body as per
the plan in kitchener stitch. Now
knit the cuffs with no. 6 needle onto
the 1st r of each sleeve in rib pattern
(k 2; p 2 alternately) the next 26 r in
anthracite; cast off “Russian” style to
give a stretchy finish: k 2, *lift both
st back to the left needle, cross and
k2tog. K 1 again and rep cont from *.
FINISHING
Sew the side seams together in kitch-
ener stitch and the underarm seams
in mattress stitch. Pick up the 304 st
from the bottom edge of the cardigan
in anthracite with no. 6 needle and
knit a border in rib (k 2, p 2) over 20
rounds. Cast off loosely.
Cardigan
#2
DIRECTION OF KNITTING
DIRECTION
OF
KNITTING SEAM
SEAM
KNIT RIBBING IN ROUNDS BY
HAND
KNIT RIBBING CUFFS IN ROWS
BY HAND
59


4
Welcome to this new book full of inspiration and ideas. Nine years after the last book,
it is high time for a whole bunch of new addiExpress Kingsize patterns, designed for us
by Ute Krugman.
Once she had started, more and more great ideas came out of the machine, so here we
can offer you a selection that is more exciting and varied than ever before.
From a felt wool children's rug, to a light summer sweater made with beautiful yarns,
right up to a complete winter outfit, you are sure to find your own personal favourites.
The beautiful new images and detailed instructions make creating the finished article
a pleasure for beginners and experienced users alike.
Show us the results of your work on www.facebook.com/addinadeln
THE WHOLE ADDI-TEAM WISHES YOU LOTS OF FUN
WITH YOUR KNITTING MACHINE!
Dear addiExpress machine
knitting fans,
UTE KRUGMANN
Graduate designer
Whether it is knitwear, home accessories, artistic
costumes or street art, she designs entrancing knitted
creations and artfully puts them in the spotlight.
Now, with the addiExpress machine, she has devel-
oped loads of imaginative suggestions to inspire you!
»www.ute-krugmann.de

6 —
— 3
— 1
— 5— 4— 2
2 /
3 /
1 /
5 / 6 /
8 /7 /
1 / 2 /
9 / 10 /
3 / 4 /
1 — YARN-HOLDER
2 — REPLACEMENT NEEDLES
3 — ROW COUNTER
4 — PLASTIC NEEDLE
5 — TABLE CLAMPS
6 — OPERATING SWITCH
SETTING UP
1 / Screw the four legs into the designated holes on
the bottom.
2 / Place the addiExpress Kingsize at the edge of the
table and affix it with the two support clamps.
3 / To set the line counter to 0, turn the black knob.
Introduction to circular knitting
All of the 46 needles are used
1 / Before you start with circular knitting, set the
operating switch in the down position to “Circular
knitting”.
2 / Pull some of the thread off and through the
middle of the addi- Express until it touches the table.
Then wrap the yarn around the black needle on the
right. (There are three needles, a left, middle and
right)
3 / Start slowly turning the handle clockwise, while
doing this, alternate the position of the yarn from in
front of to behind of the rising needles.
4 / When you reach the first black needle (the right
one) again, the yarn runs outward.
5 / Open the yarn holder by pushing it open to the
left. Place the yarn halfway. To start it is essential
to close the yarn holder to avoid damages at the
needles.
6 / Whether you place the yarn halfway or entirely
into the yarn holder, depends on the yarn. It should
run smoothly.
7 / You can now begin. Do not use force while
turning the handle clockwise - it must move smooth.
If you have the feeling that the stitches are not
positioned on the needles tightly enough, simply
pull at the bottom of the knitted piece.
8 / When you have reached the desired lenght of
your item you have to cast off: Cut the yarn off to 35
inches, pull it through the yarn holder and thread it
into the plastic needle.
9 / While slowly turning the handle go through
each of the stitches alternating from going through
the front of and back of the lowered needle. The
suture retainer must remain closed during this time,
as otherwise the needle may become damaged.
10 / You must do this to the right of the yarn holder.
Your item is now done when all stitches are cast.
Introduction to addiExpress ingsize
76

5 / 6 /
1 / 2 /
3 / 4 /
1 /
3 /
2 /
5 /
1 /
3 /
6 /
2 /
4 /
Introduction to Plain knitting
43 needles are used
1 / Make sure that the operating switch is up. Pull
some of the yarn off the ball and through the middle
of the addiExpress until it touches the table.
2 / Now turn the handle backwards and start with
the first white needle to the left of the black needles.
(The black needles are not used for plain knitting)
3 / Start turning the handle slowly clockwise, while
doing this alternate the position of the yarn from in
front of to behind of the rising needle. This is done
until you reach the first black needle.
4 / When you come to the first black needle, the
yarn runs outward. Follow the steps 5 to 6 of the
chapter “circular knitting“. (The loop of the first
black needle goes off later and can be hidden by just
pulling it tight.)
5 / The difference to round knitting is that you turn
the handle forwards and backwards. Each end of a
row will be shown by a stop of the winding. Always
turn the handle until it stops.
6 / In order to cast off follow the steps 8 to 10 of
circular knitting.
Multi-coloured knitting/version 1
Tying yarns together
1 / To knit with more than one colour, just tie the
two yarns together. Be careful to make a proper, tight
knot.
2 / Lay the ends of both yarns, one behind the other,
in a cross.
3 / Place your left thumb on the point where the
yarns cross.
4 / Then make a loop with the thread in your right
hand around its own end.
5 / Now take the end of the other colour. Lay it over
the right-hand thread of the loop and pull it through
under the left-hand thread.
6 / Remove your thumb from the loop and pull the
knot really tight. Cut the yarn end off near the knot.
When knitting it in, position the knot in such a way
that it does not sit on a needle.
Multi-coloured knitting/version 2
Crossing yarns
With this version, neater joins are generally
achieved.
At the end of a row or round, the ball that was being
used is removed from the yarn guide and placed in
the centre of the machine.
The ball with the new colour is introduced into the
thread guide and knitting continues in the normal
manner for machine knitting.
For recurring strips, such as the ones on the waste-
paper bin (see page 38) and the striped cardigan (see
page 58), the two balls are interlaced once after each
turn (= 2 rows) so that no loose threads remain on the
side - as in hand knitting.
Upon completion of the piece of knitting, that is after
casting off, it is recommended to tie the free-hanging
threads together and then to sew them up.
addiStopper
1 / The addiStopper allows you determine individual
web widths in a quick and clean style.
2 / Use: Place the stopper to the left of the black
needles, 2 needles from where you wish to begin
(to do this, first turn the handle till you reach the
desired white needle and position the first stopper).
Place the second stopper 4 needles beyond where
you wish to end. When turning the handle, make
sure the edge stitches are picked up properly!
3 / Example: To knit 10 stitches straight up, use
needles 6 to 21. To do so, position the first stopper
(start stopper) between needles 5 and 6. Position the
second stopper (end stopper) between needles 21
and 22.
98

CASTING OFF
After casting off - which is more accurately unthreading
- it is advisable to put the penultimate row onto double
pointed needles or a circular needle and to carefully
pull out the cast off
stitches. Then loosely
cast off the last row as
in conventional hand
knitting. This results
in an elastic finish
which is not too loose.
The cast on edge can
also be cast off like
this afterwards.
RIBBON YARN
Ribbon yarn must be held at an angle, so that the needles
pick up the entire ribbon. Always let the yarn run loosely
through your hand.
DECORATIVE SEAMS
For visible, decorative seams, crochet the two edges
together using single stitches. Sew through both edges
with each stitch.
YARNS
You can use any yarn, even “flamed” ones, including yarn
grades of different thicknesses.
PLAIN KNITTING
With plain knitting, ensure that no stitches catch on
the needles at the edge (particularly with thicker wool).
To avoid this, be careful to keep the wool under tension
when turning.
TOTAL ROW COUNT
Always knit an odd number of rows, because knit stitches
are better for casting off (1st row = immediately after
stopping).
SIZE CONVERSION
For smaller sizes simply make the pieces narrower. For
larger sizes use a correspondingly larger width.
REVERSE SINGLE CROCHET STITCH
Around almost all edges, finish with a round of reverse
single crochet stitches. Reverse single crochet stitches are
single stitches which are crocheted from left to right.
MATTRESS STITCH
Lay the edges that you want to join with the front facing
upwards parallel to each other. With a wool needle or
a blunt embroidery needle catch the the cross stitch
between the edge stitch and the first stitch. Pull the
thread through. On the opposite side, also catch the cross
stitch between the edge stitch and the first stitch and
pull the thread through.
Repeat this alternately on
one side and then the oth-
er. Once you have joined
approximately 2 cm like
this, tighten the thread
you are working with. The
knitted pieces will join
together seamlessly.
MULTI-COLOURED KNITTING
When knitting with more than one colour, simply tie
the two yarns together. Be careful to make a proper, tight
knot.
IF THE CRANK STOPS TURNING,
IT MAY BE BECAUSE...
... the operating switch is set to “Plain
knitting”
... the thread is not inserted correctly. In which case sim-
ply start again, following the instructions.
... remnants of yarn are stuck between the needle and
the shank. These can be plucked out out using the plastic
needle or a pair of tweezers.
IF STITCHES ARE DROPPED ...
... the crank was turned too fast.
... the thread was held too loosely.
... the thread was not properly caught on the needle. So
always watch the run of the yarn when knitting. In this
case, simply pick up the stitches again with the plastic
needle (as you would in normal knitting) and pull it over
the needle.
THE CRANK IS DIFFICULT TO TURN, BECAUSE ...
... the knitting yarn is set up too tightly. Remove the yarn
and thread it back again. Hold it loosely as you do so and
unwind the first few centimetres from the ball before you
knit the first row.
... the needles are damaged. Replace them following the
manufacturer’s instructions.
... the yarn has slipped over the needle heads and must be
properly repositioned.
TO CHANGE NEEDLES ...
... loosen the 4 ring holder screws with a Phillips precision
screwdriver, carefully lift the black ring holder, hold the
red insert from the inside and lift it up, unscrew the 2
inner screws and remove the high black cylinder. Now
gently lift out the damaged needles, replace them with
the needles supplied and put the pieces back together in
reverse order.
col colour
cont continuous
ch chain stitch
p purl
st stitch(es)
r row(s)
rd round(s)
ri right
k knit
sl1.k1.psso slip 1, knit 1, pass slip stitch over
rep repeat
k2tog knit 2 together
p2tog purl 2 together
tog together
Tips +
Tricks Trouble-
shooting Abbreviations
1110
Other manuals for Express Kingsize
1
Table of contents
Other addi Sewing Machine manuals
