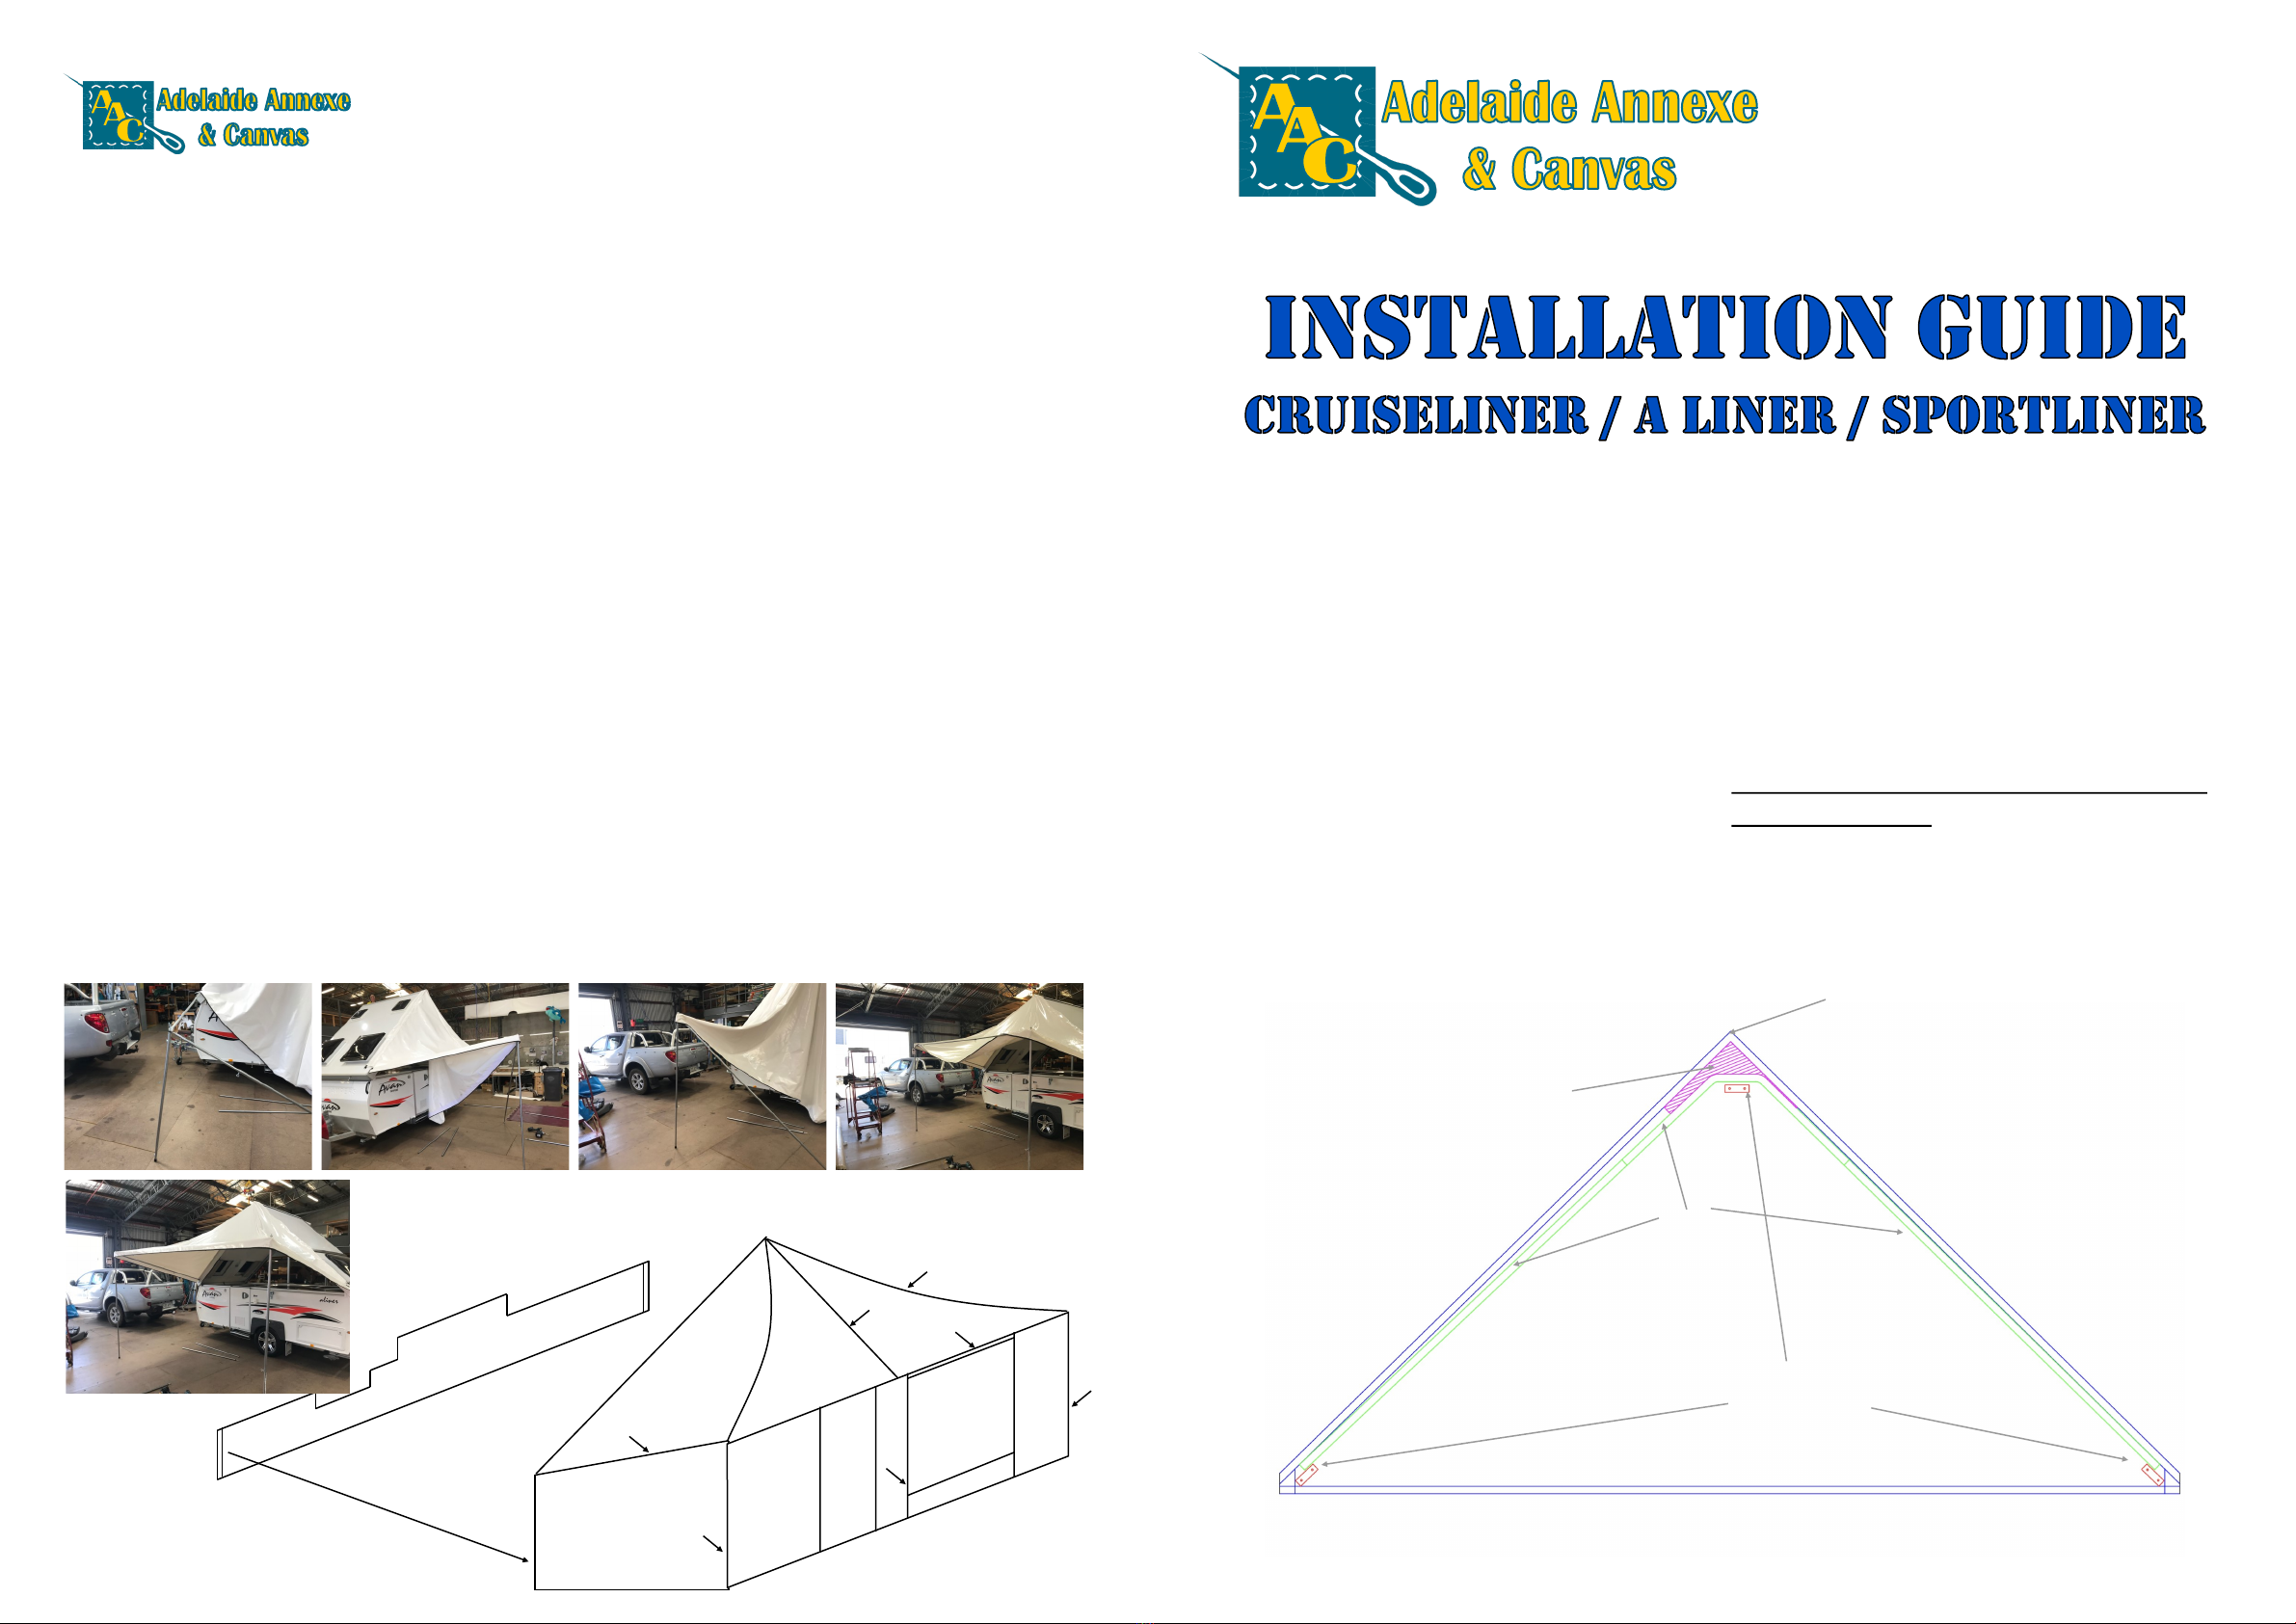
Awning Installaon Inial Notes
) Push roof up as you would when starng erecon
process.
) Marking and xing of track and brackets is best
done when door side laid horizontally in travel
posion.
) Best reach is either by step ladder and plaorm
on either side and also by liing door and stand-
ing inside van. Use whichever posion you nd
best for each secon.
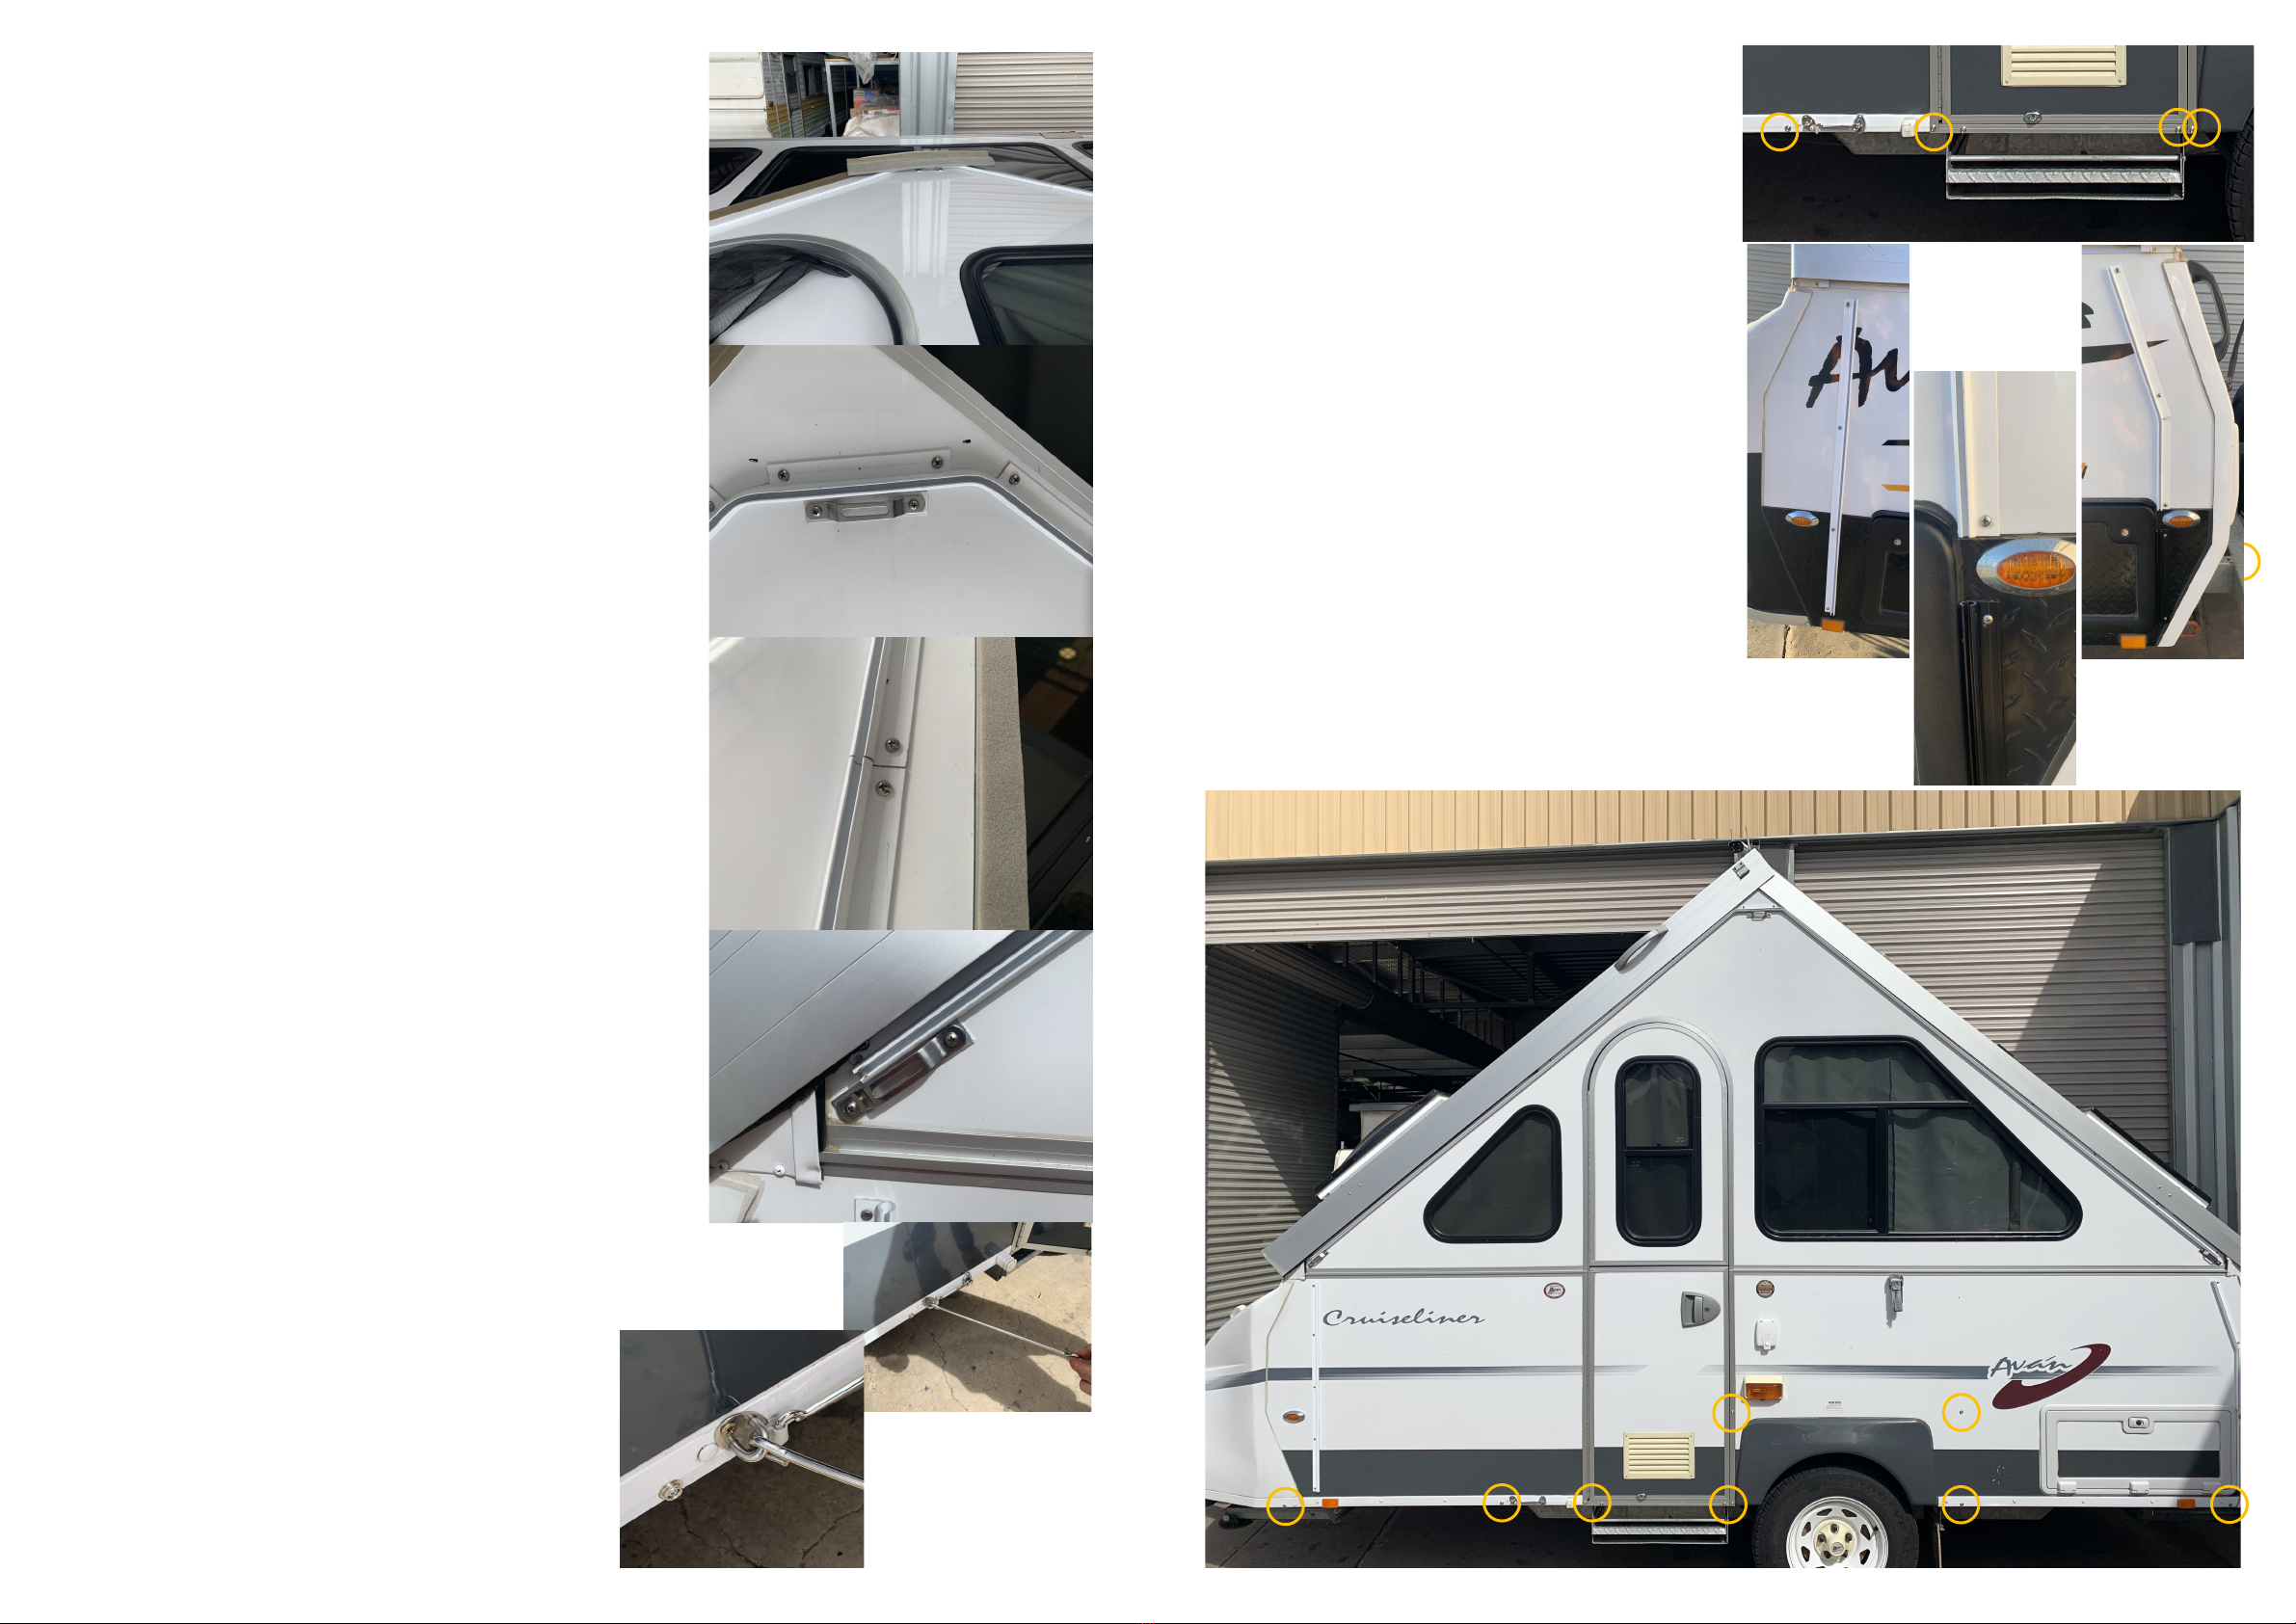
Step 1 (marking tracks)
) Lay supplied template onto top corner of white
wall (underneath aluminium edging)
) Carefully draw two very light whiteboard lines as
shown on template
) This upper line is top of curved rope track secon
) The square line is for top plate and bracket
Step 2 (ng tracks for awning)
) Place curved rope track carefully underneath
whiteboard line using small spots of Blu Tack. Po-
sion long side tracks at either end of centre sec-
on. (pieces should bu together perfectly where
they join and should just touch the aluminium
edging at the boom. Use Blu Tack on these too.
) Put up doorway wall and make sure that track
channel sits just below roof capping (make sure
Blue Tack holds). Put wall back down if all OK.
) Screw track using supplied larger pan head screws
into centre top holes (screw part way for now, do
not screw ght)
) When happy with this add screws on either side
of joins and at boom ends of long pieces.
) With tracks lightly screwed on remove screws and
add a 5mm bead of silicone to underneath of
tracks and carefully place back into posion and
then add screws into all pre drilled holes. Screw
down ght without overghtening.
Step 3 (ng brackets)
) Peel o backing paper and sck down centre top
bracket plate. Line up holes in a bracket with pre
drilled holes and screw bracket on.
) Repeat with boom brackets by posioning as
shown in photos and screw plates and brackets in
place. For each bracket when ed, remove
screws, add dob of sealant to hole and rescrew.
Step 4 (Cruiseliner and A liner only)
) Aach new door hook as shown in two photos.
) Remove screw from exisng hook holder and use
for right hand screw of new hook bracket.
Walls Installaon Inial Notes
) Erect camper fully
) Straight track is at front and bent track is for rear
) Large pan head screws for track. Smaller self
drilling screws for press studs.
Step 1 (ng side tracks for walls)
) Add front (straight) track with channel directly
under le side of bracket slot and 10mm below
wall hinge. Make sure track is vercal and screw
into place.
) Do the same with tracks on rear but with the
right side of the bracket slot. (bend will allow
miss locker door) Bent at top of reector, straight
is below
) Remove screws, add 5mm bead of sealant to
Step 2 (ng draught skirt)
) Fit draught skirt using small pan head self drilling
screws.
) Start by lining door slits evenly under door. Add
door press studs.
) Add remaining press studs in the following order
(a) either side of door (b) outer corners (c) re-
maining boom two (d) top wheel arch studs