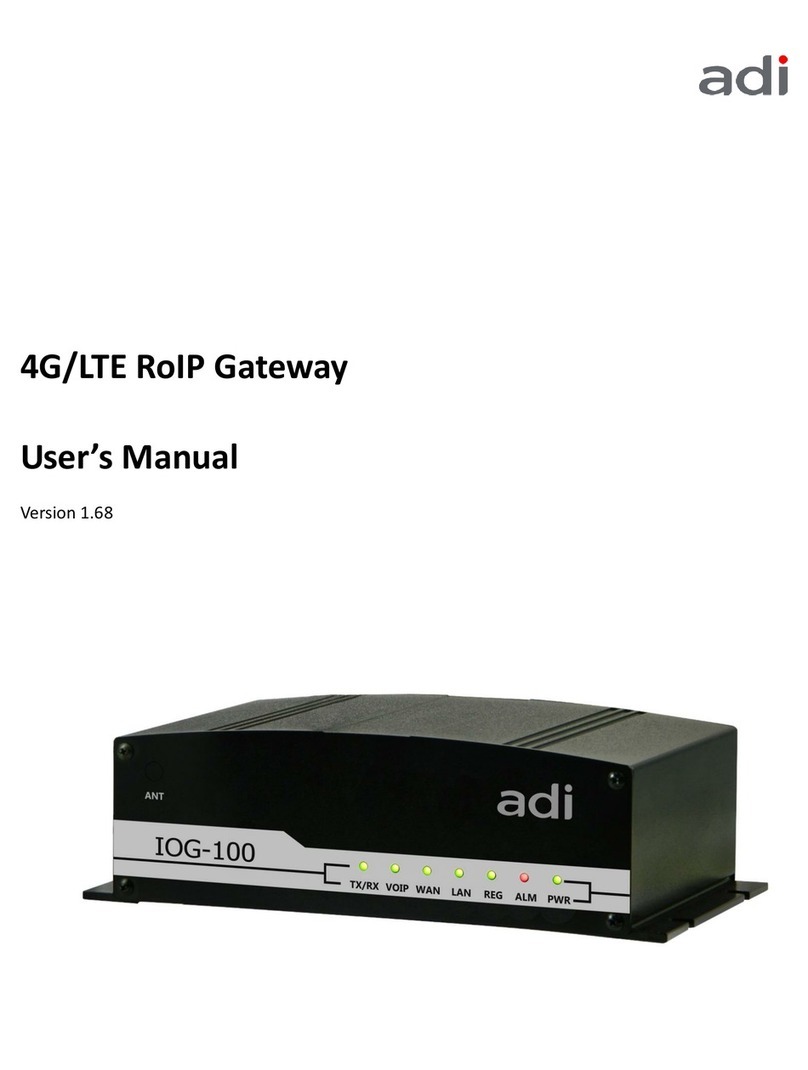
ADI TP-10 User manual

Version 1.0 (2016)
1
TP-10 RoIP Gateway
User Manual

Version 1.0 (2016)
2
Contents
1. Introduction.........................................................................................................................................................4
1-1 Product Overview ......................................................................................................................................4
1-2 Hardware Description ................................................................................................................................5
2. Radio Gateway Web Configuration...................................................................................................................7
2-1 Status.........................................................................................................................................................8
2-1-1 Current Status................................................................................................................................8
2-1-2 RTP Packet Summary ...................................................................................................................8
2-1-3 System Information........................................................................................................................9
2-2 General Settings..................................................................................................................................... 10
2-2-1 Quick Setup ................................................................................................................................ 10
2-2-2 WAN Settings.............................................................................................................................. 12
2-2-3 LAN............................................................................................................................................. 17
2-2-4 RoIP............................................................................................................................................ 18
2-2-5 SIP Advanced ............................................................................................................................. 22
2-2-6 Hot Line....................................................................................................................................... 27
2-2-7 Line settings................................................................................................................................ 28
2-2-8 Phone Book ................................................................................................................................ 31
2-2-9 CDR Settings .............................................................................................................................. 32
2-3 Advanced Settings.................................................................................................................................. 33
2-3-1 Codec setting.............................................................................................................................. 33
2-3-2 Digit Map..................................................................................................................................... 34
2-3-3 DTMF & PULSE.......................................................................................................................... 36
2-3-4 QoS Settings............................................................................................................................... 38
2-3-5 DDNS.......................................................................................................................................... 39
2-3-6 NAT Traversal ............................................................................................................................. 40
2-3-7 DoS Protection Settings.............................................................................................................. 41
2-3-8 DMZ / ALG .................................................................................................................................. 42
2-3-9 IP Filtering................................................................................................................................... 43
2-3-10 Port Filtering.............................................................................................................................. 44
2-3-11 MAC Filtering ............................................................................................................................ 45
2-3-12 Virtual Server ............................................................................................................................ 46
2-3-13 UPnP......................................................................................................................................... 46
2-3-14 IGMP......................................................................................................................................... 46
2-4 Tools....................................................................................................................................................... 47
2-4-1 Ping Test ..................................................................................................................................... 47
2-4-2 STUN Inquiry .............................................................................................................................. 47
2-5 System Settings...................................................................................................................................... 48
2-5-1 NTP............................................................................................................................................. 48
2-5-2 Language.................................................................................................................................... 49
2-5-3 Login Account ............................................................................................................................. 50
2-5-4 Backup / Restore ........................................................................................................................ 51
2-5-5 System Log................................................................................................................................. 52
2-5-6 Save/Reboot ............................................................................................................................... 52
2-5-7 Software Upgrade....................................................................................................................... 53
2-5-8 Logout......................................................................................................................................... 53

Version 1.0 (2016)
3
Terms and Conditions
Notice:
Please follow the following instructions to avoid unnecessary damage to the product.
1. Please turn off the power before plugging in/out, and also during the setup of accessories.
2. When the Internet is congested, the quality of the calls will be influenced.
3. Please keep the product away from other electronic devices to avoid radio interference, such as
wireless base station (AP), AC Power Converter, and etc.
4. “Push-to-Talk” pattern is also applied on Smart Phones calls.
5. Please use only the AC Power Converter included in the package.
6. Please do not open/dissect/fix the product by yourself. Please contact the Service Provider or the
Original Dealer for more service.
7. Please keep the product away from hot, humid, or raining environment.
8. If you find any question about this product, please contact the Service Provider or the Original
Dealer.
Item List
Please check if the package is damaged. Open the package carefully and check if the content is as the
list below. Please contact the local dealer immediately if you find any accessory is missing or damaged.
Item
Quantity
Radio Gateway
1
Antenna
1
Power Converter
1
Ethernet Cable
1
User Manual
1
Guarantee Card
1

Version 1.0 (2016)
4
1. Introduction
1-1 Product Overview
With Internet service becoming universal, the application of Internet of Things (IoT) steps into our
daily lives as well, and VoIP (Voice over Internet Protocol) is one of them. Through Radio Gateway to
make contacts directly with telephones and smart phones has become an innovative choice for
transportation, restaurants, warehousing, industries and government departments..
ADI Communications combines the benefits of radio and Internet without changing the user pattern.
Through DSP and Communication Protocol technology, the radio audio can be Encoded, Compressed
and sent through Internet as Information Packet. Of course, the Information Packet on the Internet
can be Decompressed, Decoded, and sent through Public Telecom Network as audio. This system is
ADI Communications’Radio Gateway.
Interface RJ45 is applied to the Radio Gateway to connect to traditional radio equipments, and
provides varied function according to purchased model. FXS Port connects to telephones, or connects
to PBX for internal extensions to make VoIP calls. SIP is applied to transceive the signal, and support
fixed IP/DHCP configuration. It adopts G.711 voice compression format to save network bandwidth
while providing real-time, toll quality voice transmission and reception.
Connection Frame

Version 1.0 (2016)
5
1-2 Hardware Description
Front Panel
Power : Green light indicates normal power function.
Alarm: Red light indicates Automated Start Testing or VoIP Router abnormal function.
Register: Green light is always on when SIP Server connection is normal.
LAN : Green light indicates the Internet is connected.
WAN: Green light indicates the Internet is connected.
VoIP: Green light is always on when FXS communication mode is being applied.
Radio: Green light indicates the radio is at receiving signal mode, and the red light is at
transmitting signal mode.
The light of POWER, ALARM, REGISTER, RADIO will be lighted up when the Radio Gateway is
turned on, the system will be functioning after around 30 seconds. When it’s functioning normal,
the POWER light is always on, and the ALARM light is off; if the ALARM light keeps flickering, it
indicates the Radio Gateway is connecting with ISP now, but hasn’t received the IP Address yet.

Version 1.0 (2016)
6
Back Panel
ANT : When the radio is built-in, VHF/UHF antenna can be setup.
VoIP: Through telephone the VoIP calls can be made.
RADIO : The custom-made external lead can be purchased additionally, and connect to your own
radio system.
WAN : Use Ethernet cable to connect to Hub, ADSL, Cable Modem, or Router.
LAN : Use Ethernet cable to connect to PC. You can set up the web page through LAN Port.
DC+12V : Please use the Power Converter that comes along within the package.
Reset : When the power is on, press Reset button for around 6 seconds and stop when Alarm
light is flickering, the factory defaults is now restored.

Version 1.0 (2016)
7
2. Radio Gateway Web Configuration
Steps :
1. Open a Web Browser (e.g., Explorer, Navigator, Opera, FireFox).
2. Enter the IP Adress of WAN Port, if you connect PC at LAN Port, then enter IP Address of LAN Port
in the address filed and press Enter. Default LAN port IP address: 192.168.8.254.
3. The log-in screen below will appear after the connection. The factory default settings
Username: admin/user
Password: blank(N/A)
4. After login, please go to System Settings → Login Account to reset Username and Password
5. All the settings will be effective immediately after clicking YES, but the Internet-related settings
will be effective after Reboot. Save the settings: System Settings → Save/Reboot → Reboot then press YES

Version 1.0 (2016)
8
2-1 Status
2-1-1 Current Status
Status → Current Status
On this page it shows all the Type, Extension Number, Line Status, Calls, Proxy Registration
Status, DDNS, and STUN status of each Line. You can see currently how the Radio Gateway is
working.
You can also re-set Refresh Time on this page.
2-1-2 RTP Packet Summary
Status → RTP Packet Summary
Display the audio packet transceive information of the last call of each Line, including IP Address,
audio format, packet quantity and information. You can evaluate the Internet connection quality
by this information: the portion between Packet Lost and Packet Sent.
Press Refresh you can see the latest RTP Packet summary.

Version 1.0 (2016)
9
2-1-3 System Information
Status →System Information
IP address, subnet mask, default gateway and DNS server in column WAN Port Information. If
you use PPPoE to obtain IP, you can know the obtained IP Address. If IP Address, subnet mask,
default gateway is blank, it indicates the Radio Gateway does not obtain IP Address.
LAN port IP, subnet mask, and the status of DHCP server can be seen in column LAN Port
Information
Hardware Platform and driver version are shown in column Hardware.

Version 1.0 (2016)
10
2-2 General Settings
2-2-1 Quick Setup
This part includes WAN Settings, RoIP Accounts Settings, Hotlines, and Digit Map.
WAN Settings: Including DHCP, Fixed IP, PPPoE and etc.
RoIP Accounts Settings: Including Numbers, SIP Accounts, Password, and etc.

Version 1.0 (2016)
11
SIP Proxy Server: Including SIP Proxy and Port.
Radio Settings: Including Always-On Mode, PTT Output Expiry, and etc.
Hotlines: Including Hotline Numbers, Dial Waiting and etc.
Phone Book: 3 sets of frequently dialed number can be set and used by Calls Project.
Digit Map: 3 sets of frequently dialed number can be set and used by Phone Book.

Version 1.0 (2016)
12
2-2-2 WAN Settings
WAN (Wide Area Network) Settings is applied to connect to your ISP.
IP Configuration (Setting WAN Port)
There are four methods to obtain a WAN port IP address:
1. DHCP Dynamic IP
2. Static IP Fixed IP
3. PPPoE (dial-up ADSL)
4. PPTP
IP Address obtained by DHCP and PPPoE may change. If you are not familiar with creating a
network connection, please contact your local ISP.
After selecting the suitable option, click Accept at the bottom of the screen to save the settings.
You need to save the changes and restart the Radio Gateway to activate the changes.
Enter System Settings →Save/ Restart page then Save and Restart. Wait for about 40 seconds
before the Radio Gateway obtains an IP address by the method you selected.
Note: After the new IP address is obtained, the Web Configuration Screen can be entered by
entering new IP address at the address bar if you’re connecting through WAN Port. The same
principle applies to the next two settings.
General Settings → WAN
General Settings →WAN Settings

Version 1.0 (2016)
13
DHCP:
(i) Type →DHCP, then click YES at the bottom of the page
(ii) Some ISP don’t require Hostname
(iii) System Settings →Save/Restart →Restart then click yes. After around 40 seconds the IP
Address will be obtained from DHCP Server

Version 1.0 (2016)
14
General Settings →WAN
Static IP:
If a fixed IP address is used, please enter the IP Address, Subnet Mask, and Default Gateway
provided by ISP.
If the radio gateway is set up under a broadband router, then enter an IP Address that can
connect to Internet through this broadband router. If you’re not familiar with the settings, then
please choose DHCP.
General Settings →WAN
PPPoE (dial-up ADSL):
(i) Type →PPPoE, enter PPPoE Account, Password, Confirm Password, then click YES at the

Version 1.0 (2016)
15
bottom of the page.
(ii) System Settings →Save/Restart →Restart then click yes. After around 40 seconds the IP
Address will be obtained from Server.
General Settings →WAN
PPTP: Point-to-Point Tunneling Protocol (PPTP) is a WAN connection. Enter the IP
Address, Subnet mask, PPTP Server, PPTP ID and Password.
General Settings →WAN
VoIP Connection Interface: Select a WAN interface for VoIP traffic as WAN is enabled.

Version 1.0 (2016)
16
General Settings →WAN
If your ISP determines if it’s connectable with Internet by MAC (Media Access Control), then
please copy Your MAC Address to Current MAC Address. If you want to restore to Radio
Gateway’s MAC Address, click Restore to get default settings. If you’re not sure about this setting,
please send inquiry to your ISP.
Note: The outward calls will be unavailable if the settings are incorrect.
Factory Default MAC: Radio Gateway’s MAC.
MAC Address: PC’s MAC Address, only detectable when you use LAN to enter Radio Gateway’s
WEB Page.
Current MAC Address: If it’s blank, it indicates currently it’s the same with Your MAC Address.

Version 1.0 (2016)
17
2-2-3 LAN
General Settings →LAN
LAN IP / LAN default Gateway : Enter the LAN IP address of the RoIP. It is also the default
gateway for DHCP clients.
Subnet Mask: Enter the subnet mask for DHCP clients.
General Settings →LAN
Enable DHCP Server: This variable is to assign the IP address for the devices connected to LAN
port of the RoIP.
IP Pool Starting Address/ IP Pool Ending Address: Enter the starting IP address for the DHCP
server's IP assignment.
IP Pool Uses Other Default GW: Check the box to assign different default gateway for DHCP
clients.
IP Pool Default Gateway: Enter the new default gateway that is different from LAN IP of the
RoIP.
IP Pool Subnet mask: Enter the new subnet mask.
Lease Time: Enter the length of time for the IP lease.
Domain Name Server Assignment: Select Auto or Manual to get the IP address of Domain
Name Server assigned by ISP or manually.
Domain Name Server IP: Enter the primary and secondary IP address of Domain Name Server if
Domain Name Server Assignment is Manual. Otherwise, the RoIP will not be able to access hosts
using hostnames instead of IPs.

Version 1.0 (2016)
18
General Settings →LAN
Enable Port: Tick the box to enable LAN Port.
Incoming Rate Limit: Use the drop-down menu to select the proper rate limit for the specific
LAN port. The flow is from LAN to WAN, and the rate limit cannot exceed the real upstream
bandwidth.
Outgoing Rate Limit: Use the drop-down menu to select the proper rate limit for the specific
LAN port. The flow is from WAN to LAN, and the rate limit cannot exceed the real downstream
bandwidth.
Router / Bridge:
Router: The Radio Gateway provides the IP sharing (Router) function.
Bridge: The Radio Gateway provides Bridge function.
The device connected with LAN Port on the Radio Gateway can connect to Internet or VPN via
the WAN Port; if applied, server connected to LAN Port and other computer can still use IP of
public internet or VPN, in addition the outward packets must be transferred via gateway,
combined with QoS in order to ensure the audio quality.
2-2-4 RoIP
On this page, you can set up the internet telephone number of this gateway and IP Address from

Version 1.0 (2016)
19
Voice Service Provider.
Various SIP Proxy Servers are available.
General Settings →RoIP
Enable Support of SIP Proxy Server / Soft Switch: Check the box to register the RoIP with SIP
proxy server or soft switch.
General Settings →RoIP
RoIP/FXS: Enter applied SIP number; RoIP and FXS use the same VoIP Frame, but the mode is
different. Please do not operate cross-platform.
Hunt Group: Choose the group. “No Group”is single number. When Hunt Group number is the
same with line number, that means this line number is the representative number of this line. If
it’s different, it indicates as extension number of this Hunt Group. (VoIP Only)
Register: Check the box to register with SIP proxy server.
Invite with ID / Account: The Radio Gateway provides dynamic dial function without registration
so there’s no restriction to different Service Providers. Please consult with your system provider
before applying this function.
SIP Registered ID / Password: Registered ID and password of this radio gateway.
Note: Please ensure if your VoIP Service Provider allows one account for multi-port using.

Version 1.0 (2016)
20
General Settings →RoIP
Proxy Server IP/Domain, Port: Enter the IP address or URL (Uniform Resource Locator) and
Listen Port of SIP proxy server.
Proxy Server Realm: Most of the VSP aren’t required to be set up, please consult with VSP if the
call cannot be made.
TTL (Registration interval) [10-7200 s]: The interval for RoIP re-reports to SoftSwitch.
SIP Domain, Use Domain to Register: Area Network specified by VSP (Some VSP doesn’t require
extra settings. If the connection cannot be done by applying SIP Domain, then IP will be applied
instead. Please contact the System Provider if the calls cannot be made.
Bind Proxy Interval for NAT: Check the box to keep the binding exist by sending packets when
the RoIP is behind a NAT and SIP proxy server is not able to keep the binding.
Initial Unregister: Check the box to send an unregistered message initially by the RoIP and then
it will perform a general register process.
Unregister All Contacts: RoIP sends requests to un-register
Keep SIP Auth: RoIP keeps the last register SIP MD5 authentication information and re-use it for
next register request.
Support Message Waiting Indication (MWI): It is used to enable/disable Message Waiting
Indication. It is available only when Voice Mail Service is available from the VoIP Service Provider.
(VoIP Only)
MWI Subscribe Interval: It is used to set the subscribe time for the RoIP to check the voice mail.
Table of contents
Other ADI Gateway manuals
Popular Gateway manuals by other brands
Packet Power
Packet Power Ethernet Gateway V4 quick start guide
WELLTECH
WELLTECH WELLGATE 2626 user manual

ZyXEL Communications
ZyXEL Communications PRESTIGE 660 HW Series quick start guide
OpenVox
OpenVox VS-GW1600 series user manual
SystemBase
SystemBase eCAN user manual
Monnit
Monnit MNG2-9-EGW-CCE user guide

enphase
enphase Envoy Communications Gateway Installation and operation manual
Bticino
Bticino FC80GT installation manual
Ascent
Ascent AP214H GPON HGU ONT user manual

VBOX
VBOX XTi- 4144 installation instructions

3Com
3Com PathBuilder S200 Series manual
Keysight Technologies
Keysight Technologies E5810 Installation notes
