Admiral RX600SP User manual

Quick Start Guide for Admiral RX600SP Receiver
Thank you for purchasing the Admiral RX600SP DSMX™ Compatible Receiver with 6-Axis Stabilizer from Motion RC! Here is a quick
guide to begin using your product. Visit www.HobbySquawk.com for more information.
INSTALATION –The Admiral RX600SP must be installed on a surface that is horizontal when the model is in normal level
flight attitude. The long axis of the unit must be aligned with direction of flight and the servo connectors should be to
the rear of the aircraft. We highly recommend installation of the unit in the upright position. If an inverted installation is
chosen, you MUST recalibrate the orientation of the gyro. This must be done in recovery mode followed by normal
stabilization mode. See “pre-flight testing” below and watch the following video: https://youtu.be/a6ZaxkxoGUg
BINDING - Follow the process below to bind the Admiral RX600SP receiver to your radio transmitter:
1) Insert a bind plug into the port labeled “BIND/AUX2” and then apply power to your receiver.
2) Hold down the bind button on your radio transmitter, and power on the radio transmitter.
3) The red LED at the bottom of the receiver will change from quick strobe to slow strobe.
4) Release the bind button. After a moment, the red LED will turn solid. The receiver is now bound.
5) Remove power from your receiver. Turn off your radio transmitter.
6) Remove the bind plug from the “BIND/AUX2” port. This port can now be used as a fully functional 7th channel (AUX2)
7) Completing this procedure will result in a 7 channel receiver, with all stabilization turned OFF.
ACTIVATING STABILIZATION (i.e. 7 channel receiver with “Stabilization Combo A” turned ON)
1) Move dip switches “J4” and “J5” to “ON”, furthest from the servo ports. (v-tail should turn on J5 only and delta wing planes
should turn on J4 only ). See chart below:
2) In your radio, navigate to “Mixes” and create a Mix as shown below. Mix I (bind) to GER. Rate 0% and 5%
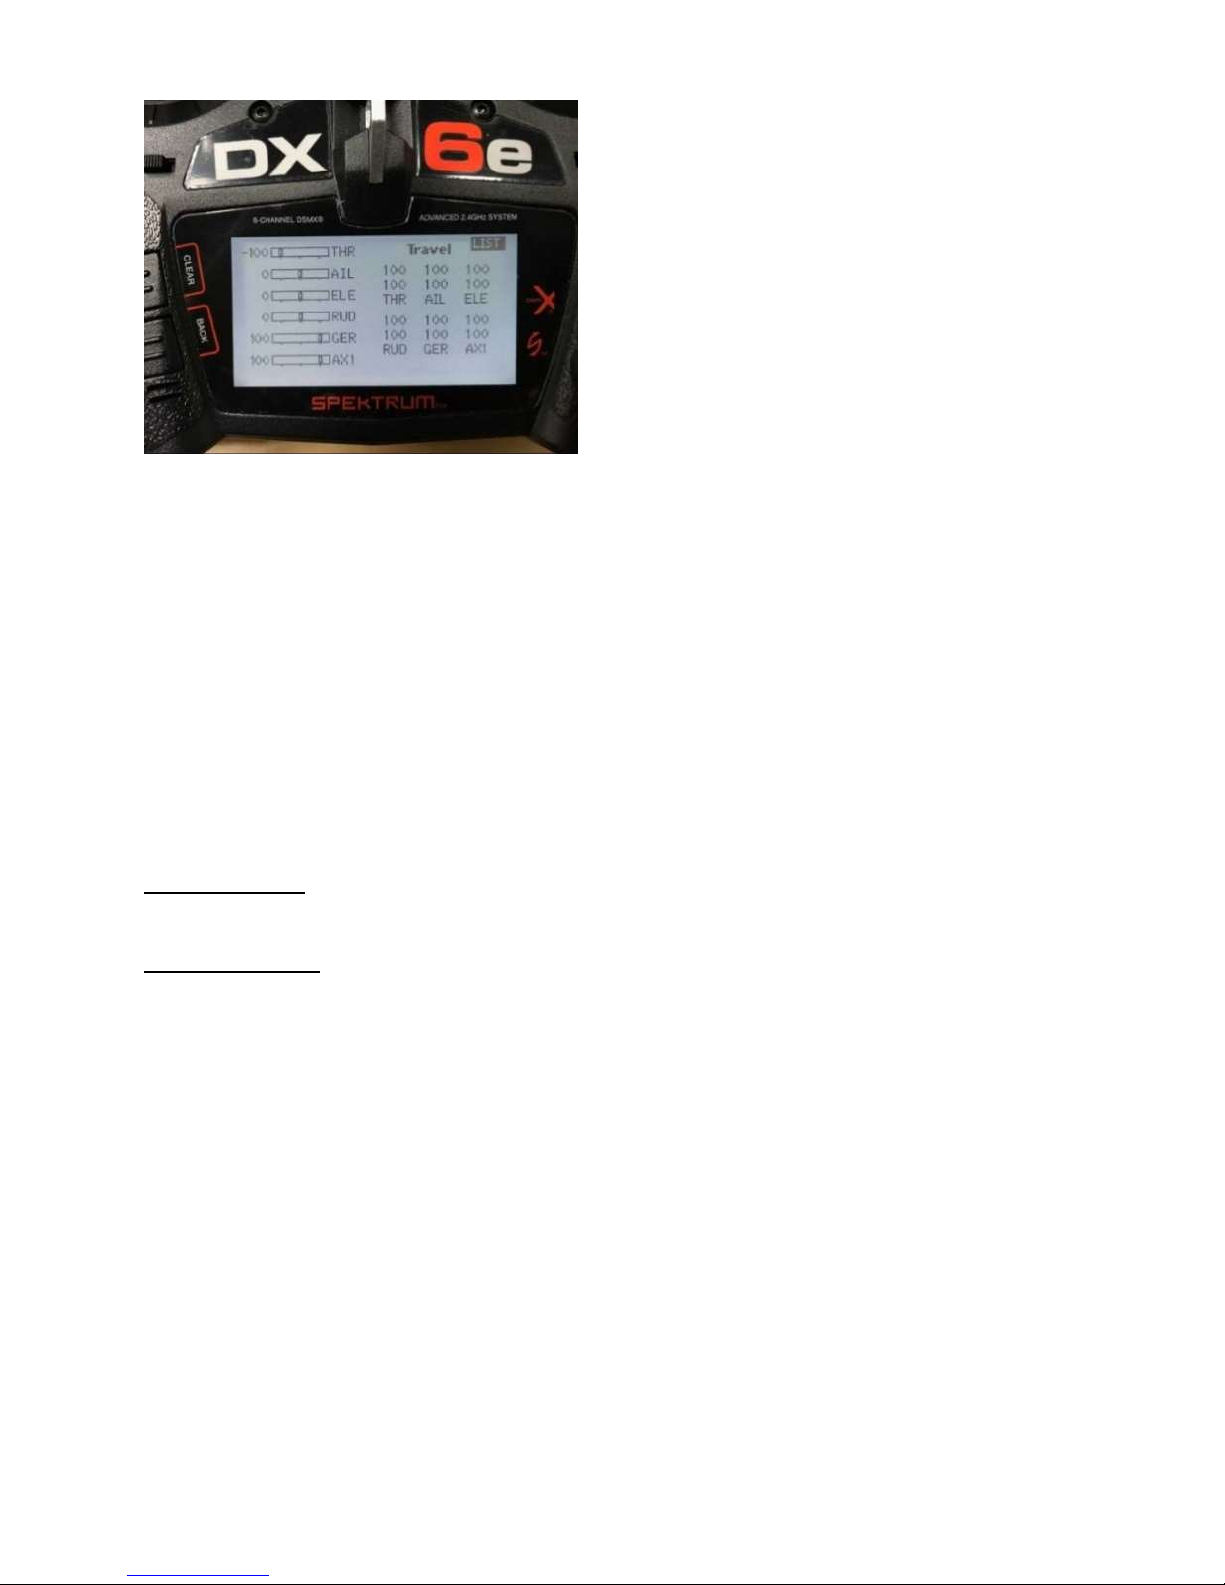
3) Verify that the default GER settings on the “Travel“ screen are unchanged. They must match this screen:
Following the instructions above, your receiver’s Stabilization Modes are now enabled, and depressing the BIND button on your
radio will toggle between the two Modes of the selected Stabilization Combination. Your RX600SP receiver can be programmed for
any of three “Stabilization Combinations”, Combo A, Combo B, or Combo C, according to your preference. The default Combo
delivered with your receiver is Combo A:
Releasing the BIND button = Gyro ON, the Green LED on the receiver is illuminated
Holding the BIND button = Recovery Mode ON, the Red and Green LEDs on the receiver ALTERNATE
SELECTING A DIFFERENT “STABILIZATION COMBO”:
Your Admiral RX600SP receiver can be programmed for any of three “Stabilization Combos”, according to your preference. To select
another Combo:
1) Insert a bind plug into the port labeled “BIND/AUX2”.
2) Insert a second bind plug along the three signal pins of channels “RUDD”, “GEAR”, and “AUX1”.
3) Apply power to your receiver.
4) Single LED Indicator: Observe the illuminated LED alongside the micro-button. This micro-button can be tapped for less than
one second to toggle between a Blue LED (Advanced Recovery mode) and Green LED (Beginner Recovery mode). “Beginner”
recovers aircraft at slower speeds more smoothly.
5) Double LED Indicator. Observe the alternating Red/Green LEDs. These LEDS alternately flash seven times, then display a
Pattern for 2-4 seconds, before beginning the alternating flash sequence again. This Pattern displays which “Combo” the
receiver is set to provide. To toggle between different Combos, depress the micro-button for two seconds until the Double
LED Indicator turns off completely, then begins to display the next Combo.
Combo A: (Default) Gyro On / Recovery. LED “Pattern” = Green displayed for two seconds
Combo B: Gyro Off / Recovery. LED “Pattern” = Red and Green displayed together for two seconds
Combo C: Gyro Off / Gyro On. LED “Pattern” = Green for two seconds, then Red for two seconds
6) When satisfied with the Combo being displayed, remove receiver power and remove the bind plugs.
VISUAL IDENTIFICATION OF MODE STATUS
At all times, the receiver’s Double LED Indicator will show you which Mode the receiver is currently in:
Solid Green = Gyro Mode ON
Solid Red + Green =Gyro OFF
Alternating Red and Green = Recovery Mode ON
PRE-FLIGHT TESTING
As with every component of your RC aircraft, we recommend extensively testing all functions of the product on the
ground before flight. Incorrect installation or configuration of this receiver can result in damage, personal injury, and/or
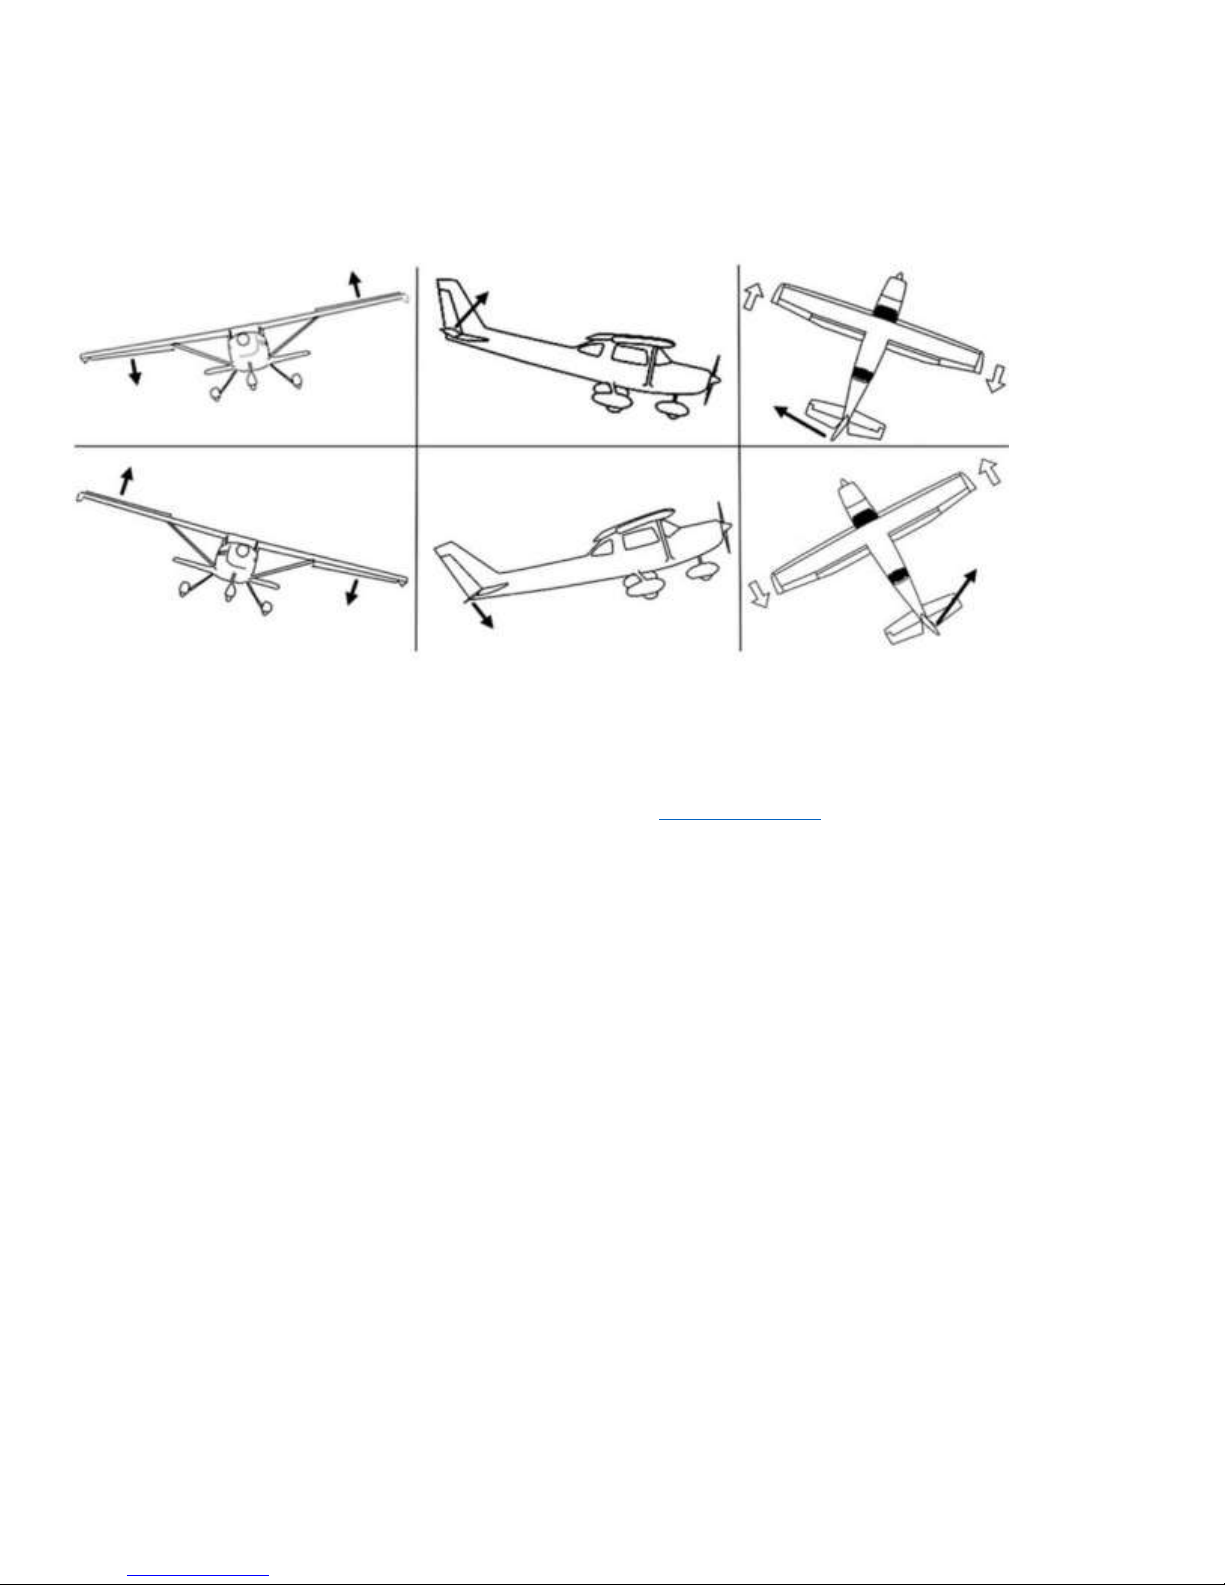
loss of the aircraft. Make sure direction of servo travel is checked by with the plane in your hand. Direction of servo
travel should be tested in both recovery mode and stabilization mode. For example, pitching the nose of the plane up
should result in the gyro moving the elevator down. Remove prop during testing. See chart:
To supplement this Quick Start Guide, see the product page for updated manuals and videos. If you have any questions of
how to utilize your Admiral RX600SP Receiver, please contact our friendly and knowledgeable Customer Support Team at 224-633-
9090, Monday-Friday 7:30AM-6:00PM CST, or contact the Chat Team at www.motionrc.com during business hours.
This is not a Spektrum™ DSMX™ product, nor is it a copy of a Spektrum™ DSMX™ product.
Admiral receivers are designed to be compatible with Spektrum's™ DSMX™ product.
The Spektrum™ and DSMX™ brands are a trademark of Horizon Hobby, Inc.
Table of contents
Other Admiral Receiver manuals


Popular Receiver manuals by other brands

Chamberlain
Chamberlain LiftMaster 850LM installation guide

LG
LG HT503PH-AM owner's manual

Marantz
Marantz SR7008 Getting started guide

Pioneer
Pioneer VSX-D812-K Service manual

Federal Signal Corporation
Federal Signal Corporation Informer I-HIOW Installation and operation manual

Strong
Strong SRT 4664XII user manual


