g
12
gDear Customer,
Please read these operating instruc-
tions carefully. The safety information
above all should be followed on the
first pages of these operating instruc-
tions! Please keep the operating in-
structions for later reference. Pass
them on to any future owner of the
appliance.
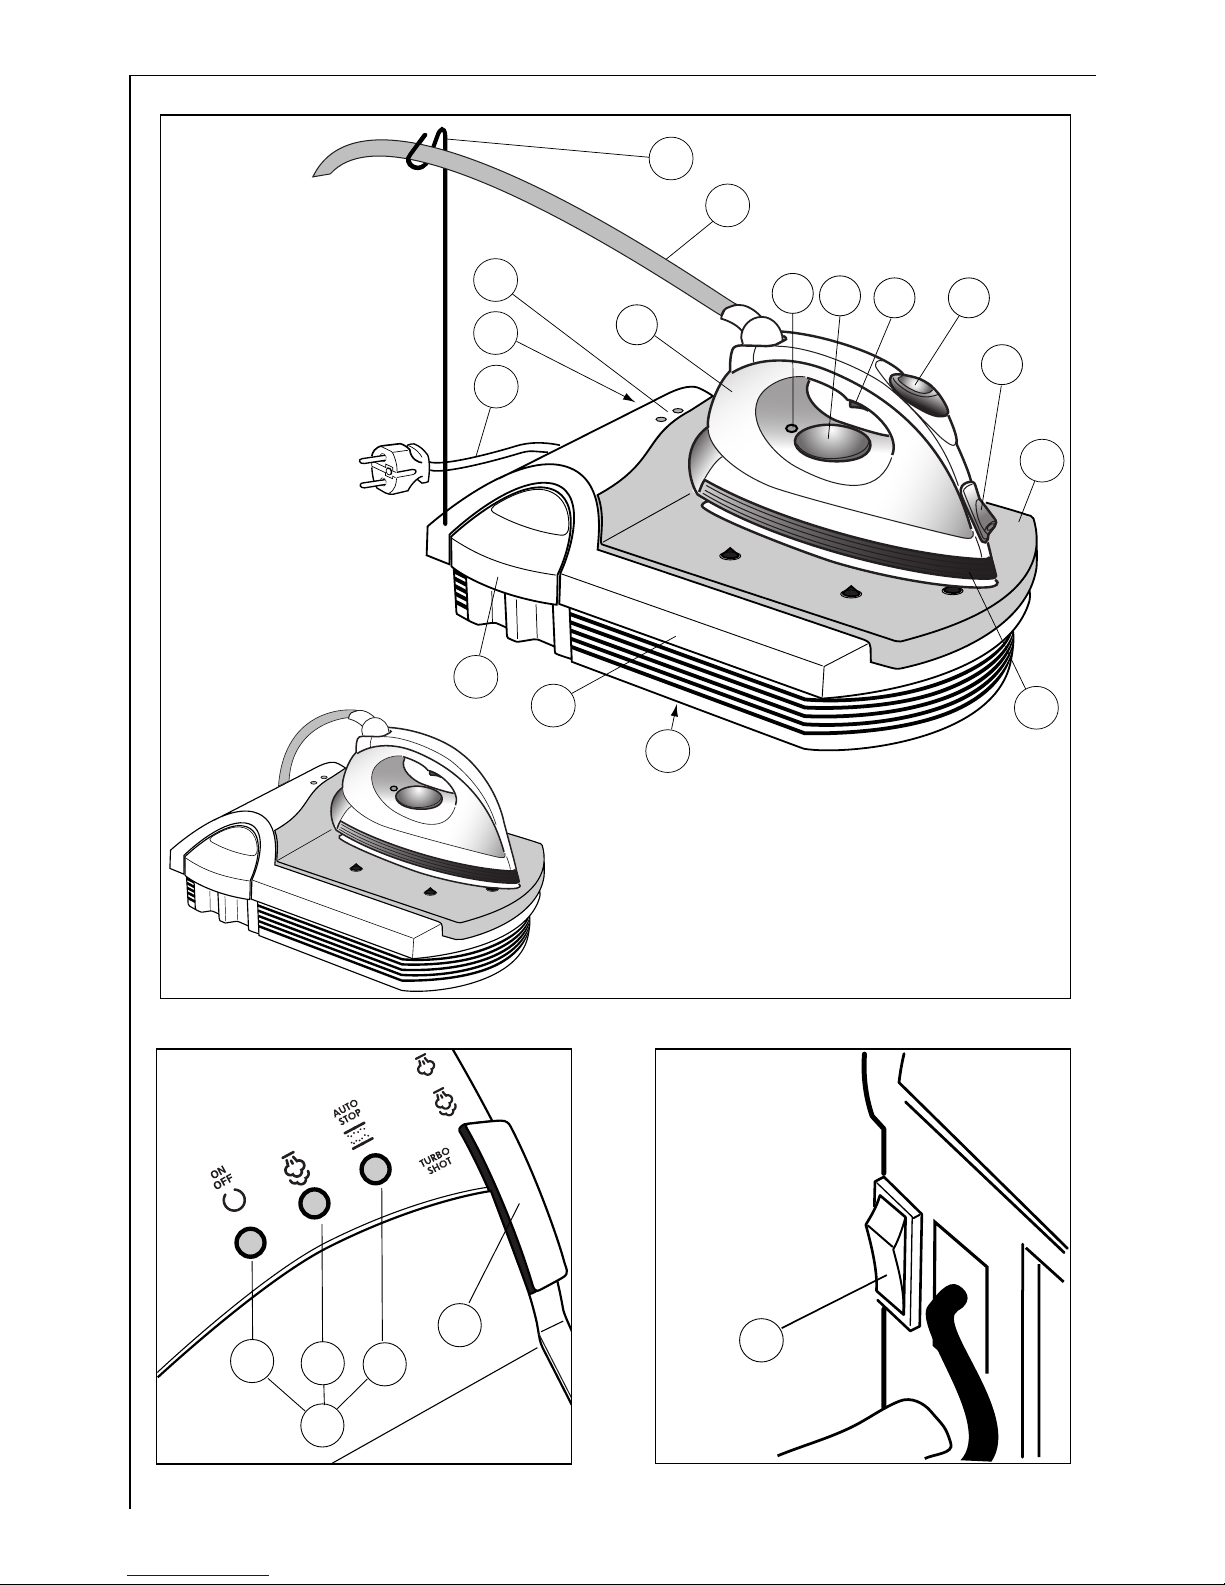
Fittings (figs. 1, 2 and 3)
AIron
BIron temperature indication lamp
CTemperature selector
DSteam jet button
EIron rest plate (removable)
FHood
GRating plate
HBase
JWater tank (removable)
KPower supply cable
LOn/Off switch
MSignal lamps
aOperating indication lamp
bSteam generator temperature
indication lamp
cExchange descaling cartridge
indication lamp
NConnecting cable with hose
Iron –base
DBS 200 only:
OSpray button
PSpray nozzle
QCable holder
Mc AUTO-STOP safety system indi-
cation lamp
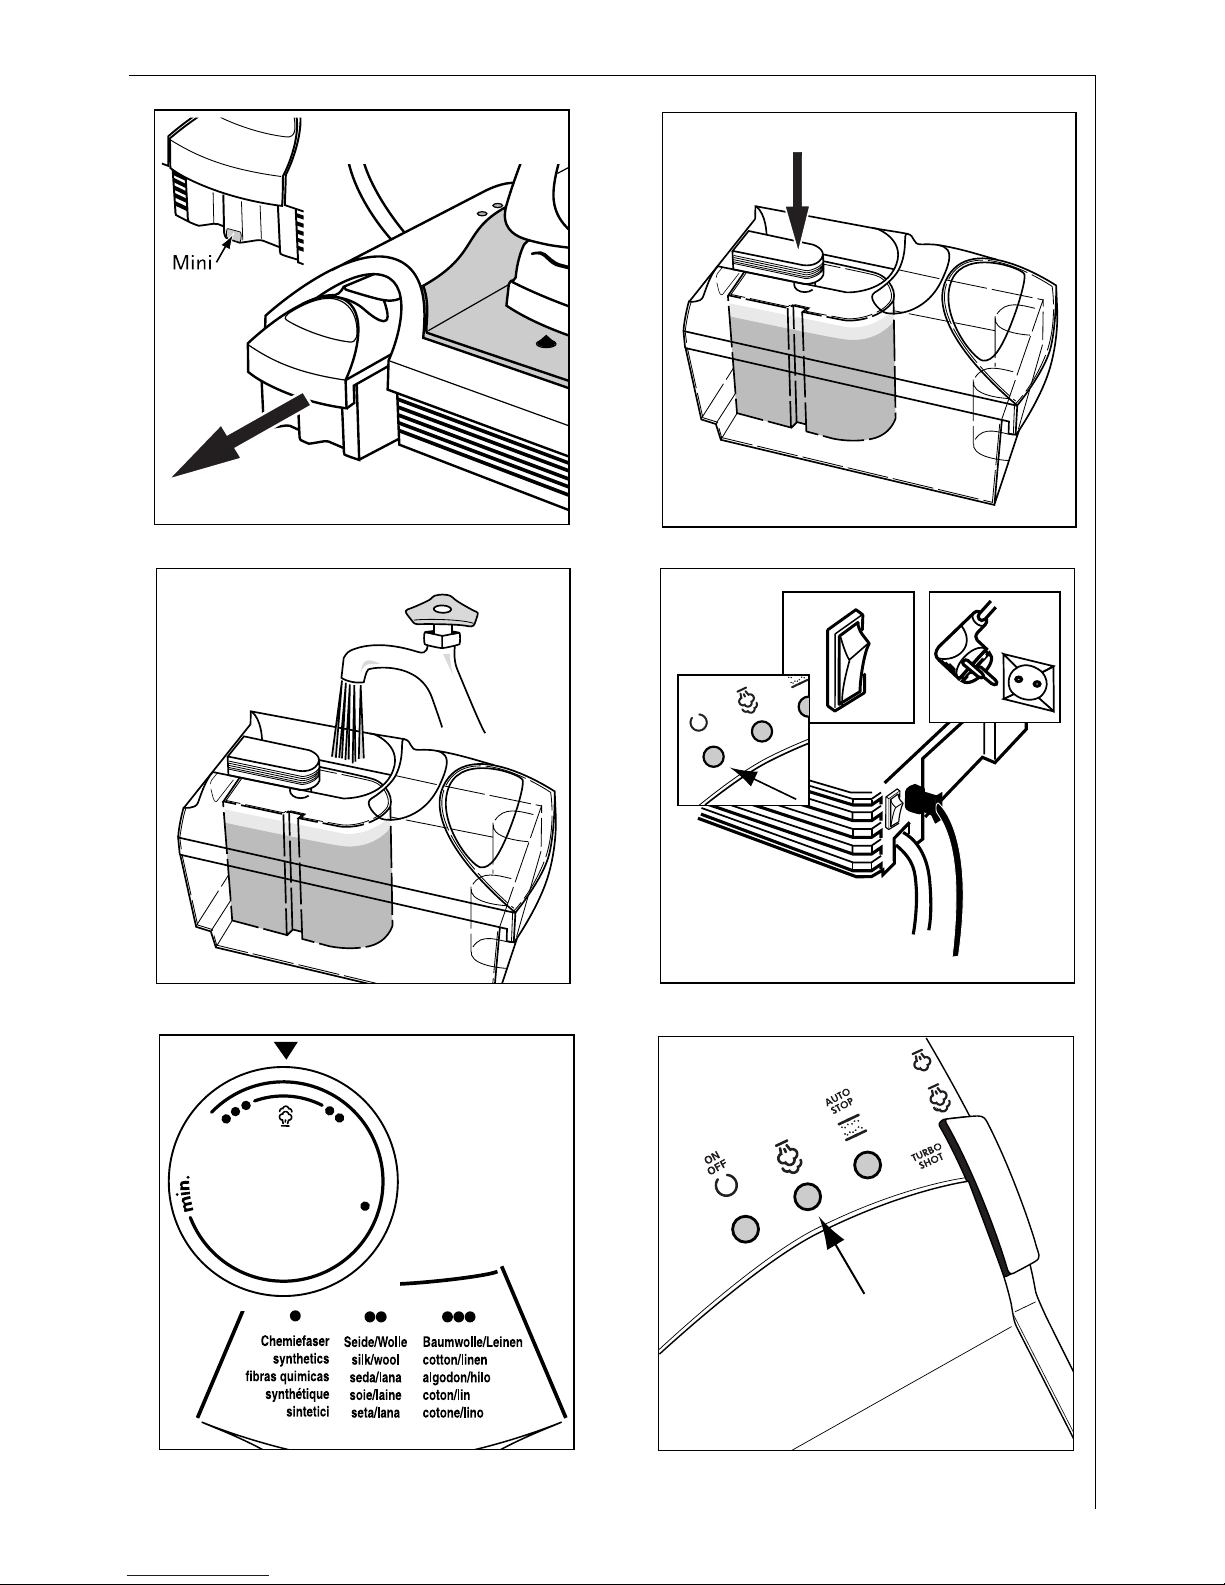
DBS 100: DBS 200:
RSteam regulator RSteam regulator
with 2 stages with 3 stages
medium medium
maxi maxi
TURBO SHOT
1Safety information
•The appliance must only be operated
with the voltage and type of power
specified on the rating plate (fig. 1/G).
•Connection must only be made to a
properly installed socket. For your own
safety use only earthed sockets.
•Use only a 10 A cable as extension for
the power cable. Ensure that the cable
is laid on the floor, so that it cannot
trip anyone or be pulled out inadvert-
ently. The extension cable must be pro-
vided with a protective conductor.
•If other appliances with high current
consumption are connected to the
power supply at the same time, over-
load can occur and the fuse blows.
•The appliance must only be operated
under supervision.
Even if the room is only left for a short
time, the power plug should be with-
drawn. Keep children away.
•The appliance must only be used for
ironing and not for any other purpose.
•Never place the iron on the base with-
out a rest plate.
•The hood can become discolored in the
course of time depending on user hab-
its. This has no effect on the function
of the appliance.
1Caution! Danger of burns!
•During operation the sole-plate and
hood of the iron get very hot!
•With steam-ironing steam escapes
from the openings in the sole-plate.
•The spray function (DBS 200 only) is
provided with hot water, some steam
may also escape in certain circum-
stances.
•The connecting cable with hose from
the base to the iron (fig. 1/N) becomes
hot during operation.
•If the cable holder (DBS 200 only, fig.
1/Q) is used, ensure that it is properly
locked in the station. Also ensure that
the appliance is standing securely on a
firm base.
•Never dip the appliance in water!