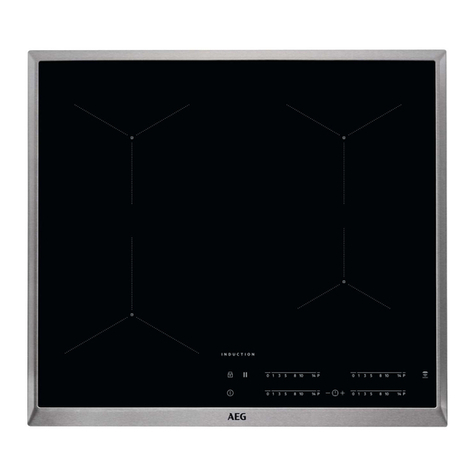
AEG HK634150XB User manual

HK634150XB
User manual Induction Hob
Kasutusjuhend Induktsioonpliit
Notice d'utilisation Table de cuisson à
induction
Benutzerinformation Induktions-Kochfeld
Használati útmutató Indukciós tűzhelylap

Thank you for choosing one of our high-quality products.
To ensure optimal and regular performance of your appliance please read this
instruction manual carefully. It will enable you to navigate all processes perfectly
and most efficiently. To refer to this manual any time you need to, we recommend
you to keep it in a safe place. And please pass it to any future owner of the
appliance.
We wish you much joy with your new appliance.
CONTENTS
SAFETY INFORMATION 2
INSTALLATION INSTRUCTIONS 3
PRODUCT DESCRIPTION 6
OPERATING INSTRUCTIONS 7
Activation and deactivation 7
Automatic Switch Off 7
The heat setting 8
Activation and deactivation of the outer ring
8
Automatic Heat Up 8
Power function 8
Timer 9
STOP+GO 9
Lock 9
The child safety device 10
HELPFUL HINTS AND TIPS 10
CARE AND CLEANING 12
WHAT TO DO IF… 12
ENVIRONMENT CONCERNS 14
Packaging material 14
Subject to change without notice
SAFETY INFORMATION
For your safety and correct operation of the appliance, read this manual carefully before
the installation and use. Always keep these instructions with the appliance also if you move
or sell it. The users must fully know the operation and safety functions of the appliance.
Children and vulnerable people safety
WARNING!
Do not let persons, children included, with reduced physical sensory, reduced mental func-
tions or lack of experience and knowledge to use the appliance. They must have supervision
or instruction for the operation of the appliance by a person who is responsible for their
safety.
• Keep all packaging away from children. There is the risk of suffocation or injury.
• Keep the children away from the appliance during and after the operation, until the ap-
pliance is cold.
WARNING!
Activate the child safety device to prevent small children and pets from an accidental acti-
vation of the appliance.
2Contents

Safety during operation
• Remove all packaging, stickers and layers from the appliance before the first use.
• Set the cooking zones to "off" after each use.
• The risk of burns! Do not put the objects made of metal, for example cutlery or saucepan
lids, on the surface that you cook. They can become hot.
• The Users with an implanted pacemaker must keep their upper body minimum 30 cm
from induction cooking zones that are activated.
WARNING!
Fire risk! Too hot fats and oils can occur with ignition very quickly.
Correct operation
• Always monitor the appliance during operation.
• The appliance is only for domestic use!
• Do not use the appliance as a work or a storage surface.
• Do not put or keep very flammable liquids and materials, easy fusible objects (made of
plastic or aluminium) on or near the appliance.
• Be careful when you connect the appliance to the near sockets. Do not let the electricity
bonds touch the appliance or hot cookware. Do not let the electricity bonds to tangle.
How to prevent a damage to the appliance.
• If the objects or cookware fall on the glass, the surface can be damaged.
• Cookware made of cast iron, cast aluminium or with damaged bottoms can cause
scratch of the glass. Do not move them on the surface.
• Do not let cookware boil dry to prevent the damage to cookware and glass .
• Do not use the cooking zones with empty cookware or without cookware.
• Do not put the aluminium foil on the appliance.
• Make sure that the airflow space of 5 mm between the worktop and front of the unit
below it stays opened.
WARNING!
If there is a crack on the surface, disconnect power supply to prevent the electrical
shock.
INSTALLATION INSTRUCTIONS
Before the installation, note down the serial number (Ser. Nr.) from the rating plate.The
rating plate of the appliance is on its lower casing.
HK634150XB 949 593 373 01
58 GAD DA AU
220-240 V 50-60 Hz
7,3 kW
Induction 3,7 kW
AEG-ELECTROLUX
Installation instructions 3

The Safety Instructions
WARNING!
You must read these!
Make sure that the appliance is not damaged because of transportation. Do not connect a
damaged appliance. If it is necessary, speak to the supplier.
Only an authorised servicing technician can install, connect or repair this appliance. Use on-
ly original spare parts.
Only use the built-in appliances after you assemble the appliance into correct built-in units
and work surfaces that align to the standards.
Do not change the specifications or change this product. Risk of injury and damage to the
appliance.
Fully obey the laws, ordinances, directives and standards in force in the country where you
use the appliance (safety regulations, recycling regulations, electrical safety rules etc.)!
Keep the minimum distances to other appliances and units!
Install shock protection, for example install the drawers only with a protective floor directly
below the appliance!
Keep safe the cut surfaces of the worktop from moisture with a correct sealant!
Seal the appliance to the work top with no space between with a correct sealant!
Keep safe the bottom of the appliance from steam and moisture, e.g. from a dishwasher or
oven!
Do not install the appliance adjacent to doors and below windows! If not, when you open
the doors or windows they can push off hot cookware from the appliance.
WARNING!
Risk of injury from electrical current. Carefully obey the instructions for electrical connec-
tions.
• The electrical mains terminal is live.
• Make electrical mains terminal free of voltage.
• Install correctly to give shock protection.
• Loose and incorrect plug and socket connections can make the terminal become too hot.
• A qualified electrician must install the connections in the clamps correctly.
• Use a strain relief clamp on cable.
• Use the correct mains cable of type H05BB-F Tmax 90°C (or higher) for a single phase or
two phase connection.
• Replace the damaged mains cable with a special cable (type H05BB-F Tmax 90°C; or
higher). Speak your local Service Centre.
The appliance must have the electrical installation which lets you disconnect the appliance
from the mains at all poles with a contact opening width of minimum 3 mm.
You must have correct devices to isolate: line protecting cut-outs, fuses (screw type fuses
removed from the holder), earth leakage trips and contactors.
4Installation instructions
Assembly
min. 500 mm
min.
50 mm
min.
50 mm
min.
5 mm
==
490+1mm 560+1mm
600mm
R 5mm
min.
25 mm
min.
5 mm
min.
20 mm
min.
38 mm
min.
5 mm
If you use a protection box (the additional acces-
sory), the front airflow space of 5 mm and protec-
tive floor directly below the appliance are not
necessary.
Installation instructions 5
PRODUCT DESCRIPTION
General overview
210
mm
145
mm
265
mm
170
mm
145
mm
3
5 4
1 2
1Single cooking zone 1200 W
2Oval cooking zone 1500 / 2400 W
3Induction cooking zone 1400 W, with
Power function 2500 W (minimum
cookware diameter - 125 mm)
4Control panel
5Induction cooking zone 2300 W, with
Power function 3700 W (minimum
cookware diameter - 180 mm)
Control panel layout
1 2 3 4 5 6 7
891011
Use the sensor fields to operate the appliance. Indicators, displays and sounds tell which
functions operate.
Sensor field Function
1
It activates and deactivates the appliance.
2
It locks and unlocks the control panel.
3
Heat setting display It shows the heat setting.
4
Timer indicators for the cooking
zones It shows for which zone you set the time.
5
Timer display It shows the time in minutes.
6
/ It increases or decreases the heat setting.
7
It activates and deactivates the outer ring.
8
/ It increases or decreases the time.
9
It selects the cooking zone.
10
It activates the Power function.
6Product description

Sensor field Function
11
It activates and deactivates the STOP+GO func-
tion.
Heat setting displays
Display Description
The cooking zone is deactivated.
Keep warm/STOP+GO function operates.
- / - The cooking zone operates.
Automatic Heat Up function operates.
Not correct cookware or too small cookware or no cookware on the
cooking zone.
There is a malfunction
A cooking zone is still hot (residual heat)
Lock/ The Child Safety device operates.
Power function operates.
The Automatic Switch Off operates.
Residual heat indicator
WARNING!
The risk of burns from residual heat!
The induction cooking zones make the heat necessary for cooking directly in the bottom of
the cookware. The glass ceramic is hot from the heat of the cookware.
OPERATING INSTRUCTIONS
Activation and deactivation
Touch for 1 second to activate or deactivate the appliance.
Automatic Switch Off
The function deactivates the appliance automatically if:
• All cooking zones are deactivated ( ).
• You do not set the heat setting after you activate the appliance.
• You spill something or put something on the control panel for more than 10 seconds, (a
pan, a cloth, etc.). The sound operates some time and the appliance deactivates. Remove
the object or clean the control panel.
• The appliance become too hot (e.g. when, a saucepan boils dry). Before you use the ap-
pliance again, the cooking zone must be cool.
• You use not correct cookware. The symbol comes on and the cooking zone deacti-
vates automatically after 2 minutes.
Operating instructions 7

• You do not deactivate a cooking zone or change the heat setting. After some time,
comes on and the appliance deactivates. See the table.
The times of Automatic Switch Off
The heat setting - - -
The cooking
zone deactivates
after
6 hours 5 hours 4 hours 1.5 hours
The heat setting
Touch to increase the heat setting. Touch to decrease the heat setting. The display
shows the heat setting. Touch and at the same time to deactivate the cooking zone.
Activation and deactivation of the outer ring
You can adjust the surface you cook to the dimension of the cookware.
To activate the outer ring touch the sensor field . The indicator comes on.
Do the procedure again to deactivate the outer ring. The indicator goes out.
Automatic Heat Up
You can get a necessary heat setting in a shorter
time if you activate the Automatic Heat Up func-
tion. This function sets the highest heat setting
for some time (see the illustration), and then de-
creases to the necessary heat setting.
To start the Automatic Heat Up function for a
cooking zone:
1. Touch . The symbol comes on in the
display.
2. Immediately touch . The symbol comes
on in the display.
3. Immediately touch again and again until
the necessary heat setting comes on. After 3
seconds comes on in the display.
To stop the function touch .
Power function
The Power function makes more power available to the induction cooking zones. The Power
function is activated for 10 minutes at most. After, that the induction cooking zone auto-
matically sets back to highest heat setting. To activate, touch , comes on. To deacti-
vate, touch or .
1
2
3
4
5
6
7
8
9
10
11
0
123456789
8Operating instructions

Power management
The power management divides the power
between two cooking zones in a pair (see the
illustration). The power function increases
the power to the maximum level for one
cooking zone in the pair. Automatically de-
creases the power in the second cooking
zone to a lower level. The display for the re-
duced zone change between two levels.
Timer
Use the Count Down Timer to set how long the cooking zone operates for only this one
time.
Set the Timer after the selection of the cooking zone.
You can set the heat setting before or after you set the timer.
•To set the cooking zone:touch again and again until the indicator of a necessary
cooking zone comes on.
•To activate or change the Timer: touch or of the timer to set the time (
00
-
99
minutes). When the indicator of the cooking zone starts to flash slow, the time
counts down.
•To deactivate the Timer: set the cooking zone with and touch to deactivate the
Timer. The remaining time counts back to
00
. The indicator of the cooking zone goes
out.
•To see the remaining time: set the cooking zone with . The indicator of the cooking
zone starts to flash quickly. The display shows the remaining time.
When the time comes to an end, the sound operates and
00
flashes. The cooking zone de-
activates.
•To stop the sound: touch
You can use the Timer as a minute minder while the cooking zones do not operate. Touch
. Touch or to set the time. When the time comes to an end, the sound operates
and
00
flashes
•To stop the sound: touch
STOP+GO
The function sets all cooking zones that operate to the lowest heat setting ( ).
When operates, you cannot change the heat setting.
The function does not stop the timer function.
•To activate this function touch . The symbol comes on.
•To deactivate this function touch . The heat setting that you set before comes on.
Lock
When the cooking zones operate, you can lock the control panel, but not . It prevents an
accidental change of the heat setting.
First set the heat setting.
Operating instructions 9

To start this function touch . The symbol comes on for 4 seconds.
The Timer stays on.
To stop this function touch . The heat setting that you set before comes on.
When you stop the appliance, you also stop this function.
The child safety device
This function prevents an accidental operation of the appliance.
To activate the child safety device
• Activate the appliance with . Do not set the heat settings.
• Touch for 4 seconds. The symbol comes on.
• Deactivate the appliance with .
To deactivate the child safety device
• Activate the appliance with . Do not set the heat settings. Touch for 4 seconds.
The symbol comes on.
• Deactivate the appliance with .
To override the child safety device for only one cooking time
• Activate the appliance with . The symbol comes on.
• Touch for 4 seconds. Set the heat setting in 10 seconds. You can operate the ap-
pliance.
• When you deactivate the appliance with , the child safety device operates again.
HELPFUL HINTS AND TIPS
Use the induction cooking zones with correct cookware.
Cookware for induction cooking zones
For induction cooking zones a strong electro-magnetic field creates the heat in the cook-
ware very quickly.
Cookware material
•correct: cast iron, steel, enamelled steel, stainless steel, the bottom made of multi-layer
(with correct mark from a manufacturer).
•not correct: aluminium, copper, brass, glass, ceramic, porcelain.
Cookware is correct for an induction hob if …
• ... some water boils very quickly on a zone set to the highest heat setting..
• ... a magnet pulls on to the bottom of the cookware.
The bottom of the cookwar must be as thick and flat as possible.
Cookware dimensions: induction cooking zones adapt to the dimension of the bottom of
the cookware automatically to some limit.
The noises during operation
If you can hear
• crack noise: cookware is made of different materials (Sandwich construction).
10 Helpful hints and tips

• whistle sound: you use one or more cooking zones with high power levels and the cook-
ware is made of different materials (Sandwich construction).
• humming: you use high power levels.
• clicking: electric switching occurs.
• hissing, buzzing: the fan operates.
The noises are normal and do not refer to appliance malfunction.
Energy saving
• If it is possible, always put the lids on the cookware.
• Put cookware on a cooking zone before you start it.
The Examples of cooking applications
The data in the table is for guidance only.
Heat
setting Use to: Time Hints
1 Keep warm the food you cooked as re-
quired Put a lid on a cookware
1-2 Hollandaise sauce, melt: butter, choco-
late, gelatine 5-25
min Mix from time to time
1-2 Solidify: fluffy omelettes, baked eggs 10-40
min Cook with a lid on
2-3 Simmer rice and milkbased dishes, heat-
ing up ready-cooked meals 25-50
min Add the minimum twice as much
liquid as rice, mix milk dishes part
procedure through
3-4 Steam vegetables, fish, meat 20-45
min Add some tablespoons of liquid
4-5 Steam potatoes 20-60
min Use max. ¼ l water for 750 g of po-
tatoes
4-5 Cook larger quantities of food, stews
and soups 60-150
min Up to 3 l liquid plus ingredients
6-7 Gentle fry: escalope, veal cordon bleu,
cutlets, rissoles, sausages, liver, roux,
eggs, pancakes, doughnuts
as nec-
essary Turn halfway through
7-8 Heavy fry, hash browns, loin steaks,
steaks 5-15
min Turn halfway through
9Boil large quantities of water, cook pasta, sear meat (goulash, pot roast), deep-fry chips
The Power function is best to heat up large quantities of water.
The induction cooking zones are faster and more energy-efficient than traditional cooking
surfaces.
Information on acrylamides
Important! According to the newest scientific knowledge, if you brown food (specially the
one which contains starch), acrylamides can pose a health risk. Thus, we recommend that
you cook at the lowest temperatures and do not brown food too much.
Helpful hints and tips 11

CARE AND CLEANING
Clean the appliance after each use.
Always use cookware with clean bottom.
WARNING!
The sharp objects and abrasive cleaning agents can cause damage to the appliance.
For your safety, do not clean the appliance with steam cleaners or high-pressure cleaners.
Scratches or dark stains on the glass-ceramic cause no effect on how the appliance oper-
ates.
To remove the dirt:
1. – Remove immediately:melted plastic, plastic foil, and food with sugar. If not, the dirt
can cause damage to the appliance. Use a special scraper for the glass . Put the scra-
per on the glass surface at an acute angle and move the blade on the surface .
–Remove after the appliance is sufficiently cool:limescale rings , water rings, fat
stains, shiny metallic discolorations. Use a special cleaning agent for glass ceramic or
stainless steel.
2. Clean the appliance with a moist cloth and some detergent.
3. At the end rub the appliance dry with a clean cloth.
WHAT TO DO IF…
Problem Possible cause and remedy
You cannot activate the appli-
ance or operate it. •The key lock or child safety device operates . Stop the func-
tion. Refer to "Lock" and "The Child safety device".
•STOP+GO operates . Stop the function. See the section
"Stop and go".
• You touched 2 or more sensor fields at the same time. Only
touch one sensor field.
• There is water or fat stains on the control panel. Clean the
control panel.
• Start the appliance again and set the heat setting in less than
10 seconds.
An acoustic signal sounds
when the appliance is off. You covered one or more sensor fields. Uncover the sensor fields.
An acoustic signal sounds 6
times and the appliance deacti-
vates.
You covered one or more sensor fields. Uncover the sensor fields.
The residual heat indicator does
not come on. The cooking zone is not hot because it operated only for a short
time. If the cooking zone must be hot, speak to the Service Cen-
tre.
12 Care and cleaning

Problem Possible cause and remedy
The automatic warm up func-
tion does not start. •The cooking zone is still hot (residual heat ). Let the cook-
ing zone cool down.
• The highest heat setting is set. The highest heat setting has the
same power as the automatic warm up function.
An acoustic signal sounds. The
appliance activates and deacti-
vates again. After 5 seconds the
acoustic signal sounds again.
You covered . Uncover the sensor field.
The sensor fields become hot. The cookware is too large or you put it too near the controls. Put
large cookware on the rear cooking zones if necessary.
The display changes between 2
heat settings. Power Management decreases the power of this cooking zone.
Use cooking zones on the other side.
comes on. • The automatic switch-off operates. Deactivate the appliance
and activate it again.
Overheating protection for the cooking zone operates. Deactivate
the cooking zone and activate it again.
comes on. • The cookware is incorrect. Use the correct cookware.
• There is no cookware on the cooking zone. Put cookware on
the cooking zone.
• The diameter of the bottom of the cookware is too small for
the cooking zone. Use the correct cookware.
and a number come on. There is an error in the appliance.
Disconnect the appliance from the electrical supply for some
time. Disconnect the fuse from the electrical system of the house.
Connect again. If comes on again, speak to the Service Centre.
and come on. Bright sunlight or other too strong light shines on the control
panel. Shade the control panel for a short time, for example with
a hand. An acoustic signal sounds and the appliance deactivates.
Activate the appliance again.
come on The cookware boiled dry or you used incorrect cookware. Over-
heating protection for the cooking zone operates. The Automatic
Switch-off operates.
Deactivate the appliance. Remove the hot cookware. After ap-
proximately 30 seconds activate the cooking zone again.
disappears. The residual heat indicator can stay on. Cool down
the cookware and make sure that it is correct for the appliance.
Refer to the section "Cookware for the induction cooking zone".
If you tried the above solutions and cannot repair the problem, speak to your dealer or the
customer service. Give the data from the rating plate, three digit letter, code for the glass
ceramic (it is in the corner of the glass surface) and an error message that comes on.
Make sure, you operated the appliance correctly. If not the servicing by a customer service
technician or dealer will not be free of charge, also during the warranty period. The instruc-
tions about the customer service and conditions of guarantee are in the guarantee booklet.
What to do if… 13

ENVIRONMENT CONCERNS
The symbol on the product or on its packaging indicates that this product may not be
treated as household waste. Instead it should be taken to the appropriate collection point
for the recycling of electrical and electronic equipment. By ensuring this product is
disposed of correctly, you will help prevent potential negative consequences for the
environment and human health, which could otherwise be caused by inappropriate waste
handling of this product. For more detailed information about recycling of this product,
please contact your local council, your household waste disposal service or the shop where
you purchased the product.
Packaging material
The packaging materials are friendly to the environment and can be recycled. The plastic
components are identified by marking: >PE<,>PS<, etc. Discard the packaging materials as
household waste at the waste disposal facilities in your municipality.
14 Environment concerns

Täname, et valisite ühe meie kvaliteetsetest toodetest.
Selleks, et tagada seadme optimaalne ja korrapärane töö, lugege see
kasutusjuhend tähelepanelikult läbi. See voimaldab teil koiki protsesse
täiuslikult ja tohusalt kasutada. Hoidke kasutusjuhendit kindlas kohas, nii
saate vajadusel seda alati lugeda ja kindlasti andke see palun edasi
seadme tulevastele omanikele.
Soovime teile roomsat seadme kasutamist.
SISUKORD
OHUTUSINFO 15
PAIGALDUSJUHISED 17
SEADME KIRJELDUS 19
KÄITUSJUHISED 20
Sisse- ja väljalülitamine 20
Automaatne väljalülitus 21
Soojusaste 21
Välimise ringi sisse- ja väljalülitamine
21
Automaatne kiirsoojendus 21
Võimsusfunktsioon 22
Taimer 22
STOP+GO 22
Lukustamine 23
Lapselukk 23
VIHJEID JA NÄPUNÄITEID 23
PUHASTUS JA HOOLDUS 25
MIDA TEHA, KUI... 26
JÄÄTMEKÄITLUS 27
Pakkematerjalid 27
Jäetakse õigus teha muutusi
OHUTUSINFO
Ohutuse huvides ja õige kasutuse tagamiseks lugege enne seadme paigalda‐
mist ja kasutamist kasutusjuhend hoolega läbi. Hoidke juhend alles, et see
oleks käepärast ka siis, seadme teise kohta viite või selle maha müüte. Kasu‐
tajad peavad olema kursis seadme kasutus- ja ohutusfunktsioonidega.
Laste ja ohustatud isikute ohutus
HOIATUS
Ärge lubage seadet kasutada lastel ega füüsilise või vaimse puudega inimes‐
tel; samuti isikutel, kel puuduvad selleks vajalikud kogemused või oskused. Kui
nad siiski seadmega töötavad, peab neid juhendama või jälgima isik, kes vas‐
tutab nende turvalisuse eest.
• Hoidke pakkematerjalid lastele kättesaamatus kohas. Lämbumis- või vigas‐
tusoht!
• Hoidke kasutamise ajal ja pärast seda lapsed seadmest eemal, kuni see on
maha jahtunud.
Sisukord 15

HOIATUS
Kasutage lapselukku, et väikesed lapsed ja loomad ei saaks seadet kogemata
tööle panna.
Ohutus kasutamisel
• Enne esmakordset kasutamist eemaldage seadmelt pakend, kleebised ja
kattekihid.
• Lülitage keeduväljad pärast iga kasutamist välja.
• Nahapõletusoht! Ärge pange pange metallist esemeid, näiteks potikaasi, sis‐
selülitatud keeduväljale. Need võivad minna kuumaks.
• Südamestimulaatoriga isikud peavad jälgima, et nende ülakeha oleks sisse‐
lülitatud induktsioonkeeduväljast vähemalt 30 cm kaugusel.
HOIATUS
Tuleoht! Ülekuumenenud rasvad ja õlid süttivad väga kiirelt.
Õige kasutamine
• Kui seade töötab, tuleb seda pidevalt jälgida.
• See seade on ette nähtud ainult koduseks kasutamiseks!
• Ärge kasutage seadet tööpinnana ega hoiukohana.
• Ärge asetage seadmele ega selle lähedusse ega hoidke seal kergestisütti‐
vaid vedelikke, materjale või sulavaid esemeid (plastikust, alumiiniumist).
• Olge ettevaatlik, kui ühendate seadme lähedalasuvatesse pistikupesadesse.
Vältige elektrijuhtmete kokkupuudet seadme või tuliste nõudega. Vältige
elektrijuhtmete sassiminekut.
Kuidas vältida seadme kahjustamist.
• Kui klaaspinnale kukub esemeid või nõusid, võivad need pinda vigastada.
• Malmist, alumiiniumvalust või katkise põhjaga nõud võivad klaaspinda krii‐
mustada. Ärge neid pliidi pinnal nihutage.
• Vältimaks keedunõude ja klaasplaadi kahjustamist ei tohi lasta nõudel tüh‐
jaks keeda.
• Ärge kasutage keeduvälju tühjade nõudega või ilma nõudeta.
• Ärge asetage seadme pinnale alumiiniumfooliumit.
• Jälgige, et tööpinna ja selle all oleva kapi vahele jääks õhu ringlemiseks vä‐
hemalt 5 mm vaba ruumi.
HOIATUS
Kui seadme pind on mõranenud, siis ühendage seade vooluvõrgust lahti, et
vältida elektrilööki.
16 Ohutusinfo

PAIGALDUSJUHISED
Enne paigaldamist kirjutage üles andmeplaadil olev seerianumber (Ser.
Nr.).Seadme andmeplaat asub korpuse alaosal.
HK634150XB 949 593 373 01
58 GAD DA AU
220-240 V 50-60 Hz
7,3 kW
Induction 3,7 kW
AEG-ELECTROLUX
Ohutusjuhised
HOIATUS
Alustage lugemist siit.
Veenduge, et seade ei ole transportimisel viga saanud. Vigastatud seadet ei
tohi vooluvõrku ühendada. Vajadusel konsulteerige tarnijaga.
Seda seadet tohib paigaldada, ühendada või remontida ainult volitatud hool‐
dustehnik. Kasutage ainult originaalvaruosi.
Sisseehitatud seadmeid võib kasutada alles pärast seda, kui need on paiguta‐
tud sobivatesse standardile vastavatesse sisseehitatud mööbliesemetesse ja
tööpindadesse.
Ärge muutke seadme parameetreid ega muutke seda toodet. Seadme vigasta‐
mise või kahjustamise oht!
Järgida tuleb seadme kasutuskoha riigis kehtivaid seadusi, määrusi, direktiive
ja standardeid (ohutuseeskirjad, materjalide korduvkasutamist puudutavad
määrused, elektriohutuse reeglid jne)!
Järgida tuleb minimaalset kaugust teistest seadmetest ja moodulitest!
Paigaldamisel tuleb tagada elektriohutus, näiteks tohib sahtleid paigutada ai‐
nult seadmest eraldava vaheplaadi alla!
Kaitske tööpinna lõikepindu niiskuse eest nõuetekohase tihendi abil!
Tihendage seadme ja tööpinna üleminekukoht nõuetekohase tihendi abil nii, et
sinna ei jääks vahesid.
Kaitske seadme alakülge nt nõudepesumasinast või ahjust tuleva auru ja niis‐
kuse eest!
Ärge paigaldage seadet uste lähedale ega akende alla! Vastasel korral võite
uksi või aknaid avades seadmel olevad kuumad nõud maha lükata.
HOIATUS
Elektrivoolust lähtuv vigastusoht. Järgige hoolikalt elektriühenduste teostamise
juhiseid.
• Toiteklemm on voolu all.
• Vabastage toiteklemm voolu alt.
• Tagage elektriohutus õige paigalduse kaudu.
• Lahtiste ja sobimatute pistikühenduste korral võib klemm üle kuumeneda.
• Ühenduste nõuetekohane kinnitamine tuleb jätta kvalifitseeritud elektriku
hooleks.
• Paigaldage kaablile tõmbetõkis.
• Ühe- või kahefaasilise ühenduse puhul tuleb kasutada sobivat toitekaablit
tüüp H05BB-F Tmax 90°C (või üle selle).
Paigaldusjuhised 17

• Kui seadme toitekaabel on kahjustatud, tuleb see asendada spetsiaalse kaa‐
bliga (tüüp H05BB-F Tmax 90°C või üle selle). Võtke ühendust kohaliku tee‐
ninduskeskusega.
Seadme võib ühendada toiteliiniga, mille lahklüliti võimaldab katkestada kõik
poolused vähemalt 3 mm suuruse kontaktide vahega.
Isoleerimiseks läheb tarvis õigeid vahendeid: kaitselüliteid, kaitsmeid (keerme‐
ga kaitsmed tuleb pesast eemaldada), maalekkevoolu kaitsmeid ja kontrakto‐
reid.
Kokkupanek
min. 500 mm
min.
50 mm
min.
50 mm
min.
5 mm
==
490+1mm 560+1mm
600mm
R 5mm
min.
25 mm
min.
5 mm
min.
20 mm
min.
38 mm
min.
5 mm
18 Paigaldusjuhised

Kui kasutate kaitsekarpi (lisatarvik), ei ole
eesmist 5 mm ventilatsiooniava ega otse
seadme all asuvat kaitsepinda vaja.
SEADME KIRJELDUS
Ülevaade
210
mm
145
mm
265
mm
170
mm
145
mm
3
5 4
1 2
1Üheringiline keeduväli 1200 W
2Ovaalne keeduväli 1500/2400 W
3Induktsioonkeeduväli 1400 W,
võimsusfunktsiooniga 2500 W
(minimaalne keedunõu diameeter
- 125 mm)
4Juhtpaneel
5Induktsioonkeeduväli 2300 W,
võimsusfunktsiooniga 3700 W
(minimaalne keedunõu diameeter
- 180 mm)
Juhtpaneeli skeem
1 2 3 4 5 6 7
891011
Kasutage seadmega töötades sensorvälju. Indikaatorid, näidud ja helid näitavad,
millised funktsioonid on sees.
Sensorväli Funktsioon
1
Seadme sisse- ja väljalülitamiseks.
2
Lukustab ja avab juhtpaneeli.
3
Soojusastme näit Näitab soojusastet.
Seadme kirjeldus 19

Sensorväli Funktsioon
4
Taimeri indikaatorid keeduvälja‐
dele Näitavad, millise välja jaoks on aeg määra‐
tud.
5
Taimeri näit Näitab aega minutites.
6
/ Suurendab või vähendab soojusastet.
7
Välise ringi sisse- ja väljalülitamiseks.
8
/ Pikendab või lühendab aega.
9
Valib keeduvälja.
10
Lülitab sisse võimsusfunktsiooni.
11
Funktsiooni STOP+GO sisse ja välja lülita‐
miseks.
Soojusastme näidud
Näit Kirjeldus
Keeduväli on välja lülitatud.
Soojashoidmise/STOP+GO funktsioon on sisse lülitatud.
- / - Keeduväli on sisse lülitatud.
Automaatne kiirsoojenduse funktsioon on sisse lülitatud.
Sobimatu või liiga väike keedunõu või ei ole keeduväljal üld‐
se nõud.
Tegemist on rikkega
Keeduväli on ikka veel tuline (jääkkuumus)
Lukk/lapselukk on sisse lülitatud.
Võimsusfunktsioon on sisse lülitatud.
Automaatne väljalülitus on sisse lülitatud.
Jääkkuumuse indikaator
HOIATUS
Põletusoht jääkkuumuse tõttu!
Induktsiooniga keeduväljad toodavad vajalikku kuumust keedunõude põhjas.
Klaaskeraamika soojeneb nõu soojuse tõttu.
KÄITUSJUHISED
Sisse- ja väljalülitamine
Seadme sisse- või väljalülitamiseks puudutage 1 sekundi vältel .
20 Käitusjuhised
Other manuals for HK634150XB
3
Table of contents
Languages:
Other AEG Hob manuals
Popular Hob manuals by other brands

Blaupunkt
Blaupunkt 5RE64350 instruction manual

Hotpoint Ariston
Hotpoint Ariston KIO 744 DD Z operating instructions

Pelgrim
Pelgrim GKV110 manual

Candy
Candy TRIO4GXNT Instructions for use and installation

CDA
CDA HVG620 Manual for installation, use and maintenance

Hotpoint
Hotpoint BE32 Instructions for installation and use

Adventys
Adventys DGIC 3600 user guide

Dometic
Dometic EK 1600 operating manual

Ariston
Ariston NEM 645 D C operating instructions

edenox
edenox GLASS- CERAMIC RAMGES-400 General instruction for installation use and maintenance

Kuppersbusch
Kuppersbusch EM 58 Instructions for fitting and use

KKT KOLBE
KKT KOLBE KF9000RL Instruction and installation manual