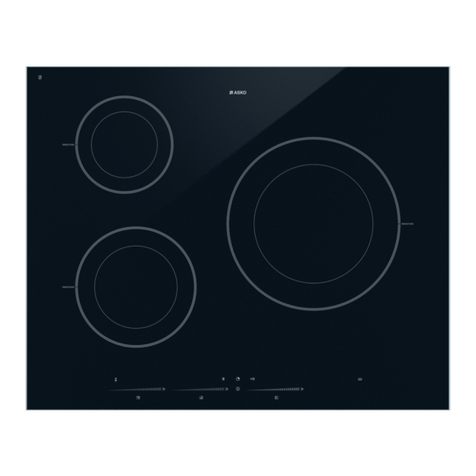
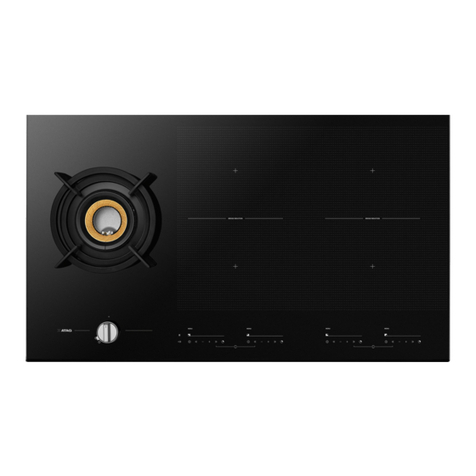
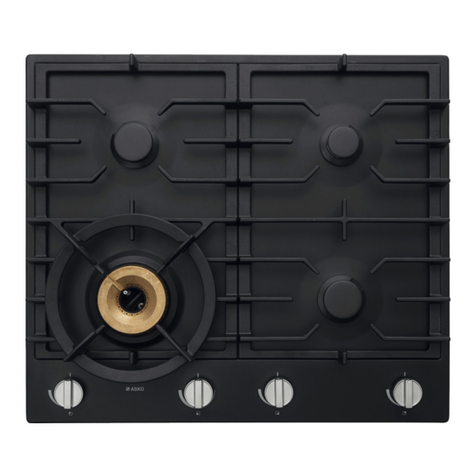
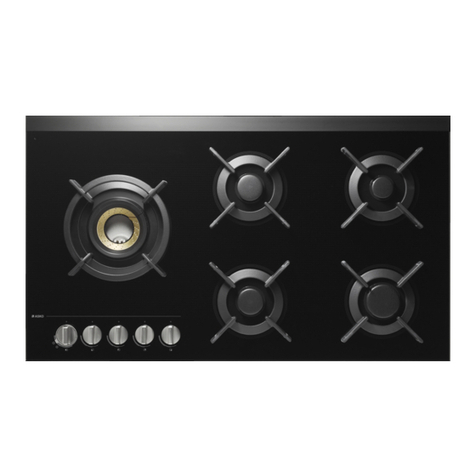
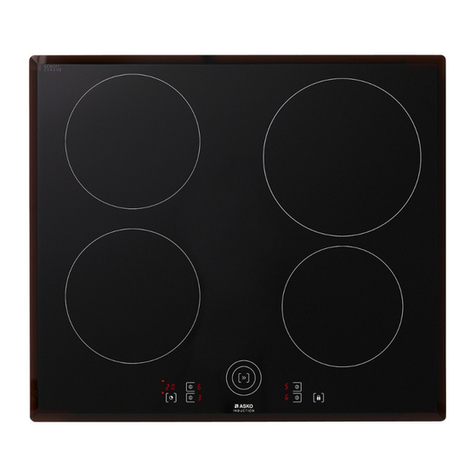
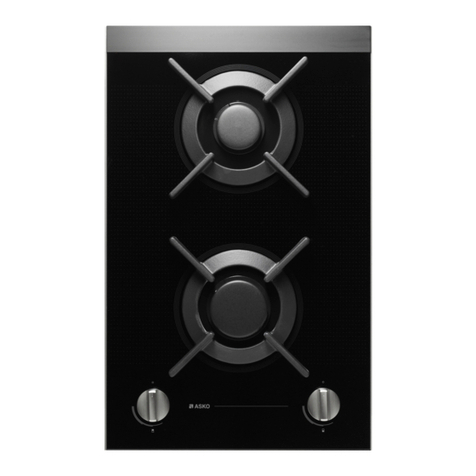
Asko H6 User manual

HOB H6
HOB H6A
ENGLISH • NORSK • SVENSKA
art. nr. 72369920/T92059

14
23
5
6
7
8
9
GB IE
N
S
english page 1 - 23
norsk side 24 - 47
svenska sida 48 - 71

appliance description H6 description of the control panel
twin area zone
2000/1000 W
left rear zone
1200 W
rear right zone
1800 W
front right zone
1200 W
1
2
3
4
5
6
7
8
9
child safety lock
timer
zone operating buttons
rear left and rear right and
timer for each zone
zone operating touch controls
front left and front right
control for twin-area zone
selection
where to find ASKO/ONE
introduction
general information about your hob
for your safety
tips for use
selecting a setting
timer
connecting the timer to a zone
twin area zone switching
child safety lock
automatic boiling / automatic frying
cooking comfortably
limiting cooking time automatically
caring for the appearance of the appliance
dealing with faults yourself
building-in – preliminary notes
electrical connection
building-in
technical details
disposal of packaging and appliance
ASKO/ONE’s guarantee
2
|
|
3
|
3
4
|
5
4
|
5
6
|
7
6
|
7
6
|
7
8
|
9
8
|
9
10
|
11
12
|
13
12
|
13
14
|
15
16
|
17
18 |
|19
20 |
|21
22 |23
24 |25
contents
indications in the display
still hot
standby
fault codes
appliance overheating
settings
automatic boiling
automatic frying
H.
{
F00 - F18
F3
1 - 12
A1 - A7
A8 - A9
GB IE
english
}
appliance description H6A
for Australia
twin area zone
1900/950 W
left rear zone
1200 W
rear right zone
1800 W
front right zone
1200 W
1
2
3
4

32
introduction
general information
about your hob
Reading these instructions will tell you
quickly what the appliance can do. You
can read about safety and how you
should maintain the appliance.
There are also tips about the
environment and information that can
help to save energy.
Keep the instructions for use and the
installation instructions. Any later user
of this appliance could benefit from
them.
Enjoy your cooking!
When you first connect the appliance to
the mains it will test itself automatically
and the displays will light briefly.
The appliance adjusts itself. At first the
controls can react very quickly. After a
few days of use this will have adjusted
to the surroundings.
If you do not select a setting within 5
seconds the zone will switch itself off
automatically.
The control panel uses touch controls.
The appliance bleeps when you touch a
control. If you touch a control for
longer than 2 seconds the function will
be repeated but there will be no bleep.
This repeat function does not apply to
switching zones on and off.
You can switch in the timer for the two
rear zones so that at the end of the
cooking time the zone will be switched
off automatically.
}
}
}
}
}
}
}
}
where you can find
ASKO/ONE
Australia
Adress:
Phone:
Fax:
New Zealand
Adress:
Phone:
Fax:
Norway
Adress:
Phone:
Fax:
Sweden
Adress:
Phone:
Fax:
ASKO Appliances
19, Trent Street
3125 Burwood
Victoria, Australia
03 - 9809 2599
03 - 9809 1358
Award Appl Ltd.
388/390 Blenheim Road
PO Box 4007 Christchurch
New Zealand
03 - 348 0556
03 - 348 0687
ASKO Elto AS
Vevelstadveien 113
1404 Siggerud
Norge
6486 8860
6486 7625
ASKO Cylinda AB
S-534 82 Vara
Sverige
0512 320 00
0512 320 10

54
Keep the control panel clean.
This cooking appliance is designed for
domestic use. Use it for the preparation
of dishes.
Use the hob for cooking only. Be careful
with aluminium foil, plastic (shrink film)
and sugar. Once melted they are difficult
to remove from the hob surface.
Use pans that are suitable for cooking by
electricity. Place only pans with a clean
dry base on the hob zones. This will
prevent marking by lime-scale or other
stains that are difficult to remove.
Do not place objects on the touch
controls. This will switch off the hob
and a fault code will appear. See
page 14, "Dealing with faults yourself".
Do not use the appliance as a working
surface.
A grain of sand can cause a scratch that
cannot be removed. Do not slide pans
across the hob surface and do not clean
vegetables on it.
Do not use pans that are smaller than
the cooking zone. This will prevent food
spills on the very hot cooking zone.
Burnt-on food spills are difficult to
remove.
tips for use
operating panel
for cooking only
pans
}
}
}
}
]
]
]
what you should do
If a crack appears in the hob surface you
must switch off or disconnect the
appliance from the mains by taking out
the plug. Do not use the appliance
anymore and get in touch with the
Service department (see page 20).
The appliance is hot during and after
use. Remember this if there are young
children near the appliance.
what you should not do
Be careful when you are using
earthenware, glass or metal objects
above the cooking surface. A dropped
herb jar, for example, can cause a
crack.
Do not leave young children alone near
an appliance that is hot.
}
}
}
}
}
}
}
}
]
]
for your safety
crack in the hob surface
young children
wrong
wrong
right
right
connecting the timer to a zone
You can connect the timer to one of the
rear zones. The zone will switch off
automatically when the time set has been
reached.
Press
1
and set the required
power with
=
or
_
.
Press
1
and set a time with
=
or
_
.
Press the timer control required (
\
).
The power set will appear in the
display.
The timer will start to count back five
seconds after setting the time required.
At the end of the time set the timer will
ring and the zone will be switched off.
1 setting the zone
2 set the timer
3 connect the timer to the zone
}
}
}
]
]
]
}
}
}
Press
1
.
Press
=
or
_
.
Press
1
.
A zero will appear in the display.
The timer will start to count back five
seconds after setting the time required.
At the end of the time set the timer will
ring.
When no control is touched the signal
will stop itself after 30 minutes.
timer
The timer only gives a signal at the end of
the time set. 1 switch the timer on
2 set the time required
3 switch the timer off
}
}
}
]
]
]
}
}
}
Press
1
.
Press
=
or
_
. You can also adjust
the power with these controls.
Press
1
.
A horizontal bar lights up to show that
the hob is on standby.
If you press
_
you will start from
setting 12.
If you press
=
you will start from
setting 1.
An H will appear in the display to show
that the hob is still hot.
selecting a setting
You can select settings between 1 and 12.
You can also select the automatic boiling
settings A1 to A7 or the automatic frying
settings A8 and A9 (see also pages 10 and
11).
If the zone is cold it will be brought up to
temperature quickly at high power.
1 switch a zone on
2 select a setting
3 switch the zone off
You can use the remaining heat to
continue heating a dish for the last few
minutes.
}
}
}
]
]
]
}
}
}
higher/lower
on/off
timer
8*
6*
6/7*
* The numbers below the illustrations refer to the corresponding numbers on the fold out page
__
==
()
_
=
1
_
=
1
&7
76

Press
ó
in the lower part of the control
panel. The light above the control will come
on.
twin area zone switching
You cannot use the outer ring on its own. switch on the twin area zone
}]}
Press
e
in the upper part of the control
panel.
Keep pressing the control for 3 to 4
seconds.
The light above the key will come on.
The selected settings are locked. You
can still switch off the zones and the
timer.
As soon as you press the control you
will hear a signal. When the lock is
switched off the signal sounds again
and the light will go out.
child safety lock
When the lock is switched on the settings
selected cannot be changed.
You can also use the child safety lock as a
cleaning setting.
1 switch on the child safety lock
2 switch off the child safety lock
}
}
]
]
}
}
9*
5*
* The numbers below the illustrations refer to the corresponding numbers on the fold out page
ó
e
98

Press
1
.
Press
_
.
Press
_
.
A horizontal bar shows that the hob is
on standby.
Setting 12 will appear in the display.
A1 to A7 will appear after each other in
the display.
automatic boiling/
automatic frying
Automatic boiling is particularly useful if
you regularly cook the same quantities.
setting rapid heating time
A1 1,5 minutes
A2 2 minutes
A3 3 minutes
A4 4 minutes
A5 6 minutes
A6 10 minutes
A7 13 minutes
setting frying heating time
A8 2 minutes
A9 2,5 minutes
1 switching a zone on
2 select setting 12
3 select the automatic boiling setting
required
}
}
}
]
]
]
}
}
}
You do not need first to select a high
setting and then to turn it down.
A prerequisite is a good quality pan,
with a heavy base.
With a small quantity on a large zone
automatic boiling can be too fierce.
Select a smaller zone with a lower
power.
Usually you bring the dish to the boil
at a high setting, you then switch to a
lower setting to finish cooking the
dish.
Automatic boiling does this for you. It
works automatically. First bring to the
boil at full power and then switch
automatically to the lower cooking
setting.
Cooking using automatic boiling
requires some experience.
You will notice after some time that
you always use the same setting to
complete the cooking of certain
dishes. For example, you always finish
cooking potatoes at setting 5.
Using automatic boiling you can select
the A5 setting.
1110

1312
Press
1
.
Press
=
or
_
.
The hob will be heated and will switch
off automatically after a certain time.
This time will differ according to the
setting selected. See the table.
limiting cooking time
automatically
setting duration
1 10 hours
2 10 hours
3 5 hours
4 5 hours
5 5 hours
6 4 hours
7 4 hours
8 4 hours
9 3 hours
10 2 hours
11 1 hour
12 1 hour
1 switch a zone on
2 select a setting
}
}
]
]
setting 1 _4
_simmering bouillon
_lightly stewing pears
_preparing stewed meats
_completing the cooking of dishes
_braising vegetables
setting 4 _7
_ completing the cooking of large
quantities
_ thawing hard vegetables, for example
green beans
setting 8
_ cooking thick pancakes
_ frying thick pieces of meat in
breadcrumbs
_ cooking through thin pieces of meat
_ broiling large pieces of meat
_ frying blocks of ham or bacon
_ frying raw potatoes
_ frying beef olives
_ frying fish in breadcrumbs
_ frying thin pieces of meat in
breadcrumbs
_ cooking omelettes
setting 9 _12
_sealing meat
_frying flat fish, thin slices or fillets
_frying cooked potatoes
_preparing smooth thickened soups
and sauces
_cooking omelettes
_frying beefsteaks (medium,
medium-rare)
_deep fat frying (depending on
temperature and quantity)
setting 12
_bringing quickly to the boil
_shrinking leaf vegetables
_blanching vegetables
_heating oil, fat and butter
_frying beefsteak (very rare, rare)
_bringing a pressure cooker up to
pressure
_cooking smooth thickened desserts
cooking comfortably
select a setting using this table
}
}
}
]}
}
}

1514
what you should do
Clean the ceramic hob after use. You can
use, for example, a little washing-up
liquid in water. Switch on the child
safety lock before cleaning the control
panel.
Special maintenance products for
ceramic hobs, such as Collo Profi or
Cerafix give the ceramic hob a protective
layer. Treat the hob with these products
also when obstinate stains have been
removed.
You can remove burnt-on stains, metal
and lime scale stains from the ceramic
hob with such special cleaning materials
as Jif, Collo Luneta or Stahlfix.
Remove boiled-over food residues with a
glass scraper. Molten plastic and sugar
can also be removed with a glass
scraper.
what you should not do
Never clean the ceramic hob with an
abrasive cleaning material!
Do not first allow the hob to cool
completely.
caring for the appearance
of the appliance
Special maintenance products for ceramic
hobs (e.g. Collo Luneta) form an antistatic
layer on the hob so that it attracts dust less
readily.
daily
weekly
obstinate stains
boiled-over food residues
}
}
}
}
]
]
]
]
}
}

1716
cause
plug not in the socket
defective fuse
incorrect cleaning material used
sliding pans across the hob is the usual
cause
a control is defective, dirty, or has an
object lying on it. Each control has its
own number, from 00 to 18. The number
of the control will appear in the display.
appliance is overheated
remedy
put the plug in the socket
check the fuses
remove with a cleaning material like
Stahlfix
do not slide pans across the ceramic
hob. A scratch cannot be removed but
polish will help!
clean the appliance or have it repaired
do not place objects on the control
panel
let the appliance cool until the code
disappears
dealing with faults yourself
Should the appliance not function as it
should, check first if you can deal with the
fault yourself using the table. Often the
cause of the fault is something minor.
zones do not get hot
metal-like marks on the ceramic hob
scratches on the ceramic hob
fault codes F00 - F18 in the display
fault code F3 appears
}
}
}
}
}
]
]
]
]
]
}
}
}
}
}
F 00
F 01
F 02
F 03
F 05
F 07
F 09
F 11
F 04
F 06
F 08
F 10
F 13
F 15
F 17
F 12
F 14
F 16
F 18

1918 building-in – preliminary notes
}caution
}general
}safety
}electrical connection
In order to avoid a hazard this appliance
must be installed according to these
instructions for installation.
Only a qualified electrician should connect
the hob to the mains supply. Damage
caused by improper installation or
connection is not covered by the guarantee.
To enable the appliance to function
properly, please ensure that:
– That the appliance is sufficiently
ventilated (see building in dimensions).
– The worktop is at least 3 cm thick.
– The worktop is flat.
– If the hob is to be built in any nearer than
50 mm from an adjacent wall or kitchen
cabinet, either to the back or side of the
appliance, the wall or cabinet should be
lined with a heat resistant material.
The connection cable is of type Y/105 °C and
may only be replaced by qualified service
personnel.
The electrical connection should always be
carried out in accordance with the national
and local regulations in force. Among other
things, these regulations specify that the
appliance should be grounded. The hobs are
fitted in the factory with a power supply of
type H05VVF (1,5 mm
2
) consisting of 5
wires:
1 ground wire (green/yellow), 2 neutral
wires (brown and blue) and 2 phase wires
(black). This power supply should be fitted
with a plug in conformity with publication
CEE7.
If you wish to make a fixed connection, the
cable should be fitted with a multipole
isolating switch with a minimum contact
gap of 3 mm, such a provision can be made
in the building wiring.
The fuse box in your home must be
fitted with a 32 A fuse.
– negative connection N (blue and
brown)
– 2x positive connection L (black
with black)
The fuse box in your home must be
fitted with a 16 A fuse.
– negative connection N1 (blue)
– negative connection N2 (blown)
– positive connections L1 (black next
to blue)
– positive connections L2 (black next
to brown)
The fuse box in your home must be
fitted with a 16 A fuse.
– negative connection N
(blue/brown)
– positive connections L1 (black)
– positive connections L2 (black)
The hob is conform to the directive
73/23/CEE (modified by the directives
93/68/CEE and 89/336/CEE) called DBT.
electrical connection
31 phase connection
1 live +1 negative 1N ac 240 V
32 phase connection
2 live +2 negative 2-2N ac 240 V
32 phase connection
2 live + 1 negative 2-1N ac 240/415 V
blue
brown black
black
yellow/green
NL
blue
brown black next to brown
black next to blue
yellow/green
N1 L1 L2
N2
blue
brown black
black
yellow/green
NL1L2

2120
building in
If necessary, connect a plug to the cable
(see also ‘electrical connection’).
Fit the plug according to the wiring
diagram and secure the cable with the
cable clamp.
Saw out the opening in the worktop. Do
this very precisely, according to
the building-in dimensions on the
previous page! Cut away any
partitions also, if necessary.
Remove the protective foil from the
sealing strip and stick the strip along
the middle of the edge of the hob (see
illustration).
Lower the hob into the opening.
Using the clamps supplied, secure the
hob (see illustration).
Make the electrical connection by
means of a plug or a fixed connection.
Finally, check the operation of the
appliance.
caution
1
2
3
4
5
6
7
building-in dimensions
560
490
min. 40
min. 20
600
48
478
548
575 505
The underside of the cooking hob can
reach a temperature exceeding 105 °C
during normal use. If after installation the
underside surface is accessible through
under-bench cupboard doors and the like,
it is essential that a rigid barrier is
installed so that such access is restricted.
In order to avoid a hazard, the barrier
must be of low thermal conductivity
material installed according to the
instructions for installation.
25
min. 5
building in
}caution
technical data
H 6
See the specifications plate
480x575x50
12 kg
The electromagnetic compatibility of this appliance complies with the terms of Directive 89/336/EEC.
The data plate with the type and serial numbers is on the underside of the appliance.
type number
mains supply
nominal load
dimensions (wxdxh)
weight

2322
Check your new appliance before using it.
Defects or damages resulting from
installation errors, are excluded from the
guarantee.
Examples include broken glass or damages
to the enamel finishing caused by bumps or
by dropping objects on or against the
appliance.
Examples include broken light bulbs,
discolouration of synthetic or enamelled
parts, and scratches.
In countries with an ASKO establishment,
please contact the ASKO Service
Department.
Contact your supplier if you discover any
damages.
Insufficient ventilation or faulty electrical
connections, for example. Complaints
resulting from changes to the appliance
are also excluded from the guarantee.
Insufficient or improper maintenance may
also result in discolouration of surfaces or
rapid ageing of rubber and plastic parts.
These complaints are also excluded from
the guarantee.
In all other countries, please contact your
supplier or your ASKO importer.
ASKO/ONE’s guarantee
Troublefree Housekeeping
A household appliance should always offer
Troublefree performance. It cannot just
suddenly stop working, it should not be noisy
or vibrate, nor should it be dirty or ugly,
waste water and electricity, or blink
obstinately while refusing to allow itself to be
programmed, The whole point of household
appliances is to make your life troublefree -
not be the cause of your troubles!
When we created ASKO/ONE, we did all we
could to prevent problems by incorporating
high quality, reliability, timeless design, and
efficient features into a few, carefully
selected models.
However, no matter how hard you try, at
some point someone may require service on
an appliance, Since neither we, nor any other
manufacturer can guarantee 100% reliability,
we created a unique service concept for our
ASKO/ONE customers which guarantees that
we will take care of any problem that might
arise - before it starts to trouble you.
We call it Troublefree houskeeping. For us
this is a way to stay in touch with our
customers, to make sure that you are still
satisfied after 3 years, as well as after 13. In
practice, the Troublefree housekeeping
concept gives you the best service possible.
You can call on the Troublefree line at any
time to ask questions or request service.
We will still stay in touch with you and your
appliance for as long as you use it - and we
expect that to be a long time!
scope of the terms of guarantee
ASKO/ONE quality is equally high
worldwide, but the guarantees vary from
country to country depending on legislation
and other factors. Guarantees and terms of
sale are presented on a separate page that
accompanies your machine.
excluded from the guarantee
transport damages
installation errors
improper use
and incorrect or insufficient maintenance
wear due to use
or ageing
whom to contact
}
}
}
}
}
}
}
}
}
}
◆
◆
◆
}
}
}
}
Please dispose of these materials in a
responsible way in accordance with the
regulations of your local authority.
Your local authority will also be able to
give you information about disposing
disused household appliances in a
responsible way.
disposal of packaging
and appliance
The packaging of the appliance is
recyclable. It is made up of:
cardboard
polyethylene film (PE)
CFC free polystyrene (PS rigid foam)
}}
-
-
-
}

25
her finner du ASKO/ONE
innledning
generelle opplysninger om komfyrtoppen
for din sikkerhet
tips ved bruk
velge innstilling
stoppekloppe
bruke stoppekloppe med platen
skru på dobbel varmesone
barnesikring
automatisk koking / automatisk steking
gode råd til matlagingen
begrense koketiden automatisk
vedlikehold av apparatet
løse problemene selv
innbygging - innledning
utskjæringsmål
innbygging
tekniske data
avhending emballasje og apparatet
ASKO/ONE’s garanti
26
|
|
27
|
27
28
|
29
28
|
29
30
|
31
30
|
31
30
|
31
32
|
33
32
|
33
34
|
35
36
|
37
36
|
37
38
|
39
40
|
41
42
|
|
43
44
|
|
45
46 |47
46 |47
innhold
N
norsk
}
apparatbeskrivelse beskrivelse av bryterpanelet
dobbel varmesone
2000/1000 W
bakre plate venstre
1200 W
bakre plate høyre
1800 W
fremre plate høyre
1200 W
Dette produktet leveres uten tilkoplingskabel og støpsel.
1
2
3
4
5
6
7
8
9
knapp for barnesikring
stoppeklokke
berøringsbrytere for bakre plater,
venstre og høyre, og stoppeklokke
for hver plate
berøringsbrytere for fremre plater,
venstre og høyre
berøringsbrytere for valg av
dobbel varmesone
symboler på displayet ASKO "Cook-Light"-elementer
fortsatt varm
standby
feilkoder
overoppheting av apparatet
innstillinger
automatisk koking
automatisk steking
Asko "Cook-Light"-elementer
kombinerer fordelene til et
halogenelement med fordelene til
et vanlig strålingselement.
Elementet varmes opp jevnt og
raskt. “Cook-Light”-varmeplater
oppnår maksimal temperatur
innen 3 sekunder, men bruker
svært lite strøm.
H.
{
F00 - F18
F3
1 - 12
A1 - A7
A8 - A9

2726
innledning
generelle opplysninger
om komfyrtoppen
Denne bruksanvisningen gir deg en rask
oversikt over mulighetene til apparatet.
Du kan lese om sikkerhet og hvordan du
kan vedlikeholde apparatet. Den inne-
holder ogsåmiljøtips og informasjon
som kan hjelpe deg med åspare strøm.
Ta vare påbruksanvisningen og
installasjonsanvisningen. En eventuelt
senere bruker av apparatet kan ha nytte
av dette.
Lykke til med matlagingen!
Første gang du kopler apparatet til
hovednettet, gjennomfører det en
automatisk selvtest og displayet lyser et
kort øyeblikk.
Apparatet justerer seg selv. I
begynnelsen kan bryterne reagere
svært raskt. Etter et par dager vil dette
justere seg etter omgivelsene.
Dersom du ikke velger en innstilling
innen 5 sekunder, vil platen slåseg av
automatisk.
Bryterpanelet bruker berøringsbrytere.
Apparatet piper når du trykker påen
bryter. Dersom du holder bryteren inne
i mer enn 2 sekunder, vil funksjonen
gjentas, men det kommer ingen
pipelyd. Denne repetisjonsfunksjonen
gjelder ikke når du slår platene av og
på.
Du kan stille inn stoppeklokken for de to
bakre platene slik at de slår seg av
automatisk når koketiden er slutt.
}
}
}
}
}
}
}
}
her finner du ASKO/ONE
Australia
Adress:
Phone:
Fax:
New Zealand
Adress:
Phone:
Fax:
Norway
Adress:
Phone:
Fax:
Sweden
Adress:
Phone:
Fax:
ASKO Appliances
19, Trent Street
3125 Burwood
Victoria, Australia
03 - 9809 2599
03 - 9809 1358
Award Appl Ltd.
388/390 Blenheim Road
PO Box 4007 Christchurch
New Zealand
03 - 348 0556
03 - 348 0687
ASKO Elto AS
Vevelstadveien 113
1404 Siggerud
Norge
6486 8860
6486 7625
ASKO Cylinda AB
S-534 82 Vara
Sverige
0512 320 00
0512 320 10

2928
Hold bryterpanelet rent.
Denne komfyren er laget for bruk i
husholdningen. Bruk den til tilbereding
av mat.
Bruk ikke komfyrtoppen til annet enn
matlaging. Vær forsiktig med
aluminiumsfolie, plastikk (krympefilm)
og sukker. Dersom dette først smelter, er
det svært vanskelig åfjerne fra platen.
Bruk kjeler som passer til matlaging ved
hjelp av elektrisitet. Plasser kun kjeler
med ren og tørr bunn påkokesonene.
Dette vil hindre at de får merker av
kalkflak eller andre flekker som er
vanskelige åfjerne.
Plasser ikke gjenstander påberørings-
bryterne. Dette vil føre til at komfyr-
toppen slås av og en feilkode kommer
fram. Se side 36, "Løse problemene
selv".
Bruk ikke apparatet som arbeidsplate.
Et sandkorn kan lage en ripe som ikke
kan fjernes. Dra ikke kjelene over
kokeplaten og vask ikke grønnsaker på
den.
La være åbruke kjeler som er mindre
enn kokesonen. Dette vil hindre at det
kommer matrester påsvært varme
kokesoner. Matrester som brennes fast
er vanskelig åfjerne.
}
}
}
}
tips ved bruk
bryterpanel
kun til matlaging
kjeler
]
]
]
hva du bør gjøre
Dersom det kommer en sprekk i
kokeplaten, mådu slåav eller kople
apparatet fra hovednettet ved åtrekke ut
støpselet. La være åbruke apparatet, og
ta kontakt med serviceavdelingen.
Apparatet er varmt under og etter bruk.
Vær oppmerksom pådette dersom det er
småbarn i nærheten av apparatet.
hva du ikke bør gjøre
Vær forsiktig når du bruker steintøy og
gjenstander av glass eller metall over
kokeplaten. Dersom du for eksempel
mister et krydderglass, kan det lage en
sprekk.
La ikke småbarn være alene i nærheten
av et varmt apparat.
}
}
}
}
}
}
}
}
]
]
for din sikkerhet
sprekk i kokeplaten
små barn
feil
feil
riktig
riktig

3130
Trykk på
1
og still inn ønsket varme
med
=
eller
_
.
Trykk på
1
og still inn tiden med
=
eller
_
.
Trykk påønsket bryter for stoppe-
klokken (
\
).
Innstilt varme vises pådisplayet.
Stoppeklokken begynner åtelle ned fem
sekunder etter at ønsket tid er innstilt.
Når innstilt tid er over, ringer klokken
og platen slår seg av.
}
}
}
}
}
}
Trykk på
1
.
Trykk på
=
eller
_
.
Trykk på
1
.
En null kommer til syne pådisplayet.
Stoppeklokken begynner åtelle ned fem
sekunder etter at ønsket tid er innstilt.
Når innstilt tid er over, ringer klokken.
Dersom ingen av bryterne berøres,
stopper signalet av seg selv etter
30 minutter.
}
}
}
}
}
}
Trykk på
1
.
Trykk på
=
eller
_
. Du kan også
justere styrken med disse bryterne.
Trykk på
1
.
En horisontal strek viser at
komfyrtoppen er klar til bruk.
Dersom du trykker på
_
starter du fra
innstilling 12.
Dersom du trykker på
=
starter du fra
innstilling 1.
En H kommer til syne pådisplayet for å
vise at komfyrtoppen fortsatt er varm.
}
}
}
}
}
}
bruke stoppeklokke med platen
Du kan bruke stoppeklokken med en av de
bakre platene. Platen vil skru seg av
automatisk når den innstilte tiden er over.
1 stille inn platen
2 stille inn stoppeklokken
3 bruke stoppeklokken med platen
]
]
]
stoppeklokke
Stoppeklokkken gir kun signal når innstilit
tid er over. 1 slå på stoppeklokken
2 stille inn ønsket tid
3 slå av stoppeklokken
]
]
]
velge innstilling
Du kan velge innstillinger mellom 1 og 12.
Du kan ogsåvelge innstillingene A1 til A7
for automatisk koking eller instillingene A8
og A9 for automatisk steking (se ogsåside
32 og 33).
Dersom platen er kald, vil den raskt få
ønsket temperatur påfull styrke.
1 slå på platen
2 velge innstilling
3 slå av platen
Du kan bruke varmen som er igjen til å
fortsette åvarme en rett i de siste
minuttene.
]
]
]
høyere/lavere
av/på
stoppeklokke
8*
6*
6/7*
* Tallene under figurene viser til de tilsvarende tallene på utbrettsiden.
__
==
()
_
=
1
_
=
1
&7

3332
Trykk på
e
påden øvre delen av
bryterpanelet.
Hold bryteren inne i 4 sekunder.
Lampen over nøkkelen lyser. De valgte
innstillingene er låste. Du kan fortsatt
slåav platene og stoppeklokken.
Du hører et signal såsnart du trykker
påbryteren. Når barnesikringen slås av,
hører du signalet igjen og lyset slukkes.
}
}
}
}
Trykk på
ó
påden nedre delen av
bryterpanelet. Lampen over bryteren lyser.
skru på dobbel varmesone
Du kan ikke bruke den ytre ringen alene. slå på den doble varmesonen
}]}
barnesikring
De valgte innstillingene kan ikke endres når
sikringen er på.
Du kan ogsåbruke barnesikringen som en
innstilling ved rengjøring.
1 slå på barnesikringen
2 slå av barnesikringen
]
]
9*
5*
* Tallene under figurene viser til de tilsvarende tallene på utbrettsiden
ó
e

3534
deretter skru ned.
En forutsetning er at du har en kjele av
høy kvalitet med tung bunn.
Med en liten mengde påen stor plate
kan automatisk koking bli for voldsomt.
Velg en mindre plate påen lavere
styrke.
koking krever en viss erfaring.
Etter en stund vil du merke at du alltid
bruker den samme innstillingen til å
tilberede visse retter. For eksempel vil
du alltid avslutte koking av poteter på
innstilling 5.
Ved bruk av automatisk koking kan du
velge A5-innstillingen. Du trenger ikke
åvelge en høy innstilling først og
Trykk på
1
.
Trykk på
_
.
Trykk på
_
.
En horisontal strek viser at
komfyrtoppen er klar til bruk.
Innstilling 12 vises pådisplayet.
A1 til A9 vises etter hverandre på
displayet.
automatisk koking/
automatisk steking
Automatisk koking er spesielt nyttig
dersom du ofte lager samme mengde mat.
innstilling hurtig oppvarmingstid
A1 1,5 minutter
A2 2 minutter
A3 3 minutter
A4 4 minutter
A5 6 minutter
A6 10 minutter
A7 13 minutter
innstilling oppvarmingstid steking
A8 2 minutter
A9 2,5 minutter
1 slå på platen
2 velg innstilling 12
3 velg ønsket innstilling for automatisk
koking
}
}
}
]
]
]
}
}
}
Normalt koker du opp maten påen høy
innstilling før du skrur ned påen lavere
innstilling for åfortsette matlagingen.
Automatisk koking gjør dette for deg.
Funksjonen virker automatisk. Først får
du maten til kokepunktet påfull styrke,
deretter skrus varmen automatisk ned
til en lavere innstilling.
Matlaging ved hjelp av automatisk
This manual suits for next models
1
Table of contents
Languages:
Other Asko Hob manuals