Award H903BG User manual

user manual
Model: H903BG
Gas Hob

Preface
Thank you for choosing our gas hob.
To use this hob correctly and prevent any potential risk, read these instructions
before using the hob.
Keep these instructions in a place where you can find them easily.
If you are unsure of any of the information contained in these instructions, please contact
our customer care centre.
The manufacturer shall not be responsible for any damages to persons or property caused
by incorrect installation or use of the
The hob has been certified for use in countries other than those marked on the
The manufacturer also reserves the right to make any modifications to the products as may
be considered necessary or useful, also in the interests of the user, without jeopardising
the main functional and safety features of the products themselves.
The hob is designed for a domestic environment and not a commercial one.
1
hob.
hob.

contents
Preface
Instructions for use and maintenance
Safety Warning
Safety Instructions
Installation
Child and People Safety
During Use
Cleaning and Service
8 Environmental Information
Description of the hob
How to Use the hob
Safety and Energy saving advice
Cleaning and Maintenance
Technical instructions
6
16
17
18
21
15
13
12
23
2
5
4
3
8
9
10
22
24
Using instructions
Positioning
Installing the hob
Gas Connection
Gas Specifition
Electrical Connection
Gas adjustment
Trouble shooting

Safety Instructions
Danger/Warning
Caution Neglect of this mark may result in minor personal injury
or property damage.
Caution No Access
No Fire Tool Must Do
Danger
- Do not turn on the light.
- Do not switch on/off any electrical hob and do not touch any electric plug.
- Do not use a telephone.
1Stop using the product and close the middle valve.
2 Open the window to ventilate.
3Contact our service centre by using a phone outside.
* Gas used contains mercaptan, so that you can smell a gas leak (smell of rotten garlic
or egg) even where only 1/1000 of the gas is in the air.
The following marks are used in the Instruction Manual
as follows:
3
If gas seems to leak,take the actions as follow:
Neglect of this mark may result in severe personal injury
or death.
Please take the time to read this Instruction Manual before installing or using the
7KLVLQVWUXFWLRQERRNOHWPXVWEHNHSWZLWKWKHDSSOLDQFHIRUDQ\IXWXUHUHIHUHQFH.
If the is sold or transferred to another person,ensure the booklet is passed on to
the new user.
7KHPDQXIDFWXUHUGHFOLQHVDQ\OLDELOLW\VKRXOGWKHVHVDIHW\PHDVXUHVQRWEHREVHUYHG
TKHIROORZLQJPDUNVDUHPDGHWREHHDVLO\XQGHUVWRRGVRWKDW\RXFDQSUHYHQWDQ\
accident caused by misuse in advance, and use the hob more conveniently.
RHDGWKHIROORZLQJFRQWHQWVWKRURXJKO\DQGHQVXUH\RXXQGHUVWDQGWKHP.
hob.
hob
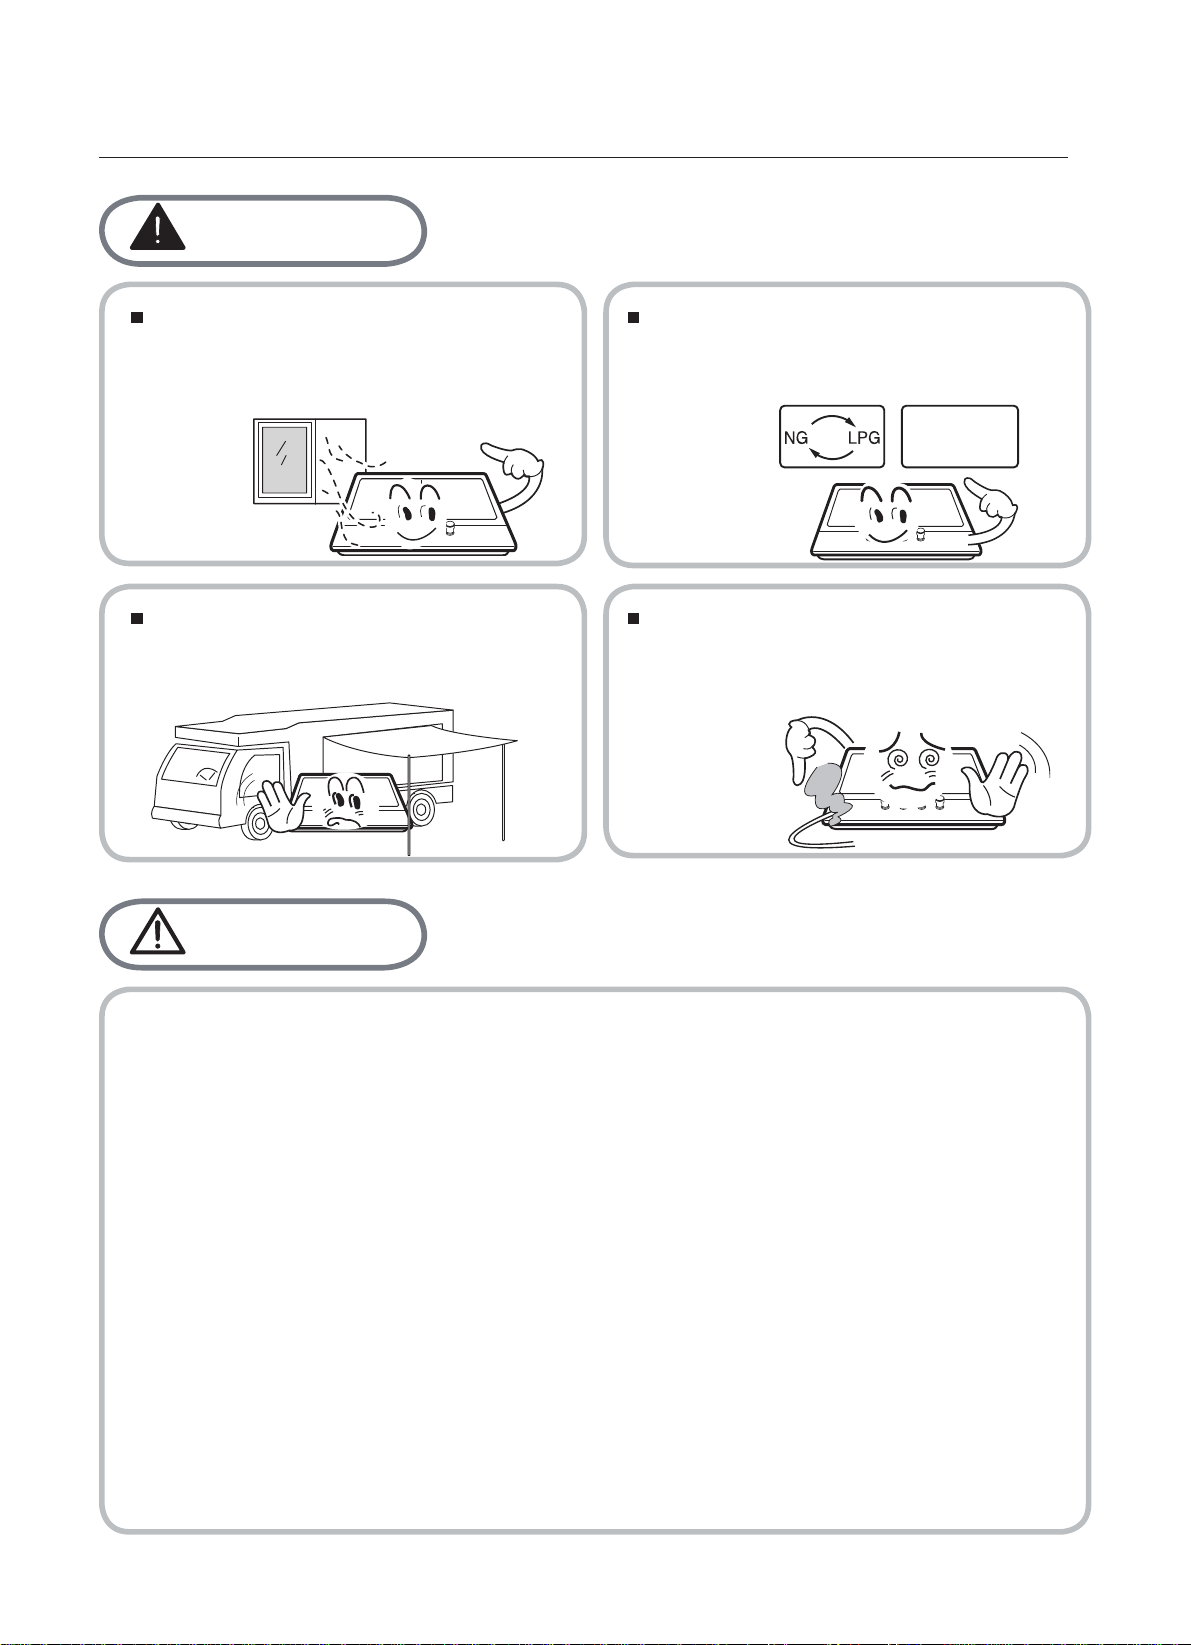
Installation
Warning
This hob shall be installed in
accordance with regulations in force
and only used in a well ventilated
space.
Prior to installation,ensure that the
gas and electrical supply complies
with the type stated on the rating
plate.
Where this
marine craft or in caravans, it should
not be used as a space heater.
The gas pipe and electrical cable
must be installed in such a way that
they do not touch any parts or the
Caution
4
hob is installed in
hob.
220V-240V
Ŷ7KLVDSSOLDQFHVKRXOGEHLQVWDOOHGE\DTXDOL¿HGWHFKQLFLDQRULQVWDOOHU
Ŷ7KHDGMXVWPHQWFRQGLWLRQVIRUWKLVDSSOLDQFHDUHVWDWHGRQWKHODEHORUGDWDSODWH
Ŷ5HPRYHDOOSDFNDJLQJEHIRUHXVLQJWKHDSSOLDQFH
Ŷ$IWHUXQSDFNLQJWKHDSSOLDQFHPDNHVXUHWKHSURGXFWLVQRWGDPDJHGDQGWKDWWKH
connection cord is in perfect condition. Otherwise, contact the dealer before
installing the hob.
ZLWKVWDQGDPLQLPXPWHPSHUDWXUHRIÛ&DERYHWKHDPELHQWWHPSHUDWXUHRIWKH
room it is located in, whilst in use.
Ŷ,QWKHHYHQWRIEXUQHUÀDPHVEHLQJDFFLGHQWDOO\H[WLQJXLVKHGWXUQRIIWKHEXUQHU
control and do not attempt to re-ignite the burner for at least one minute.
Ŷ
The use of a gas cooking appliance results in the production of heat and moisture in the
room in which it is installed. Ensure that the kitchen is well ventilated: keep natural
YHQWLODWLRQKROHVRSHQRULQVWDOODPHFKDQLFDOYHQWLODWLRQGHYLFHPHFKDQLFDOH[WUDFWRUKRRG
Ŷ3URORQJHGLQWHQVLYHXVHRIWKHDSSOLDQFHPD\FDOOIRUDGGLWLRQDOYHQWLODWLRQIRU
H[DPSOHRSHQLQJRIDZLQGRZRUPRUHHIIHFWLYHYHQWLODWLRQIRUH[DPSOHLQFUHDVLQJ
the level of mechanical ventilation where present.
Ŷ7KHDGMDFHQW DQGDOOPDWHULDOVXVHGLQWKHLQVWDOODWLRQPXVWEHDEOHWR
cabinetry

Child and People Safety
Do not allow children to play near or with the
The hob gets hot when it is in use.
Children should be kept away until it has cooled.
Warning
Caution
5
Ŷ7KLVDSSOLDQFHLVGHVLJQHGWREHRSHUDWHGE\DGXOWV
Ŷ&KLOGUHQFDQDOVRLQMXUHWKHPVHOYHVE\SXOOLQJSDQVRUSRWVRIIWKHDSSOLDQFH
Ŷ7KLVDSSOLDQFHLVQRWLQWHQGHGIRUXVHE\FKLOGUHQRURWKHUSHUVRQVZKRVHSK\VLFDO
VHQVRU\RUPHQWDOFDSDELOLWLHVRUODFNRIH[SHULHQFHDQGNQRZOHGJHSUHYHQWVWKHP
from using the hob safely without supervision or instruction by a responsible
person to ensure that they can use the hob safely.
hob.

During Use
Warning
The use of a gas
results in the production of heat and
moisture in the room in which it is
installed. Ensure that the kitchen is
well ventilated : keep natural
ventilation holes open or install a
mechanical ventilation device
(mechanical
extractor hood).
Never leave the hob unattended
when cooking.
Burner
panel is not designed to operate from
an external timer or separate remote
control system.
6
Ŷ2QO\XVHWKHDSSOLDQFHIRUSUHSDULQJ
food.
LQcontact with water. Do not operate
this hob with wet hands.
Ŷ'RQRWXVHWKLVDSSOLDQFHLILW comes
Ŷ7KHKHDWLQJDQGFRRNLQJVXUIDFHVRI
the hob become hot when they
are in use, take all due precautions.
Ŷ'RQRWXVHODUJHFORWKVWHDWRZHOVRU
similar as the ends could touch the
ÀDPHVDQGFDWFK¿UH
Ŷ8QVWDEOHRUPLVVKDSHQSDQVVKRXOG
not be used on the hob as they
can cause an accident by tipping or
spillage.
hob
During Use
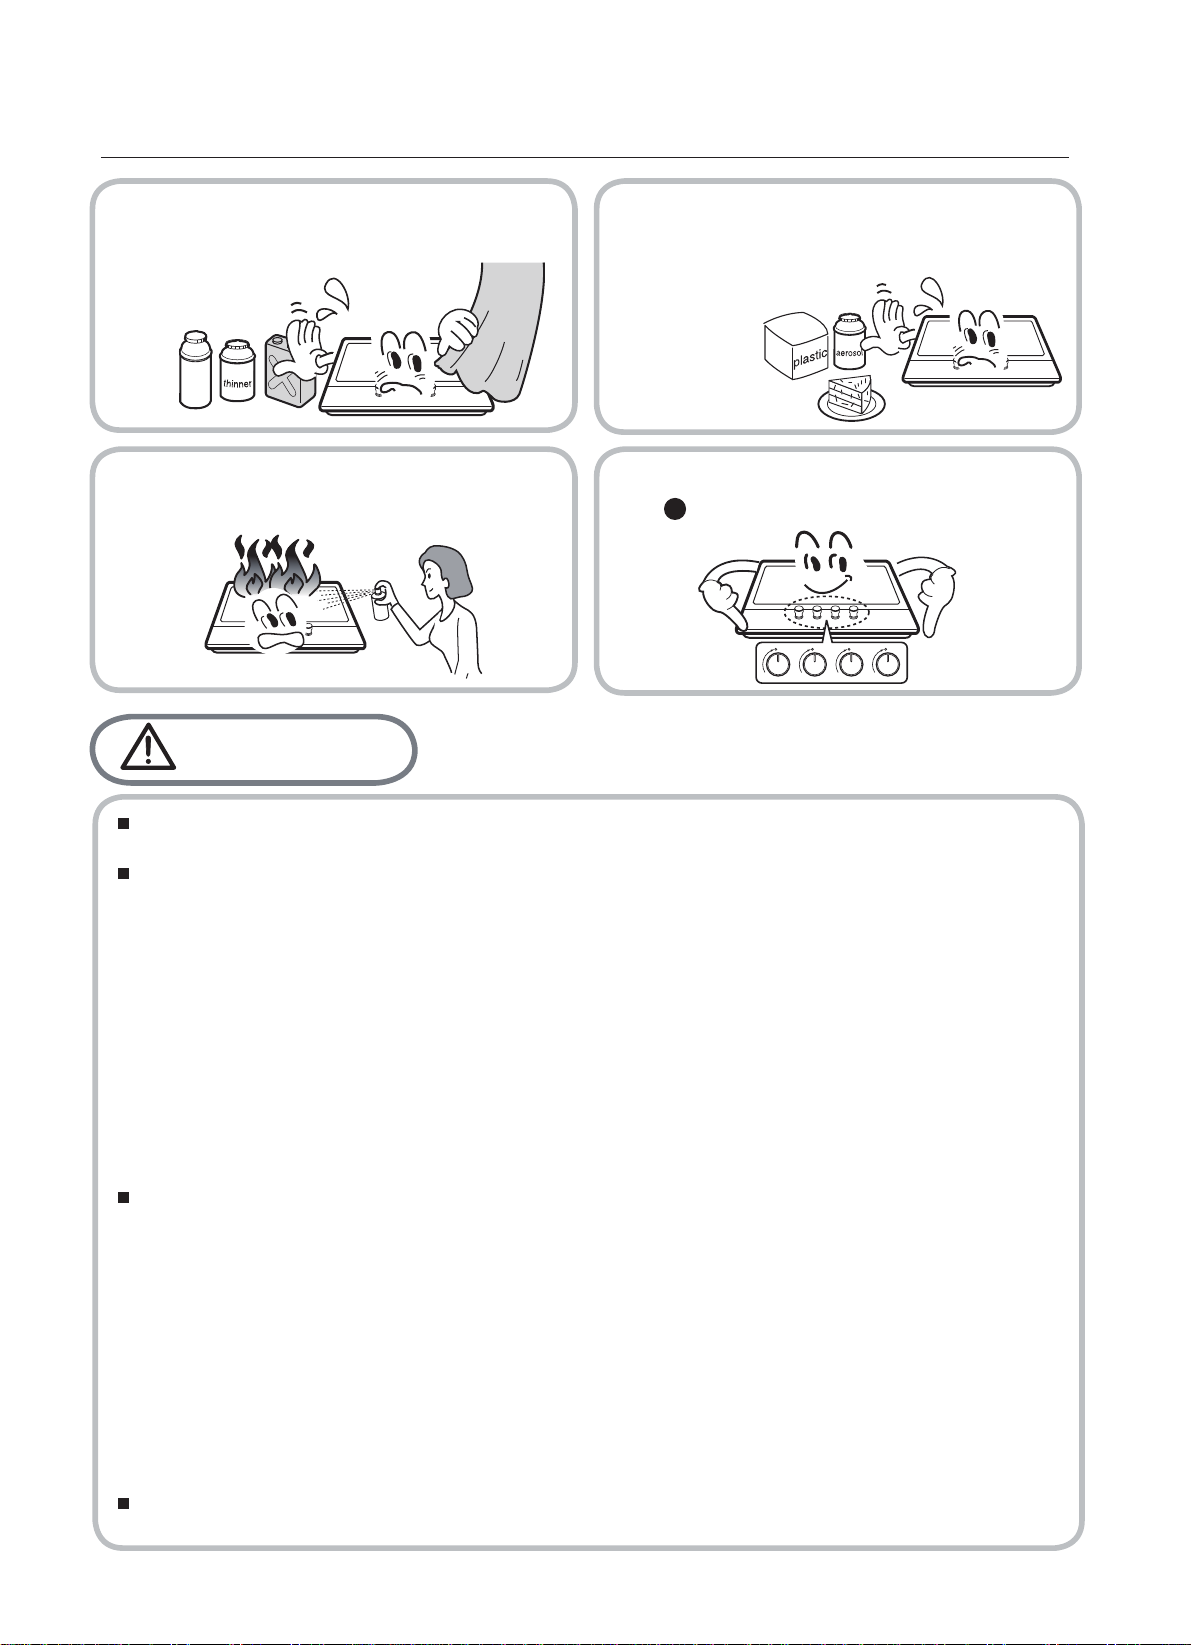
Ŷ'RQRWVSUD\DHURVROVLQWKHYLFLQLW\RI
this hob while it is in operaiton. ‘ ’ position when not in use.
Caution
7
Ŷ 'RQRWXVHRUVWRUHÀDPPDEOH materials
in the storage drawer near this
hob.
Ŷ3HULVKDEOHIRRGSODVWLFLWHPVDQG
aerosols may be affected by heat and
should not stored above or below the
hob.
Ŷ(QVXUHWKHFRQWURONQREVDUHLQWKH
This is intended for domestic cooking only.It is not designed for commercial
or industrial purposes.
Prolonged intensive use of the may call for additional ventilation,for example
opening of a window, or increasing the level of mechanical ventilation where present.
Ŷ8VHKHDWUHVLVWDQWSRWKROGHUVRUJORYHVZKHQKDQGOLQJKRWSRWVDQGSDQV
Ŷ'RQRWOHWSRWKROGHUVFRPHQHDURSHQÀDPHVZKHQOLIWLQJFRRNZDUH
Ŷ7DNHFDUHQRWWROHWSRWKROGHUVRUJORYHVJHWGDPSRUZHW DVWKLVFDXVHVKHDWWRWUDQVIHU
WKURXJKWKHPDWHULDOTXLFNHUZLWKWKHULVNRIEXUQLQJ\RXUVHOI
ŶOQO\HYHUXVHWKHEXUQHUVDIWHUSODFLQJSRWVDQGSDQVRQWKHP'RQRWKHDWXSDQ\HPSW\
is made of glass-cracked, switch off the hob to avoid possible electrocution.
Ŷ 7RPLQLPLVHWKHSRVVLELOLW\RIEXUQVLJQLWLRQRIÀDPPDEOHPDWHULDOVDQGVSLOODJHWXUQ
FRRNZDUHKDQGOHVWRZDUGWKHVLGHRUFHQWHURIWKH ZLWKRXWH[WHQGLQJRYHU
adjacent burners.
Ŷ$OZD\VWXUQEXUQHUFRQWUROVRIIEHIRUHUHPRYLQJFRRNZDUH
Ŷ&DUHIXOO\ZDWFKIRRGVEHLQJIULHGDWDKLJKÀDPHVHWWLQJ
Ŷ$OZD\VKHDWIDWVORZO\DQGZDWFKDVLWKHDWV
Ŷ)RRGVIRUIU\LQJVKRXOGEHDVGU\DVSRVVLEOH)URVWRQIUR]HQIRRGVRUPRLVWXUHRQIUHVK
Ŷ:KHQXVLQJJODVVFRRNZDUH PDNHVXUHLWLVGHVLJQHGIRU
If the surface
using the hob.
'RQRWXVHDWHDWRZHORUVLPLODUPDWHULDOVLQSODFHRIDSRWKROGHU6XFKFORWKVFDQ
FDWFKILUHRQDKRWEXUQHU
foods can cause hot fat to bubble up and over the sides of the pan.
Never try to move a pan of hot fat,especially a deep fat fryer.Wait until the fat is
completely cool.
pots or pans.
Ŷ1HYHUXVHSODVWLFRUDOXPLQLXPIRLOGLVKHVRQWKHDSSOLDQFH
Ŷ:KHQXVLQJ RWKHUHOHFWULFDODSSOLDQFHV HQVXUHWKHFDEOHGRHVQRWFRPHLQWRFRQWDFWZLWK
the hob surfaces of the hob.
Ŷ,I\RXKDYHDQ\PHFKDQLFDOSDUWVHJ LQ\RXUERG\FRQVXOWDGRFWRUEHIRUH
hob
hob
pacemaker
use on a gas hob.
cook top

Cleaning and Service
Environmental Information
unusable, by cutting off the cable.
disposed with other household wastes at the end of its working life. To prevent
possible harm to the environment or human health from uncontrolled waste disposal,
please separate this from other types of wastes and recycle it responsibly to promote
the sustainable reuse of material resources.
agents.
Warning
and cooled.
clean the hob.
or serviced by an authorised Service
Engineer and only genuine approved
spare parts should be used.
Caution
8
Ŷ1HYHUXVHDEUDVLYHRUFDXVWLFcleaning Ŷ 7KLVDSSOLDQFHVKRXOGRQO\EHrepaired
Ŷ%HIRUHDWWHPSWLQJWRFOHDQWKHDSSOLDQFHLWVKRXOGEHGLVFRQQHFWHGIURPWKHPDLQV
Ŷ<RXVKRXOGQRWXVHDVWHDPMHWRUDQ\RWKHUKLJKSUHVVXUHFOHDQLQJHTXLSPHQWWR
Ŷ$IWHULQVWDOODWLRQSOHDVHGLVSRVHRIWKHSDFNDJLQJ
with due regard to safety and the environment.
Ŷ:KHQGLVSRVLQJRIDQROGDSSOLDQFHPDNHLW
Ŷ7KLVPDUNLQJVKRZQRQWKHSURGXFWRULWVOLWHUDWXUHLQGLFDWHVWKDWLWVKRXOGQRWEH
Ŷ+RXVHKROGXVHUVVKRXOGFRQWDFWHLWKHUWKHUHWDLOHUZKHUHWKH\SXUFKDVHGWKLVSURGXFW
RUWKHLUORFDO IRUGHWDLOVRIZKHUHDQGKRZWKH\FDQWDNHWKLVLWHP
for environmentally safe recycling.
Ŷ%XVLQHVVXVHUVVKRXOGFRQWDFWWKHLUVXSSOLHUDQGFKHFNWKHWHUPVDQGFRQGLWLRQVRI
WKHSXUFKDVHFRQWUDFW7KLVSURGXFWVKRXOGQRWEHPL[HGZLWKRWKHUFRPPHUFLDO
wastes for disposal.
Correct Disposal of This Product
(Waste Electrical & Electronic Equipment)
council

9
Description of the hob
ΣQn
860*525*100
Continuous
Ignition
Type
G1/2 thread
2W
220-240Vac,
50Hz-60Hz,
Ignition
device
Gas
Connection
Electric
supply
Burner
Feature
Dimension
(W*D*H)
Top Plate
Glass
Rapid (1),
Semi-rapid(2),
Auxiliary (1),
Triple-Crown(1)
40.68MJ/h
Table of contents
Other Award Hob manuals


