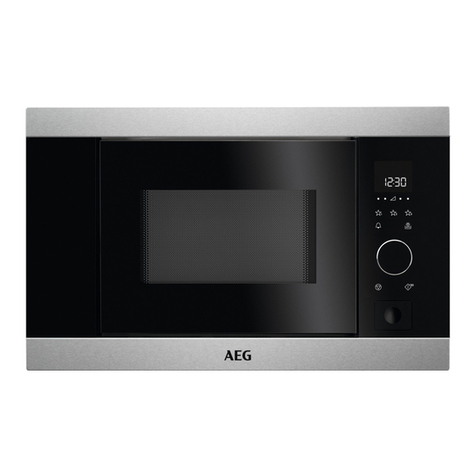
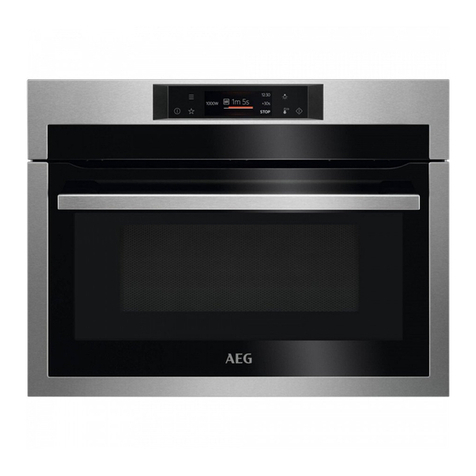
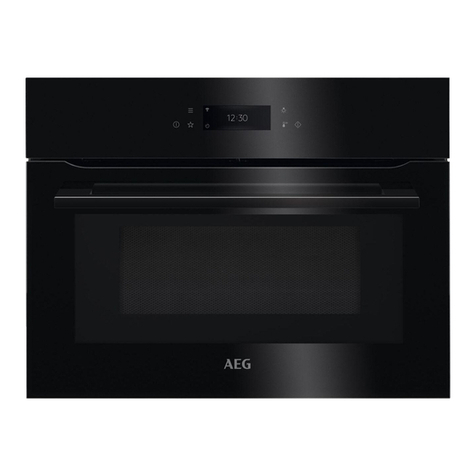
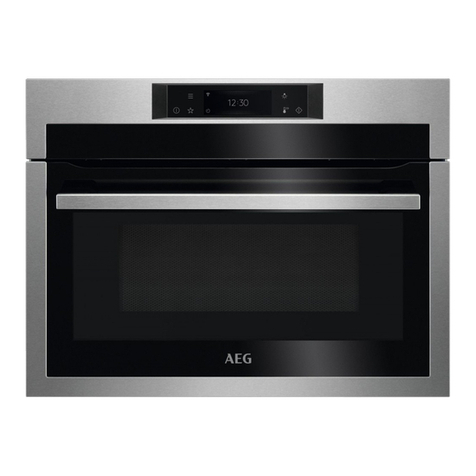
AEG MSE3057CB User manual

USER
MANUAL
MSE3057CB EN User Manual
Microwave Oven

1
CONTENT
CONTENT ................................................................................................................... 1
PRECAUTIONS TO AVOID POSSIBLE EXPOSURE TO EXCESSIVE MICROWAVE ENERGY...... 2
IMPORTANT SAFETY INSTRUCTIONS..................................................................2
INSTALLATION GUIDE............................................................................................ 5
GROUNDING INSTRUCTIONS.................................................................................6
RADIO INTERFERENCE...........................................................................................6
BEFORE CALLING FOR SERVICE ......................................................................... 6
COOKING TECHNIQUES..........................................................................................7
COOKING UTENSILS GUIDE...................................................................................7
SPECIFICATIONS...................................................................................................... 8
PRODUCT DIAGRAM................................................................................................8
TURNTABLE INSTALLATION ..................................................................................9
CONTROL PANEL ................................................................................................... 10
OPERATION INSTRUCTIONS................................................................................ 11
SETTING CLOCK TIME.....................................................................................................11
TIMER FUNCTION............................................................................................................11
EXPRESS COOKING........................................................................................................ 12
MICROWAVE COOKING................................................................................................... 12
GRILL ............................................................................................................................. 12
CONVECTION ................................................................................................................. 13
MICROWAVE+CONVECTION...........................................................................................14
TIME DEFROST................................................................................................................14
WEIGHT DEFROST...........................................................................................................14
FERMENT FUNCTION.......................................................................................................14
MULTI-STAGE COOKING..................................................................................................15
MEMORY FUNCTION........................................................................................................15
CHILD LOCK.....................................................................................................................15
COOKMENU .................................................................................................................... 16
AIR FRY COOK.................................................................................................................17
AUTO COOK.....................................................................................................................20
TROUBLE SHOOTING ............................................................................................... 21
CLEANING AND CARE .............................................................................................. 21
WARRANTY CONDITIONS ............................................................................................... 23
WARRANTY INFORMATION ........................................................................................... 25
2
PRECAUTIONSTOAVOID
POSSIBLEEXPOSURE
TOEXCESSIVE
MICROWAVEENERGY
1.
Do not attempt to operate this oven with the door open as open-door operation
can result in harmful exposure to microwave energy. It is important not to break
or tamper withthe safety interlocks.
2.
Do not place any object between the oven front face and the door or allow
soiled or cleanerresidue to accumulate on sealing surfaces.
3.
Do not operate the oven if it is damaged. It is very important that the oven door
close properly and that there is no damage to the
a)
Door(including any bent),
b)
Hinges and latches(broken or loosened),
c)
Door seals and sealing surfaces.
4.
The oven should not be adjusted or repaired by anyone except qualified service
personnel.
IMPORTANTSAFETY
INSTRUCTIONS
When using electrical appliance basic safety precautions should be followed,
includingthefollowing:
WARNING!--To reduce the risk of burns, electric shock, fire, injury to persons or
exposuretoexcessivemicrowaveenergy:
1.
Read all instructions before usingthe appliance and keep it for future reference.
2.
Use this appliance only for its intended use as described in the manual. Do not
use corrosive chemicals or vapours in this appliance. This type of oven is
specifically designed to heat, cook or dry the food. It is not designed for industrial
orlaboratoryuse.
3.
Do not operate the oven without food.
4.
WARNING!--Only allow children to use the oven without supervision when
adequate instructions have been given so that the child is able to use the oven
in a safe way and understands the hazards of improper use.
5.
WARNING!--When the appliance is operated inthe combinationmode, children
should only use the oven under adult supervision due to the high temperature
generated

3
6.
To reduce the risk of fire in the oven cavity:
➢
Should not heat the food in plastic or paper container, keep an eye on the
oven due to the possibility of ignition.
➢
Removing the winding tape from the paper or plastic bag before putting it in
theoven.
➢
If smoke is observed, switch off or unplug the appliance and keep the door
closed in order to stifle any flames.
➢
Do not use the cavity for storage purposes. Do not leave paper products,
cooking utensils, or food in the cavity when not in use.
➢
The microwave oven is intended for cooking, drying and heating food and
beverages. Drying of clothing and heating of hot/warm pads, slippers,
sponges, damp cloth and similar may lead to risk of injury, ignition or fire.
7.
WARNING!--Liquid or other food must not be heated in sealed containers as
theymayexplode.
8.
Microwave heating of beverage can result in delayed eruptive boiling, therefore
care has to be taken when handle thecontainer.
9.
Do not fry food in the oven. Hot oil can damage oven parts and utensils and
even result in skin burns.
10.
Eggs in their shell and whole hard-boiled eggs should not be heated in
microwave ovens as they may explode even after microwave heating has
ended.
11.
Pierce foods with heavy skins such as potatoes, whole squashes, apples and
chestnutsbeforecooking.
12.
The contents of feeding bottles and baby jars should be stirred or shaken and
thetemperatureshould be checkedbefore serving to avoid burns.
13.
Cooking utensils may become hot because of heat transferred from the heated
food.Potholders may be needed to handle the utensil.
14.
Utensils should be checked to ensure that they are suitable for use in
microwaveoven.
15.
WARNING!--It is hazardous for anyone other than a trained person to carry out
any service or repair operation which involves the removal of any cover which
gives protectionagainst exposureto microwaveenergy.
16.
This Microwave complies with EN 55011/CISPR 11, in this standard it belong to
Class B Group 2 classification. Group 2 equipment: group 2 contains all ISM RF
equipment in which radio-frequency energy in the frequency range 9 kHz to 400
GHz is intentionally generated and used or only used locally, in the form of
electromagnetic radiation, inductive and/or capacitive coupling, for the treatment
of material, for inspection/analysis purposes, or for transfer of

4
electromagnetic energy. Class B equipment is equipment suitable for use in
locations in residential environments and in establishments directly connected
to a low voltage power supply network which supplies buildings used for
domesticpurposes.
17.
This appliance is not intended for use by persons (including children) with
reduced physical, sensory or mental capabilities, or lack of experience and
knowledge, unless they have been given supervision or instruction concerning
use of the appliance by a person responsible for their safety.
18.
Children should be supervised to ensure that they do not play with the
appliance.
19.
The microwave oven is only used in freestanding.
20.
WARNING!--Do not install oven over a range cook top or other heat-producing
appliance.To avoid damage ,the warranty would be avoid with such installation.
21.
The microwave oven should not be placed in the cabinet other than designated
22.
WARNING!--Accessiblepartsmaybecome hot during use.Young children
shouldbe kept away.
23.
WARNING!--If the door or door seals are damaged, the oven must not be
operated until it has been repaired by a competent person.
24.
The appliances are not intended to be operated by means of an external timer
or separateremote-controlsystem.
25.
The microwave oven is for household use only and not for commercialuse.
26.
Never remove the distance holder in the back or on the sides, as it ensures a
minimum distance from the wall for air circulation.
27.
Please securethe turntable beforeyou move the appliance to avoid damages.
28.
CAUTION!--It is dangerous to repair or maintain the appliance by no other than
a specialist because under these circumstances the cover have to be removed
which assures protection against microwave radiation. This applies to changing
the power cord or the lighting as well. Send the appliance in these cases to our
servicecentre.
29.
The microwave oven is intended for defrosting, cooking and steaming of food
only.
30.
Use gloves if you remove any heated food.
31.
Caution! Steam will escape, when opening lids or wrapping foil.
by the manufacturer.

5
INSTALLATIONGUIDE
1.
Make sure that all the packing materials are removed from the inside of the
door.
2.
WARNING!--Check the oven for any damage, such as misaligned or bent door,
damaged door seals and sealing surface, broken or loose door hinges and
latches and dents inside the cavity or on the door. If there is any damage, do not
operate theovenand contact qualified service personnel.
3.
This microwave oven must be placed on a flat, stable surface to hold its weight.
4.
Do not place the oven where heat, moisture, or high humidity are generated, or
nearcombustiblematerials.
5.
Do not operate the oven without glass tray, roller support, and shaft in their
properpositions.
6.
Make sure that the power supply cord is undamaged and does not run under the
oven or over any hot or sharp surface.
7.
The socket must be readily accessible so that it can be easily unplugged in an
emergency.
8. Do not use the oven outdoors.

6
GROUNDING INSTRUCTIONS
This appliance must be grounded. This oven is equipped with a cord having a
grounding wire with a grounding plug. It must be plugged into a wall receptacle
that is properly installed and grounded. In the event of an electrical short circuit,
grounding reduces risk of electric shock by providing an escape wire for the
electric current. It is recommended that a separate circuit serving only the oven be
provided. Using high voltage is dangerous and may result in a fire or other
accidentcausingovendamage.
WARNING!--Improper use of the grounding plug can result in a risk of electric
shock.
Note:
1.
If you have any questions about the grounding or electrical instructions, consult
aqualified electrician or serviceperson.
2.
Neither the manufacturer nor the dealer can accept any liability for damage to
the oven or personal injury resulting from failure to observe the electrical
connectionprocedures.
The wires in this cable main are colored in accordance with the following code:
Green and Yellow = EARTH
Blue = NEUTRAL
Brown = LIVE
RADIO INTERFERENCE
Operation of the microwave oven can cause interference to your radio, TV, or
similar equipment. When there is interference, it may be reduced or eliminated by
takingthefollowingmeasures:
1.
Clean the door and sealing surface of the oven.
2.
Reorient thereceiving antenna of radio or television.
3.
Relocate the microwave oven with respect to the receiver.
4.
Move the microwave oven away from the receiver.
5.
Plug the microwave oven into a different outlet so that microwave oven and
receiverareon differentbranchcircuits.
BEFORECALLINGFORSERVICE
Beforeaskingfor service, please check each item below:
Check to ensure the oven is plugged in securely. If not, remove the plug from

7
the outlet, wait 10 seconds, and plug it in again securely.
Check for a blown circuit fuse or a tripped main circuit breaker. If these are
operatingproperly, testthe outlet with another appliance.
Check toensurethecontrol panelisprogrammedcorrectlyandthetimer is set.
Check to ensure the door is securely closed, engaging the door lock system. If
the door is not properly closed, the microwave energy will not flow inside.
IF NONE OF THE ABOVE RECTIFIES THE SITUATION, THEN CONTACT A
QUALIFIED TECHNICIAN. DO NOT TRY TO ADJUST OR REPAIR THE OVEN
YOURSELF.
COOKING TECHNIQUES
1.
Arrangefood carefully. Place thickest areas towards outside of dish.
2.
Watch cooking time. Cook for the shortest amount of time indicated and add
more as needed. Food severely overcooked can smoke or ignite.
3.
Cover foods while cooking. Covers prevent spattering and help foods to cook
evenly.
4.
Turn foods over once during microwave cooking to every cook foods such as
chicken and hamburger patty. Large items like roasts must be turned over at
leastonce.
5.
Rearrange foods such as meatballs halfway through cooking both from top to
bottom and from the center of the dish to the outside.
COOKINGUTENSILSGUIDE
1.
Microwave cannot penetrate metal. Only use utensils that are suitable for use in
microwave ovens. Metallic containers for food and beverages are not allowed
during microwave cooking. This requirement is not applicable if the
manufacturer specifies size and shape of metallic containers suitable for
microwavecooking.
2.
Do not use recycled paper products when microwave cooking, as they may
contain small metalfragments which may cause sparks and/or fires.
3.
Round /oval dishes rather than square/oblong ones are recommended, as food
incorners tends to overcook.
4.
Narrow strips of aluminum foil may be used to prevent overcooking of exposed
areas. But be carefuldon’t usetoo much andkeep adistance of 1 inch (2.54cm)
between foil and cavity.
The list below is a general guide to help you select the correct utensils.

8
Cookware
Microwave
Grill
Convection
Combination*
Heat–ResistantGlass
Yes
Yes
Yes
Yes
NonHeat–ResistantGlass
No
No
No
No
Heat–Resistant Ceramics
Yes
Yes
Yes
Yes
Microwave–SafePlasticDish
Yes
No
No
No
KitchenPaper
Yes
No
No
No
MetalTray
No
Yes
Yes
No
MetalRack
No
Yes
Yes
No
AluminumFoil & FoilContainer
No
Yes
Yes
No
*Combination:applicableforboth"microwave+grill",and"microwave+convection"
cooking.
SPECIFICATIONS
PowerSupply
230-240V/50Hz
PowerConsumption(Microwave)
1400W
PowerConsumption(Grill)
1250W
PowerConsumption(Convection)
2200W
RatedMicrowavePowerOutput
900W
OperationFrequency
2450MHz
OutsideDimensions
390mm(H)×595mm(W)×410m m(D)
OvenCavityDimensions
220mm(H)×354 mm(W)×375mm(D)
OvenCapacity
30Litres
NetWeight
Approx.19.1kg
Model number
MSE3057CB
Plug Type& Cable Length
SAFplug(SouthAfrica),1010MM
PRODUCTDIAGRAM
1.
Door Safety Lock System
2.
OvenWindow
3.
Shaft
4.
RollerRing
5.
ControlPanel
6.
WaveGuide
(Please do not remove the mica
platecovering the waveguide)
7.
GlassTray
8.
GrillHeater
9.
Metal Rack
10.
Air Fry Kit

9
TurntableInstallation
Hub(underside)
Glasstray
Turntableringassembly
Turntableshaft

10
CONTROLPANEL
•
DISPLAY
Time,powerandindicators aredisplayed.
•
MICROWAVE
Press to selectmicrowave power levels.
•
GRILL
Press to set grill cooking program.
•
COMBI
Press to set microwave and convection
combinationcookingprograms.
•
DEFROST
Press once to defrost food based on time.
Press twice to defrost food based on weight.
•
FERMENT
Press toset fermentation program.
•
CONVECTION TEMPERATURE
Press to set convectioncookingtemperature.
•
CONVECTIONTIME
Press to set convection cooking time.
•
AUTOMENU
Press to set auto cooking program.
•
WEIGHT
Press to set food weight.
•
AIRFRY
Press to set air fry cooking program.
•
DIAL
Turn the dial to set time.
•
TIMER/CLOCK
Press to set timer function and clock time.
•
STOP/CLEAR
Press once to temporarily stop cooking, or twice
tocancelcookingaltogether.
It is also used to set child lock.
•
START /+30 SEC
Press to start cooking programs.
Simply press it repeatedly to set cooking time

11
OPERATION INSTRUCTIONS
➢
When the oven is plugged in for the first time, a beep will sound and the display
will show "00:00" after the LED and nixie tube display on the display board are
scanned from top to bottom.
➢
In the process of setting, without any operation for about 30 seconds the oven will
returntostandby mode.
➢
During cooking, if press STOP/CLEAR button once, the program will be paused,
and then press START/+30 SEC button once to resume. If you press
STOP/ CLEAR button twice, the program will be cancelled.
➢
After cooking end, the display will show End and beep will sound every two
minutes until user press STOP/CLEAR button or open the door.
➢
In the process of operation, press a valid button, the buzzer rings once, but if press
a invalid button, the buzzer rings twice.
➢
The electronically controlling system of the microwave oven has the feature of
cooling. As for any cooking which cooking time above 2 minutes, open the oven
door or stopping state, the oven fan will work about 3 minutes automatically to cool
the oven for prolonging the life span of the oven.
SETTING CLOCK TIME
1. Instandby mode, press TIMER/CLOCK button twice.
2. Turn dial to set hour digit.
3. PressTIMER/CLOCKbuttononce.
4. Turn dial to set minute digit.
5. PressTIMER/CLOCKbuttontoconfirm.
NOTE: This is a 24- hour clock. During cooking or pausing, you can check the
current clocktimeby pressingTIMER/CLOCKbutton.
TIMER FUNCTION
The first way (Time increases):
1. Instandby mode, during cooking or pausing, press TIMER/CLOCK button once.
2. Press START/+30 SEC button once. When the time increases to 95 minutes,
the buzzer gives an alarm for 5 seconds and automatically returns to standby
(or cooking countdown state) at the same time.
The second way (Time decreases):
1. Instandby mode, during cooking or pausing, press TIMER/CLOCK button once.
2. Turn dial to set desired time. The longest time is 95 minutes.

12
3. Press START/+30SECbutton to start.When thecountdown ends, the buzzer will
beep to remind you, and automatically returns to standby (or cooking countdown
state) at the same time.
NOTE:
When the timer is running, you can set cooking function.
Press STOP/CLEAR button once to pause the timing, thenpress START/+30
SEC button once to continue the timing. But if press STOP/CLEAR button twice
to cancel the timing and return to standby.
If in standby mode to set the timer, the display will always show the timing without
returningtostandby mode.
After the timer is started, the indicator light of TIMER/CLOCK button is always on.
EXPRESS COOKING
Use this feature to program the oven to microwave food at 100% power conveniently.
In standby mode, press START/+30 SEC button repeatedly to set cooking time (Each
press to increase 30 seconds, and up to 95 minutes.), the oven will start working
automatically. During cooking, you can add the cooking time by pressing START/+30
SEC button.
MICROWAVE COOKING
1. Instandby mode, pressMICROWAVE buttonrepeatedlyto selectacookingpower
level.
2. Turn dial to set cooking time. The longest time is 95 minutes.
3. Press START/+30 SECbutton tostart.
Press MICROWAVE button to set cooking power level:
PressMICROWAVEbutton
Power(Display)
Once
100%(HI)
Twice
80%(M-HI)
3 times
60%(MED)
4 times
40%(M-LO)
5 times
20%(LO)
GRILL
Grill cooking is particularly useful for thin slices of meat, steaks, chops, kebabs,
sausages and pieces of chicken. It is also suitable for hot sandwiches and au gratin
dishes.
1. Instandby mode, press GRILL button once.
2. Turn dial to set cooking time. The longest time is 95 minutes.
3. Press START/+30 SECbutton tostart.

13
CONVECTION
During convectioncooking, hot airis circulated throughout the ovencavity to brown
and make crisp foods quicklyand evenly. This oven can be programmed for ten
differentcookingtemperatures(110℃→120℃→130℃→140℃
→150℃→160℃→170℃→180℃→190℃→200℃).Thelongestcookingtimeis95
minutes.
To preheat and cook with convection:
Your oven can be programmed to combine preheating and convection cooking
operations.
1.
Instandby mode, press CONVECTIONTEMPERATURE button once.
2.
Turn dial to select a temperature.
3.
Press START/+30 SEC button once to confirm. Beeps will sound when the
designatedtemperatureisreached.
4.
Open the door, place container of food at the center of the turntable.
5.
Turn dial to set cooking time.
6.
Press START/+30 SECbuttontostart.
NOTE:
During preheating, youcan check thecooking temperatureby pressing
CONVECTIONTEMPERATUREbutton.
During preheating, you can press STOP/CLEAR once or directly open the oven
doortoexitthepreheating state, andthedisplay will show "0:00".Atthis time, turn
dial to set cooking time and press START/+30 SECbutton to start the program.
The longest preheat time is 30 minutes, and the preheat time cannot be set.
When the oven reaches preheat temperature, if there is not any operation within
30minutes, the program will end automatically.
To cook with convection:
1.
Instandby mode, press CONVECTIONTEMPERATURE button once.
2.
Turn dial to select a temperature.
3.
Press CONVECTIONTIME buttononce
4.
Turn dial to set cooking time.
5.
Press START/+30 SECbuttontostart.
NOTE: During cooking, you can check the cooking temperature by pressing
CONVECTIONTEMPERATUREbutton.

14
MICROWAVE+CONVECTION
This oven has two pre-programmed settings that make it easy to cook with both
convectionheatandmicrowaveautomatically.
1. Instandby mode, press COMBIbutton repeatedlyto select combination mode
"170°+HI"or"200°+HI".
2. Turn dial to set cooking time.The longest time is 95 minutes.
3. Press START/+30 SECbutton tostart.
TIME DEFROST
1. Instandby mode, press DEFROSTbuttononce.
2. Turn dial to set defrosting time. The longest time is 95 minutes.
3. Press START/+30 SECbutton tostart.
NOTE: During defrosting, the system will pause and sound to remind user to turn food
over, afterthat, press START/+30 SECbutton to resume.
WEIGHT DEFROST
The defrosting time and power level are automatically set once the food weight is
programmed. The frozen food weight ranges from 100 g to 1000 g.
1. Instandby mode, press DEFROSTbuttontwice.
2. Turn dial to to set food weight.
3. Press START/+30 SECbutton tostart.
NOTE: During defrosting, the system will pause and sound to remind user to turn food
over, afterthat, press START/+30 SECbutton to resume.
FERMENT FUNCTION
Prepare the dough, put it into a deeper container, spray water in the container slightly
beforefermentation,seal the fresh-keeping film, andstartthe program.
1. In standby mode, press FERMENT button once. The display will show the default
fermentationtime60minutes
2. Turn dial to to set fermentation time. The time ranges from 60 minutes to 95
minutes.
3. Press START/+30 SECbutton tostart.

15
MULTI-STAGE COOKING
Your oven can be programmed for up to 2 automatic cooking sequences.
Suppose you want to set the following cooking program.
Microwavecooking
↓
Microwavecooking(with lowerpowerlevel)
1.
Input the first microwave cooking program. Do not press START/+30 SEC button.
2.
Input the second microwave cooking program
3.
Press START button to start
NOTE: Express cooking, auto cook menus, air fry menus and convection with preheat
can’t be set in multi-stage cooking.
MEMORY FUNCTION
This function is to remember the last set power level. When this function is selected
next time, the default power level is the last set power level. It takes effect only after
pressing START/+30 SECbutton to start.
NOTE: When the microwave oven is powered on again, the system will
automatically restore the default setting. The microwave and convection combination
can memorize the power level, defrost memory defrosting type, auto cook menus
memory the menu defaultcode.
CHILD LOCK
Thelock prevents unsupervisedoperationby children.
To set: In standby mode, press and hold STOP/CLEAR button for 3 seconds, then a
beep will sound and the indicator light will turn on, the oven will auto enter child lock
mode. In the lock state, all buttons are disabled.
To cancel: In child lock mode, press and hold STOP/CLEAR button for 3 seconds to
cancel the childlock, a beep will sound and the indicator light will disappear.

16
COOK MENU
For the following food, it is recommended to use time and power for better cooking effect.
Food type
Cooking
function
Power/Temperature
Weight/Share
Cooking
time
Beverage /
coffee
Microwave
100%
1 cup
1:30
2 cups
2:40
3 cups
3:50
Popcorn
Microwave
100%
100 g
2:00~3:00
Auto reheat rice
Microwave
100%
200 g
1:30
300 g
2:00
400 g
2:30
500 g
3:00
600 g
3:30
700 g
4:00
800 g
4:30
Potatoes
Microwave
100%
230 g
5:00
460 g
8:00
Bake Pizza
Conv
180℃
150 g
14:00
300 g
15:00
450 g
16:00
Cake
Conv
140℃
475 g
55:00
Chicken
Conv combi
200℃
800 g
27:00
1000 g
30:00
1200 g
33:00
1400 g
36:00
Fries/Chicken
nuggets
Conv combi
200℃
150-200g
21:00
201-250g
24:00
251-300g
27:00
301-350g
30:00
Chicken wings
Conv combi
200℃
150-250g
20:00
251-350g
24:00
351-450g
26:00
451-550g
28:00

17
AIR FRY COOK
For the following food, it is not necessary to program the cooking time and power. It is
sufficient to indicate the type of food that you want to cook as well as the weight or
servings of this food.
1. Instandby mode, pressAIRFRY button once.
2. Turn dial to select a food code.
3. Press WEIGHTbuttononce.
4. Turn dial to select a food weight or servings code.
5. Press START/+30 SECbutton tostart.
NOTE: During cooking, the system will pause to remind user to turn food over,
after that, press START/+30 SECbutton to resume.

18
Air fry menus:
FoodCode
Food
Weight or Serving Code
WeightorServing
F-1
PotatoWedges
1
150-200g
2
201-250g
3
251-300g
4
301-350g
F-2
FrenchFries
1
150-200g
2
201-250g
3
251-300g
4
300-350g
F-3
Popcorn/Chicken
Nuggets
1
150-200g
2
201-250g
3
251-300g
4
301-350g
F-4
FriedSpringRolls
1
150-200g
2
201-250g
3
251-300g
4
301-350g
F-5
Satay Pork
1
150-250g
2
251-350g
3
351-450g
4
451-550g
F-6
PorkChop
1
100-150g
2
151-250g
3
251-350g
PorkSteak
1
100-150g
2
150-250g
3
4 251-350g
351-450g
F-7

19
F-8
ChickenBreast
(FriedChicken)
1
150-250g
2
251-350g
3
351-450g
4
451-550g
F-9
ChickenWings
1
150-250g
2
251-350g
3
351-450g
4
451-550g
F-10
ChickenDrumsticks
1
100-200g
2
201-300g
3
301-400g
4
401-500g
F-11
Beef or Pork
Hamburgers
120-150g/serving)
1
2servings
2
3servings
3
4servings
4
5servings
F-12
FriedStreakyPork
1
150-250g
2
251-350g
3
351-450g
4
451-550g
F-13
BreadFried Fish
100-150g/serving
1
1serving
2
2servings
3
3servings
4
4servings
F-14
PorkBacon(added)
1
100-200g
2
201-300g
3
301-400g
Table of contents
Other AEG Microwave Oven manuals

AEG
AEG EX 30 LF User manual

AEG
AEG MICROMAT COMBI 625 E User manual

AEG
AEG MC2662E User manual

AEG
AEG MCC4061E User manual

AEG
AEG MICROMAT DUO 230 User manual

AEG
AEG MFB25222S-MB User manual

AEG
AEG MFB295DB User manual

AEG
AEG KMK561000M User manual

AEG
AEG Micromat 112 Z User manual

AEG
AEG MICROMAT DUO 3214 L User manual

AEG
AEG COMBIQUICK 7000 Series User manual

AEG
AEG KMK968000T User manual

AEG
AEG MC1752E User manual

AEG
AEG MFB25222D-MB User manual

AEG
AEG CMK36506MM User manual

AEG
AEG KME768080M User manual

AEG
AEG MCD1751E User manual

AEG
AEG MICROMAT DUO 4274 L User manual

AEG
AEG KMK565000X User manual

AEG
AEG KME561000M User manual