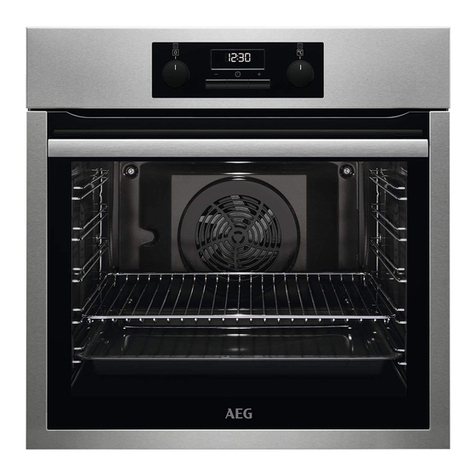
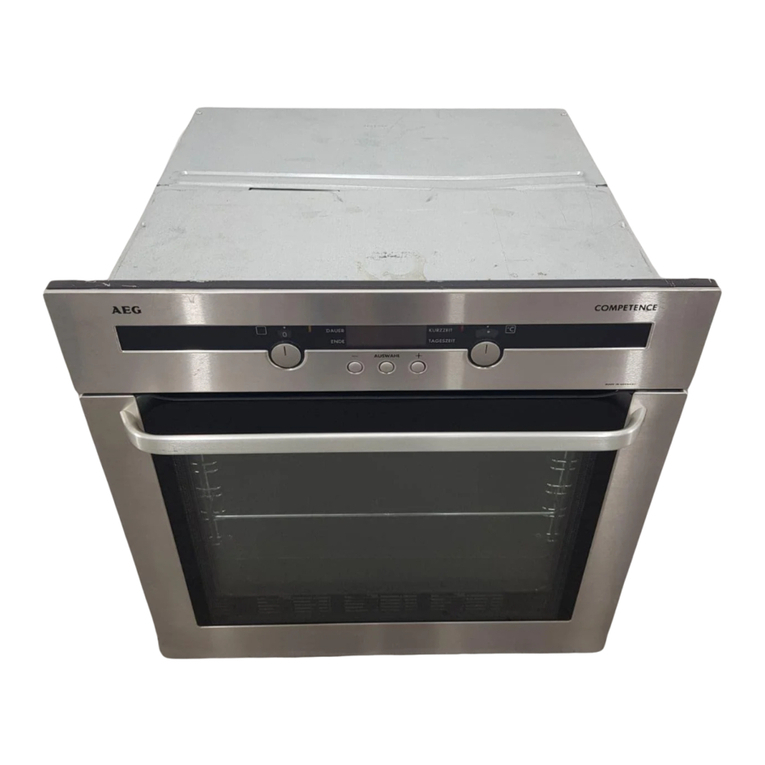
AEG Competence 32081 B User manual

COMPETENCE
32081
B
Build-In-Double-Oven
Operating
Instructions

Thank
you
for
purchasing
an
AEG
appliance,
we
are
confident
you
will
enjoy
using
the
app-
liance
and
also
find
cooking
easier.
To
enable
you
to
use
your
appliance
effectively
and
safely,
please
read
this
instruction
book
carefully
before
installing
or
using
the
appliance,
and
retain
for
future
reference.
if
you
require
further
assistance
or
advice,
please
contact
our
customer
care
Department
either
by
letter
or
telephone.
Customer
Care
Department
*
AEG
Domestic
Appliances
Limited
PO
Box
47
Newbury
Berkshire
RG14
5XL
Tel.:
01635
572700
Fax:
01635
42970
Accessories
The
following
accessories
are
available
as
optional
extras,
please
consult
the
AEG
price
list
or
contact
your
retailer.
Catalytic
liners
Baking
Sheet
Meat
Tin
GUTEK800
10/96
UK

‘
Important
Safety
Information
Safety
Instructions
Environmental
Information
Technical
Data
Description
of
the
appliance
Control
panel
Accessories
’
Before
first
use
Setting
the
time
of
day
Pre-cleaning
before
use
Electronic
Clock
Minute
minder
Automatic
switch
off
Automatic
switch
on
and
off
Main
Oven
Controls
_
Cooking
Functions.
Shelflevels
Fat
Filter
Operating
the
main
oven
Secondary
Oven
Controls
Cooking
Functions
Shelf
levels
Operating
the
secondary
oven
Cooking
Methods
Baking
Baking
Tables
Hints
and
Tips
for
baking
Roasting
Roasting
Tables
Grilling
(secondary
oven)
Defrosting
Cleaning
and
care
Interior
and
External
Cleaning
Cleaning
the
fat
filter
Care
of
Catalytic
liners
(optional
extra)
Removing/refitting
shelf
supports
Removing/refitting
oven
door
Replacing
oven
light
bulb/cleaning
glass
i!
Something
Not
Working
Service
Guarantee
Conditions
_
1E806
10/96
UK
oad.
NO

These
warnings
are
provided
in
the
interests
of
your
safety.
Ensure
you
fully
under-
stand
them
before
installing
or
using
the
appliance.
Your
safety
is
of
paramount
importance.
If
you
are
unsure
about
the
meaning
of
these
warnings
contact
the
Customer
Care
Department
for
assistance.
Installation
The
oven
must
be
installed
according
to
the
instructions
supplied.
Any
electrical
installation
work
must
be
undertaken
Dy
a
qualified
electrician/competent
person.
This
oven
is
heavy,
care
must
be
taken
when
moving
it.
Do
not
try
to
move
the
oven
by
pul-
ling
the
door
handles.
All
packaging,
both
inside
and
outside
the
oven
must
be
removed
before
the
oven
is
used.
it
is
dangerous
to
alter
the
specifications
or
modify
the
oven
in
any
way.
After
installation
please
dispose
of
the
packaging
with
due
regard
for
safety
and
the
environment.
Child
Safety
This
oven
is
designed
to
be
operated
by
adults
and
children
under
supervision.
Young
chil-
dren
must
not
be
allowed
to
tamper
with
the
controls
or
play
near
or
with
the
oven.
The
oven
and
accessible
parts
become
hot
when
the
oven
is in
use.
Keep
children
away
until
it
has
cooled.
During
Use
Do
not
use
this
oven
if
it
is
in
contact
with
water.
Never
operate
it
with
wet
hands.
Take
great
care
when
heating
fats
and
oils
as
they
will
ignite
if
they
become
too
hot.
This
oven
has
been
designed
for
cooking
edible.foodstuffs
only,
and
must
not
be
used
for
any
other
purposes.
Never
place
plastic
or
any
other
material
which
may
melt
in
or
on
the
oven.
Fruit
juices
dripping
from
an
ovendish
may
leave
marks
on
the
enamel,
which
cannot
be
removed.
Use
a
baking
tray
to
protect
the
enamel.
Do
not
leave
the
grill
pan
handle
in
position
when
grilling
and
ensure
oven
gloves
are
used
to
remove
and
replace
the
handle,
as
it
willbecome
hot.
—
Always
use
oven
gloves
to
remove
and
replace
food
in
the
oven.
SIB800
10/96
UK-SIB807
10/96
UK-SIB802
10/96
UK-SIB803
10/96
UK

S$IB803
10/96
UK-SI8804
10/96
UK-SIB805
10/96
UK
Ensure
that
all
vents
are
left
unobstructed
to
ensure
ventilation
of
the
oven
cavity.
Never
line
any
part
of
the
oven
with
aluminium
foil.
Do
not
allow
heat
proof
cooking
material,
€.g.
roasting
bags
to
come
into
contact
with
oven
elements
because
they
may
catch
fire.
Always
stand
back
from
the
oven
when
opening
the
oven
door
to
allow
any
build
up
of
steam
or
heat
to
release.
Stand
clear
when
opening
the
drop
down
oven
doors.
Support
the
doors
using
the
handles
until
fully
open.
:
Do
not
place
sealed
cans
or
aerosols
inside
the
oven.
They
may
explode
if
they
are
he-
ated.
Ensure
that
all
control
knobs
are
in
the
OFF
position
when
not
in
use.
Do
not
stand
on
open
oven
doors.
Do
not
hang
towels,
dishcloths
or
clothes
from
the
oven
or
its
handles.
Cleaning
and
Maintenance
The
oven
is
heavy
and
care
must
be
taken
when
moving
it.
This
oven
should
be
kept
clean
at
all
times.
A
build-up
of
fats
or
other
foodstuffs
could
result
in
a
fire,
especially
in
the
grill
pan.
Do
not
leave
cookware
containing
foodstuffs,
e.g.
fat
or
oil
in
the
oven
in
case
it
is
inadver-
tently
switched
on.
Always
allow
the
cooling
fan
to
cool
the
oven
down
before
switching
off
at
the
wall
prior
to
carrying
out
any
cleaning/maintenance
work.
Only
clean
this
oven
in
accordance
with
the
instructions
given
in
this
book.
Service
Repairs
should
not
be
carried
out
by
inexperienced
persons
as
this
may
cause
injury
or
ser-
ious
malfunction.
This
oven
should
only
be
serviced
by
an
authorised
AEG
Service
Engineer
and
only
genuine
approved
spare
parts
should
be
used.

important
Safety
Instructions
Environmental
Information
Packaging
AEG
is
an
environmentally
conscious
company,
packaging
materials
are
therefore
kept
to
a
minimum.
All
transit
packaging
materials
are
environmentally
compatible
and
can
be
reused.
Wood
is
untreated.
The
cardboard
boxes
consist
of
between
80-100
%
recycled
paper.
The
sheet-
ing
is
made
out
of
polyethylene
(PE)
and
the
strapping
of
polystyrol
(PS)
which
are
pure
hy-
drocarbon
compounds
and
can
be
recycled.
By
treating
and
re-using
them,
raw
materials
can
be
saved
and
the
volume
of
waste
reduced.
Please
dispose
of
the
packaging
with
due
care
for
the
environment.
Old
appliances
When
disposing
of
your
old
appliance:
-
Make
the
appliance
unusable
by
cutting
off
the
cable,
and
remove
any
door
catches
to
en-
sure
small
children
cannot
become
trapped
inside.
Help
to
keep
your
country
tidy
-
use
an
authorised
disposal
site.
EVA800-1
10/96
UK

MA807
10/96
UK-MA801
10/96
UK
Technical
Data
-
Competence
32081
B
Aperture
Dimensions
Height
88.5cm
Width
59.2cm
Depth
.
56.3cm
Internal
Oven
Dimensions
(Main
Oven)
Height
33.0cm
Width
45.0cm
Depth
41.0cm
Oven
Capacity
~
61.0Ltr.
Oven
Ratings
(Main
Oven)
Oven
Element
1840W
Convection
Fan
30W
Oven
Light
40W
Cooling
Fan
20W
Total
Rating
1950
W
Internal
Oven
Dimensions
(Secondary
Oven)
Height
—
18.0cm
Width
45.0cm
Depth
41.0cm
Oven
Capacity
33.0
Ltr.
Oven
Ratings
(Secondary
Oven)
Oven
Element
920
W
Grill
Element
1840W
Double
Grill
Element
2800
W
Total
Rating
‘2800
W
-
Total
Connected
Load
4750
W
Cable
Cable
Cross-section
6mm
Fuse
(min.)
;
30
amp
C
€
This
appliance
complies
with
the
following
EC
Directives:
LVD
(Low
Voltage
Directive)
73/23/EC
dated
19.
02.
1973
EMC
(Electromagnetic
Compatibility)
89/336/EC
dated
03.
05.
1989
(including
amendment
Directive
91/31/EC)
This
appliance
must
be
installed
by
a
qualified
competent
person
in
accordance
with
exist-
ing
rules
and
regulations.
If
this
appliance
is
not
installed
in
accordance
with
the
instructions
supplied,
the
wolealy
will
not
be
valid.

A.
Temperature
selector
for
the
main
oven
B
Cc
D
.
Pilot
light
for
oven
.
Thermostat
control
light
for
the
main
oven
.
Electronic
timer
for
the
main
oven:
7.
Minute
minder
button
2.
Button
to
set
cooking
duration
3.
Button
to
set
end
of
cooking
time
4.
Selector
button
for
automatic
or
manual
operation
5.
Time
selection
(increase
and
decrease)
buttons
E.
Thermostat
control
light
for
secondary
oven
F.
Temperature
selector
for
the
secondary
oven
G.
Cooking
function
selector
for
the
secondary
oven
AUS805
10/96
UK

VBI802
10/96
UK
Oven
Accessories
Wire
Shelf,
large
x
2
Meat
Tin
Grill
Pan
.
,
Grill
Pan
Grid
Grilt
Pan
Handle

10
Description
of
the
:
Anti-tip
The
wire
shelves
and
meat
tray
are
fitted
with
an
anti-tip
device,
so
that
they
cannot
be
pulled
out
completely
by
accident.
Ensure
that
these
are
fitted
correctly,
with
the
shelf
stop-
pers
at
the
rear.
Before
use
|
Ensure
ail
packaging
inside
the
oven
has
been
removed.
Wipe
down
the
front
of
the
appliance
with
a
damp
cloth.
Do
not
use
caustic
or
abrasive
cleaners,
as
these
will
damage
the
surface
of
the
product
(see
maintenance
and
cleaning).
Before
using
the
oven
for
the
first
time
the
oven
should
be
pre-cleaned
as
described
later
in
this
section,
however
before
this
cleaning
operation
can
be
carried
out
the
time
of
day
must
be
set
on
the
electronic
timer.
Electronic
timer
—
Setting
the
time
of
day
As
soon
as
the
appliance
is
switched
on
at
the
mains
supply
(and
also
after
a
power
cut),
the
clock
display
will
flash.
Before
the
oven
can
be
operated
you
will
need
to
set
the
time
of
day.
COMPETENCE
=|
1.
Press
buttons
2[h]
and
3]
simultaneously.
2.
Press
buttons
5
{O}
or
|}
until
the
correct
time
of
day
shows
in
the
display.
VBI803-1
10/96
UK-VBI800-1
10/96
UK,

VBI804
10/96
UK-KZ800-1
10/96
UK
Pre-cleaning
the
oven
before
use
Before
using
the
oven
for
the
first
time
all
accessories
(shelf
supports,
wire
shelves
etc)
should
be
washed
with
warm
soapy
water
(warm
water
with mild
detergent),
and
the
oven
heated
empty
for
1
hour
to
burn
off
any
residue
from
the
internal
surfaces.
To
burn
off
residue
from
internal
surfaces
During
this
operation
an
unpleasant
odour
may
be
emitted,
it
is
therefore
advisable
to
open
a
window
for
ventilation.
Main
oven
1.
Turn
the
temperature
selector
A
to
250
°C.
Secondary
oven
1.
Set
the
function
selector
G
to
conventional
cooking
[=]
2.
Turn
the
temperature
selector
F
to
250
°C.
When
the
oven
has
cooled,
wipe
down
with
a
warm
soapy
water.
Clean
all
the
accessories
and
shelf
supports
in
the
same
way.
14

Operating
the
Electronic
Clock
To
set
the
Minute
minder
1.
Press
button
1
[Q]
and
2.
Press
buttons
5
[©]
or
[6]
until
the
display
shows
the
time
required.
When
the
selected
time
has
elapsed
you
will
hear
an
audible
signal
(which
will
switch
off
au-
tomatically
after
approximately
2
minutes).
To
switch
off
the
signal
press
button
1
[Q].
The
display
will
show
the
time
of
day.
Programming
the
main
oven
to
switch
off
automatically
The
main
oven
can
be
programmed
to
switch
off
automatically.
To
programme
the
Main
oven
to
switch
off
1.
Set
the
required
temperature
with
temperature
selector
A.
2.
Press
button
2{44
and
enter
the
cooking
time
required
with
buttons
5
[©]
and
(6).
The
“AUTO”
symbol!
will
light
up
(Automatic
operation)
and
the
oven
will
switch
off
auto-
matically
when
the
cooking
time
has
elapsed.
At
the
end
of
the
cooking
period,
the
oven
will
switch
off,
the
audible
signal
will
sound
and
the
“AUTO”
symbol
will
flash.
To
switch
off
the
audible
signal
button
4
(al.
Press
button
4
[8]
again
to
switch
off
the
flashing
AUTO
[9]
symbol
and
return
the
oven
to
manual
function.
Turn
the
temperature
selector
dial
to
the
OFF
position.
To
cancel
a
programme
1.
Press
button
2(h],
and
return
the
length
of
cooking
time
to
zero
using
buttons
5
[6]
and
(@).
|
KZ800-1
10/86
UK-BAA802
10/96
UK
42
|
2.
Press
button
4
[8]
to
return
the
cooker
to
manual
function.

BAAS803
10/96
UK
Programming
the
main
oven
to
switch
on
and
off
automatically
|
The
main
oven
can
be
programmed
to
switch
on
and
off
automatically.
1.
Set
to
required
temperature
using
temperature
selector
A.
2.
Press
button
2)
and
select
the
length
of
cooking
time
required
using
buttons
5[©]
and
().
3.
Press
button
34
and
enter
the
required
finish
time
using
buttons
5
[6]
and
[@).
The
[@]
symbol
and
the
time
of
day
will
appear
again
in
the
display.
The
oven
pilot
light
will
illuminate
when
the
oven
switches
on.
The
thermostat
control
light
will
illuminate
while
the
oven
is
heating,
and
will
cycle
on
and
off
during
cooking
to
show
that
temperature
is
being
maintained.
At
the
end
of
the
cooking
period,
the
oven
will
switch
off,
the
audible
signal
will
sound
and
the
[i]
symbol
will
flash
To
switch
off
the
audible
signal
press
button
4[8}.
To
return
the
oven
to
manual
operation
press
button
4
[i],
and
turn
the
temperature
Off.
re
13

14
Main
Oven
Controls
for
the
Main
Oven
A.
Temperature
selector,
adjustable
from
50-275
°C
B.
Oven
pilot
light
C.
Thermostat
control
light
D.
Electronic
timer
for
bottom
oven
only
with:
.
Minute
minder
button
.
Button
to
set
cooking
duration
time
for
the
oven
.
Button
to
set
end
of
cooking
time
for
the
oven
.
Selector
button
for
automatic
or
manual
operation
.
Time
selection
(increase
and
decrease)
buttons
OhQNM
—
G
-
COMPETENCE
BBE803
10/86
UK

EBB810
10/96
UK-EBB808
10/96
UK-EBB802
10/96
UK-ESH800
10/96
UK
Functions
—
Main
Oven
The
main
oven
is
a
hot
air
oven,
Ventitherm
cooking.
ied
Oven
Lighting
The
oven
light
will
be
on
when
the
oven
is
in
use,
however
you
may
select
this
function
to
illuminate
the
oven
for
cleaning
purposes.
Ventitherm
fan
cooking
The
main
oven
is
a
fan
oven
only.
A
fan
in
the
rear
of
the
oven
ensures
that
hot
air
is
continu-
ously
circulated
around
the
oven,
allowing
you
to
cook,
bake
and
roast
simultaneously
us-
ing
any
shelf.
This
cooking
method
uses
lower
temperatures
than
conventional
cooking
and
is
therefore
highly
energy
efficient.
‘|.
Shelf
levels
—
main
oven
The
oven
has
shelf
supports
on
either
side,
which
provide
6
cooking
levels.
Please
note
that
when
using
the
cooking
tables
provided
in
this
instruction
book,
the
levels
are
counted
from
the
top
downwards.
15

16
Fat
filter
for
the
main
oven.
The
fat
filter
supplied
with
the
appliance
protects
the
fan
against
soiling.
The
filter
must
al-
ways
be
used
when:
~—
Cooking
meat
in
an
uncovered
container
using
the
Ventitherm
cooking
mode
(fan
oven).
Note
Do
not
use
the
fat
filter
when
baking.
Fitting
the
fat
filter.
Hold
the
fat
filter
by
the
handle
and
fit
both
tabs
downwards
into
the
slots
in
the
back
panel
of
the
oven,
thereby
covering
the
fan
opening.
Please
note
that
the
fat
filter
must
cover
the
fan
opening
completely.
Removing
the
fat
filter.
Hold
the
fat
filter
by
the
handle,
unhook
and
pull
upwards.
For
information
on
cleaning
the
fat
filter,
please
see
the
maintenance
and
cleaning
section.
FF801-1
10/96
UK

BEA806
10/96
UK
1.
Turn
cooking
function
selector
A
to
the
required
temperature.
2.
Set
the
temperature
with
temperature
selector
B.
The
oven
pilot
light
will
illuminate
when
the
oven
is
switched
on.
The
oven
thermostat
control
light
will
illuminate
while
the
oven
is
heating
up
and
will
cycle
on
and
off,
when
the
pre-selected
temperature
has
been
reached.
it
will
continue
to
cycle
on
and
off
to
show
that
the
set
temperature
is
being
maintained.
Pre-Heating
In
general
it
is
not
necessary
to
pre-heat
the
oven
when
using
Ventitherm
roasting.
However,
if
pre-heating
is
required
select
the
required
temperature
for
the
oven.
When
the
oven
has
reached
the
pre-selected
temperature
the
thermostat
control
light
D
will
go
out.
17

18
B
Oven
pilot
light
E.
Secondary
Oven
thermostat
control
light
F.
Temperature
selector
adjustable
from
50-275
°C
G.
Cooking
function
selector
Cooking
functions
—
Secondary
Oven
Oven
Lighting
The
oven
light
will
be
on
when
the
oven
is
in
use,
however
you
may
select
this
function
to.
illuminate
the
oven
for
cleaning
purposes..
=
Conventional
Cooking
This
method
of
cooking
uses
the
top
and
bottom
element.
To
ensure
a
uniform
distribution
of
heat,
you
should
cook
on
one
level
only.
[vee]
Grilling
The
source
comes
from
grill
elements
mounted
in
the
oven
ceiling.
This
method
of
grilling
is
particularly
suitable
for
grilling
flat
pieces
of
meat
e.g.
steaks,
fish
or
toast.
[Fr
Dual
circuit
grill
You
can
use
the
large
grill
surface
[F]
for
grilling
or
toasting
larger
quantities.
For
grilling
smalter
quantities
(e.g.
steaks,
possibly
4
pieces
of
toast)
use
the
smalier
grill
area
ead
BBE804
10/96
UK-EBB807
10/96
UK

ESH801
10/96
UK-BEA804
10/96
UK
Shelf
levels
-
Secondary
Oven
The
oven
has
shelf
supports
on
either
side,
which
provide
4
cooking
levels.
Please
note
that
when
using
the
cooking
tables
provided
in
this
instruction
book
the
levels
are
counted
from
the
top
downwards.
COMPETENCE
€2%9
1.
Turn
the
cooking
function selector
G
to
the
required
cooking
method.
2.
Set
the
required
temperature
with
temperature
selector
F.
.
The
oven
pilot
B
will
illuminate.
The
oven
thermostat
control
light
E
will
remain
illuminated
while
the
oven
is
heating
up,
it
will
then
cycle
on
and
off
when
the
pre-selected
temperature
has
been
reached
and
will
continue
to
cycle
on
and
off
to
show
that
the
temperature
is
being
maintained.
Pre-Heating
If
pre-heating
is
required,
set
the
temperature
required.
When
the
oven
reaches
the
correct
temperature
the
thermostat
light
E
will
cycle
on
and
off.
19

20
Bakeware
How
bakeware
affects
browning:
4.
Bakeware,
which
is
dark
in
colour,
has
a
non-stick
coat
or
is
made
from
aluminium
ab-
sorbs
more
heat
which
is
then
transferred
to
the
cake
resulting
in
shorter
cooking
times,.
lower
energy
consumption
and
increased
base
browning.
2.
Bakeware
which
is
light
in
colour
or
is
made
of
tin
reflects
the
heat
away
resulting
in
longer
cooking
times
and
less
base
browning.
Shelf
Levels
When
using
the
following
cooking
charts
please
note
that
the
shelf
levels
are
counted
from
the
top
downwards.
Baking
using
the
conventional
cooking
function
in
the
secondary
oven
(upper/ower
ele-
ments)
should
be
carried
out
on
one
shelf
level
only.
When
possible
place
cakes
in
trays
in
the
centre
of
the
shelf.
If
you
are
using
two
trays
place
the
trays
side
by
side
on
one
shelf,
the
cooking
times
may
have
to
be
extended.
You
can
bake
on
three
shelf
levels
at
the
same
time
when
using
the
Ventitherm
{fan}
cooking
method.
1
Baking
tray
Use
shelf
level
3
2
Baking
trays
Use
shelf
levels
3
and6
3
Baking
trays
Use
shelf
levels
1,3
and6
BTB801-1
10/96
UK
Other manuals for Competence 32081 B
1
Table of contents
Other AEG Oven manuals

AEG
AEG COMPETENCE 54081 B User manual

AEG
AEG BPK556220B User manual

AEG
AEG COMPETENCE B1180-1 User manual

AEG
AEG DUK431110M User manual

AEG
AEG COMPETENCE B8831-4 User manual

AEG
AEG BEE435111M User manual

AEG
AEG BPK35102YM User manual

AEG
AEG BSE77280M User manual

AEG
AEG BP532310M User manual

AEG
AEG Competence 3215V User manual

AEG
AEG BP501432WM User manual

AEG
AEG Competence E2191-4 Operation manual

AEG
AEG COMPETENCE B3000-1 User manual
AEG
AEG BPK948330T User manual

AEG
AEG BEK35502HM User manual

AEG
AEG BE2003021 User manual

AEG
AEG B 88.1 L User manual

AEG
AEG COMPETENCE 3050 B User manual

AEG
AEG Competence 53081 B User manual

AEG
AEG COMPETENCE 7658 B User manual