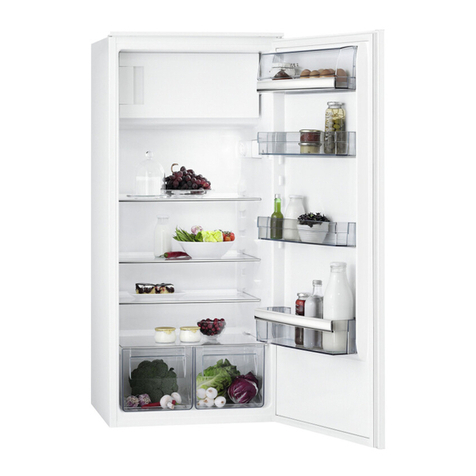
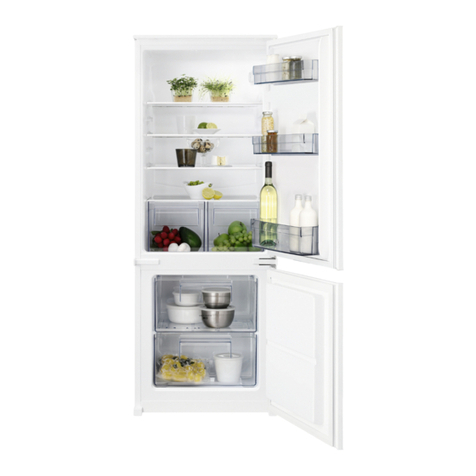
AEG SANTO 70312 User manual

SANTO 70312-1 KG
Fridge-freezer
Operating Instructions
A G Hausgeräte GmbH
Postfach 1036
D-90327 Nürnberg
http://www.aeg.hausgeraete.de
© Copyright by A G
2223 338-01 05/06 Subject to change without notice

2
Dear customer,
Before placing your new refrigerator/freezer into operation please read the-
se operating instructions carefully. They contain important information for
safe use, for installation and for care of the appliance.
Please keep these operating instructions for future reference. Pass them on
to possible new owners of the appliance.
Notes which are important for your safety or for the proper functioning of
the appliance are stressed with a warning triangle and/or with signal words
(Warning!, Caution!, Attention!). Please observe the following carefully.
Additional information regarding operation and practical applications of
the appliance appear after this symbol.
Tips and notes concerning economical and environmentally sound use of
the appliance are marked with the flower.
In the event of a malfunction, these operating instructions contain infor-
mation on how to rectify faults yourself, see the “Something Not Working”
section.
For futher assistance contact your local A G service Force Centre, see the
chapter “Service and Spare Parts.
To buy accessories, consumables and spare parts at our online shop please
visit: http://www.aeg-electrolux.co.uk

3
Contents
Safety . . . . . . . . . . . . . . . . . . . . . . . . . . . . . . . . . . . . . . . . . . . . . . . . . .4
Disposal . . . . . . . . . . . . . . . . . . . . . . . . . . . . . . . . . . . . . . . . . . . . . . . .5
Appliance Packaging Information . . . . . . . . . . . . . . . . . . . . . . . . . . . . . .5
Disposal of old Appliances . . . . . . . . . . . . . . . . . . . . . . . . . . . . . . . . . . . . .5
Remove Transport Packaging . . . . . . . . . . . . . . . . . . . . . . . . . . . . . . .5
peration and control panel Fridge . . . . . . . . . . . . . . . . . . . . . . . . . .7
Starting up - Setting the Temperature . . . . . . . . . . . . . . . . . . . . . . .8
Interior Accessories . . . . . . . . . . . . . . . . . . . . . . . . . . . . . . . . . . . . . . .9
Storage shelves . . . . . . . . . . . . . . . . . . . . . . . . . . . . . . . . . . . . . . . . . . . . . .9
Door rack . . . . . . . . . . . . . . . . . . . . . . . . . . . . . . . . . . . . . . . . . . . . . . . . . . .9
Humidity control . . . . . . . . . . . . . . . . . . . . . . . . . . . . . . . . . . . . . . . . . . . . .9
Drawer . . . . . . . . . . . . . . . . . . . . . . . . . . . . . . . . . . . . . . . . . . . . . . . . . . . .10
Fresh food refrigeration . . . . . . . . . . . . . . . . . . . . . . . . . . . . . . . . . .10
perating and indicator panel Freezer . . . . . . . . . . . . . . . . . . . . . . .11
Starting up - Setting the Temperature . . . . . . . . . . . . . . . . . . . . . .12
Freezing and storing frozen food . . . . . . . . . . . . . . . . . . . . . . . . . . .14
Preparation of Ice Cubes . . . . . . . . . . . . . . . . . . . . . . . . . . . . . . . . .15
Freezing calender . . . . . . . . . . . . . . . . . . . . . . . . . . . . . . . . . . . . . . . .15
Defrosting . . . . . . . . . . . . . . . . . . . . . . . . . . . . . . . . . . . . . . . . . . . . .16
Cleaning and Care . . . . . . . . . . . . . . . . . . . . . . . . . . . . . . . . . . . . . . .17
Energy Saving Tips . . . . . . . . . . . . . . . . . . . . . . . . . . . . . . . . . . . . . . .18
What to do if . . . . . . . . . . . . . . . . . . . . . . . . . . . . . . . . . . . . . . . . . .19
Correcting Malfunctions . . . . . . . . . . . . . . . . . . . . . . . . . . . . . . . . . . . . .19
Changing the light bulb . . . . . . . . . . . . . . . . . . . . . . . . . . . . . . . . . . . . . .20
Service and Spare Parts . . . . . . . . . . . . . . . . . . . . . . . . . . . . . . . . . . .21
Customer Care Department . . . . . . . . . . . . . . . . . . . . . . . . . . . . . . .21
Guarantee Conditions . . . . . . . . . . . . . . . . . . . . . . . . . . . . . . . . . . . .22
Installation - Electrical Connection . . . . . . . . . . . . . . . . . . . . . . . . .23
Positioning - Rear spacer . . . . . . . . . . . . . . . . . . . . . . . . . . . . . . . . . . . . .24
Reversing the door . . . . . . . . . . . . . . . . . . . . . . . . . . . . . . . . . . . . . . . . . .25
Regulations, Standards, Guidelines . . . . . . . . . . . . . . . . . . . . . . . . .26
26
12. Dismantle the handles, by sliding
the handle-cover, by unscrewing
its side and middle screws and
reassemble them on the opposite
side. Cover the holes left open
with the plugs contained in the
documentation pack.
1
2
Regulations, Standards, Guidelines
This appliance was designed for household use and was manufactured in
accordance with the appropriate standards. The necessary measures in
accordance with appliance safety legislation regulations (GSG), accident
prevention regulations for refrigeration appliances (VBG 20) and the regu-
lations of the German Society of lectrical ngineers (VD ) were observed in
the manufacture of this appliance.
The refrigerant circuit has been checked for leaks.
This appliance is in accordance with the following U guidelines:
– 73/23/ WG dated 19 February 1973 - low voltage guidelines.
– 89/336/ WG dated 3 May 1989
(including guideline change notice 92/31/ WG) - MV guideline

4
Safety
The safety aspects of our refrigerators/freezers comply with accepted tech-
nical standards and the German Appliance Safety Law. Nevertheless, we
consider it our obligation to make you aware of the following safety infor-
mation:
Intended use
• The refrigerator is intended for use in the home. It is suitable for the coo-
ling, freezing and storing of frozen food, as well as for making ice. If the
appliance is used for purposes other than those intended or used incor-
rectly, no liability can be accepted by the manufacturer for any damage
that may be caused.
• Alterations or changes to the freezer are not permitted for reasons of
safety.
• If you use the refrigerator in a commercial application or for purposes
other than the cooling, freezing or frozen storage of foods, please obser-
ve all valid legal regulations for your application.
Prior to initial start–up
• Check the refrigerator for transport damage. Under no circumstance
should a damaged appliance be plugged in! In the event of damage, please
contact your retailer.
Refrigerant
The refrigerant isobutane (R600a) is contained within the refrigerant circuit
of the appliance, a natural gas with a high level of environmental compa-
tibility, which is nevertheless flammable.
• During transportation and installation of the appliance, be certain that
none of the components of the refrigerant circuit become damaged.
• If the refrigerant circuit should become damaged:
– avoid open flames and sources of ignition;
– thoroughly ventilate the room in which the appliance is situated.
Safety of children
• Packaging (e.g. wraps, polystyrene) can be dangerous for children. There is
a risk of suffocation! Keep packaging material away from children!
• Please make old appliances unusable prior to disposal. Pull out the mains
plug, cut off the mains cable, break or remove spring or boltcatches, if fit-
ted. By doing this you ensure that children cannot lock themselves in the
fridge when playing (there is risk of suffocation!) or get themselves into
other dangerous situations.
• Often children cannot recognise the hazards present in household
appliances. It is therefore important that you ensure adequate supervision
and never let children play with the appliance!
25
F
D
PR18
F
F
F
E
E
H
G
Reversing the door
The side at which the door hangs can be changed from the right side (fac-
tory supplied) to the left side, if the installation site requires.
Warning! When changing the side at which the door opens, the appliance
may not be connected to the mains. Remove plug from the mains befo-
rehand.
Procced as follow:
1. Remove the clip-in ventilation grille
(D).
2. Remove the bottom hinge ( ) by
unscrewing the fixing screws.
3. Slide the bottom door off the centre
hinge (H).
4. Remove the centre hinge and slide
the top door off pin (G); unscrew pin
(G) and refit it on the opposite side.
5. Remove the two plugs, to reveal the
holes for the hinge pivots, and
remount them on the other side.
6. Refit the top door and the centre
hinge (H) on the opposite side.
7. Refit the bottom door.
8. Using a 10 mm spanner, unscrew
the hinge pin ( ) and reassemble it
on the opposite side of the hinge;
9. Refit bottom hinge ( ) on the oppo-
site side, using the screws previously
removed.
10. Remove blanking cover (F) from ven-
tilation grille (D) by pushing it in the
direction of the arrow and refit it on
the opposite side.
11. Refit ventilation grille (D), clipping it
into place.

6
A
C
B
Warning! Before disposing of old appliances make them inoperable. Remo-
ve plug from mains, sever the power cable, remove or destroy any snap or
latch closures, to prevent small children being trapped inside.
The symbol on the product or on its packaging indicates that this
product may not be treated as household waste. Instead it shall be
handed over to the applicable collection point for the recycling of
electrical and electronic equipment. By ensuring this product is dispo-
sed of correctly, you will help prevent potential negative consequen-
ces for the environment and human health, which could otherwise be
caused by inappropriate waste handling of this product. For more
detailed information about recycling of this product, please contact
your local city office, your household waste disposal service or the
shop where you purchased the product.
Remove Transport Packaging
The appliance and the interior fittings are protected for transport.
• Remove all adhesive tape and packing pieces from the interior of the
appliance.
Your appliance is equipped with shelf
retainers that make it possible to
secure the shelves during transporta-
tion.
To remove them proceed as follows:
Move the shelf retainers in the direc-
tion of the arrow, raise the shelf from
the rear and push it forward until it
is freed and remove the retainers.
23
Installation
lectrical Connection
Any electrical work required to install this appliance should be carried
out by a qualified electrician or competent person.
WARNING – THIS APPLIANCE MUST BE EARTHED
The manufacturer declines any liability should these safety measures not
be observed.
Before switching on, make sure the electricity supply voltage is the same as
that indicated on the appliance rating plate. The rating plate is inside, on the
left.
The appliance is supplied with a 13 amp plug fitted. In the event of having
to change the fuse in the plug supplied, a 13 amp ASTA approved (BS 1362)
fuse must be used.
Important!
The wires in the mains lead are
coloured in accordance with the fol-
lowing code:
Green and Yellow arth
Blue Neutral
Brown Live
As the colours of the wires in the
mains lead of this appliance may not
correspond with the coloured mark-
ings identifying the terminals in your
plug, proceed as follows:
1. The wire coloured green and yellow must be connected to the terminal
marked with the letter “ ” or by the earth symbol or coloured green and yel-
low.
2. The wire coloured blue must be connected to the terminal marked “N” or
coloured black.
3. The wire coloured brown must be connected to the terminal marked “L” or
coloured red.
4. Upon completion there must be no cut, or stray strands of wire present and
the cord clamp must be secure over the outer sheath.
Warning! A cut-off plug inserted into a 13 amp socket is a serious safety
(shock) hazard. nsure that the cut-off plug is disposed of safely.
D207
GREEN & YELLOW 13 AMP. FUSE
BROWN
CORD CLAMP
BLUE
13 AMP
This manual suits for next models
1
Table of contents
Other AEG Refrigerator manuals

AEG
AEG SANTO K 78800 User manual

AEG
AEG SCE81826TC User manual

AEG
AEG OKO-SANTO Series User manual

AEG
AEG AGN2291 User manual

AEG
AEG SANTO Refrigerator/Freezer User manual

AEG
AEG OKO-SANTO SUPER 2870-4 User manual

AEG
AEG SANTO Series User manual

AEG
AEG S71709TSW0 User manual

AEG
AEG SCS41800S0 User manual

AEG
AEG SKS81000F0 User manual