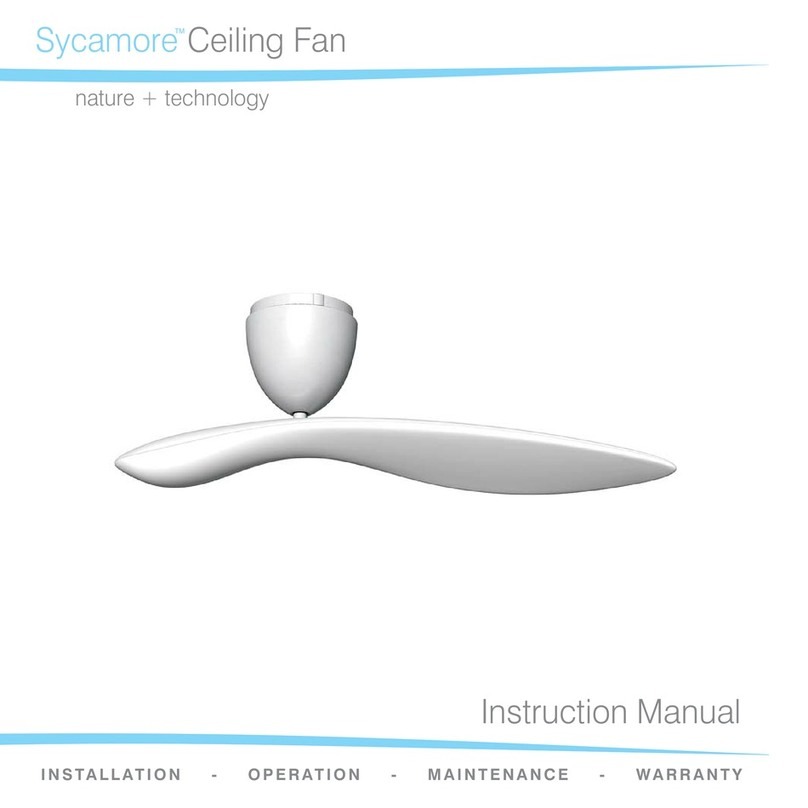
Aero Profile DC Instruction Manual

Prole DC
ATTENTION ELECTRICIANS:
ANY PROBLEMS FOUND DURING INSTALLATION OF THE FAN PLEASE CONTACT THE NATIONAL
WARRANTY NUMBER PRIOR TO LEAVING SITE.
DO NOT REMOVE THE FAN FROM THE CEILING
UNLESS INSTRUCTED TO DO SO.
National Warranty Number | 1300 116 305 Monday to Friday 9am to 5pm AEST
gNOTE: THIS FAN MUST BE INSTALLED BY A LICENSED AND QUALIFIED
ELECTRICIAN IN ACCORDANCE WITH LOCAL AUTHORITY REGULATIONS
Australian Edition Version 2.5 October 2020
Installation & User Manual
PLEASE NOTE: THE REMOTE CONTROL
COMES PRE-PROGRAMMED TO THE FAN

NOTE: THIS FAN MUST BE INSTALLED BY A LICENSED AND QUALIFIED
ELECTRICIAN IN ACCORDANCE WITH LOCAL AUTHORITY REGULATIONS
1
IMPORTANT INFORMATION - PLEASE READ BEFORE ATTEMPTING INSTALLATION
Please Note: Nothing in this manual is intended to instruct or assist untrained or
unqualied persons to install this product. Additionally, it is the responsibility of the
installer and user to apply common sense and care at all times.
Please note: Minor design changes may result in slight variations between the product illustrations and the fan contained within the packaging.
1. Please read these instructions carefully, be mindful of all warnings and safety information shown throughout this
manual. Should you have any questions, please contact 1300 116 305.
2. Please review the accompanying assembly diagrams before attempting installation.
3. This fan MUST be installed by a licensed & qualied electrician according to local authority regulations and in
accordance with current wiring rules AS/NZS3000. Therefore, to protect our repair personnel, on-site warranty
claims will not be accepted if products have been installed by unlicensed persons.
4. A copy of the purchasing receipt and proof of installation by a licensed and qualied electrician according to local
authority regulations is required for all warranty claims.
5. Where special access equipment is required in accordance with local authority regulations all associated costs are
the responsibility of the owner.
6. We reserve the right to charge a $175 service fee for all call outs where the fan is found not to be defective and
/ or where access is not provided.
7. An isolation switch providing full disconnection of both fan and light must be tted in accordance with the wiring
rules (AS/NZS 60335.1 C1.7.12.2). In addition to all pole disconnection an isolation switch must be installed for
each individual fan located in the same room to allow for programming and ongoing maintenance.
8. The Fan and Light (if supplied) must be earthed.
9. Your warranty will be void if a solid state dimmer or any other brand of wall or remote controller is used.
10. Installation using steel beams, grid ceilings and exible structures are not recommended due to their inability to
absorb vibration from normal operation. Timber is the recommended material to support the fan.
11. To avoid possible electric shock during installation, be sure electricity is turned off at the main power box before
commencing work. Disconnect power by removing fuse or turning off circuit breaker before installing the fan.
Ensure all spliced connections are adequately insulated.
12. Warning! Do not allow the rotating fan blades to come into contact with any object, this can cause serious injury
or death.
13. Damage caused by; incorrect installation, Force-majeure, lightning, electrical surges & spikes, exposure to water,
pests or moisture is not covered under warranty.
14. In accordance with AS/NZS60355-1 & ASNZS60355-2-80: “This appliance is not intended for use by persons
(including children) with reduced physical, sensory or mental capabilities, or lack of experience and knowledge,
unless they have been given supervision or instruction concerning use of the appliance by a person responsible for
their safety. Children should be supervised to ensure that they do not play with the appliance.”
15. Children should be supervised to ensure that they do not play with the appliance.
16. Children shall not play with the appliance.
17. Cleaning and user maintenance shall not be made by children.
18. Blades must be replaced only as a complete set. Blades are supplied only as a pre-balanced set and the replacement
of individual blades may void the warranty by causing mechanical damage to the motor, excessive noise or
premature wear.
19. Do not use outdoors where the fans could be directly exposed to water or moisture. Incorrect installation can be
dangerous and will void the warranty.
20. No more than eight (8) DC fans per lighting circuit as this may cause intermittent tripping.

National Warranty Hotline|1300 116 305 Monday to Friday 9am to 5pm AEST 2
Provide adequate clearance from the oor. The lowest point on the
fan blades must be at least 2.1m (7 feet) from oor level in Australia
and at least 2.3m from oor level in the European Union and afliated
countries.
Make sure that the chosen location of the fan will not allow the rotating
fan blades to come into contact with any objects.
Ensure ceiling joists are sound and of adequate size and strength to
support a 25Kg (55lb) load.
To reduce the risk of re, electrical shock or personal injury, ensure
that the fan mounting bracket is supported directly from the building
structure. DO NOT mount to an outlet box.
The mounting bracket must be rmly screwed to a load bearing structure e.g. a concrete ceiling, steel structure or
timber frame. If a timber frame is to be added it must be securely nailed or screwed between two beams.
After the fan is completely installed, check to make sure that all connections are secure to prevent the fan from falling
and/or causing damage or injury.
To reduce the risk of personal injury, do not bend or damage the motor or Fan Assembly when handling or during
installation.
Please ensure special care is taken when assembling the fan. Each screw must be sufciently tightened.
LOCATION AND INSTALLATION REQUIREMENTS
TABLE OF CONTENTS
Fan assembly & parts list - without LED light kit.........................
Fan assembly & parts list - with LED light kit..............................
Installing fan - without LED light..............................................
Installing fan - with LED light....................................................
Operating the fan from the remote control.................................
General Information.................................................................
General maintenance & cleaning...............................................
Troubleshooting............................................................ ...........
Ceiling fan warranty information................................................
Not covered by warranty...........................................................
Documents to retain for future warranty claims..........................
Electrician Checklist..................................................................
Page 3
Page 4
Page 5
Page 7
Page 9
Page 10
Page 10
Page 11
Page 12
Page 13
Page 13
Page 14
minimum
2100mm
Floor Level
Ceiling

NOTE: THIS FAN MUST BE INSTALLED BY A LICENSED AND QUALIFIED
ELECTRICIAN IN ACCORDANCE WITH LOCAL AUTHORITY REGULATIONS
3
FAN ASSEMBLY & PARTS LIST - WITHOUT LIGHT KIT
Unpacking your Fan
Unpack your fan and check the contents. Please check each item prior to installation, should you nd any issues please
contact the Warranty Helpline on 1300 116 305 for assistance. To reduce the chance of marks or possible damage
please only remove the parts when required for installation.
To avoid possible electrical shock, be sure
electricity is turned off at the main fuse box
before assembling and wiring the fan.
WARNING
Part Quantity Part Quantity
Ceiling Bracket 1Fan Motor 1
Ceiling Bracket Screws 2 ABS Blades 3
Ceiling Bracket Covers 2 Blade Screws 9
Receiver 1Bottom Cover 1
Handset 1
Handset
Ceiling Bracket
Ceiling Bracket Screws
Fan Receiver
Blades
Blade Screws
Bottom Cover
Fan Motor
Ceiling Bracket Screw cover

National Warranty Hotline|1300 116 305 Monday to Friday 9am to 5pm AEST 4
FAN ASSEMBLY & PARTS LIST - WITH LED LIGHT KIT
Unpacking your Fan
Unpack your fan and check the contents. Please check each item prior to installation, should you nd any issues please
contact the Warranty Helpline on 1300 116 305 for assistance. To reduce the chance of marks or possible damage
please only remove the parts when required for installation.
To avoid possible electrical shock, be sure
electricity is turned off at the main fuse box
before assembling and wiring the fan.
WARNING
Handset
Ceiling Bracket
Ceiling Bracket Screws
Fan Receiver
Blades
Blade Screws
LED Light Kit
Fan Motor
Ceiling Bracket Screw cover
Part Quantity Part Quantity
Ceiling Bracket 1Fan Motor 1
Ceiling Bracket Screws 2 ABS Blades 3
Ceiling Bracket Covers 2 Blade Screws 9
Receiver 1LED Light Kit 1
Handset 1

NOTE: THIS FAN MUST BE INSTALLED BY A LICENSED AND QUALIFIED
ELECTRICIAN IN ACCORDANCE WITH LOCAL AUTHORITY REGULATIONS
5
DANGER! Before commencing installation, turn off electricity supply at the main power
box or disconnect power by removing fuse or turning off circuit breaker. This fan must be
installed by a licensed and qualied electrician in accordance with local authority regulations.
INSTALLING FAN - WITHOUT LIGHT
In accordance with Australian Standards, the fan blades must be at least 2.1 metres above oor level and the blades
require at least 300mm clearance to the nearest object.
1
3
2
4
5 6

National Warranty Hotline|1300 116 305 Monday to Friday 9am to 5pm AEST 6
DANGER! Before commencing installation, turn off electricity supply at the main power
box or disconnect power by removing fuse or turning off circuit breaker. This fan must be
installed by a licensed and qualied electrician in accordance with local authority regulations.
INSTALLING FAN - WITHOUT LIGHT
In accordance with Australian Standards, the fan blades must be at least 2.1 metres above oor level and the blades
require at least 300mm clearance to the nearest object.
7
9
8
10

NOTE: THIS FAN MUST BE INSTALLED BY A LICENSED AND QUALIFIED
ELECTRICIAN IN ACCORDANCE WITH LOCAL AUTHORITY REGULATIONS
7
DANGER! Before commencing installation, turn off electricity supply at the main power
box or disconnect power by removing fuse or turning off circuit breaker. This fan must be
installed by a licensed and qualied electrician in accordance with local authority regulations.
INSTALLING FAN - WITH LIGHT
In accordance with Australian Standards, the fan blades must be at least 2.1 metres above oor level and the blades
require at least 300mm clearance to the nearest object.
1
3
2
4
5 6

National Warranty Hotline|1300 116 305 Monday to Friday 9am to 5pm AEST 8
DANGER! Before commencing installation, turn off electricity supply at the main power
box or disconnect power by removing fuse or turning off circuit breaker. This fan must be
installed by a licensed and qualied electrician in accordance with local authority regulations.
INSTALLING FAN - WITH LIGHT
In accordance with Australian Standards, the fan blades must be at least 2.1 metres above oor level and the blades
require at least 300mm clearance to the nearest object.
7
9
8
10

NOTE: THIS FAN MUST BE INSTALLED BY A LICENSED AND QUALIFIED
ELECTRICIAN IN ACCORDANCE WITH LOCAL AUTHORITY REGULATIONS
9
FAN REMOTE CONTROL PROGRAMMING - OPERATING THE FAN FROM THE REMOTE CONTROL
NOTE: The Fan itself has NO DIP switches. Each individual fan must be set-up and programmed
to the corresponding remote control where multiple fans are installed. If there is more than
one fan please ensure the other fans remain powered off while programming.
INSTALL BATTERY:
Locate and install battery, observe polarity and make sure battery sits properly in recess. The remote has a small light
which will iluminate when a button is pressed, use this to conrm battery is installed correctly.
REPROGRAMMING: THIS IS NOT REQUIRED WHEN INSTALLING THE FAN
The remote comes pre-programmed to the fan and does not require following the below steps.
1. Turn off power to fan at isolation / wall switch and wait for 30 seconds.
2. Turn power back on, the fan will beep once.
3. Press and hold the “FORWARD/REVERSE” button until you hear one beep from the receiver.
The remote will then be linked to the fan. Two remotes can be used with each fan and the same remote can control
multiple fans.
To remove a second remote see page 15 “Removing a second remote programmed to a fan”
CHANGE LED COLOUR TEMPERATURE (WITH LIGHT VERSION ONLY):
The light kit on the fan has three different colour temperature options 3000K / 4000K / 6000K.
To change the colour temperature, using the remote control:
1. Start with the light off and press the “LIGHT ON/OFF” button three times within 5 seconds
2. Keep pressing the “LIGHT ON/OFF” button until the desired colour temperature is selected
3. Turn the light off for 10 seconds to set the colour temperature using the remote control.
NOTE: The fan may start up and run on high speed, this assists with programming the
fan speeds. During this time the fan remote control will not respond to the fan until the
programming is complete - this is not a fault. Once the fan has completed the programming
it will return to normal operation.
*To turn the fan on, press the fan speed you desire*
The buttons on the remote control transmitter control the fan as follows:
Fan Off
Turns the fan off
Forward/Reverse
Fan will spin in forward
(Summer) or reverse
(Winter) mode
Light
Dimming - Down
Dims the light down
Fan Timer Button
Timer Setting for fan, 1h, 2h, 4h
Light On/Off
Turns the light on and off
Fan Speed
Speed settings from 1-6,
1 being slow 6 being fast
Light
Dimming - Up
Dims the light up

National Warranty Hotline|1300 116 305 Monday to Friday 9am to 5pm AEST 10
Figure 13Figure 13
GENERAL MAINTENANCE & CLEANING
* Before maintenance ensure fan is switched off at the isolation switch or circuit breaker *
Changing Remote Batteries
Batteries used in Handsets will weaken over time and should be replaced every 6 months. Batteries removed from the
handset should be disposed of properly and kept out of reach of children.
Cleaning the Motor Housing
Motor housings should be cleaned every 3 to 4 months to avoid build up of dust. Dust will attract moisture and
condensation leading to corrosion. Use a soft, damp (not wet) cloth to remove dust. Use only water and mild detergent.
Spray cleaners may damage coatings.
Cleaning the Blades
Use a soft damp cloth to remove dirt from blades. Always dry blades after cleaning. Blades should not be left damp or
wet as this will damage blade nish or cause corrosion. Use only water and mild detergent. Spray cleaners may damage
coatings. Always use soft cloths to clean blades and motor housings to avoid scratching painted and plated nishes.
Ideally your fan should be cleaned every 3 to 4 months.
If removing blades for cleaning then do so for each fan separately, do not mix blades from different fans as this can
upset the balance of the fan. Put blades back in the position they came from.
Normal Wear and Tear
Please note that a ceiling fan travels an enormous distance in the course of its normal operation. Air is abrasive and
suspended dust, high humidity and other contamination will cause wear and tear of surfaces.
The use of fans under roofed decks and pergolas next to swimming pools and in coastal areas will require increased
maintenance due to the presence of chlorides (either as common air borne salt spray or from compounds in pool
chemicals)
The temperatures attained in the peak of a pitched deck or veranda roof can easily exceed 60-70°C and especially when
coupled with chlorides this will increase maintenance requirements. Even indoors in coastal areas the inux of warm,
sea air can accelerate the surface corrosion of metal parts. This can still happen many kilometres from the sea.
When humidity is high and temperature drops moisture condenses on metal surfaces including ceiling fans. The layer of
moisture can be almost microscopic but it will affect the surface by depositing a tiny layer of dissolved salts or airborne
acidic compounds and thus eventually leading to corrosion if the product is not properly and regularly cleaned. This
applies equally to indoor and outdoor fans.
LACK OF MAINTENANCE LEADING TO SURFACE CORROSION OR SIMILAR
DAMAGE IS NOT COVERED BY WARRANTY.
GENERAL INFORMATION
1. All electrical motors, including fan motors make some noise, and may feel hot to the touch. This is NOT a fault.
2. Ceiling fans tend to move during operation due to the fact that they are not rigidly mounted. (Rigid mountings can
generate excessive vibration and stress on the mountings). Movement of a couple of centimetres is quite OK and does
not suggest that the fan will fall down. The fan is mounted securely on a metal Hanger Bracket with rubber cushioning
and a ball joint to allow free movement. Please note that due to manufacturing variations not all ceiling fans are exactly
the same some may move more than others.
3. Ceiling fans are an environmentally smart choice to help cool you in your home. They work by creating air ow
which causes a cooling sensation on the skin. The faster the speed of the air ow, the greater the cooling sensation.
Ceiling fans do not work by cooling the room, so they should be switched off when there is no one in the room, to save
energy. The effectiveness of ceiling fans is also dependent on the humidity in the air they are more effective in humid
environments, and less so in dry ones.
4. During winter, a reverse turning fan helps to reduce heating costs. Warm air rises to the ceiling, where it cannot
be felt by the occupants of a room, especially in areas with high ceilings. The fan helps to keep warm air away from the
ceiling, and mixes it with the air below.

NOTE: THIS FAN MUST BE INSTALLED BY A LICENSED AND QUALIFIED
ELECTRICIAN IN ACCORDANCE WITH LOCAL AUTHORITY REGULATIONS
11
TROUBLESHOOTING
PROBLEM POSSIBLE CAUSES PROBABLE SOLUTIONS
Fan does not power
up. No mains voltage going to fan.
Check the dwelling’s fuse/box circuit breakers has not
failed / tripped and check that 240V is available at the
Terminal Block
Isolation switch turned off. Check isolation switch is turned on.
Fan is not
responding to the
remote control.
Batteries in the remote control at Change the Batteries in the remote control - always
install brand new batteries (not lithium).
Fan not programmed properly Check that the handset has been programmed to the
receiver (refer to page 8)
Fan Wobbles.
(Warning: The ceiling
fan must be switched
OFF and the assistance of
a licensed electrician may
be required.)
Blades not a matching set Check each blade to make sure that the weights are the
same. (there is a 3gm buffer)
Loose Screws Check all screws are tight - be careful to never over
tighten the screws.
Loose Ceiling Bracket Check that the bracket is tight against the ceiling and
the ceiling and ceiling structure is not moving.
Countersunk screws have been used
Countersunk screws will make the fan wobble and
eventually allow the bracket to move. Replace
Countersunk screws with screws that have been
supplied in box
Fan is noisy
Loose Screws or Parts
Check all screws and parts are secured rmly - be
careful to never over tighten the screws. Ensure there
are no loose parts moving inside the motor housing.
Ceiling Bracket could be loose Check that the ceiling bracket is secure.
Light does not turn
on.
(Warning: The ceiling
fan must be switched
OFF and the assistance of
a licensed electrician may
be required.)
No power to the fan. Check circuit breakers / Fuses / isolation switch.
Loose wire in light assembly. Check wires in light kit assembly.
Issue with the remote control. Refer to above issues pertaining to the remote control
for a solution.
Fan does not move
much air
The fan is in winter mode. Using the remote control change the fan from winter
(reverse) to summer mode.
One remote is
controlling two
different fans /
Removing a
second remote
programmed to a
fan.
The remote is crossed programmed
to two fans. Or two remote’s are
controlling one fan.
Follow the programming steps on page 11 twice in
succession using the original remote. This will delete
all other remote controls attached to the fan.

National Warranty Hotline|1300 116 305 Monday to Friday 9am to 5pm AEST 12
CEILING FAN WARRANTY INFORMATION
This warranty applies only to Australian states and its mainland territories. The benets of this warranty
are in addition to any rights offered under state or territory law.
Please also note the following, prior to requesting service, please consult the Troubleshooting section in
the manual;
1.
All electric motors, including fans, make some noise and may feel hot to touch – this is not a fault.
2.
Some fans wobble more than others – even the same model.
3.
Blades are weighed to be within tolerance to minimise wobbling. In multiple installations do not mix blades from
fans.
4.
Fan lights can rattle and are not covered by warranty.
5.
Blade, remote control and light shade replacements are not covered by in home servicing.
This product warranty excludes to the extent possible under law any liability for consequential loss or damages directly
or indirectly resulting from a faulty ceiling fan or accessory product that is not installed or maintained according to the
installation instructions. When installed, maintained and used according to the instructions such loss or damage can be
easily avoided or minimised.
This statement is required by the Australian Consumer Law: “Our goods come with guarantees that cannot be excluded
under the Australian Consumer Law. You are entitled to a replacement or refund for a major failure and for compensation
for any other reasonably foreseeable loss or damage. You are also entitled to have the goods repaired or replaced if the
goods fail to be of acceptable quality and the failure does not amount to a major failure.”
MAKING A CLAIM
You must have the original purchase receipt or bill of sale along with a proof of installation by a Licensed Electrician to
make a warranty claim. No claim will be accepted without these documents being provided. Please contact AeroDC via
the warranty hotline, web or email.
Please note carefully - If the product is found to be free of defects or the product is not functioning properly as a
result of faulty installation or lack of maintenance then AeroDC or its service agent reserve the right to charge a service
fee to rectify the reported problem.
CEILING FAN WARRANTY PERIOD.
The ceiling fan itself, excluding the Remote Control Transmitter and Receiver, is covered by a 3 year in home warranty.
During this period, AeroDC will, at its discretion, repair or replace defective product. Labour and product delivery costs
are borne by AeroDC during this 3 year period. The cost of obtaining or using special access equipment (scissor lifts,
scaffolding etc.) is specically excluded, and it is the responsibility of the owner to provide such equipment and have it
safely installed and operated.
REMOTE CONTROL WARRANTY PERIOD.
In general, AeroDC Remote Controls and Receivers are covered by a 1 year in home warranty under the same conditions
as described above.
BALANCE OF WARRANTY ON REPAIRED OR REPLACED PRODUCTS.
Any replaced or repaired product is covered only by the balance of the warranty remaining on the original article.
TRANSFER OF WARRANTY.
If the dwelling where the fan or remote control is installed changes hands, the balance of the warranty passes to the
new owner, providing the original bill of sale and proof of installation by a Licensed Electrician for the product is retained
by the new owner.
Warranty for the fan does not cover damage to the fan if it is moved from one dwelling to another during the warranty
period. The warranty is voided in total if the product is sold as second hand goods.

NOTE: THIS FAN MUST BE INSTALLED BY A LICENSED AND QUALIFIED
ELECTRICIAN IN ACCORDANCE WITH LOCAL AUTHORITY REGULATIONS
13
1. Any damage incurred after delivery to the owner that is not caused by a fault in the products materials or
workmanship; damage from lightning or power surges; incorrect installation; damage due to incorrect installation;
noise or other inuence of ripple control or information access systems operated over power delivery infrastructure;
water damage of any kind; installation or use outdoors; damage arising from connection to or use with alternative
power systems (e.g. inverters, solar, etc.).
2. Interference from other devices operating on the same frequency. This issue can be overcome by
reprogramming the remote control hand piece to the Fan. A mechanism to isolate power is required, this will
remove the requirement to engage a licensed electrician to complete the programming steps.
3. Ceiling fans not installed by a licensed and qualied electrician in accordance with local authority regulations.
4. Incorrect operation of the ceiling fan, accidental damage, modication in any way or not servicing in accordance
with the maintenance instructions.
5. Travelling costs incurred by AeroDC personnel or service agents exceeding 30kms between the nearest agents’
service depot and the customer. These costs must be met by the purchaser.
6. Subject to any statutory provisions to the contrary, claims for damage to furniture, carpet, walls, ceilings,
foundations or any other consequential loss either directly or indirectly resulting from a faulty ceiling fan.
7. Signals sent through the mains power supply by the electricity supplier for off peak hot water, and other signals
including those for street lights and such. These signals may cause an intermittent humming in the ceiling fan. It
is not the fault of the ceiling fan.
8. When humidity is high and temperature drops moisture condenses on metal surfaces including ceiling fans. The
layer of moisture can be almost microscopic but it will affect the surface by depositing a tiny layer of dissolved
salts or airborne acidic compounds and thus eventually leading to corrosion if the product is not properly and
regularly cleaned.
9. A service call fee will be charged where; there is nothing wrong with the ceiling fan or; the defective operation of
the ceiling fan is due to failure of electricity or; the installation is not in accordance with AeroDC instructions and/
or applicable local regulations or; the defects have been caused by incorrect application or abuse of the ceiling fan
or; the damage has been caused by unauthorised persons attempting to repair the fan
NOT COVERED BY WARRANTY.
DOCUMENTS TO RETAIN FOR FUTURE WARRANTY CLAIMS
TO ASSIST WITH ANY WARRANTY CLAIMS ATTACH THE FOLLOWING DOCUMENTS FOR
FUTURE REFERENCE.
1. Copy of the Purchasing Receipt.
2. Proof of Professional Installation - in-accordance with local authority Regulations (copy of installation Invoice,
Safety Certicate or letter on Letter head including licence details)

National Warranty Hotline|1300 116 305 Monday to Friday 9am to 5pm AEST 14
ELECTRICIAN CHECKLIST
Electricians make sure everything on this checklist is ticked off before you leave the installation site. If you have trouble
installing our product please refer to the trouble shooting section on page 11 rst, then phone the AeroDC Warranty
Hotline on 1300 116 305 (open 9am to 5pm EST). DO NOT uninstall the fan unless asked to do so.
1. Ceiling fan is not installed using a solid-state wall controller. Wall controllers must only be types
approved for use by AeroDC.
2. The fan, fan light assembly and bracket are earthed.
3. Fan, fan light and remote control receiver are run from the same nal circuit via an isolation switch.
4.
Mounting bracket must be rmly secured to a solid structure such as a concrete ceiling, steel structure
or timber framing. If additional bracing is added it must be rmly secured to the rafters and not left
oating on the ceiling.
5. Counter sunk screws are not to be used to attach bracket to ceiling.
6. Fan blades are at least 2.1m (7 feet) above oor level.
7. Check the fan is operating correctly on all speeds.
8. If light is installed. Check light is functioning properly.

NOTE: THIS FAN MUST BE INSTALLED BY A LICENSED AND QUALIFIED
ELECTRICIAN IN ACCORDANCE WITH LOCAL AUTHORITY REGULATIONS
EM Imports Pty Ltd
10 Overlord Place
Acacia Ridge Queensland
Australia 4110
Warranty & Support:
AeroDC
Ph: 1300 116 305
National Warranty Hotline|1300 116 305 Monday to Friday 9am to 5pm AEST
Distributed by
Table of contents
Other Aero Fan manuals
Popular Fan manuals by other brands

Perel
Perel CFANUSBD2 user manual
Monte Carlo Fan Company
Monte Carlo Fan Company 3NDR54XXD Series Owner's guide and installation instructions
Nicotra Gebhardt
Nicotra Gebhardt RDM 56 operating instructions
Hema
Hema 80.01.0072 Instructions for use

Goldair
Goldair GCPF130 operating instructions
Vents
Vents VPA100-1.8-1 operating manual

Vent-Axia
Vent-Axia Silhouette SELV 12 Series Fitting and wiring instructions
Schako
Schako AQUARIS SILENT Installation, Mounting and Maintenance

Airwood
Airwood Matchables Wood Vent installation instructions
Savoy
Savoy 52-EUP-5RV-WH owner's manual
QuietCool
QuietCool AFR SMT ES-2.0 owner's guide

EUROM
EUROM Kamin Vento 3 instruction manual


