AEROSPA Aero-pool User manual

© 2022 Aero-Spa®, LLC REV C
Installation Guide

© Copyright Aero-Spa®, LLC 2017 P/N102757 rev B
2
For outdoor use only!
WARNING
Pool care and sanitizing is the sole responsibility of
the owner. In some cases a residual sanitizer must be
present to minimize cross contamination. Pools/Spas
are not intended to treat infections. Never allow use of
pool if you are unable to verify the condition of open
sores, wounds, lesions, cuts, sores, abrasions, boil,
etc. or infections of any type exist. The best industry
practice is to maintain a minimum of 2 PPM residual
chlorine sanitizer in the water at all times. The best
industry practice will minimize the possibility of cross
contamination; however; will not eliminate the
possibility.

© Copyright Aero-Spa®, LLC 2017 P/N102757 rev B
3
Operation and Precautions
IMPORTANT SAFETY INSTRUCTIONS
Proper installation and usage of your Aero-Pool ozone
generator is your responsibility. Read and follow this installation
guide carefully for important installation, operation and safety
information. Basic safety precautions should always be
followed, including but not limited to the following:
Read and follow all instruction.
Never operate Aero-Pool equipment indoors.
Do not use pool for 30 minutes after the Aero-Pool unit
has operated.
Never inhale ozone exhausted by Aero-Pool unit.
Follow all electrical installation instructions in this
installation guide.
Do not operate Aero-Pool unit unless the electrical
source is protected by a Ground Fault Circuit Interrupt
(GFCI) device.
Do not use the Aero-Pool unit for applications other
than those described in this installation guide.
Follow all applicable electrical codes.
WARNING - To reduce the risk of electrical shock, do
not use this product if it has a damaged cord. Call Aero-
Spa LLC immediately to get the product repaired.
Mount the Ozone Generator so that it is inaccessible to
anyone in the pool.
Never attempt servicing when wet.
Do not allow children to operate the Aero-Pool.
Plastic ozone supply tubing is available with the Ozone
Generator. Never replace this tubing with metal tubing.
Trace amounts of hydrochloric acid may be present in
the ozone tube. Avoid contact with eyes, skin and
clothing.
SAVE THESE INSTRUCTIONS.

© Copyright Aero-Spa®, LLC 2017 P/N102757 rev B
4
Equipment Identification
Remove the equipment from the packaging. Care must be
taken when handling the components. Do not drop the
generator or sintered diffuser, as they are fragile.
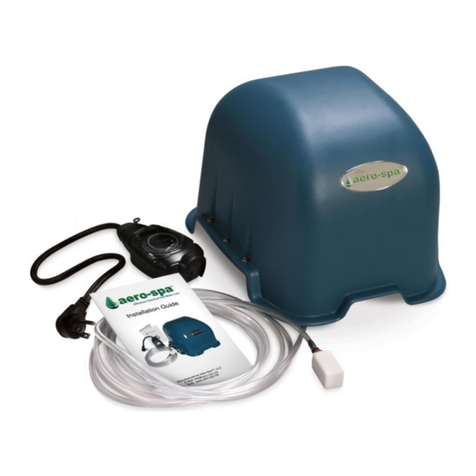
Identify the equipment components: Ozone Generator, Ozone
Tube, and Sintered Diffuser.
Please note that your product may vary from photos in this
installation guide.
Model: AP 1000
DESCRIPTION
QTY
Aero-Pool Generator
1
20ft –Ozone Tube
1
Sintered Diffuser
1
Aero-Pool
Generator
20ft Ozone
Tube
Sintered
Diffuser
Figure 1: Equipment Identification

© Copyright Aero-Spa®, LLC 2017 P/N102757 rev B
5
Equipment Set-up
For best results it is highly recommended that the pool be
thoroughly cleaned to remove residual dirt and contaminants
prior to installation of the Aero-Pool system.
Set the equipment on a level solid spacer block that is at least 2
–3/8” thick and at least 10’ from the pool that is not prone to
flooding (equipment is weather proof but not waterproof) Figure
2. If the supplied ozone tube is not of adequate length, move
the equipment closer to the pool but not closer than 10’. Do not
extend or shorten the ozone tube. If the tube is too long, coil
the excess tube in an 8” diameter coil.
Note: an improperly sized ozone tube will detrimentally affect the
performance and life of this product and may void the warranty!
2 3/8 in.
Minimum
Resting Surface
Spacer
Block
Figure 2: Unit Placement

© Copyright Aero-Spa®, LLC 2017 P/N102757 rev B
6
Install ballast tube.
1. Remove screw from center section, slide ballast tube onto
bottom of diffuser section with a slight back and forth twisting
motion until the small hole on diffuser section is in the center of
the large hole in ballast tube. Insert screw and tighten until
screw head is flush.
Figure 3: Ballast Installation
2. Connect the free end of the 20’ ozone tube to the fitting
exiting the underside of the Aero-Pool unit. Secure with
provided cable tie.
3. Lower the sintered diffuser into the pool in an area that is 7’
deep or less and allow it to rest on the bottom.
4. Locate the closest electrical outlet on the house or garage
that is at least 10’ from the pool that can be used to supply
power to the equipment.
5. Insert the electrical plug from the unit into a GFCI (Type 15-
5R) outlet. The equipment will begin to operate. You will hear a
faint hum from the generator and a steady bubble stream will
be emitted from the diffuser.

© Copyright Aero-Spa®, LLC 2017 P/N102757 rev B
7
Grounding Requirements
This product must be grounded. In the event of an electrical
short circuit, grounding reduces the risk of electric shock by
providing an escape wire for the electric current. This product is
equipped with a cord having a grounding wire with an
appropriate grounding plug (type 5-15P). The plug must be
plugged into an outlet (type 5-15R) that is properly installed and
grounded in accordance with all local codes and ordinances. If
repair or replacement of the cord or plug is necessary, contact
Aero-Spa, LLC or a qualified electrician. Check with a qualified
electrician or serviceman if the grounding instructions are not
completely understood, or if in doubt as to whether the product
is properly grounded.
Do not modify the plug provided; if it will not fit the outlet, have
the proper outlet installed by a qualified electrician. This
product is for use on a nominal 120-volt circuit. No adapter
should be used with this product. This product has an
automatic thermal limiter, which shuts off the entire product
when an elevated temperature condition exists. When the
product cools it will automatically restart. Only if required,
obtain a UL outdoor rated extension cord. Never locate the
Aero-Spa generator closer than 10’ from the hot tub. In the
event of a power outage, the GFCI device will need to be reset
manually.
Figure 4: Plug and GFCI Outlet
DANGER: Improper installation of the grounding
plug can result in a risk of electric shock.

© Copyright Aero-Spa®, LLC 2017 P/N102757 rev B
8
Occasionally GFCI breakers will experience nuisance tripping.
This will shut off the power to the equipment. If this occurs,
press the “reset” button. If pressing the “reset” button does not
start the equipment, unplug the cycle timer and press the
“reset” button again. If the “reset” button does not “hold in”,
replace the GFCI breaker. If the button does “hold in”, plug the
generator power cord into the GFCI breaker and circumvent the
cycle timer. Press the “reset” button again. If the “reset” button
does not “hold in” replace the GFCI breaker. If the “reset”
button does “hold in” contact Aero-Spa, LLC.
Do not operate this equipment without a GFCI breaker installed.
Maintenance and Care
This product has no user serviceable parts. If service is
required, contact Aero-Spa, LLC. Attempts to service the ozone
generator will void the customer satisfaction policy, Limited
Warranty, and expose the user to electrical shock which may
cause severe injury or death.
Keep the area around the product free of leaves and other
debris. If debris enters the product through the air intake holes,
unplug the product and carefully remove the debris. Restart
product.
The diffuser stone can be cleaned with a 3% hydrogen
peroxide solution or muriatic acid.
Fill & Start-Up Recommendations
Our customers have been using the Aero-Pool system as the
primary water treatment process for years with limited harsh
chemicals. Because we cannot control how your pool is
used/maintained and according to the EPA we must
recommend maintaining at 2 PPM of an approved residual
sanitizer to minimize cross contamination of users.

© Copyright Aero-Spa®, LLC 2017 P/N102757 rev B
9
TROUBLESHOOTING
Aero-Pool not running / No bubble from sintered diffuser
1. Verify unit is receiving power
a. Reset GFCI breaker.
b. Reset circuit breaker at house fuse panel.
2. Verify ozone tube is not broken, pinched, or disconnected
3. If these steps do not solve the problem call Aero-Spa, LLC
Water is cloudy
A condition typically associated with excess organic particulates from
oils and soaps.
1. Apply pool clarifier.
2. If not resolved within (4) days, contact Aero-Spa, LLC
Strong ozone odor near Aero-Pool generator
1. Verify ozone tube is not broken
2. Verify ozone tube is not pinched or disconnected
3. Unplug unit and call Aero-Spa, LLC
Strong ozone odor in pool
1. Reduce cycle run time by 25%. Repeat if odor remains strong
after 1 hour.
2. Unplug unit and call Aero-Spa, LLC
Ozone tube is cloudy in color and not flexible
This is normal, periodically check for cracks in ozone tube.
Replacement parts are available from Aero-Spa, LLC
Sintered diffuser is turning brown
1. This is normal when the water used to fill the pool has high
iron content. The diffuser can be soaked in “rust or stain
remover” or similar product and rinsed thoroughly after
soaking.
2. If these steps do not solve the problem call Aero-Spa, LLC
Brown ring at water line
1. This is normal when the water used to fill the pool has high
iron content. Using “rust or stain remover” solution, wipe the
rust stain with damp sponge containing rust or stain remover.
Rinse sponge in solution periodically.
2. If these steps do not solve the problem call Aero-Spa, LLC

© Copyright Aero-Spa®, LLC 2017 P/N102757 rev B
10
Light scale on surface
1. This occurs when the water used to fill the pool is hard. Using
a sponge or “Scouring pad” pad, wipe surface to remove
scale. Care should be used if using a “Scouring pad” pad to
ensure the surface of the pool is not damaged.
2. If these steps do not solve the problem call Aero-Spa, LLC
Light brown material on surface of pool walls
1. This occurs when the water is not adequately circulated in the
pool. Using a sponge, wipe surface to remove scale.
2. Increase pool circulation pump cycle time. Synchronize
circulation pump and Aero-Pool™ run time.
3. If these steps do not solve the problem call Aero-Spa, LLC
Water back siphoned into the ozone tube and or the ozone
generator
1. A small amount of moisture can be considered normal in high
humidity conditions and in such a case nothing needs to be
done. If there is more than a few drops proceed to step 2.
below
2. Turn off all power by unplugging Aero-Pool from the 120 volt
power outlet. Remove the sintered diffuser from the pool and
lay it on the ground at a lower elevation than the generator.
Allow the unit to purge the water from the ozone tube. When
complete, reinstall sintered diffuser in pool and make sure the
air line is installed as described in the installation procedure.
3. If these steps do not solve the problem call Aero-Spa, LLC

© Copyright Aero-Spa®, LLC 2017 P/N102757 rev B
11
CUSTOMER SATISFACTION POLICY
We are confident that the Aero-Spa™ process will maintain the desired water quality in your
hot tub or pool. If during the first ninety days you are not satisfied with the water quality in your
hot tub or pool you can return the Aero-Spa™ product to us for a refund. All other unused
products and accessories returned are subject to a twenty-five percent restocking fee and
must be returned within fourteen days of purchase. Payment Plan fees are not refundable. To
be eligible to receive any refund under this Customer Satisfaction Policy you must contact us
by telephone, e-mail or in writing within the time specified above, from the date of your invoice.
A Return Material Authorization (RMA) will be issued with instructions. Canceled orders or
RMA’s for systems as described above issued or inquired about for any reason within thirty
days of invoice date are subject to a fourteen percent restocking fee. All products must
thereafter be received at our facility within twenty-one days of the return authorization date.
Buyer is responsible for all shipping charges of returned product including insurance. Upon
receipt, any evidence of tampering or misuse of the unit will void this Customer Satisfaction
Policy. For more information, or to seek a refund under this Customer Satisfaction Policy,
please contact Aero-Spa™ at W300 N7706 Christine Lane, Hartland, Wisconsin, 53029, visit
refund claim, please provide the reason for seeking the refund.
MANUFACTURERS LIMITED WARRANTY
DISCLAMIER, DURATION, AND SCOPE OF THE WARRANTY
Aero-Spa™, LLC (“Aero”) warrants its products against defective materials or workmanship at
the time of shipment for a specific warranty period. Aero offers the following warranty periods
for each of its products: 12 months for “New” products, and 6 months for all refurbished
products. To make a valid claim under this warranty, Aero must be notified through writing, e-
mail or otherwise of any warranty claim within the applicable warranty period and in the
manner described below.
All implied warranties including the IMPLIED WARRANTY OF MERCHANTABILITY and the
IMPLIED WARRANTY OF FITNESS FOR A PARTICULAR PURPOSE are also LIMITED IN
DURATION to the applicable warranty period. SOME STATES DO NOT ALLOW
LIMITATIONS ON HOW LONG AN IMPLIED WARRANTY LASTS, SO THE ABOVE
LIMITATIONS MIGHT NOT APPLY TO YOU. This warranty only covers the original Buyer of
Aero’s product. Aero will not be responsible under this warranty for any defect, failure, or
malfunction of this product caused by abuse, misuse, unauthorized adjustments or
dissembling of this product during the duration of this warranty. AERO MAKES NO OTHER
WARRANTY BEYOND THAT CONTAINED IN THIS WRITING.
EXCLUSIVE REMEDY AVAILABLE UNDER THIS WARRANTY
If after the expiration of the Customer Service Policy, the Aero product fails to operate properly
under normal conditions within the remaining warranty period because of a defect in materials
or workmanship, Aero will repair or replace this product without cost to you for parts or labor. If
repair or replacement of the product is impossible or impracticable, as an alternative, Aero
retains the option to reimburse you with the original purchase price of the product within a

© Copyright Aero-Spa®, LLC 2017 P/N102757 rev B
12
reasonable amount of time. THE REMEDY DESCRIBED ABOVE SHALL BE YOUR
EXCLUSIVE REMEDY FOR BREACH OF ANY EXPRESS OR IMPLIED WARRANTY. NO
OTHER REMEDY FOR BREACH OF THIS WARRANTY, EXPRESS OR IMPLIED
(INCLUDING THE IMPLIED WARRANTIES OF MERCHANTABILITY AND FITNESS FOR A
PARTICULAR PURPOSE), SHALL BE AVAILABLE TO YOU. Under no circumstances will
Aero be responsible for INCIDENTAL AND/OR CONSEQUENTIAL DAMAGES, lost profits,
lost sales, injury to property, or any other loss. These limitations do not apply, however, to
damages related to personal injury. SOME STATES DO NOT ALLOW LIMITATION ON
INCIDENTAL OR CONSEQUENTIAL DAMAGES, SO THE ABOVE LIMITIATIONS MAY
NOT APPLY TO YOU. For service, questions or to make a warranty claim, contact Aero at
W300 N7706 Christine Lane, Hartland, Wisconsin, 53029, visit our website at www.aero-
spa.net or e-mail us at info@aero-spa.net. If Buyer is making a warranty claim, please provide
a description of the nature of the problem. Alternatively, call the following toll-free number to
obtain further warranty instructions: 1-877-226-8111.
STATE LAWS AND THIS WARRANTY
THIS WARRANTY GIVES YOU SPECIFIC LEGAL RIGHTS, AND YOU MAY ALSO HAVE
OTHER RIGHTS WHICH VARY FROM STATE TO STATE. To the extent that state law
renders any provision in this warranty inoperative, state law shall apply and that clause shall
be severed from the warranty; this severance, however, does not render the entire warranty
inoperative.
Table of contents
Other AEROSPA Hot Tub manuals
