Agilent Technologies M3815A User manual

Blood Pressure Unit
User Guide
M3815-90001-UG-Eng-revD.qxd 5/1/01 4:20 PM Page 1

Blood Pressure Unit Quick Start
2
Before You Start
• Make sure you read and understand the Blood Pressure Unit
User Guide.
Taking Your Blood Pressure
To begin, sit down, put on the blood pressure cuff, and press the
START/STOP button. Your blood pressure (BP) is measured and
displayed automatically.
1. Sit comfortably with your left forearm resting on a flat surface
so that the center of your upper arm is at about the same height
as your heart.
2. Loosen the blood pressure cuff so that you can slide the cuff
over your arm. Place your hand into the cuff.
3. Slide the cuff up your forearm.
4. As you slide the cuff on, position the cuff so that the bottom of
the cuff is on your upper arm and about one inch above the
elbow crease; make sure that the air hose dangles
on the inside of your arm.
5. Pull on the cuff end to tighten it. The cuff does not have to be
pulled very tight. For comfort, you can leave room for one fin-
ger to fit under the cuff.
6. Fold the cuff end back over the metal D-ring, and fasten the
cuff end to the Velcro®closure.
7. Press the START/STOP button. Sit still and do not move your
arm during the measurement. If you want to stop the measure-
ment at any time, press the START/STOP button. Wait 15 min-
utes before taking your blood pressure again.
M3815-90001-UG-Eng-revD.qxd 5/1/01 4:20 PM Page 2

3
BP User Guide
8. A series of numbers and symbols appear in the display window.
The cuff inflates and may feel tight. A long beep signals the end of
the BP measurement and the cuff deflates. The display window
shows your final BP measurement and pulse rate.
WARNING: As you watch the display, if you notice the pressure
increase above 330 mmHg OR if the pressure decreases and remains
at 15 mmHg for more than 3 minutes, press the START/STOP but-
ton to stop the measurement. The BP Unit is defective. Contact your
Health Care Provider.
9. You can remove the cuff. The BP Unit has taken your blood pres-
sure and pulse rate. The BP Unit turns off automatically.
Note: Do not store the BP Unit with the air hose twisted or wrapped
tightly around the display.
M3815-90001-UG-Eng-revD.qxd 5/1/01 4:20 PM Page 3

Notice
4
The information contained in this document is subject to change
without notice.
Agilent Technologies makes no warranty of any kind with regard to this
material, including, but not limited to, the implied warranties of mer-
chantability and fitness for a particular purpose. Agilent Technologies
shall not be liable for errors contained herein or for incidental or conse-
quential damages in connection with the furnishing, performance, or use
of this material.
Agilent Technologies assumes no responsibility for the use or
reliability of its software on equipment that is not furnished by
Agilent Technologies.
This document contains proprietary information that is protected by
copyright. All rights are reserved. No part of this document may be
photocopied, reproduced, or translated to another language without
the prior written consent of Agilent Technologies.
Copyright ©2001 Agilent Technologies, Inc.
All rights reserved.
Agilent Technologies, Inc.
3000 Minuteman Rd.
Andover, MA 01810
USA
Note: All Agilent devices must be initially installed by an Agilent
installer or responsible party. The installation information provided in
this guide is for reference only.
M3815-90001-UG-Eng-revD.qxd 5/1/01 4:20 PM Page 4

Table of Contents
5
BP User Guide
Blood Pressure Unit Quick Start ........................................2
Notice ....................................................................................4
Introduction ..........................................................................6
Precautions ............................................................................7
BP Unit Symbols ..................................................................9
BP Unit Components ..........................................................10
Installation ..........................................................................12
Installation Setup ..........................................................12
Inserting Four Type AA (1.5 Volt) Alkaline
Batteries ........................................................................13
Performing a Radio Test................................................15
Preparing the Cuff Assembly ........................................17
How to Take Your Blood Pressure ....................................18
Taking Your Blood Pressure..........................................19
What Display Symbols Mean ............................................26
Maintenance........................................................................27
Troubleshooting ..................................................................28
Specifications ......................................................................30
Electromagnetic Compatibility ........................................32
Electromagnetic Compatibility Testing ....................32
Avoiding Electromagnetic Interference Problems ..33
FCC Regulations ................................................................34
Conclusion ..........................................................................35
M3815-90001-UG-Eng-revD.qxd 5/1/01 4:20 PM Page 5

6
Welcome to Agilent Technologies’ Interactive Healthcare Services. Your
Health Care Provider has enrolled you in a progressive program to mea-
sure, transmit, and review your vital signs on a daily basis. This pro-
gram’s approach will help you and your provider make better informed
decisions about your care.
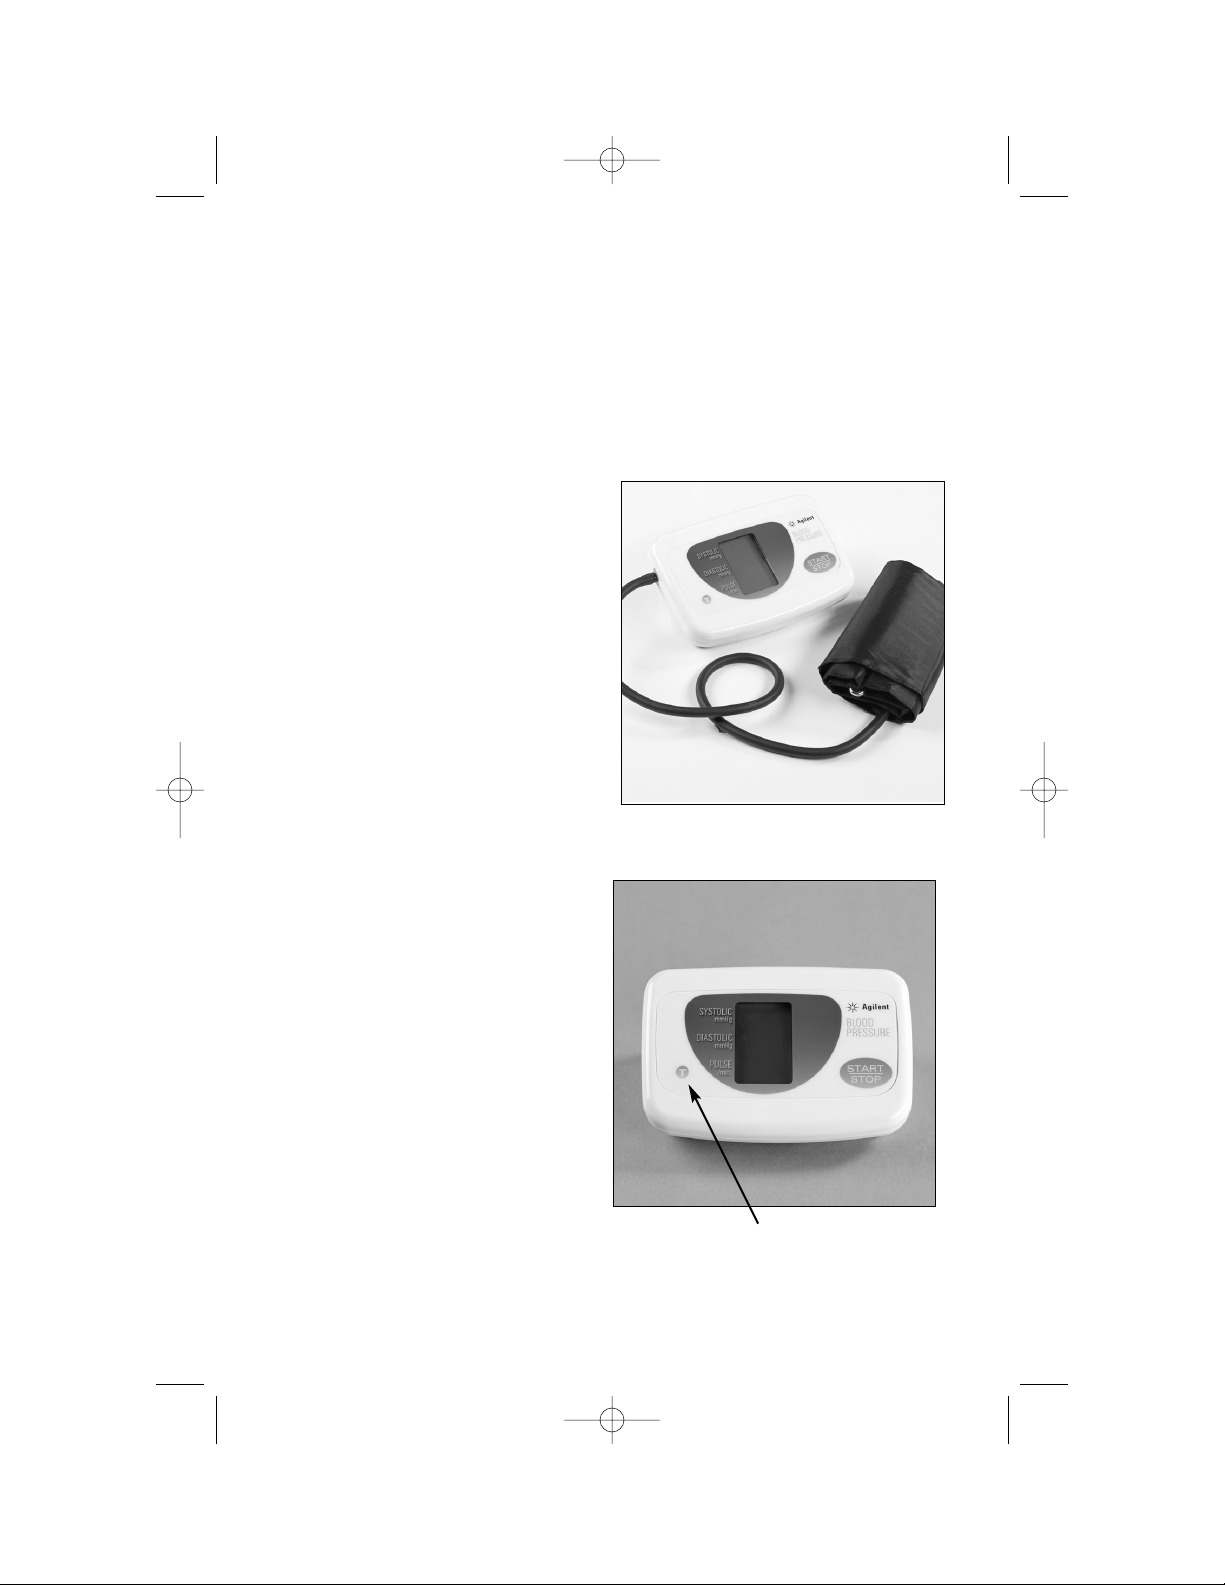
Your patient measurement set—which may include a Scale, Blood
Pressure Unit, Rhythm Strip Recorder, and Home Hub—is designed to
let you quickly and easily take your vital signs. The data you collect in
a few minutes each day are automatically transferred via the Agilent
Home Hub, using your existing phone line, to your Health Care
Provider’s computer system. The Home Hub is smart enough to know
when you’re not on the phone, and that’s when it will make the data
transfer. You do not need to do anything. Feel free to use the phone at
any time. The Home Hub also recognizes if the connection was inter-
rupted and will automatically re-transmit stored information later.
If any of the devices in your patient measurement set is not functioning
properly, please advise your Health Care Provider and Agilent will
repair or replace the device.
As a user of Interactive Healthcare Services, you are taking an active
role in providing your Health Care Provider with accurate, relevant, and
timely information—information we expect will go a long way toward
improving your quality of life.
The Blood Pressure Unit User Guide explains how you can measure your
blood pressure and pulse rate from the convenience and comfort of your
own home. This guide provides you easy-to-understand information about
operation and maintenance. Agilent and your Health Care Provider appre-
ciate your efforts to actively participate in your home health care plan.
Introduction
M3815-90001-UG-Eng-revD.qxd 5/1/01 4:20 PM Page 6

Precautions
7
BP User Guide
• It is important that you use this Blood Pressure Unit (BP Unit) as
directed by your Health Care Provider. This BP Unit is provided for
your personal use only. Please do not allow others to use this BP
Unit.
• Your Health Care Provider will tell you when and how often to take
your blood pressure. Please follow your Health Care Provider’s
directions carefully. Report any change in the way you take your
blood pressure (BP) to your Health Care Provider.
• Follow your physician’s instructions regarding symptoms that require
direct contact with your Health Care Provider. Keep in mind that use
of this BP Unit is not a substitute for medical care. Only your Health
Care Provider is qualified to interpret the results. If you have any
questions regarding how to use your BP Unit, please contact your
Health Care Provider.
•Caution: Avoid storing your BP Unit inside a metal container or
drawer, such as a file cabinet.
•Caution: Do not attempt to service or repair the BP Unit yourself.
If a mechanical problem occurs, contact your Health Care Provider
for further instructions.
•WARNING: It is important for you to watch the display when taking
your blood pressure measurement. If the numbers go up to 330
mmHg, press the START/STOP button to stop the measurement.
The BP Unit is defective. Contact your Health Care Provider for fur-
ther instructions.
M3815-90001-UG-Eng-revD.qxd 5/1/01 4:20 PM Page 7

Precautions
8
•WARNING: As you watch the display when taking your blood pres-
sure measurement, if the BP numbers drop down to 15 mmHg and
stay that way for more than 3 minutes, press the START/STOP but-
ton to stop the measurement. The BP Unit is defective. Contact your
Health Care Provider for further instructions.
• If you received an error message, aborted the BP measurement while
in progress, or feel that the reading might be in error, wait 15 min-
utes before taking your blood pressure again.
•Caution: Avoid storing the BP Unit where children or pets have
access to it. There may be a risk of injury if children or pets get
tangled in the air hose or if the cuff inflates.
•WARNING: Do not allow children to use this BP unit. This BP unit
is intended for the patient only.
M3815-90001-UG-Eng-revD.qxd 5/1/01 4:20 PM Page 8

Blood Pressure Unit Symbols
9
BP User Guide
Symbol Definitions
Type B Patient Applied Parts as defined in IEC 60601-1.
Not suitable for direct cardiac application.
Attention: Consult accompanying documents.
Complies with Canadian Standards Association.
Complies with Class B standard.
M3815-90001-UG-Eng-revD.qxd 5/1/01 4:20 PM Page 9

Blood Pressure Unit Components
10
The BP Unit is made up of the BP
Unit and a cuff assembly. An air
socket is on one side of the BP
Unit. The cuff assembly has a cuff
(with metal D-ring) and an air
hose (with air connector).
The BP Unit face has a
START/STOP button, a display
window (for the BP and pulse
measurement), and a Radio Test
button.
Radio Test button
M3815-90001-UG-Eng-revD.qxd 5/1/01 4:20 PM Page 10

Blood Pressure Unit Components
11
BP User Guide
The BP Unit back has a battery compartment.
Storage Between Uses
Store the BP Unit so that the hose is not bent. Do not wrap the hose
around the BP display unit.
Battery compartment
Right Way Wrong Way
M3815-90001-UG-Eng-revD.qxd 5/1/01 4:20 PM Page 11

Installation
12
• Locate and store your BP Unit within 20 feet of the Home Hub. In
addition to transmitting data when you take your blood pressure,
your BP Unit sends periodic updates to the Home Hub.
• Hazards for children are packing materials that can be swallowed or
plastic bags that can be pulled over the head. Discard and safely dis-
pose of these materials immediately.
•Caution: Avoid storing the BP Unit where children or pets have
access to it. There may be a risk of injury if children or pets get
tangled in the air hose or if the cuff inflates.
•Caution: Avoid storing your BP Unit inside a metal container or
drawer, such as a file cabinet.
Installation Setup
The measurements you take cannot be transmitted to your Health Care
Provider until you install the Home Hub.
You must install the Home Hub before you set up the BP Unit. Refer to
the Home Hub User Guide.
After you have performed the installation for the Home Hub, insert
alkaline batteries into the BP Unit, perform the Radio Test, and prepare
the cuff assembly. Then, you must return to the Home Hub User Guide
and complete the connection steps.
WARNING: Do not allow children to use this BP unit. This BP unit is
intended for the patient only.
It is important to take your blood pressure as instructed by your Health
Care Provider. Your Health Care Provider may contact you if they do
not receive blood pressure measurements as scheduled.
M3815-90001-UG-Eng-revD.qxd 5/1/01 4:20 PM Page 12

Installation
13
BP User Guide
Inserting Four Type AA (1.5 Volt) Alkaline Batteries
Caution: Use alkaline batteries only. Replace all four batteries at the
same time. Do not use rechargeable batteries. Always replace old
batteries with four new batteries.
WARNING: Do not use this equipment with the battery door removed.
1. Remove the battery compartment cover on the back of the BP
Unit by gently lifting up the tab marked with the arrow symbol
and popping the cover off.
Arrow symbol
M3815-90001-UG-Eng-revD.qxd 5/1/01 4:20 PM Page 13

Installation
14
2. Place the batteries in the compartment with the positive (+) and
negative (-) terminals matching those shown in the compart-
ment. To prevent the batteries from popping out, insert the bat-
teries in the bottom row first. Make sure that the battery termi-
nals make contact with the compartment terminals.
3. Replace the cover by inserting its tabs into the slots of the com-
partment and gently pressing the cover into place.
4. Perform a Radio Test as described in the next section.
Bottom row
M3815-90001-UG-Eng-revD.qxd 5/1/01 4:20 PM Page 14

Installation
15
BP User Guide
Performing a Radio Test
Perform a Radio Test when you set up the BP Unit, change batteries,
or change the testing location.
1. The Radio Test button appears as a circle with a “T” inside it on
the lower left of the display (for SYSTOLIC, DIASTOLIC,
PULSE) on the front of the BP Unit. Press and hold the Radio
Test button for at least 3 to 5 seconds until the
Home Hub starts beeping (at a rate of one beep per second).
Note: If the Home Hub’s using phone light turns on while performing
the Radio Test, stop and wait until the using phone light turns off
before resuming the Radio Test.
2. If the Home Hub does not beep, determine if there are any
obstacles (such as large metal objects) between the BP Unit and
the Home Hub.
Radio Test button
M3815-90001-UG-Eng-revD.qxd 5/1/01 4:20 PM Page 15

Installation
16
3. If obstacles are present, move the BP Unit so that no obstacles
are between the BP Unit and the Home Hub. If no obstacles
are present, move the BP Unit closer to the Home Hub.
4. Press and hold the Radio Test button until the Home Hub
beeps. If the Home Hub does not beep within 5 seconds, con-
tact your Health Care Provider.
Note: If you accidentally press the Radio Test button, it is OK.
If you are performing the Radio Test for the first time, stop now and return to the
Home Hub User Guide, and then complete the steps to connect the Home Hub.
Otherwise, you can begin using your BP Unit as usual.
Preparing the Cuff Assembly
1. Insert the air connector at
the end of the air hose into
the socket on the side of the
BP Unit. Gently rotate the
air connector as you insert it
into the socket. You should
feel the air connector snap
into place.
M3815-90001-UG-Eng-revD.qxd 5/1/01 4:20 PM Page 16

Installation
17
BP User Guide
2. If the cuff has not been threaded through the metal D-ring,
thread the cuff end through now. Then, fold the cuff end back
over the D-ring so that the end fastens to the
Velcro®closures.
The BP Unit is now ready for use.
M3815-90001-UG-Eng-revD.qxd 5/1/01 4:20 PM Page 17

18
How to Take Your Blood Pressure
To begin, sit down, put on the BP cuff, and press the START/STOP
button. Your blood pressure is measured and displayed automatically.
Caution: Do not talk or move during the measurement.
Before you take your BP measurement, do the following:
• Sit within 20 feet of the Home Hub.
• Relax for about 15 minutes.
• Remove restrictive clothing or roll up a loose garment sleeve. You
will be placing the cuff on your bare upper arm.
• Use the left arm for the BP measurement unless instructed otherwise
by your Health Care Provider.
M3815-90001-UG-Eng-revD.qxd 5/1/01 4:20 PM Page 18

19
BP User Guide
How to Take Your Blood Pressure
Taking Your Blood Pressure
1. Sit comfortably with your left forearm resting on a flat surface
so that the center of your upper arm is at about the same height
as your heart.
Note: If you desire, you may lie down while someone else takes your
blood pressure.
It is important to be consistent in the way you take your blood
pressure (either sitting or lying down). Report any changes in
how you take your blood pressure to your Health Care Provider
immediately.
M3815-90001-UG-Eng-revD.qxd 5/1/01 4:20 PM Page 19

20
How to Take Your Blood Pressure
2. Place your hand into the cuff.
3. Slide the cuff up your forearm.
M3815-90001-UG-Eng-revD.qxd 5/1/01 4:20 PM Page 20
Table of contents