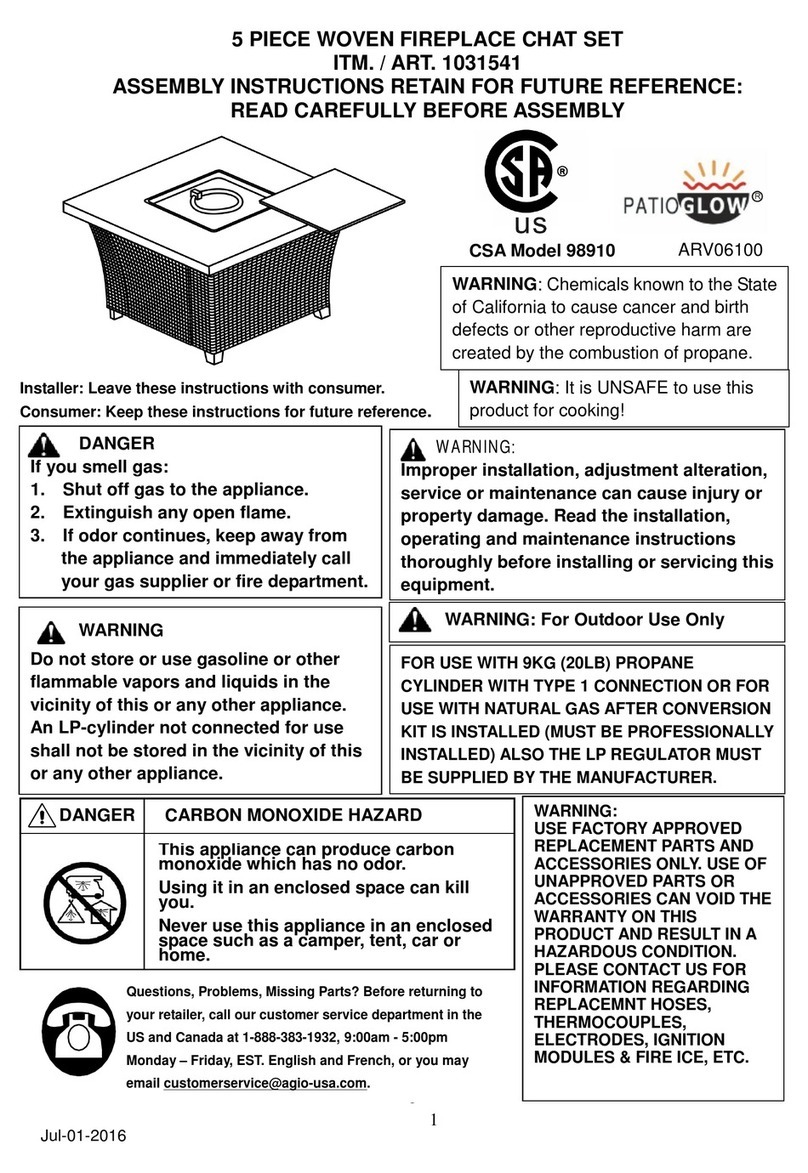
Agio 98300 User manual

1
11 PIECE HIGH DINING FIRE TABLE SET
ITM. / ART. 1500096
IMPORTANT
RETAIN FOR FUTURE REFERENCE: READ CAREFULLY
BEFORE ASSEMBLY
WARNING
Do not store or use gasoline or other
flammable vapors and liquids in the
vicinity of this or any other appliance.
An LP-cylinder not connected for use
shall not be stored in the vicinity of this
or any other appliance.
DANGER
If you smell gas:
1. Shut off gas to the appliance.
2. Extinguish any open flame.
3. If odor continues, keep away from
the appliance and immediately call
your gas supplier or fire department.
WARNING:
USE FACTORY APPROVED
REPLACEMENT PARTS AND
ACCESSORIES ONLY. USE OF
UNAPPROVED PARTS OR
ACCESSORIES CAN VOID THE
WARRANTY ON THIS
PRODUCT AND RESULT IN A
HAZARDOUS CONDITION.
PLEASE CONTACT US FOR
INFORMATION REGARDING
REPLACEMENT HOSES,
THERMOCOUPLES,
ELECTRODES, IGNITION
MODULES & FIRE ICE, ETC.
WARNING:
Improper installation, adjustment alteration,
service or maintenance can cause injury or
property damage. Read the installation,
operating and maintenance instructions
thoroughly before installing or servicing this
e
q
ui
p
ment.
FOR USE WITH 9KG (20LB) PROPANE
CYLINDER WITH TYPE 1 CONNECTION OR FOR
USE WITH NATURAL GAS AFTER CONVERSION
KIT IS INSTALLED (MUST BE PROFESSIONALLY
INSTALLED).
Jun-01-2017
Installer: Leave these instructions with consumer.
Consumer: Keep these instructions for future reference.
Questions, Problems, Missing Parts? Before returning to
your retailer, call our customer service department in the
US and Canada at 1-888-383-1932, 9:00am - 5:00pm
Monday – Friday, EST. English and French, or you may
Thi
s app
li
ance can pro
d
uce car
b
on
monoxide which has no odor.
Using it in an enclosed space can kill
you.
Never use this appliance in an enclosed
space such as a camper, tent, car or
home.
DANGER CARBON MONOXIDE HAZARD
WARNING: For Outdoor Use Only
WARNING: Chemicals known to the State
of California to cause cancer and birth
defects or other reproductive harm are
created by the combustion of propane.
WARNING: It is UNSAFE to use this
product for cooking!
1
CSA Model 98300
ARV13200

2
TABLE OF CONTENTS
Important Safety Information 3
Important Information About Propane 4
Specifications 4
Parts Identification List 5
Installation 6-7
Natural Gas Conversion 8-9
Batteries 9
Lighting Instructions 10
Maintenance 10
Lazy Susan/Burner cover assembly 11
Troubleshooting Guide 11
Warranty 12-13
For additional online video support on troubleshooting
and set up, please feel free to visit our website at:
www.agio-usa.com/support/firepits
Jun-01-2017

3
IMPORTANT SAFETY INFORMATION
The installation must conform with local codes or, in the absence of local codes, with the National Fuel Gas
Code, ANSI Z223.1/NFPA 54; International Fuel Gas Code. ; Natural Gas and Propane Installation Code,
CSA B149.1; or Propane Storage and Handling Code, B149.2, as applicable.
The appliance and appliance main gas valve must be disconnected from the gas supply piping system during
any pressure testing of that system at test pressures in excess of 1/2 psi (3.5kPa).
The appliance must be isolated from the gas supply piping system by closing its equipment shutoff valve
during any pressure testing of the gas supply system at test pressure equal to or less than 1/2 psi (3.5kPa).
The appliance area must be kept clear and free from combustible materials, gasoline and other flammable
vapors and liquids.
Do not use this appliance if any part has been under water. Immediately call a qualified service technician to
inspect the appliance and to replace any part of the control system and any gas control which has been under
water.
Children and adults should be alerted to the hazards of high surface temperatures and kept at a safe
distance to avoid burns or clothing ignition.
Young children should be carefully supervised when they are anywhere near the appliance.
Clothing or other flammable material should not be hung from the appliance, or placed on or near the
appliance.
Any screen or guard removed for servicing an appliance must be replaced prior to operating the
appliance.
Installation and repair should be done by a qualified service person. The appliance should be
inspected before use and at least annually by a professional service person. More frequent cleaning
may be required as necessary. It is imperative that the control compartments, burners and circulating
air passageways of the appliance be kept clean.
Do NOT burn solid fuels in this gas fireplace.
Do NOT ignite the burner before pouring all of the burner media (lava rock or fire ice) into the burner pan. The
media must be evenly distributed over the burner.
During initial firing of firepit, please stay away from the firepit for 20 minutes as fire media (lava rock or fire ice)
may pop and hit someone on the face or eyes
Do NOT ignite or use the firepit if the burner media (lava rock or fire ice) are wet. Ensure the burner media are
completely dry before igniting as intense heat could cause the media to crack and pop.
ItisUNSAFEtousethisproductforcooking!
CAUTION: The propane gas pressure regulator provided with this appliance must be used. This regulator is
set for an outlet pressure of 11 inches water column.
This outdoor gas appliance is not intended to be installed in or on recreational vehicles and/or boats.
Before each use of this gas appliance, open the LP (Liquid Propane) Tank Drawer and inspect the LP Hose. If
there is evidence of excessive abrasion or wear, or the hose is cut, it must be replaced prior to the gas
appliance being put into operation. Use only the replacement hose assembly specified in this manual. Inspect
the burner before each use of the appliance. The burner must be replaced prior to the appliance being put
into operation if it is evident that the burner is damaged. Use only the burner listed in these instructions.
Keep the fuel supply hose away from any heated surfaces.
Jun-01-2017

4
IMPORTANT SAFETY INFORMATION ABOUT
PROPANE (LP) GAS
A LP-gas cylinder for use with this appliance must have a capacity of 9 kgs / 20
lbs . and must be equipped with a Type 1 connector and an OPD (overfill protection
device). Figure 1
The LP-gas supply cylinder to be used must be constructed and marked in
accordance with the specification for LP-gas cylinders of the U.S. Department of
Transportation (DOT) or the National Standard of Canada, CAN/CSA-B339,
Cylinder, Sphere and Tubes for the Transportation of Dangerous Goods.
The cylinder supply system must be arranged for vapor withdrawal.
The cylinder used must include a collar to protect the cylinder valve.
This appliance shall be used only outdoors in a well-ventilated space and shall
not be used in a building, garage or any other enclosed space.
When this appliance is not in use, the gas must be turned off at the supply
cylinder.
Storage of this appliance indoors is permissible only if the cylinder is
disconnected and removed from the appliance.
Cylinders must be stored outdoors in a well-ventilated area out of the reach of
children. Disconnected cylinders must have threaded valve plugs tightly
installed and must not be stored in a building, garage or any other enclosed
areas.
CSA (Canadian Standards Association) certified to ANSI Z21.97-2014 / CSA
2.41-2014 “Outdoor Decorative Gas Appliances”
The gas hose is routed through a “U” bolt to prevent the hose from coming in contact
with the burner. DO NOT remove the hosefromthe“U”bolt. SeeFigure2.
SPECIFICATIONS
INPUT 40,000 Btu/hr 30,000 Btu/hr Low fire
Propane Regulator
Pressure
2.74 kpa / 11 in water column
Natural Gas Minimum
Inlet Pressure
1.74 kpa / 7 in water column
Clearances to
combustible surfaces
Sides 60.9 cm / 24 inches Top:182.8cm/72 inches
Regulator hose
pointed down
Figure 1 Figure 2
Jun-01-2017

5
DESCRIPTION PART# QTY
A CONTROL KNOB FP0245 1
B GAS VALVE FP0307 1
C THERMOCOUPLE FP0004 1
D LP REGULATOR HOSE FP0005 1
E ELECTRODE FP1330 1
F GAS TUBE FP1384 1
G ORIFICE ELBOW FP1385 1
H IGNITION MODULE FP0006 1
I ORIFICE BRACKET FP0311 1
J PROPANE ORIFICE FP1283 1
K NATURAL GAS ORIFICE FP1284 1
L LP TANK RETAINING KNOB FP0585 2
M FIRE ICE SET FP1650 1
N ADJUSTABLE FOOT CAPS FC0759 4
O BOLTS HW0036 4
P WASHERS HW0594 4
Q HEX BOLT DRIVER HW0252 1
R FIREPIT TABLETOP FP1813 1
S FIREPIT BASE FP1814 1
T
BURNER COVER
PROTECTIVE RING FP1815 1
U FIREPAN/BURNER
ASSEMBLY FP1816 1
V
LAZY SUSAN / BURNER
COVER FP1817 1
W “AAA” BATTERY(1.5V) HW0705 1
Jun-01-2017
PART
PARTS IDENTIFICATION LIST

6
INSTALLATION
1. Carefully unpack all items from the box. Place the base in the final position. There must
be a minimum of 60.9 cm / 24 inches of clearance from the side of the table top to any
combustible walls.
2. Place the tabletop on the base. Secure the tabletop to the firepit base using the bolts
and washers that are provided. Put the burner cover protective ring into the tabletop. See
Figure 3.
3. Pour the fire ice into the burner pan completely covering the burner. See Figure 4.
4. Remove the cardboard cover from the ignition well as shown in Figure 5. Remove any
lava rock or fire ice on top of the ignition well.
CARDBOARD COVER
5. Slide the tank drawer out and place the LP tank in the drawer. Connect the regulator as
shown in Figure 6. Turn the black handle clock-wise to tighten. Turn the handle counter
Figure 3
Figure 4
Figure 5
Jun-01-2017

7
clock-wise to remove. The hose must point down. Check that the valve is turned all the way
clockwise to the "OFF" position. Open the tank valve. Apply a solution of soapy water to the
tank-regulator connection and to the valve-hose connection to check for leaks. If soap
bubbles continue to form, the connection has a leak. If a leak is found, close the tank valve
and tighten all connections.
NEVER USE A FLAME TO CHECK FOR LEAKS.
5. Tighten threaded knobs (L) found on tank tray (Figure 7) so that the LP tank cannot
move from side to side. Do not remove plastic cap from end of threaded section.
Figure 7
Figure 6
Jun-01-2017

8
NATURAL GAS CONVERSION
Natural gas conversion must be performed only by your natural gas provider or
service company.
Step 1- At the control panel, disconnect the rubber gas hose from the gas valve.
Step 2- Below the burner, disconnect the aluminum gas tube from the orifice elbow.
Step 3- Remove the 2 M4 nuts from the orifice holder and remove the orifice bracket
assembly.
Step 4- Disconnect the orifice from the elbow and replace it with the Natural Gas orifice
from the kit.
Re-fit the orifice bracket assembly onto the holder using the 2 M4 screws and nuts.
Re-connect the aluminum gas tube into the end of the elbow. Connect your Natural Gas
supply line onto the gas valve at the control panel. BEFORE ATTEMPTING TO USE
THE FIREPIT, check ALL of the connections for leaks using a solution of soapy water. If
a leak is discovered and any bubbles are seen, close the main gas valve and re-tighten
ALL the connections. NEVER USE A FLAME TO CHECK FOR GAS LEAKS!
Jun-01-2017

9
Step 5- Stick the conversion label on the rating plate as shown in Figure 8.
Metal Rating Plate
Conversion Label
BATTERIES
Make sure the control knob is in the "OFF" position.
Unscrew the push button cap on the ignition module
located on the control panel to access the battery
compartment. The ignition module requires one
Alkaline AAA size battery (1.5V). The negative (-) end
goes in first. See Figure 9. Dispose of battery safely.
Battery may explode or leak if charged or disposed of
in fire. Make sure of the polarity. The battery included
is mercury and cadmium free.
CAUTIONS: BATTERY INSTRUCTIONS
●Always purchase the correct size and grade of battery most suitable for the
intended use.
●Always replace the whole set of batteries at one time, taking care not to mix old
and new ones, or batteries of different types.
●Clean the battery contacts and also those of the device prior to battery
installation.
●Ensure the batteries are installed correctly with regard to polarity (+ and -).
●Remove batteries from equipment which is not to be used for an extended
period of time.
●Remove used batteries promptly.
For recycling and disposal of batteries to protect the environment, please check
the internet or your local phone directory for local recycling centers and / or follow
local government regulations.
Figure 9
IGNITION
MODULE
Jun-01-2017
Serial Number _________________ Model Number: 98900
CAUTION: The gas pressure regulator provided with this appliance must be used. This regulator is set for an outlet pressure of
Minimum clearance from combustible constructions: Sides: 60.9 cm/24 inches. Top 182.8 cm/72 inches.
FOR OUTDOOR USE ONLY. If stored indoors, detach and leave cylinder outdoors.
This appliance has been converted to use Natural Gas. Input 40,000 Btu/hr.
Max Gas Supply Pressure 7 inch w.c. (1.74 kPa) Min. Gas Supply Pressure 5 inch w.c. (1.24 kPa)
Figure 8

10
LIGHTING INSTRUCTIONS
Warning: If these instructions are not followed exactly, a fire or
explosion may result causing property damage, personal injury
or loss of life.
1. Open the tank drawer and find the control panel on the left.
Make sure the control knob is in the "OFF" position. See
Figure 10. Open the tank valve all the way.
2. Push in the igniter button. You will hear a slight clicking sound.
With the igniter button pushed in, push and turn the control
knob to the “ON” position. The fire should light within a few
seconds. Once the flame is lit, release the igniter button and
continue to hold the control knob in for 10 to 15 seconds.
Release the control knob. The control knob should pop back
out and then the fire remains lit. Note: If the fire does not light,
turn the knob to the “OFF” position and wait five (5) minutes
before trying again.
3. To turn down the flame, push the control knob in slightly and
turn to Medium (medium flame), or Low (small flame).
4. To shut down the fire pit, turn the control knob to the “OFF”
position and turn off the tank valve.
MAINTENANCE
The flames should look like those in Figure 11. To clean the burner, use a soft brush after
the burner has cooled completely. Never use a vacuum cleaner on the burner. It is
recommended to store the firepit indoors during winter if it will be subjected to freezing
temperatures. The LP cylinder must be disconnected and removed from the appliance
before the appliance can be stored indoors.
Figure 10
Figure 11
Jun-01-2017

11
LAZY SUSAN/BURNER COVER ASSEMBLY
Place the lazy susan / burner cover on the table top as shown in Figure12.
WARNING: BEFORE PLACING THE LAZY SUSAN / BURNER COVER ON, MAKE SURE THE
FIREPIT HAS BEEN SHUT OFF AND THE BURNER HAS COMPLETELY COOLED DOWN.
TROUBLESHOOTING GUIDE
PROBLEM CAUSE REMEDY
No Propane Gas at Burner
Check that gas tank valve is open. Turn
control knob to “ON” and push control knob
in. Make sure tank has propane gas.
No Spark at Electrode
Check that AAA battery is installed with
negative (-) end first and has a charge.
Check that the wire is connected to the
ignition module. Check that the electrode is
not cracked or broken.
Burner won’t light
Lack of oxygen Remove excess lava rocks or fire ices from
around the ignition well.
Thermocouple not in flame
Check that the tip of the thermocouple is
even with the top of the ignition well.
Remove any fire ice from the ignition well.
Thermocouple connection
at the main control valve is
loose
Tighten the thermocouple nut at the back of
the valve.
Burner won’t stay
lit after lighting
No Fire ice on Burner Cover the burner with fire ice per the
instructions.
Figure 12
Jun-01-2017

12
One Year Limited Warranty for Firepit
What is covered under this warranty?
Subject to the terms and conditions set forth below, fireplaces are warranted against defects in
material and workmanship for a period of one year.
If you have questions regarding care and maintenance of the item(s) you have purchased, please
see the accompanying care and maintenance guide or visit our website at www.agio-usa.com. If
you have further questions, please call our customer service center in the US and Canada at
1-888-383-1932. 9:00am- 5:00pm Monday-Friday, EST.English and French. International Regions
please visit http://www.agio-usa.com/service-center/costco-international/ or contact email
How Do I Obtain Warranty Service?
To obtain warranty service, you must contact our customer service center within the
relevant warranty period and provide us with a copy of your dated register receipt as proof
of the purchase date. We reserve the right to request photographs and/or return of the
defective item(s) and/or such other evidence relating to any claim as we shall reasonably
require. Warranty claims for missing or damaged items must be submitted within 90 days
of purchase. If you purchased our product through any of our dotcom retailers and receive
a damaged item, please contact the retailer to report shipping damage. Please call our
customer service center in the US and Canada at 1-888-383-1932 for additional warranty
claim details and procedures. You may also contact us by emailing
Eastern Standard Time.
What are the Limitations and Exclusions of this Warranty?
Warranty Limitations: This warranty is subject to the limitations set forth above. In
addition, this warranty is made to the original purchaser only, and is effective only if items
are purchased from one of our authorized dealers. This warranty is not transferable. For
warranty replacements based on warranty claims submitted within one year of purchase,
we will pay shipping and handling charges within continental North America. After the first
year, shipping and handling charges are your responsibility. We will not be responsible for
charges associated with shipments outside continental North America at any time or for
any reason.
This warranty is given and relates to product sold to your retailer by an Agio International
Company, Limited; Dimension Industries Company, Limited; or Woven Design Company,
Limited. It may also relate to products otherwise sold under the Agio brand. Warranty
services are administered by Point of Impact, Inc., an independent contractor, which is not
responsible for the warranty obligations set forth herein.
Warranty exclusions: This warranty is subject to the exclusions set forth above.In
addition, the following are excluded from coverage under this warranty: any item used for
commercial, contract or any other non-residential purpose; display models or items
Jun-01-2017

13
purchased “as is”; freight damage; items subject to misuse, abuse, neglect or lack of
proper care or maintenance (including without limitation as provided in any “care and
maintenance guide” or similar information we provide); normal wear and tear; damage
caused by acts of nature, acts of force majeure, vandalism, fire or other casualty, or
improper assembly; hardware against corrosion or rusting; purchased or replacement
parts; and all plastic parts. Also excluded are loss of use or time; inconvenience; money;
travel; packaging or incidental, special or consequential damages of any kind.
Replacement of defective items or parts as provided herein, or prorated refund of your
purchase price, at our sole discretion, shall constitute your sole and exclusive remedy for
items which are not as warranted. In no event shall our responsibility exceed the purchase
price of the item found to be other than as warranted. This warranty is the exclusive
statement of your rights with respect to items you have purchased and supersedes any
other express warranty or statement, written or oral, made in connection with the purchase
and sale of such items. The term “item” when used herein in the singular refers to the
specific piece found to be defective, and not to the entire set of which the item is a part.
Some states do not allow exclusion or limitation of incidental or consequential damages,
so the limitation may not apply to you. This warranty gives you specific legal rights, and
you may also have other rights that vary from state to state.
Our goods come with guarantees that cannot be excluded under the Australian Consumer
Law. You are entitled to a replacement or refund for a major failure and for compensation
for any other reasonably foreseeable loss or damage. You are also entitled to have the
goods repaired or replaced if the goods fail to be of acceptable quality and the failure does
not amount to a major failure.
Jun-01-2017
14
11 PLÈCES TABLE À MANGER AVEC FEU CENTRAL COMPRENANT
ITM. / ART. 1500096
IMPORTANT
GARDER POUR RÉFÉRENCE FUTURE. LIRE ATTENTIVEMENT
LES INSTRUCTIONS AVANT DE COMMENCER L’ASSEMBLAGE.
CSA Model 98910
WARNING: Il est DANGEREUX d'utiliser
ce produit pour la cuisson!
Installateur, laissez ces instructions au consommateur.
Consommateur, gardez ces instructions pour référence future.
DANGER
S'il y a une odeur de gaz:
1. É teindre l'alimentation en gaz de l'appareil.
2. É teindre toute source de flamme nue.
3. Si l'odeur persiste, rester éloigné de
l'appareil et appeler immédiatement le.
fournisseur de gaz ou le service des pompiers
AVERTISSEMENT:
une installation, un ajustement, de l’entretien ou de la
maintenance incorrects peuvent causer des blessures
ou des dommages. Lire attentivement les instructions
concernant l'installation, le fonctionnement et
l'entretien avant d'installer l'appareil ou d'effectuer son
entretien courant.
POUR UNE UTILISATION AVEC UNE BONBONNE DE PROPANE
DE 9 kg (20 lb) AVEC UNE CONNEXION DE TYPE 1 OU AVEC DU
GAZ NATUREL APRÈS QUE L’ENSEMBLE DE CONVERSION A
ÉTÉ INSTALLÉ . (CETTE INSTALLATION DOIT Ê TRE FAITE PAR
UN PROFESSIONNEL.) LE RÉGULATEUR DE PROPANE
LIQUIDE (LP) DOIT AUSSI Ê TRE FOURNI PAR LE .FABRICANT.
AVERTISSEMENT : à usage extérieur seulement
AVERTISSEMENT
Ne pas entreposer ni utiliser de l’essence ou
autres vapeurs et liquides inflammables dans le
voisinage de cet appareil ou de tout appareil
identique. Lorsqu'une bonbonne de GPL n'est
pas utilisée, il ne faut pas l'entreposer à
proximité de cet appareil ou tout autre appareil.
A
VERTISSEMENT:
N’UTILISER QUE DES PIÈCES DE
RECHANGE ET DES ACCESSOIRES
APPROUVÉS PAR LE FABRICANT.
L’UTILISATION DE PIÈCES OU
D’ACCESSOIRES NON APPROUVÉS
PEUT ANNULER LA GARANTIE DE
CE PRODUIT ET OCCASIONNER
DES CONDITIONS DANGEREUSES.
NOUS CONTACTER POUR TOUTE
INFORMATION CONCERNANT LE
REMPLACEMENT DES TUYAUX,
THERMOCOUPLES, É LECTRODES,
MODULES D’ALLUMAGE ET «
GLACE DE MÉ THANE », ETC.
Des questions, des pièces manquantes, des problèmes?
Avant d’aller chez le fournisseur, appeler, aux États-Unis
et au Canada, notre service à la clientèle au
1-888-383-1932, du lundi au vendredi de 9 h à 17 h (HNE),
C
e
t
appare
il
peu
t
pro
d
u
i
re
d
u monox
id
e
de carbone, un gaz sans odeur.
L'utilisation de cet appareil en milieu
clos peut causer la mort.
Ne jamais utiliser cet appareil dans un
lieu clos comme une caravane, une
tente, une voiture ou une maison.
DANGER MONOXIDE DE CARBONE
Jul-01-2017

15
TABLE DES MATIÈRES
Informations de sécurité importantes 16
Information importante au sujet du propane 17
Caractéristiques 17
Listedespièces 18
Installation 19-20
Conversion au gaz naturel 21-22
Piles 22
Instructions d’allumage 23
Entretien 23
Assemblage du couvercle du brûleur et du couvercle du foyer 24
Guide de dépannage 24
Garantie 25-26
Pour de l'ivnformation supplémentaire, une vidéo expl-icative ou
des instructions de dépannage, se rendre sur notre site au :
www.agio-usa.com/support/firepits (en anglais).
Jul-01-2017

16
INFORMATION DE SÉCURITÉ IMPORTANTES
L’installation doit être conforme aux codes locaux ou, en leur absence, au National Fuel Gas Code, ANSI
Z223.1/NFPA 54; à l'International Fuel Gas Code; au Natural Gas and Propane Installation Code, CSA B149.1;
ou au Propane Storage and Handling Code, B149.2.
L’appareil et le robinet de gaz principal doivent être isolés du système de tuyaux d’alimentation en gaz en
fermant la vanne d'arrêt pendant tout essai de pression du système d’alimentation en gaz à des pressions
d’essai égales ou inférieures à ½ psi (3,5 kPa).
L’appareil doit être isolé du système de tuyaux d’alimentation en gaz en fermant la vanne d'arrêt pendant tout
essai de pression du système d’alimentation en gaz à des pressions d’essai égales ou inférieures à ½ psi (3,5
kPa).
Il ne doit jamais y avoir du matériel de combustion, essence et autres vapeurs et liquides inflammables, sur
l’aire où se trouve l’appareil.
Ne pas utiliser cet appareil si l’une de ses pièces a été immergée dans l’eau. Appeler immédiatement un
technicien de service qualifié afin qu’il inspecte l’appareil et remplace toute pièce du système de contrôle et tout
contrôle de gaz qui aurait été immergé.
Les enfants et les adultes doivent être prévenus des dangers des hautes températures sur les surfaces
et doivent rester à une distance sécuritaire pour éviter les brûlures ou l’inflammation des vêtements.
Les jeunes enfants doivent être attentivement supervisés quand ils se trouvent à proximité de
l’appareil.
Les vêtements et autres matériaux inflammables ne doivent ni être suspendus à l’appareil, ni placés
dessus ou à proximité.
Tout écran ou élément de protection retiré pour l'entretien de l’appareil doit être remis avant de le faire
fonctionner à nouveau.
L'installation et les réparations doivent être faites par un technicien d'entretien qualifié. L'appareil doit
être inspecté avant son utilisation et au moins une fois par an par un professionnel. Des nettoyages
plus fréquents peuvent s'avérer nécessaires. Il est impératif que les compartiments de contrôle, les
brûleurs et les passages où l'air circule dans l'appareil soient gardés propres.
Ne PAS faire brûler de combustibles solides dans ce foyer à gaz.
N'enflammez pas le brûleur avant de verser tous les médias de brûleur (la roche de lave ou la glace de feu)
dans la casserole de brûleur. Les médias doivent être également distribués sur le brûleur.
Pendant le allumage initial de brasero, absentez-vous s'il vous plaît du brasero depuis 20 minutes puisque les
médias de feu (la roche de lave ou la glace de feu) peuvent faire éclater et frapper quelqu'un sur le visage ou
les yeux.
N'enflammez pas ou utilisez le brasero si les médias de brûleur (la roche de lave ou la glace de feu) sont
mouillés. Garantissez que les médias de brûleur sont complètement secs avant de s'enflammer puisque la
chaleur intense pourrait faire les médias se fendre et éclater.
Il est DANGEREUX d'utiliser ce produit pour la cuisson!
AVERTISSEMENT : le régulateur de pression de gaz de propane fourni avec cet appareil doit être utilisé. Ce
régulateur est installé pour une pression de 11 pouces de colonne d'eau.
Cet appareil à gaz extérieur n’est pas conçu pour être installé dans ou sur un véhicule récréatif et/ou un bateau.
Avant chaque utilisation de cet appareil au gaz, ouvrir le tiroir du réservoir de GPL (gaz de pétrole liquéfié) et
inspecter le tuyau de gaz. S'il est évident qu'il y a de l'usure ou de l'abrasion excessive, ou si le tuyau est
coupé, il doit être remplacé avant que l’appareil au gaz soit mis en marche. N'utiliser que l'ensemble de tuyaux
de remplacement spécifié dans ce manuel. Inspecter le brûleur avant chaque utilisation de l'appareil. Le brûleur
doit être remplacé avant que l'appareil soit mis en opération s'il est évident qu'il a été endommagé. N’utiliser
que le brûleur indiqué dans ces instructions. Tenir le tuyau d’alimentation éloigné de toute surface chaude.
Jul-01-2017

17
INFORMATION DE SÉCURITÉ IMPORTANTE À
PROPOS DU PROPANE (GPL)
Une bonbonne contenant du gaz (GPL) doit avoir une contenance de 9 kg (20 lb)
pour être utilisée avec cet appareil et être équipée d’un connecteur de type 1 et
d’un OPD (appareil de protection de trop-plein). Voir le schéma 1.
La bonbonne de gaz GPL utilisée doit avoir été fabriquée et marquée selon les
spécifications pour les bonbonnes de gaz GPL de l’U.S. Department of
Transportation (DOT) ou la norme CAN/CSA-B339, bouteilles et tubes utilisés pour
le transport des matières dangereuses de l’Association canadienne de
normalisation.
Le système d'alimentation de la bonbonne doit être préparé pour la sortie de la
vapeur.
La bonbonne utilisée doit comprendre un collier de protection de sa valve.
Cet appareil sera utilisé seulement à l'extérieur dans un espace bien ventilé et
ne sera pas utilisé dans un bâtiment, un garage ou tout autre espace clos.
Quand cet appareil n’est pas utilisé, l'alimentation en gaz de la bonbonne doit
être fermée.
L'entreposage de cet appareil à l'intérieur n'est autorisé que si la bonbonne est
déconnectée et retirée de l'appareil.
Les bonbonnes doivent être entreposées à l’extérieur dans une zone bien
ventilée et hors de la portée des enfants. Les bonbonnes déconnectées
doivent avoir des bouchons de valve filetés installés serrés et ne doivent pas
être entreposées dans un bâtiment, un garage ou tout autre espace clos.
Certifié conforme aux exigences ANSI Z21.97•CSA 2.41-2012 de l'Association
canadienne de normalisation (CSA) sur les appareils décoratifs d'extérieur
fonctionnant au gaz. Le tuyau de gaz est installé à l'aide d'une pièce de fixation
en U de manière à ne pas venir en contact avec le brûleur. Ne pas retirer la pièce
de fixation en U. Voir le schéma 2.
Schéma 1 Schéma 2
CARACTÉ RISTIQUES
ENTRÉE 40 000 BTU GRAND FEU 30 000 BTU PETIT FEU
Pression de régulation
du propane colonne d’eau de 2,74 kPa /
11 pouces
Pression d’entrée du
gaz naturel colonne d’eau de 1,74 kPa
/ 7 pouces
Dégagement par rapport
aux surfaces combustibles
latéral 60,9 cm / 24 po supérieur 182,8 cm / 72 po
Tuyau du régulateur
tourné vers le bas
Jul-01-2017

18
DESCRIPTION No DE PIÈCE QTÉ
A BOUTON DE CONTRÔLE FP0245 1
B ROBINET DE GAZ FP0307 1
C THERMOCOUPLE FP0004 1
D TUYAU DE RÉGULATEUR GPL FP0005 1
E ÉLECTRODE FP1330 1
F TUYAU D'ALIMENTATION EN
GAZ FP1384 1
G ORIFICE COUDÉ FP1385 1
H MODULE D’ALLUMAGE FP0006 1
I SUPPORT D’ORIFICE FP0311 1
J ENTRÉE DU PROPANE FP1283 1
K ENTRÉE DU GAZ NATUREL FP1284 1
L BOUTON DE MAINTIEN DE
LA BONBONNE DE GPL FP0585 2
M « GLACE DE MÉTHANE » FP1471 1
N CAPUCHON DE PIED
AJUSTABLE FC0759 4
O BOULONS HW0142 4
P RONDELLES HW0594 4
Q CLÉ HEXAGONALE HW0252 1
R DESSUS DE TABLE DU
FOYER FP1813 1
S BASE DU FOYER FP1814 1
T ANNEAU DE PROTECTION DU
COUVERTURE DU BRÛUR FP1815 1
U ASSSEMBLAGE
FOYER/BRÛLEUR FP1816 1
V COUVERCLE DU BRÛLEUR FP1817 1
W PILE AAA (1,5 V) HW0705 1
LISTE DES PIÈCES
PIÈCE

19
INSTALLATION
1. Déballer avec précaution tous les articles de la boîte. Mettre la base dans sa
position finale. Il faut un espace minimal de 60 cm / 24 po entre l'article et tout
mur combustible.
2. Mettre le dessus de table sur la base. Attacher le dessus de table à la base avec
les rondelles et les boulons fournis. Mettre l'anneau de protection du couverture
du brûur dans la table. Voir les schémas 3.
Schéma 3
3. Déposer la « glace de méthane » dans le bac du brûleur pour le recouvrir
complètement. Voir le schéma 4.
Schéma 4
4. Retirer le carton de protection du puits d’allumage comme montré sur le schéma
5.
COUVERCLE DE CARTON Schéma 5
5. Sortir le tiroir en le faisant glisser et y placer la bonbonne de GPL. Connecter le
régulateur tel que montré sur le schéma 6. Visser la poignée noire dans le sens
des aiguilles d’une montre pour serrer. Tourner la poignée dans le sens
contraire des aiguilles d’une montre pour la retirer. Le tuyau doit pointer vers le
bas. Vérifier que le robinet est bien tourné à fond dans le sens des aiguilles
d’une montre sur la position « Off » (Arrêt). Ouvrir le robinet de la bonbonne.
Jul-01-2017

20
Appliquer une solution d’eau savonneuse sur la connexion du régulateur de la
bonbonne et sur celle du tuyau-robinet pour déceler d’éventuelles fuites. Si la
solution fait des bulles, la connexion fuit. Dans ce cas, fermer le robinet de la
bonbonne et resserrer les connexions.
NE JAMAIS UTILISER DE FLAMME POUR CHERCHER DES FUITES.
Schéma 6
6. Serrer les tiges filetées qui se trouvent sur le plateau de la bonbonne (schéma 7)
pour que la bonbonne de GPL ne puisse pas bouger. Ne pas enlever les
capuchons en plastique qui se trouvent au bout des tiges filetées
Schéma 7
Jul-01-2017
Table of contents
Languages:
Other Agio Patio Furniture manuals
Popular Patio Furniture manuals by other brands

Leigh Country
Leigh Country Charlog TX 93620 quick start guide

Borroughs
Borroughs HTS installation instructions

Alice's Garden
Alice's Garden HELIOS1 manual

Stratco
Stratco Cooldek Roofing Design guide

CASARIA
CASARIA Deuba 992668 instructions

Inter-fab
Inter-fab TANNING LEDGE TABLES Assembly/installation instructions