AIRBOW FRAMER User manual

Quick Guide
Refer to the Airbow® website for more information. www.airbowsystems.com

Airbow® Framer Quick Guide 32 Airbow® Framer Quick Guide
CONTENTS
Your Airbow® Framer
Side A
Side B
Internal Chambers and Mechanics
Adjustable & Reversible Belt Hook
Filling
Loading Nails
Removing Nails
Using the Airbow® Framer
Before Use
Pressurise the Firing Chamber
After Use
Clear Nail Jam
Depressurise the Firing Chamber
Remove All Nails From The Magazine
Loosen The Two Screws Near Nose Depth Adjuster
Remove jammed nail
Long Term Storage
Basic Troubleshooting For First Use
4
6
8
9
10
12
14
15
Initial variability
Your Airbow® Framer is a precision tool. It can in some cases
require initial bedding in of components such as seals. You can expect
some variability in performance during initial use.
Do not repeatedly dry fire this tool
You risk damaging your tool. If you experience more than 1 dry fire
refer to the trouble shooting section of the Framer Manual.

Airbow® Framer Quick Guide 54 Airbow® Framer Quick Guide
Your Airbow®Framer
Cylinder
Pressure Gauge
Trigger
Onboard Canister covered by
Removable Protection Sleeve
Nail
Reload
Lever
Reload
Release
Safety Nail Catch
Nose Safety
Contact
Nail Depth
Adjustment Lever Re-cock Lever
Safety Pressure
Release Button
Cylinder Pressure
Release Valve
Fill Valve
Belt hook
SIDE B
SIDE A
Note: The Airbow® Onboard Canister is rated to a maximum working pressure of 310bar/ 4500psi.
(Refer to the Airbow® Framer manual download for all cylinder compliance information www.airbowsystems.com)
Onboard
Canister
Firing Chamber
Onboard
Canister
Firing Chamber
INTERNAL CHAMBERS AND MECHANICS
Firing Chamber Pressurised (See P10) Firing Chamber Isolated (See P11)
ADJUSTABLE & REVERSIBLE
BELT HOOK
Fully adjustable for your belt or hanging
on a joist and reversible for both right & left handers.
Press the button to slide in and out.

0
1
2
3
4
5
x1000 PSI
0
1
2
3
4
5
x1000 PSI
Onboard
Canister
Firing Chamber
Airbow® Framer Quick Guide 76 Airbow® Framer Quick Guide
Fill with COMPRESSED AIR ONLY. Do not fill
with Oxygen or any other bottled gases as
explosion may occur. Fill to a maximum pressure
of 310bar/4500psi. Do not exceed.
Use only an Airbow® approved high pressure
compressor otherwise explosion may occur.
Refer to www.airbowsystems.com for further information.
Prior to first use ensure Cylinder Pressure
Release Valve is closed (Hand tighten with a
flathead screwdriver or nail head).
Follow compressor instructions for compressor
set up. Ensuring appropriate cooling in place,
turn compressor on. Close pressure release valve
and check there are no leaks at connection points.
When Airbow® Framer pressure gauge
reaches 4,500 psi (310 Bar), turn compressor
off (if not auto shut off).
Disconnect high pressure air compressor
from Airbow® Framer, being sure to recap the
fill valve after filling.
WARNING: Compressor hose may whip if air
pressure is not released prior to disconnection.
Slowly unscrew pressure release valve. You will hear
a release of air pressure. Keep clear of air release.
Note 1: This Filling diagram is intended as a generic overview of the process
only. Before you undertake this process, please refer to your country’s
local regulations for any specific requirements regarding filling cylinders
with compressed air. Note 2: Be sure to read and understand your high
pressure air compressors operating instructions prior to use. Note 3: Using
a poorly filtered high pressure air compressor could introduce unwanted
particulate into your Airbow® Framer, resulting in damage to the framer
and potentially making it hazardous. It will also void your Framer Warranty.
Refer to www.airbowsystems.com for more information.
1
2
3
Connect high pressure air compressor
to Airbow® Framer Fill Valve.
i ii
iviii
Filling
Firing Chamber
Isolated /
Onboard
Canister FULL
HOLD
RELEASE
Ensure properly connected.
i
ii
iii
iv

i
Load Collated
Nails ONLY
from bottom of
magazine.
Continue moving the collated nails up until
they are above the Nail Safety Catch.
Push Nail Reload Lever
down over the nails...
...to bottom of collated nails. Release Nail Reload Lever
and click into place
Loading Nails Removing Nails
Hold & Press Nail Reload Lever.
Nails will fall naturally using gravity when
Airbow® Framer is held upright.
Depress Nail Safety Catch... ...and pull nails down over & out
bottom of magazine. (Ensure removed nails
are placed in an appropriate container).
Release Nail Reload Lever, it will rise
to the top and click into place.
1 1
2
i ii iii
i ii
iviii
ii
Uses a wide range of 34° D Head collated nail brands
(as listed on the Airbow® Website).
Capacity: 66 / Smooth & Ring.
50 - 90mm length. 2.8mm – 3.3mm gauge.
Airbow® Framer Quick Guide 98 Airbow® Framer Quick Guide

Using the Airbow®Framer
PRESSURISE THE FIRING CHAMBER
AFTER USE
TIME TO
TOP UP
Pull until you feel a
second movement.
0
1
2
3
4
5
x1000 PSI
0
1
2
3
4
5
x1000 PSI
0
1
2
3
4
5
x1000 PSI
0
1
2
3
4
5
x1000 PSI
Required if the Airbow® Framer has been
depressurised using the Safety Pressure
Release process (See AFTER USE: P11).
To pressurise the Firing Chamber, pull
Re-cock Lever back slowly but firmly until
you hear the air transfer.
Note: You should
depressurise Firing Chamber
when you do not intend
firing nails. – See P11
BEFORE USE
Ensure Airbow® Framer is topped up
with Compressed Air.
Ensure Nails are loaded and Nail Reload
Lever is in place.
3 2 1 0 -1 -2 -3
DEPRESSURISE
THE FIRING CHAMBER
When you are putting
the tool down, or have
finished using, please push
and hold Safety Pressure
Release button (listen
for air release) to depressurise
the Firing Chamber
& isolate the onboard canister .
When in position to fire depress Nose Safety Contact
firmly against target first before pulling trigger.
As the onboard canister pressure hits its ‘Empty’ level
the Airbow® Framer will fire a ‘soft shot’ that leaves
the nail sticking out approx. 15mm. This indicates low
pressure and time to top up the Airbow® Framer.
NOTE: Magazine nail lock out will engage with approx.
5-6 nails left to prevent dry firing. DO NOT intentionally
dry fire the Airbow® Framer.
15mm
‘SOFT SHOT’
Choose the desired depth of fired nails by setting
the Nail Depth Adjustment Lever.
1
4 5
3
2
Onboard
Canister
Firing Chamber
Firing Chamber
Pressurised
Onboard
Canister
Firing Chamber
Firing Chamber
Isolated
Airbow® Framer Quick Guide 1110 Airbow® Framer Quick Guide

Clear Nail Jam
NEVER DEPRESS NOSE
SAFETY CONTACT
KEEP FINGERS AWAY
FROM TRIGGER
SAFETY FIRST!
Remember to make sure
the nose safety contact
is never depressed during
this process and keep fingers
away from the trigger.
LOOSEN THE TWO
SCREWS NEAR NOSE
DEPTH ADJUSTER
3
REMOVE JAMMED NAIL
Remove the jammed nail.
It’s best to use long nose pliers
for this.
4
RE-TIGHTEN THE SCREWS
Re-tighten the two screws near the
Nail Depth Adjustment Lever.
5
REMOVE ALL NAILS FROM
THE MAGAZINE
Hold & Press Nail Reload Lever.
2
Nails will fall naturally using
gravity when Airbow® Framer
is held upright.
Release Nail Reload Lever, it will
rise to the top and click into place.
Depress Nail Safety Catch... ...and pull nails down over & out
bottom of magazine. (Ensure
removed nails are placed in an
appropriate container).
i ii
iii iv
DEPRESSURISE
THE FIRING CHAMBER
Push and hold the
Safety Pressure Release
button (listen for air
release) to depressurise
the Firing Chamber.
1
Loosen the two screws near the
Nail Depth Adjustment Lever
with just a couple of turns.
There’s no need to remove them.
Onboard
Canister
Firing Chamber
Firing Chamber
Isolated
Airbow® Framer Quick Guide 1312 Airbow® Framer Quick Guide

Couriering the
Airbow® Framer
anywhere.
Airbow® Framer
is to be transported
via air travel
There is a
suspected issue
with the Airbow®
Framer onboard canister.
Before any repairs
are done to
the Airbow® Framer.
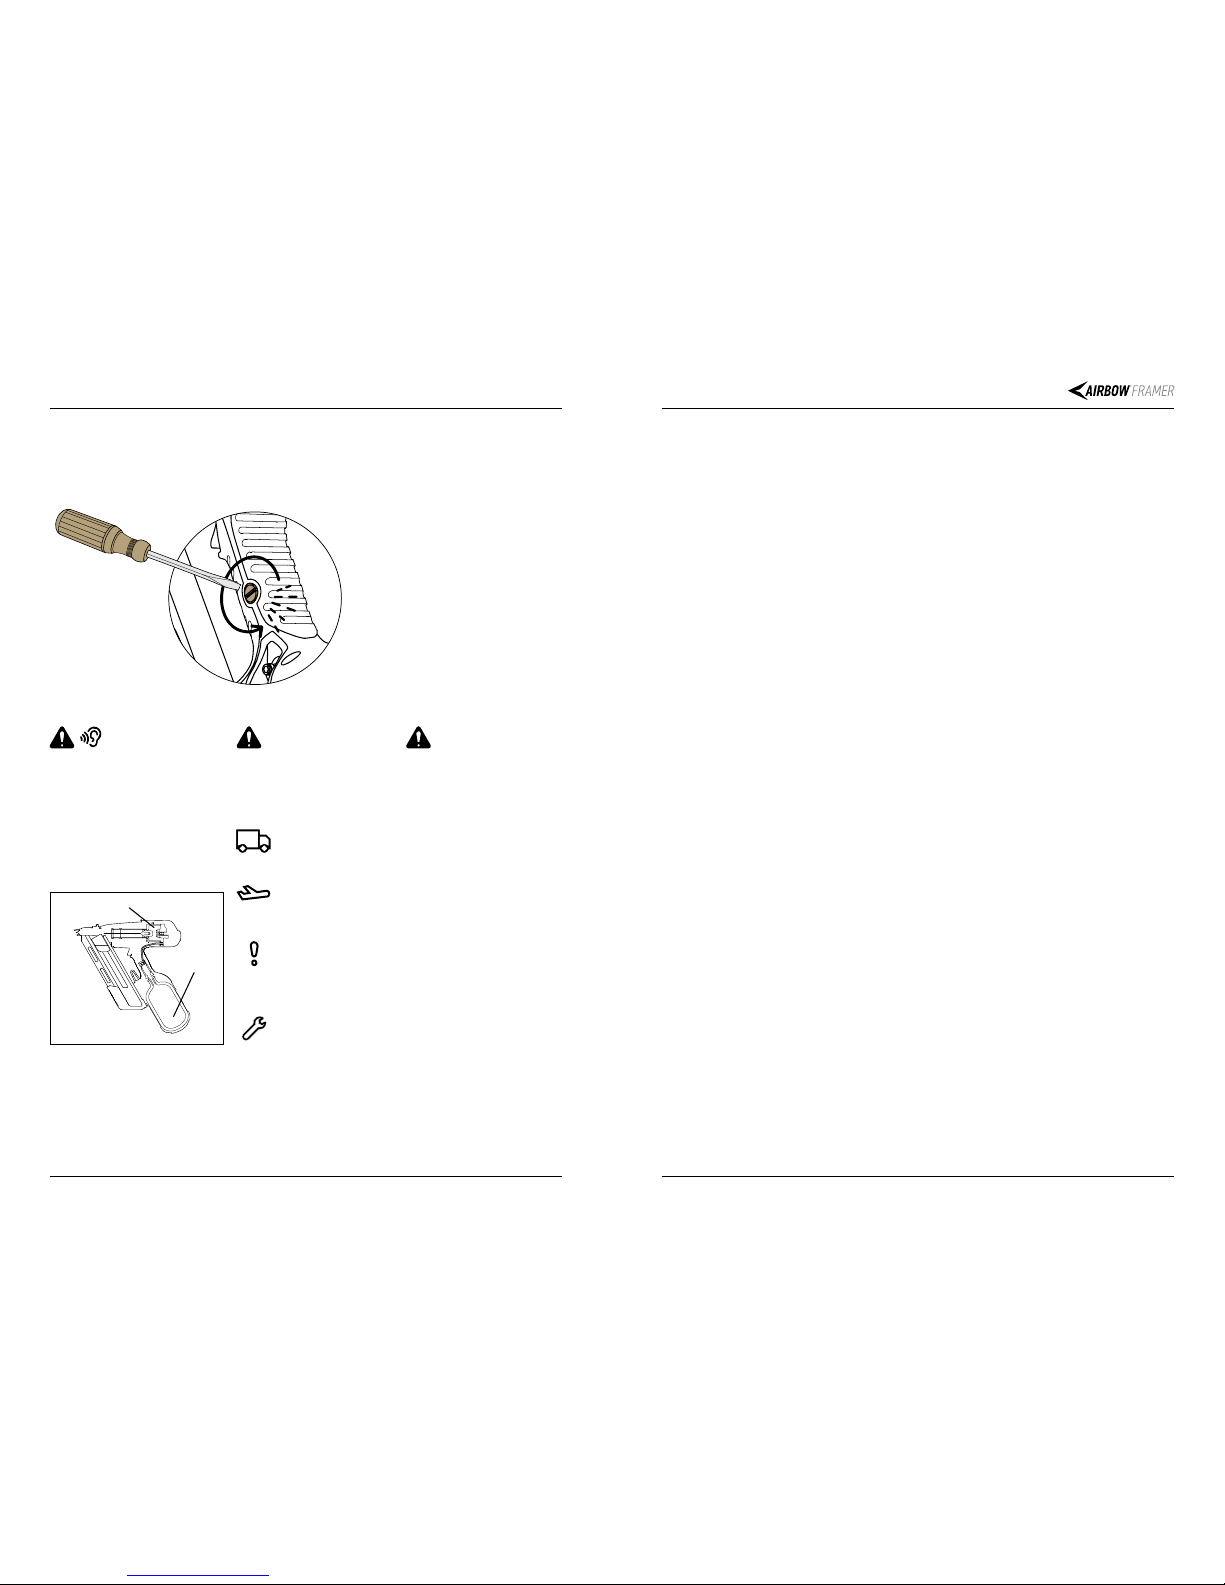
LONG TERM STORAGE BASIC TROUBLESHOOTING FOR FIRST USE:
For long term storage open
Cylinder Pressure Release
Valve to release all pressure
(listen for air release) from
the Onboard Canister. Leave
valve open until next use.
Full Troubleshooting Guide is available on-line at
www.airbowsystems.com
Important
Releasing all pressure from
the onboard canister must be
undertaken when:
General Safety:
• Always store your Airbow®
Framer in the case provided.
• Avoid leaving your Airbow®
Framer in direct sunlight for
prolonged periods. Refer to
the full Airbow® Framer Manual
for pressure related variations
relating to heat (online
at www.airbowsystems.com).
Airbow® Framer Quick Guide 1514 Airbow® Framer Quick Guide
Onboard
Canister
Firing Chamber
Open Cylinder
Pressure Release
Valve
Airbow® Framer doesn’t fire
• Check the Cylinder Pressure
Release valve is closed.
• Check your Airbow® Framer
is topped up with Air.
• Check that your high pressure
compressor is operating correctly
and that its pressure release
valve is closed.
• Check your Airbow® Framer
is Re-cocked (to charge Firing
Chamber).
• Check you have nails loaded.
You can hear air escaping from
Airbow® Framer
• Your Cylinder Release Valve may
not be closed completely.
Dry Firing (No nail driven on fire)
• Paper issue. Some paper collated
nails will deposit small amounts
of paper into the guiding
components of the magazine
during the firing process.
• If you are experiencing dry fires,
do not continue to fire the tool.
• Check to see if any paper
is visible at the top of the
magazine. If easily cleared, do so.
• If not easily cleared, remove
all nails from the magazine.
• Depress the safety relief valve
to release pressure from the
firing mechanism and then
clear any pieces of paper or glue
that have been deposited
(refer to Clearing a Nail Jam).
Nails aren’t firing home
• Check your Nose Depth
Adjustment setting.
• Check the pressure in your
Airbow® Framer.
• Check that your high pressure
compressor is operating correctly
and that its pressure release
valve is closed.
• Check Cylinder Release Valve
is closed completely (if air
is escaping the Firing Chamber
won’t refill quickly enough
with air).
• Check correct collated nails
are being used.
Note: It is safe for the Airbow®
Framer’s onboard canister to remain
under pressure during normal daily
transportation by motor vehicle
however we recommend pushing the
Safety Pressure Release button (rear
of Re-cock Lever) to depressurise
& isolate the Firing Chamber for
transportation as a safety precaution.

Refer to the Airbow® website for more information. www.airbowsystems.com
Table of contents
Popular Nail Gun manuals by other brands

Senco
Senco FinishPro 32 operating instructions

Central Pneumatic
Central Pneumatic Contractor 97520 Assembly and operating instructions

Central Pneumatic
Central Pneumatic 66995 Set up and operating instructions

Central Pneumatic
Central Pneumatic Contractor Series Assembly and operating instructions

Toolshop
Toolshop 208-2198 Operator's manual

WorkPro
WorkPro B622H Original operating instructions

Central Pneumatic
Central Pneumatic 68020 owner's manual

Stanley
Stanley SCN618 Original instructions

KMR
KMR 3418 11 Series Additional instructions

Toua
Toua GSN65 Cleaning Reference Guide

Chicago Electric
Chicago Electric 68993 Owner's manual & safety instructions

Senco
Senco FramePro 701XP operating instructions