AirTEK Fitness AT-1000B User manual
V2.2
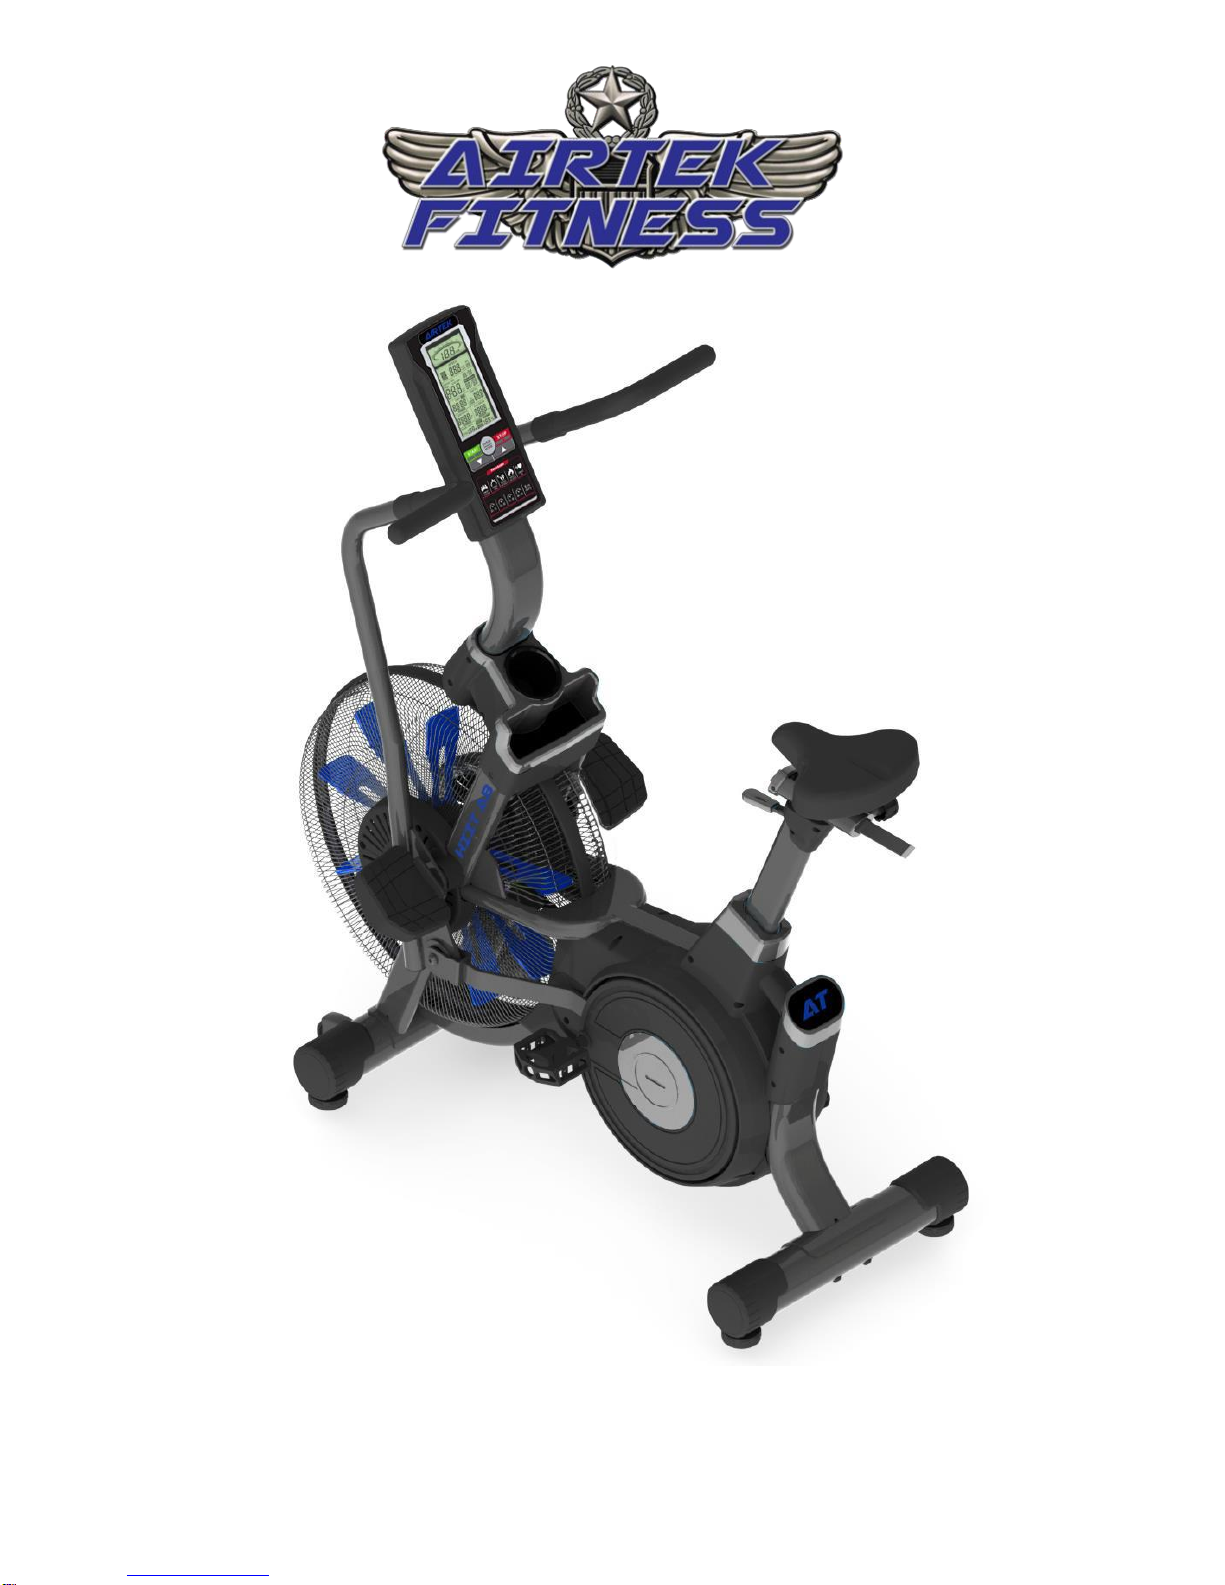
HIIT AiRBIKE
AT-1000B
AirTEK Fitness
www.AirTEKFitness.com
PO Box 1509 Langley WA, 98260
(360) 321-7090 or (800) 398-9121

2
SAFETY FIRST....................................................................................................................3
WARRANTY INFORMATION ..............................................................................................4
ASSEMBLY NOTE...............................................................................................................4
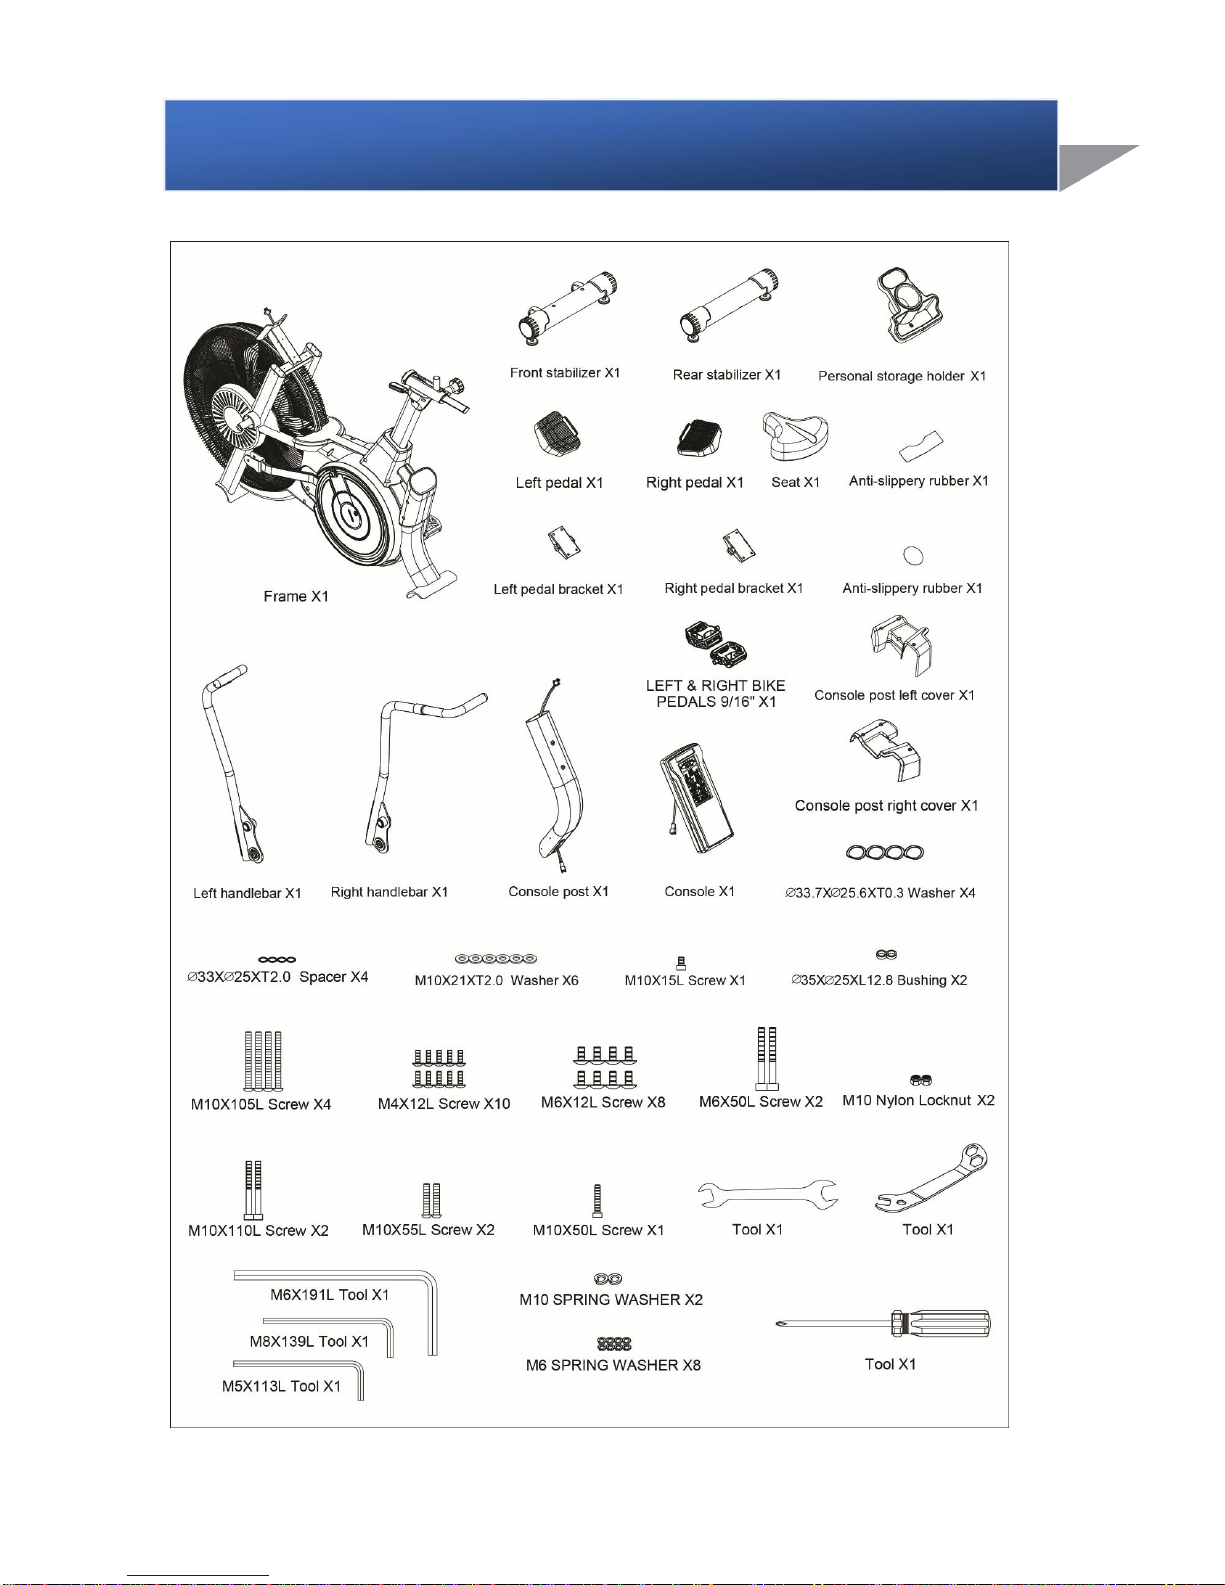
ASSEMBLY PARTS......................................................................................................................5
ASSEMBLY INSTRUCTIONS..............................................................................................6
OVERVIEW OF YOUR AIRBIKE .......................................................................................11
DISPLAY FUNCTIONS......................................................................................................12
QUICK START GUIDE.......................................................................................................14
PROGRAMS......................................................................................................................15
QUICK PROGRAM KEYS .................................................................................................16
DISPLAY OPPERATION........................................................................................................18
TROUBLE SHOOTINGDISPLAY OPPERATION .................................................................18
TROUBLE SHOOTING......................................................................................................19
EXPLODED DIAGRAMTROUBLE SHOOTING.................................................................19
EXPLODED DIAGRAM......................................................................................................21
PARTS LISTEXPLODED DIAGRAM..................................................................................21
PARTS LIST.......................................................................................................................22
QUESTIONS OR PROBLEMS?
STOP –DO NOT RETURN TO THE STORE.
We are here to help with our hassle-free service.
360-321-7090 or Toll Free 800-398-9121
Service@hcifitness.com
TABLE OF CONTENTS

3
This exercise equipment was designed and built for optimum safety. However, certain
precautions apply whenever you operate a piece of exercise equipment. Be sure to read the
entire manual before assembly and operation of this machine. Also, please note the
following safety precautions:
1. Read all instructions carefully before using themachine.
2. Consult your physician or other health care professional before beginning this or any type
of exercise program.
3. Always wear proper exercise apparel when using themachine.
4. If at any time you feel faint, light-headed or dizzy while operating the machine, stop
exercise immediately. You should also stop exercising if you are experiencing pain or
pressure.
5. Keep children and pets away from the machine while inuse.
6. Only one person can use the machine at a time.
7. Make sure your machine is correctly assembled before you use it. Be sure all screws,
nuts, and bolts are tightened prior to use and retighten periodically.
8. Do not operate this or any exercise equipment if it isdamaged.
9. Keep hands and feet away from any moving parts. Do not insert any objects into any
openings.
10.Keep clothes, jewelry and loose items away from movingparts.
The maximum user weight for this machine is 350 lbs. (160kgs.)
SAFETY FIRST

4
Dear Valued Customer,
Thank you for your recent purchase of the HIIT AirBike fromAirTEK Fitness. We
believe that you have purchased one of the highest quality and affordable AirBikes on the
market today. Prior to using you HIIT AirBike please review the owner’s manual and
product tips to maximize your workoutexperience.
Wishing you the best of luck in reaching your health and fitness goals!
Record you Serial Number in your owner’s manual and register online www.AirTEKFitness.com/warranty
Serial Number: Purchase Date:
Lifetime Frame Warranty, 2 Year Parts, Non-Transferable Limited Warranty.
Before beginning to assembly your HIIT AirBike:
1. Check all the parts included as shown in the manual. If parts aremissing ordamaged,
please contact AirTEKFitness.
2. Ready all your tools & parts. Only use original parts, safety cannot be ensured if any
unapproved components were used.
3. Make sure the space is free from anything that may cause injury and keep
unsupervised children, pets, disable persons & senior citizens during assembly.
4. If you have any question or doubts during assembling, please contact AirTEK Fitness
at (360) 321-7090 or (800) 398-9121.
WARRANTY INFORMATION
ASSEMBLY NOTE
5
ASSEMBLY PARTS
Parts Numbered on Back of Packaging

6
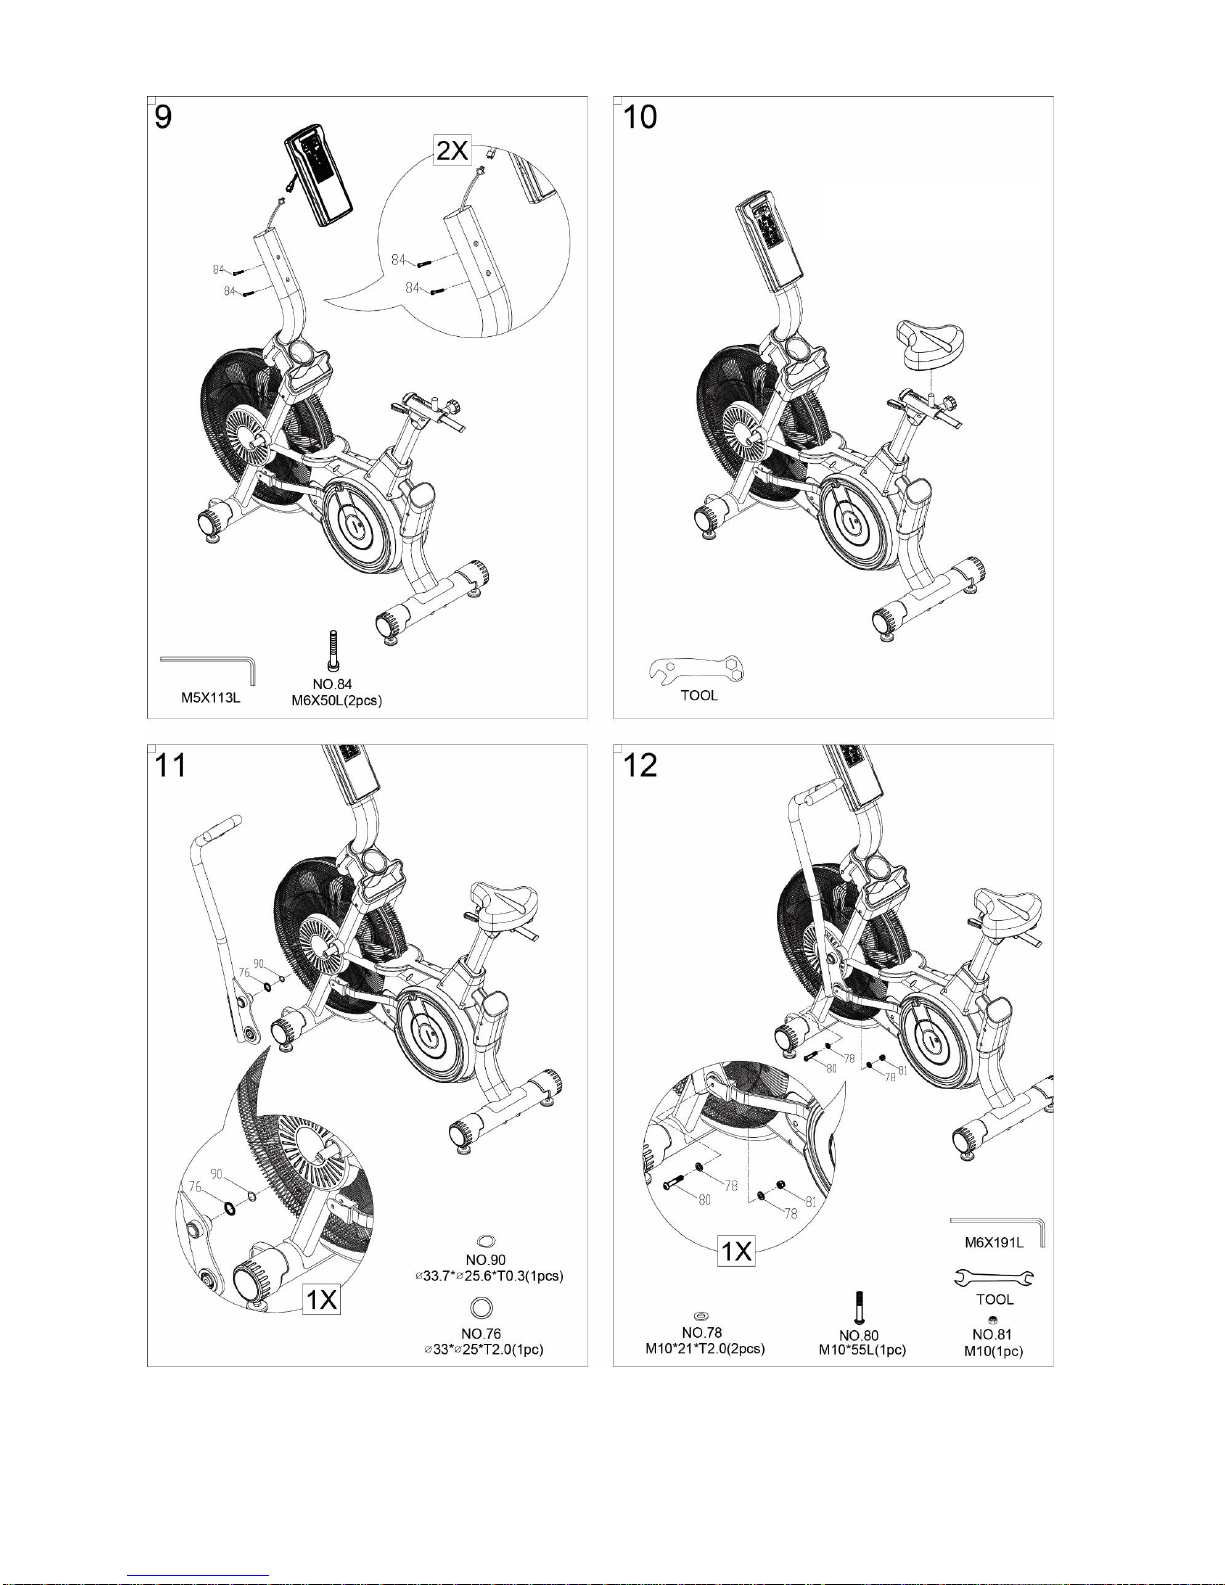
ASSEMBLY INSTRUCTIONS
Wire Pinch Point
Use Threaded
Holes in
Frame

7
8
2 AA Batteries

9
Caution: Secure Arm During Assembly

1
0
Congratulations on completing the assembly of your new HIIT AirBike! Be sure to
occasionally check that the screws and bolts are properly tightened as they may loosen from
extended use. It is best to use a diluted cleaning solution and a soft rag to wipe your unit
clean. Thank you for your purchase and enjoy your HIIT AirBike!
This manual suits for next models
1
Table of contents
Popular Exercise Bike manuals by other brands


Sunny Health & Fitness
Sunny Health & Fitness SF-B121021 user manual

Monark
Monark 827E instruction manual

Stamina
Stamina 1310 owner's manual

American Fitness
American Fitness SPR-BK1072A owner's manual
 Service manual")
Cateye
Cateye CS-1000 (CYCLO SIMULATOR) Service manual

BH FITNESS
BH FITNESS H9158H Instructions for assembly and use