manuals.online logo
Brands
  1. Home
  2. •
  3. Brands
  4. •
  5. Aleko
  6. •
  7. Swing Set
  8. •
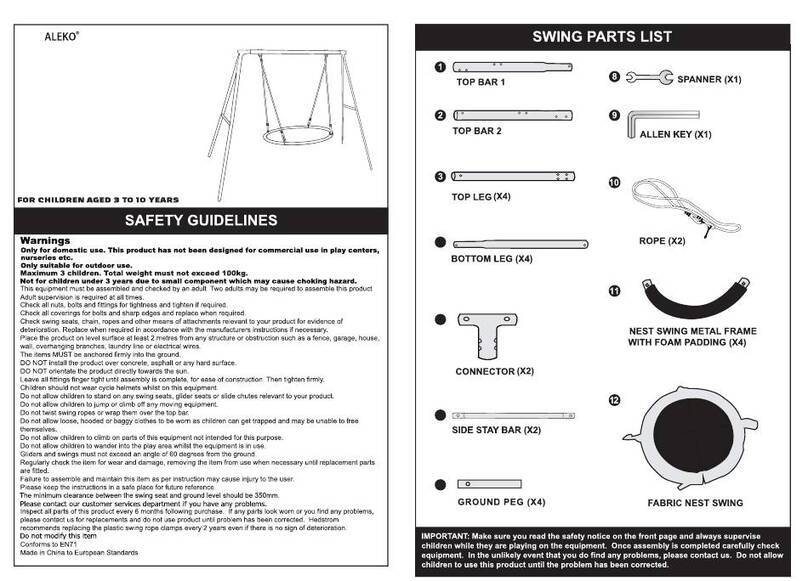
  9. Aleko BSW08 User manual

Aleko BSW08 User manual

16
35
6
5
M6 BOLT 32mm (x4)
G7
G7
16
66
16
F5 F5
F3
F3
F3
(x4) (x4)
M6 BOLT 60mm (X4)
F6
5
35
5
35
F6
F6
M8 BOLT 59mm (X1)
M6 BOLT 52mm (X12)
M8 BOLT 65mm (X4)
F5
43
83
Nest Swing & Glider - BSW08
www.aleko.com
16
35
6
5
G7
G7
16
66
16
F5 F5
F3
F3
F3
(x4) (x4)
M6 BOLT 60mm (X4)
F6
5
35
5
35
F6
F6
M8 BOLT 59mm (X1)
M6 BOLT 52mm (X12)
M8 BOLT 65mm (X4)
F5
83
Nest Swing & Glider - BSW08
Step 1. Insert tapered end of Top Bar 1 into the end of Top Bar 2. Make sure there
is only 1 set of holes in the end connected to Top Bar 1.
Step 2. Use 1 F2 fastener to connect Top Bar 1 to Top Bar 2
**Always Make sure to place included washers between fastener head or nut
and adjoining swing components**
Step 3. Insert 1 Top Leg segment into either side of the T-shaped Connector,
secure with 2 F3 fasteners per Leg. Repeat for both Connector and Top Legs
assemblies.
Step 4. Insert either end of assembled Top Bar into Connecter and Leg Assemblies.
Use 2 F5 fasteners on each side to attach.
Step 1. Completely disassemble F1 U-Bolts then place u-shaped bolt through the
hole in the bearing assembly found at the end of the Swing ropes.
Step 2. Tighten open-ended F1 nut down onto u-shaped bolt, place 1 F1 washer on
each end of the bolt and insert into Top Bar through 2 sets of vertical holes. Ensure
washer placement between nuts and Top Bar.
Step 3. Place 1 F1 washer on the exposed threaded ends of the F1 bolt, then attach
F1 cap nuts and tighten down. Repeat for both sets of Swing ropes.
Attach Swing to Assembled Frame
Nest Swing Assembly
Fig. 1
Attach Bottom Legs and Side Stay Bar
Step 1. Insert 1 Bottom Leg into the open end of each of the 4 Top Legs. Place
a F3 fastener into each of the holes at the junction, making sure the exposed
threaded end is pointed away from the Nest Swing (Fig. 1).
Step 2.Place Side Stay Bar over the exposed fastener ends so that the flat side
of the Stay Bar ends is in contact with the Top/Lower Leg assembly (Fig 1).
Step 3. Tighten F3 nut down onto Side Stay Bar.
M6 BOLT 32mm (x4)
43
Glider Assembly
Step 1. Slide Glider bracket over Top Bar on Glider side and align to the 2
horizontal holes (Fig. 2).
Step 2. Attach Glider Bracket to Top Bar using 2 G1 fasteners.
Step 3. Insert 1 G8 Plastic Spacer into the holes on either side of the Glider Handle
Tubes.
Step 4. Attach curved upper bar portion of Glider Handle Tubes to holes on bottom
corner of the Glider Bracket using 1 G2 fastener for each side (Fig. 3).
Step 5. Insert tapered segment of Glider Legs into exposed open side of Glider
Handle Tubes, use 2 G6 fasteners on either side to attach.
G7
83
G7
Step 6. Insert 1 G9 Plastic Spacer into either side of the holes near the center of the
Glider Legs (Fig. 4).
Step 7. Attach the Glider Seat Tubes to either side of the Glider Legs by placing a G4
fastener through the same holes that the G9 Spacers have been installed in.
Step 8. Fasten Glider Seat to Glider Seat Tubes using 4 G7 Fasteners in both sets of
holes on both Seat Tubes. Repeat to assemble both Seats.
Step 9. Use G5 fasteners to secure Glider Footrest to lower holes in Glider Legs
Fig. 2
Fig. 3
Fig. 4
16
35
6
5
M6 BOLT 32mm (x4)
16
66
16
F5 F5
F3
F3
F3
(x4) (x4)
M6 BOLT 60mm (X4)
F6
5
35
5
35
F6
F6
M8 BOLT 59mm (X1)
M6 BOLT 52mm (X12)
M8 BOLT 65mm (X4)
F5
43
Nest Swing & Glider - BSW08
Anchoring Swing Set to the Ground
Step 1. Attach Ground Pegs to all 4 Nest Swing Bottom Legs using F6 fasteners.
Step 2. Place assembled Swing Set in desired location and dig a footing hole,
measuring 12" (30cm) Long x 12" (30cm) Wide x 20" (50cm) Deep, at the base of each
support leg.
Step 3. Prepare and pour concrete into the footing holes following concrete
manufacturer's instructions. Fully fill footing holes to be level with ground surface.
Step 4. While Concrete is still wet, angle Ground Pegs toward opposing legs at roughly
120-degrees, then insert Ground Pegs into concrete footing, making sure Swing Set
Bottom Legs do not sink below ground surface (utilize concrete set time information).
Use temporary support made from wood or other material if necessary to prevent
sinking (Fig. 5).
Swing Set will be ready for use once concrete is fully set and cured (consult concrete
manufacturer's instructions).
visit us at www.aleko.com
Fig. 5

Other Aleko Swing Set manuals

Aleko BSW07 User manual

Aleko

Aleko BSW07 User manual

Aleko BSW03 User manual

Aleko

Aleko BSW03 User manual

Popular Swing Set manuals by other brands
Backyard Discovery MONTPELIER 30211G owner's manual

Backyard Discovery

Backyard Discovery MONTPELIER 30211G owner's manual

Component Playgrounds Monkey Tree Swing Set w/Slide and Turning... installation instructions

Component Playgrounds

Component Playgrounds Monkey Tree Swing Set w/Slide and Turning... installation instructions

CAME SALOON40 installation manual

CAME

CAME SALOON40 installation manual

Huck Honeycomb nest Assembly instructions

Huck

Huck Honeycomb nest Assembly instructions

Backyard Discovery MASON 36114 owner's manual

Backyard Discovery

Backyard Discovery MASON 36114 owner's manual

gartenpirat Classic 4.1 GP1300 Assembly instruction

gartenpirat

gartenpirat Classic 4.1 GP1300 Assembly instruction

Big Backayard F23242 Installation and operating instructions

Big Backayard

Big Backayard F23242 Installation and operating instructions

Backyard Discovery 55010B manual

Backyard Discovery

Backyard Discovery 55010B manual

Terra Bound Solutions 581-706 quick start guide

Terra Bound Solutions

Terra Bound Solutions 581-706 quick start guide

Palmako MV70-2421-1 Assembly, installation and maintenance manual
Palmako

Palmako MV70-2421-1 Assembly, installation and maintenance manual

Kettler 08371-190 Assembly instructions

Kettler

Kettler 08371-190 Assembly instructions

gartenpirat GP1349 manual

gartenpirat

gartenpirat GP1349 manual

Trigano Jardin FORESTER J-748612 Assembly instructions

Trigano Jardin

Trigano Jardin FORESTER J-748612 Assembly instructions

AGame Paradise Peak WP-641 owner's manual

AGame

AGame Paradise Peak WP-641 owner's manual

Graco ISPS031AA owner's manual

Graco

Graco ISPS031AA owner's manual

Component Playgrounds CP-AR24-8 installation instructions

Component Playgrounds

Component Playgrounds CP-AR24-8 installation instructions

HAMPTON BAY GSS00224BW Use and care guide

HAMPTON BAY

HAMPTON BAY GSS00224BW Use and care guide

Plum Giant Baboon Assembly instructions

Plum

Plum Giant Baboon Assembly instructions

manuals.online logo
manuals.online logoBrands
  • About & Mission
  • Contact us
  • Privacy Policy
  • Terms and Conditions

Copyright 2025 Manuals.Online. All Rights Reserved.