AlienBees ABR800 User manual

The AlienBees™ Ringflash Operation Instructions
The ABR800 is a 320 True Wattsecond, self-contained ringflash for serious photographers.
The ABR800 is made in the USA, designed by Paul C. Buff and manufactured by Paul C. Buff, Inc.™
Your Absolute Satisfaction Guarantee and Factory Warranty
AlienBees™ offers a 60-Day Absolute Satisfaction Guarantee on the ABR800. If, for any reason, you
are not completely satisfied with your purchase, you may return your unit within those 60 days for a
complete refund, minus shipping charges. The ABR800 additionally carries a 2-Year Factory Warranty.
The obligation of Paul C. Buff, Inc.™ is limited to the repair or replacement of products that have become
defective under normal use, as outlined in the manual. The warranty does not apply to the ashtubes
or modeling lamps as these become exhausted based on normal use (except in the unusual case of an
unexpected manufacturer’s defect). Should you experience any difculties, please contact us so that we can
assess your predicament and let you know if we need to bring in your unit for repair.
For our international customers who purchased their unit(s) through our authorized international partner, 1st
Line Digital, please contact the appropriate European (inf[email protected]) or Australian (info@paulcbuff.
com.au) technical support facilitator.
Our Toll Free Customer Service Line: 1-800-443-5542
Our Customer Service Team is here, ready to take your call Monday through Friday, from
9:00 am until 5:00 pm, CT. No question is too big or too small! We bees aim to please!
www.PAULCBUFF.com
AlienBees™ is a division of PAUL C. BUFF, INC.™ 2725 Bransford Avenue Nashville,Tennessee 37204
v. 08/2011

2Toll Free 1-800-443-5542 Please call us if you need any assistance!
Most cars are capable of traveling 120 MPH on a winding gravel road and do not place limits on your ability to do this.
But common sense indicates that if you drive this way you are probably going to ruin your car and perhaps your life. Even
if you don’t have a wreck, if you do this for a long period of time you will surely overheat the engine and burn it up. That
said, the ABR800 units (as well as our other products) have safe operating parameters that are difficult to place limits or
user controls upon and it is up to the user to exercise reasonable caution in heavy-use situations and in unusual shooting
configurations.
Heat Considerations: The ABR800 has high intensity modeling lamps that produce considerable heat, as well as a flashtube
and internal electronics that must dissipate 320 Ws for each flash. An internal fan removes the heat from these sources
in most configurations in normal use. However, if the unit is flashed each time it recycles and the modeling lamps are left
continuously on at full brightness, operating under these conditions requires the dissipation of about 500 watts of heat.
While the unit can tolerate this for short periods of time, it cannot do this indefinitely without overheating and being
damaged. This is aggravated when accessories such as the grids, gels, diffusers and softboxes restrict the airflow. In order
to guide the user, we conducted a series of tests on an ABR800 fitted with the cover / diffuser, the honeycomb grid and a
gel.
TEST 1 – Long Term Shooting: The modeling lamps were set to the Model = Ready Mode to reduce the heat load during
firing. The ABR800 unit was fired continuously at Full Power once every 20 seconds. Under these conditions, the temperature
of the grid and diffuser eventually stabilized at 200°F. The unit is designed to allow for temperatures up to 250°. Beyond
this, there is concern for user-burns and damage to components. Conclusion: This configuration is generally acceptable.
Shooting rates could likely be increased to about one shot per 10 seconds on a long term basis without damage. However,
additional care should be taken if the unit is facing downward as this will increase the amount of heat flowing back into
the electronics. Common sense suggests feeling the outside of the ABR800 housing occasionally during shooting. If it feels
extremely hot to the touch you should let the unit rest for a while. You can reduce the amount of heat build up by setting
the Modeling Lamps to Proportional (Tracking Mode) and by setting the lamps to Model = Ready Mode.
TEST 2 – Burst Shooting: We next fired the ABR800 once per second in Model = Ready mode. The unit was already at
200ºF at the beginning of this test. After 100 shots, the temperatures reached the 270°F point. The unit was allowed to
rest for five minutes with the modeling lamps still on Full brightness and the temperatures returned to 200°F. Conclusion:
Burst shooting should be limited to about 50 consecutive shots in 50 seconds, followed by a 3-minute rest period.
TEST 3 – Destruction Testing: In this test, we turned the model lamps on (Model = Ready = Off) and fired at Full Power
once per second. After 150 flashes in 150 seconds, the diffuser reached over 300°F and began to soften and melt. In this
test, the electronics continued to function, but this sort of overuse is obviously not acceptable and can result in serious
damage to the unit.
General Recommendation: Based on these results, a prudent operating routine would be to limit Full Power operation with
modeling lamps (preferably in Model = Ready Mode) at a long term rate of no more than 20 flashes per minute, or to a
burst rate of no more than 50 flashes followed by a rest period. If the unit is used at less than Full Power, particularly with
the modeling lamps OFF or in Proportional (Tracking) mode, proportional higher usage rates can be tolerated. If the unit
feels very hot to the touch, a rest period with the modeling lamps off is indicated.
Safety Precautions
For your safety, please note these warnings:
WARNING! This unit contains no user serviceable parts and should not be disassembled except by a qualified
technician. Please do not attempt to disassemble or service this unit on your own. The only parts that you may
replace yourself are the flashtubes and modeling lamps, though caution must be taken here as well and the unit must
be powered down while these items are replaced (instructions for replacement of these items are included in this
manual). Always turn your unit OFF and unplug it whenever attaching or removing any accessories (such as the
reflector, diffuser and camera platform) and whenever you are replacing the modeling lamps or flashtubes.
The unit may only be connected to a 3-wire grounded AC outlet to avoid shock hazard. Do not connect the unit
to ungrounded outlets, or to two-wire extension cords or adaptors that eliminate the ground prong.
Do not allow any unattended children around this unit (or any other studio flash equipment) as potentially dangerous
conditions may result including burns and electrical shock hazards. Please be safe with your equipment!

3
the AlienBees™ Ringflash
abr800
Each unit arrives with a 15-foot, grounded power cord that connects to the ringflash unit on the
back control panel with a down-angle, standard IEC connector and must then be connected to a 120
VAC, 50-60 Hz power outlet. The units are rated at 3 amps average current, and may briefly peak
at 16 amps input current at the very beginning of the recycle period. The units will draw less average
current if the flashpower is set for lower output and the modeling lamps are off. Depending on the
modeling setting, the units require approximately 1 ampere to illuminate the lamps and maintain the
flash between shots.
When shooting in an environment where a suitable AC power source is not available, we recommend
the use of our Vagabond™ Portable Power System (please see our website or call us for details).
The Vagabond™ System is designed specifically for Paul C. Buff™ units to provide a convenient,
lightweight, self-contained battery power source at a very low cost. In addition, the Vagabond™
battery can be recharged from any source of commercial AC power nearly anywhere in the world.
Multiple Vagabond™ units may be purchased for the price of a single generator or high power true
sine wave inverter system.
Please contact us to learn more about using a Vagabond™ system with your units!
Using the included sync cord, you can directly connect the ringflash to your camera. The supplied sync cord has a 1/8-inch
plug to connect to the sync jack on the ringflash back panel and a PC sync to connect to your camera’s PC outlet. If your
camera does not have PC sync, the sync cord can be connected through your hot shoe with an adapter (for our Hot Shoe
Adapter, please see our website). With the ringflash and camera directly connected, the unit will only take its cue to fire
from you. The ABR800 can additionally be fired using the built-in slave tripper which will detect and reliably fire the unit
whenever it “sees” any flash of light from another flash unit - tripped 50+ feet away. This slave allows you to connect one
light in your setup to your camera, leaving the other lights to fire with this slave. The unit will fire at its prescribed settings
simultaneously with the connected unit. The slave is disengaged whenever a sync cord or blank “dummy” plug is inserted
into the sync jack. Using the remote control jack, you can also connect a Paul C. Buff™ remote to control the firing and/or
flashpower and modeling. Additionally, our CyberSync™ 2.4GHz Radio Remote Control system may be used for wireless
firing.
As with virtually all studio flash units, your camera must be set to the manual exposure mode with any pre-flash turned
off when using the ABR800. Exposure should be determined using a flashmeter and/or histograms and the camera should
be set to “flash sync speed” (typically 1/125 second). When using the ringflash, you cannot leave your camera in automatic
mode as its internal meter will not be able to detect the light that will be emitted and will thus be set to an inaccurate
shutter speed and aperture, causing your picture to be overexposed. Furthermore, when in automatic mode, many cameras
have TTL metering that will send out a pre-flash to read the light, and that signal/flash may fire the unit via the built-in
slave before the shutter actually opens, causing incorrect exposure. When using the ringflash and various light modifying
techniques, the best way to ensure a proper exposure is to use a high quality flashmeter. There are several manufacturers
who offer excellent meters, allowing you to enter the specific settings that you’ve chosen for a shot and read the amount
of light present. You can use the meter’s “test/arm” option or you can connect the sync cord and select the “cord” option.
The meter will indicate the appropriate settings so that you may set your camera accordingly. A reading from the camera
position or from the subject position may be used to determine an overall scene reading. Depending on the subject, you
may additionally want to take spot meter readings.
Our customer service team can help you determine how best to use the unit with your particular camera. Please call
us on our Toll Free Line at 1-800-443-5542 or send us an email at info@paulcbuff.com if you would like
assistance. We’re here, happy to help you, Monday through Friday, from 9:00 am until 5:00 pm, Central Time.
Ringflash Syncronization
Using The Ringflash With Your Camera
Power Requirements

4Toll Free 1-800-443-5542 Please call us if you need any assistance!
What Arrives With Your Ringflash?
The Ring Reflector
The ABR800 arrives with our standard wide-angle reflector. This flat field reflector measures
10 inches in diameter, having an 80º beam spread. The reflector is made of high-temperature,
high-strength polycarbonate with a chrome-filmed interior. The supplied reflector provides
even coverage with the widest of lens angles - a must for interior and architectural shots.
Additionally, the reflector is designed to hold our accessory 20º honeycomb grids (sold
separately) for “Hollywood Style” lighting and for other low key effects. Use of the included
diffuser with the grid spot prevents stray light from falling on the lens. The internal cooling fan
along with intelligent thermal management prevents heat build up, allowing the reflector with
accessories to be used with full modeling lamp brightness.
A Set of Eight Modeling Lamps
Eight 10-Watt, 24-Volt Modeling Lamps are used in each unit, mounted coaxially on-axis
with the flashtube to provide true “What-You-See-Is-What-You-Get” previews. Proprietary
voltage regulation circuitry provides effective modeling output comparable to a 150-Watt
lamp. With matched light patterns and diffusion, the output of the lamps will match the
pattern of light that you will see on film or digital image. The long-life, high-efficiency bulbs
have a 500 to 3000 hour lifespan and may be replaced by the user.
For replacement lamps, please see item 10W, a set of 8 lamps, available on our website.
A Pair of Half-Circle Flashtubes
The ABR800 uses two 10mm, 6-inch diameter flashtubes that work as a pair, with both tubes
required to create a complete circular flash. The tubes have an expected lifespan of 250,000
to 1,000,000 flashes and upon exhaustion or breakage, the user may easily replace them.
For replacements, please see item ABRFT10MM, available on our website. As the unit requires two
half-circle flashtubes, you may purchase a single ABRFT10MM flashtube, or purchase the pair. For
best results, we recommend replacing both at the same time.
Our 15-foot Power Cord
As the ABR800 requires AC power, each unit comes with our heavy-duty 15-foot power cord,
with a three-wire grounded plug to connect to a standard 120 VAC, 50-60 Hz power outlet.
The cord connects on the back panel of the unit with a standard IEC connector and has a
low-profile, down-angle connector that fits inside the recessed power cord socket to prevent
any interference with the camera body.
If a longer cord is desired, we also offer an optional 25-foot cord, though this cord does not have
the down-angle connector. For the longer, optional cord, please see item UPC25, available on our
website.
Our 12-inch Sync Cord
Our 12-inch sync cord arrives with each unit, so that you may connect the ringflash to your
camera. This sync cord has a 1/8-inch miniplug on one end to connect on the back panel of
your ringflash, with a PC-connection on the other end to connect to your camera. With the
sync cord, your ringflash will only take its cue to fire from you when your shutter is pressed.
If your camera does not have a PC outlet, the sync cord can be connected through your hot shoe
with an adapter or our CyberSync™ 2.4GHz Radio Remote Control system may be used. For more
information please contact us. You can call us or visit us online at www.paulcbuff.com

5
the AlienBees™ Ringflash
abr800
What Arrives With Your Ringflash?
continued
Our Front Cover / Diffuser / Gel Holder
Each unit arrives with our front cover, fitted around the flashtube and lamps on the faceplate of
the unit. This frosted cover functions as a safety piece to protect the flashtube and modeling
lamps while in transit. While in use, the cover functions as a diffuser, softening the total light
output. The cover / diffuser additionally serves as a gel holder, having a raised center retaining
lip to which one can attach our doughnut shaped gels (sold separately as the ABRW/DF6).
The Universal Camera Mounting Bracket
Each ABR800 arrives with our universal mounting bracket, designed to accommodate most
popular pro and semi-pro cameras with its wide range of adjustments. With the adjustable
camera platform, you can attach your camera to the bracket and slide it in and out of the
ringflash center hole to find the position that best suits your specific camera. Side to side
adjustments can be made along the platform as well to center your camera lens while the
bracket itself adjusts up and down along the ringflash mounting post to accommodate large
camera bodies and battery packs, supporting cameras with a 1 to 4.75-inch distance from lens
center to camera base.
>>The Adjustable Camera Platform: The camera platform offers a grip pad surface where
your camera rests, having four horizontal slots for you to securely mount your camera using
the provided platform screw that attaches to your camera’s tripod socket. The slots provide
flexibility for you to choose the best mounting position for your specific camera, allowing
you to adjust forwards and backwards among the slots and side to side within each slot
depending on your camera body size, lens size and tripod socket position. You can use the
platform mounting screw to attach your camera to the bracket, or simply use the platform
as a resting place as you free-hold your camera. With your camera attached, you can slide
the platform forwards and backwards to move your lens in and out of the ringflash center
hole. As the platform screw connection is separate from the rest of the bracket, you can
keep your camera attached to the platform and remove it entirely from the ringflash to
review images, reload film or take shots away from the ringflash.
>>Tripod Mounting: The mounting bracket includes a standard tripod socket so that both
the camera and ringflash or just the ringflash may be attached to a standard tripod. As the
tripod socket is flush with the bottom of the bracket, you can use your tripod’s quick release
as well. When using the tripod mount, the stand mount conveniently tucks out of the way.
>>Light Stand Mounting: The mounting bracket additionally includes our swivel light stand
mount that allows both the camera and ringflash or just the ringflash to be attached to a
standard light stand (stands having brass attachment studs up to 5/8-inch).
>> Handheld Operation: The lightweight design of the ringflash makes it ideal for
hand-holding.With the bracket attached, the additional length of the mounting post provides
a convenient vertical handle or the flat bracket base can be held, fitting comfortably in your
palm.
To learn more about adjusting and using the various bracket components, see pages 9 - 11.
The Umbrella Adapter
Each unit arrives with our accessory umbrella adapter, fitting inside the ringflash center
chamber and locked into position using the same twist-and-lock method that is used to attach
the diffuser. The adapter allows umbrellas to be used with the ringflash unit when using it as
a conventional flash in non-aim-through mode. An umbrella pole slides through the adapter
and is tightened into place with the adjustment knob.
The diffuser / front cover may not be used with the adapter as both pieces use the inner ring of the unit for
attachment. The ring reflector, however, may be used with the umbrella adapter.

6Toll Free 1-800-443-5542 Please call us if you need any assistance!
The ABR800 Ringflash Back Control Panel
Power Cord Socket
The provided UPC15 power
cord plugs into this female
power cord socket then into
a suitable AC power source.
Power ON / OFF
The power ON / OFF switch
turns the entire ringflash unit
on or off and additionally has a
built-in 6 amp circuit breaker.
Flashpower / Modeling Output Control
The flashpower and modeling lamp output are continuously adjustable over a 6 f-stop variability, with
typical accuracy and repeatability of plus or minus 1/10 f-stop. The output is adjusted steplessly from Full
down to 1/32nd of the total power, in whole f-stop increments and everywhere in between, adjusted
with this slide fader showing marked fractions and f-stop increments. This convenient slide fader allows
you to adjust the output of your unit simply and quickly, changing the quantity and intensity of the light
produced without having to physically move the light source back and forth.
Sync Jack
Slave Cell
The supplied 12-inch sync cord has a 1/8-inch miniplug on one end and a PC-connection on the other.
The miniplug plugs into this sync jack while the other end of the cord connects to your camera’s PC
connection outlet or hot shoe adapter.
The slave cell will detect any flash of light and reliably fire the unit whenever it “sees” any flash of light
from your camera’s built-in flash or from another flash unit that is synced to your camera. The slave cell is
disengaged whenever a sync cord or blank “dummy” plug is inserted into the sync jack.
Flash OK / Flash DUMP / Flash TEST
After the unit fires (releasing the energy from the capacitors), it will begin recycling. The red DUMP LED
will light as the unit recycles, then the green OK LED will light to indicate that the recycle is complete and
that the unit is ready to fire at the prescribed settings. The DUMP LED will also light whenever the unit is
adjusted from a higher to a lower power setting. The unit will automatically dump this excess charge, or
you can push the red TEST button to dump the charge instantly. When the green OK LED comes on, the
unit holds the correct amount of energy for the settings, and is ready to fire.

7
the AlienBees™ Ringflash
abr800
Modeling Lamp Control
Remote Control Jack
The modeling lamps can be set to full brightness, set so that their output is proportional to the flashpower
adjustment, or turned off. Additionally, the lamps can be set to indicate the unit’s recycle status by going
dark when the unit is fired and returning to previous brightness when recycle is complete.
Model Lamp ON (white): This button turns the eight modeling lamps on - the lamps are collectively
adjusted or turned all off or all on, depending on the position of the “TRACK” switch (described below).
Model Lamp TRACK (dark grey): When depressed, the modeling lamps will track the flashpower settings.
When released, the lamps will remain at full brightness regardless of changes made in the flashpower.
Model Lamp CYCLE (light grey): When depressed, the modeling lamps will visually indicate the recycle
status by going dark when the unit is flashed, then coming back on when the unit is recycled. When
re-leased, the lamps remain on during recycle. This recycle indication feature may be used whenever the
lamps are on, whether the lamps are set to full or tracking mode.
The standard Paul C. Buff™ remote control jack accepts wired or wireless remote control of flashpower,
modeling lamp output and triggering. Plugging the provided phone cord of any Paul C. Buff™ remote
control into the jack causes the unit’s flashpower and modeling to be externally controlled. When a cord
is plugged in, the rear panel controls are ignored - signals will be received from the remote. Plugging in a
remote control does not, however, defeat the slave eye.
Ringflash Specifications
notes on the following page
Output 320 True Wattseconds / 14,000 Lumenseconds
Power Variability 6 f-stops (Full to 1/32 power)
Recycle to 100% 1 second to Full Power (proportionately faster at reduced power settings)
Flash Duration (t.5 method) 1/2000 second at Full Power
the flash duration becomes somewhat longer as the power is reduced, as with all competitive
variable flashpower systems, reaching approx. 1/1200 second at the minimum power setting
Sync / Trigger Voltage 5.6 volts (low current - safe for digital cameras)
Power Requirements 120 VAC, 50 – 60 Hz, 6 Amp Circuit Breaker
Modeling Lamps a set of eight 10-Watt, 24-Volt bulbs
500 to 3,000 hour lifespan; total output comparable to a conventional 150 Watt lamp
(approx. 2,200 Lumens)
Flashtubes two half-circle 6-inch diameter tubes (10mm)
250,000 to 1,000,000 flash lifespan
Color Temperature 5500K at Mid-Power
varies +/- 200º at other power levels – typical of studio flash units with variable power
Mounting / Attachment Options (3) Handheld Operation,Tripod Mounting and Light Stand Mounting
Weight approximately 2.5 pounds
Dimensions 8 inches (diameter) x 4.5 inches (depth) including the front cover / diffuser
Camera / Lens Compatibility accommodates most pro / semi-pro cameras with lenses up to 4 inches in
diameter
Typical Output (Full Power) f16 (at 10 feet, ISO 100 with the standard reflector)
approx. f11 (at 10 feet, ISO 100 with the MU30 30-inch Moon Unit™)

8Toll Free 1-800-443-5542 Please call us if you need any assistance!
Notes and Additional Info on Ringflash Specifications
True Ws, EffectiveWs, Lumenseconds and Guide Numbers: Quantity of electrical energy is measured in Wattseconds (Ws), also known
as Joules. This rating defines the amount of electrical power discharged with each flash. The actual amount of light (Lumenseconds -
Ls) produced for a given number of Ws can vary, depending on the efficacy of the unit or system. In particular, older “box and cable”
systems, in certain configurations, often produced considerably less usable light per Wattsecond than do highly efficient systems. In other
words, a highly efficient modern 160 Ws unit might yield as much usable light as an older or poorly designed 400 Ws unit. This disparity
gave rise to the adoption of the informal “Effective Ws” term by some manufacturers of highly efficient units. The Effective Ws term
is currently discouraged by most professionals due to its arbitrary nature. Most modern units and systems from reputable manufacturers
now offer similar efficiency factors and may generally be compared with reasonable confidence on the basis of True Ws - but there still
remain certain low efficiency systems which will boast a high Ws rating yet deliver less light than one might expect. The specification
that should be universally used is “Lumenseconds” as this is the only term that actually describes light output. In the absence of this term
being widely adopted, the best comparison available to the photographer is the measured output with specifically defined real-world
accessories. Regarding the common misconception that Guide Numbers are a good basis for comparison, this is more affected by the
angle of the reflector used than by the actual usable amount of light available, and is of essentially no value to the studio flash user. For
example, a given studio flash fitted with a narrow 50° reflector will yield a much higher guide number than the same flash fitted with a
wider 80° reflector, yet the amount of light emitted is the same in both cases.
Flash Duration (the industry standard for expressing flash duration is referred to as “t.5”): This term defines
the length of time it takes for 50% of the total light to be emitted from the flash. Many users confuse this
with the exposure time setting on the camera, but they are not comparable specifications. The light output
of a studio flash is not a sharply defined on-off function like the camera shutter. Instead, the light intensity
trails off after firing the flash as shown in the graph. The light does not suddenly shut off at the t.5 point,
but continues to diminish over time. As can be deduced from the graph, a flash duration of, say, 1/1000
second will not stop action as cleanly as would a camera shutter speed of 1/1000 second. A more usable
figure for determining the stop-action capability of a flash system would be approximately double the
specified t.5 flash duration (approximately 1/500 second for the “t.5 = 1/1000 second” example given).
Sync / Trigger Voltage: When using digital cameras, it is best to check on the maximum sync voltage allowed for your specific camera.
Some brands of flash units have sync voltages much higher than ours, some as high as 400 Volts that can damage digital cameras. The
sync voltage on all of our AlienBees™ flash units is under 6 Volts, safe for use with digital cameras.
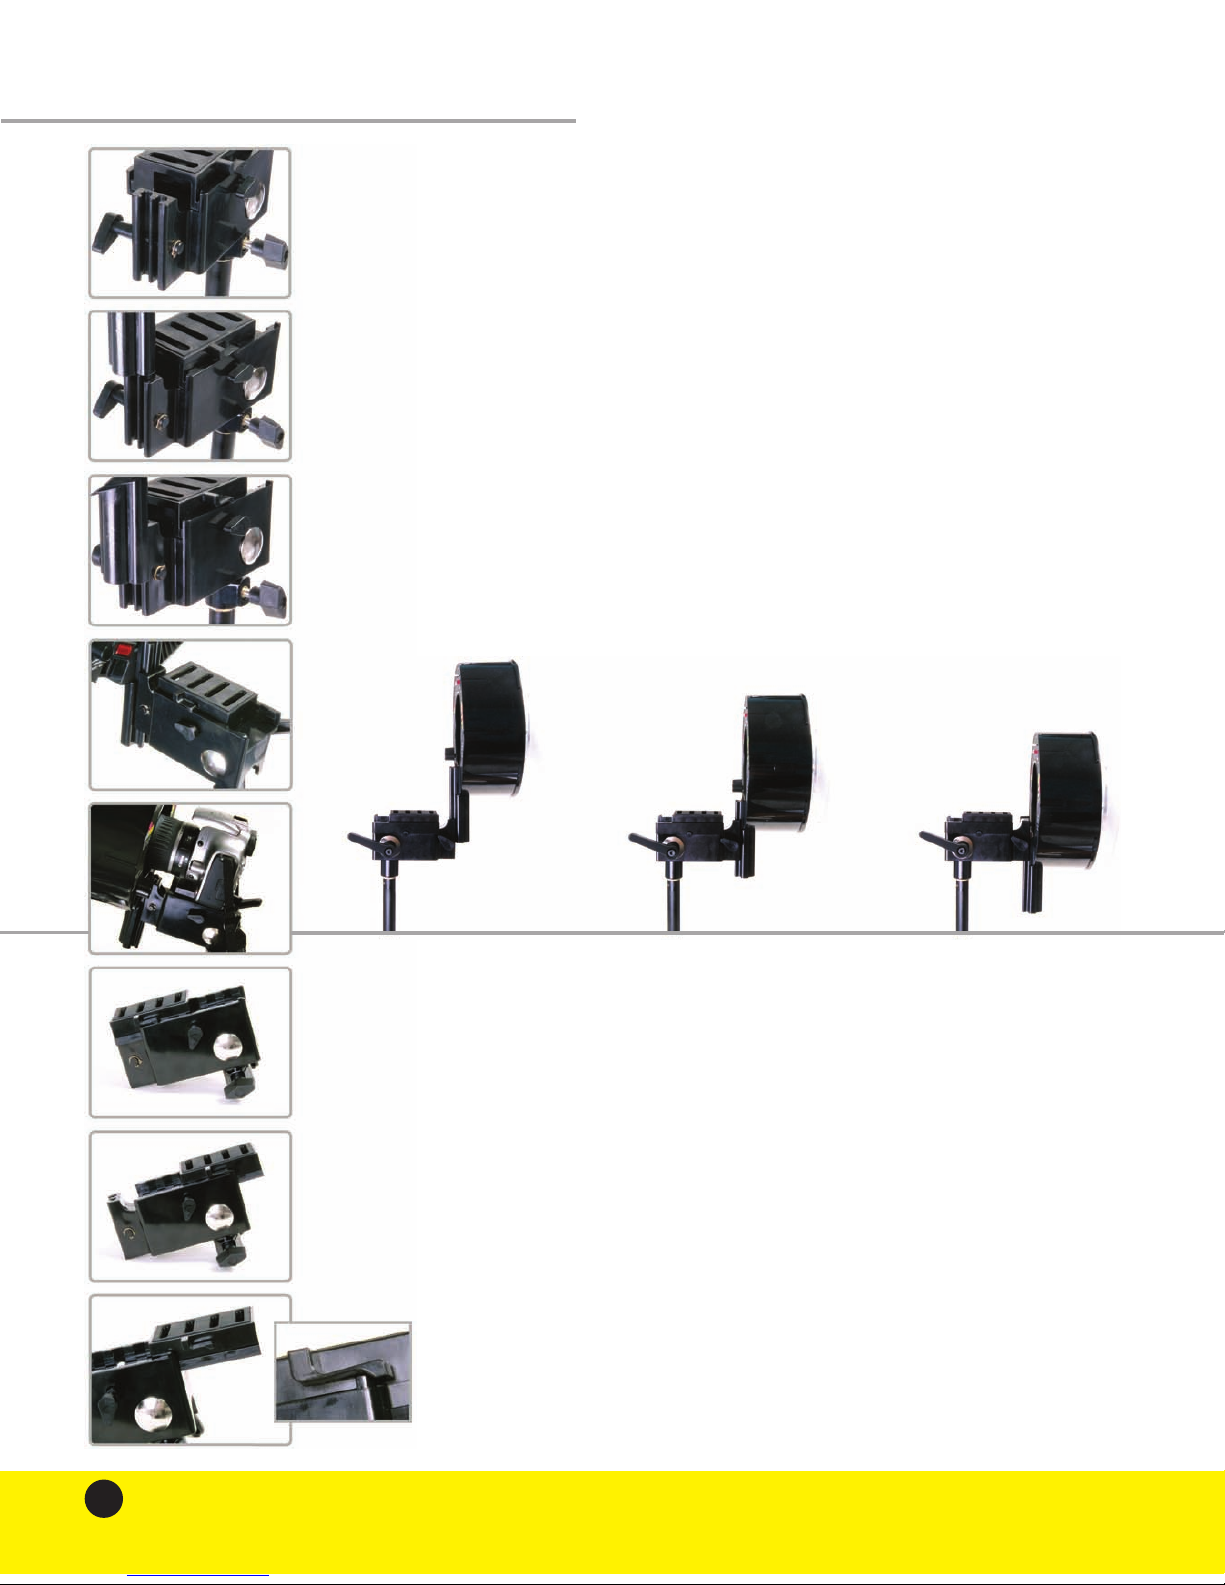
Typical Output Measurements: Typical Full Power exposure at 10 feet (ISO 100) with the standard ring reflector is approximately f16 at
a coverage angle of 80°.The readings may vary when taken in various environments (with various room sizes and conditions) and with
various flashmeters, as different brands of meters can vary by as much as 1 whole f-stop in their interpretation of “correct” values.
Power Range: The flashpower and modeling lamp output are continuously adjustable over a stepless 6 f-stop variability, with typical
accuracy and repeatability of plus or minus 1/10 f-stop. The output is adjusted steplessly from Full down to 1/32nd of the total power,
in whole f-stop increments and everywhere in between, adjusted with the slide fader located on the back control panel of the flash unit.
The slide fader shows marked fractions and f-stop increments, allowing you to adjust the output of your unit simply and quickly.
Color Temperature: Most pro studio flash units produce a “color temperature” between 5000K and 6000K. However, choosing the
“correct” color temperature alone does not assure fully accurate color rendition and neutral colors in a scene will still show slight
colorcasts, or deviations from true neutral. While it is the nature of Xenon flashtubes to produce excellent color rendition, there
remain small discrepancies in the Xenon flash spectrum that require post processing (in Photoshop or RAW) if perfect color balance
and accurate neutrals are to be achieved. This is also true of “color corrected” or “UV coated” flashtubes. Fortunately, with digital
equipment, this is easily accomplished. The accessories used, as well as the shooting environment, are usually of more concern than the
color temperature of the light source itself. Light modifiers such as umbrellas and softboxes will often change the color balance of the
light by as much as 600K, as will the room colors - even if they appear to the eye to be neutral. These, too, can be easily corrected in
Photoshop or RAW. With the exception of “constant color” lighting equipment, studio flash units that employ variable output power
typically vary in color temperature by about 400K as they are adjusted from Full Power down to 1/32 Power. Even the use of these
“constant color” lights will not eliminate the effects of accessories and environments. When flashes are mixed with different accessories
it is rare that perfect or consistent color balance will be achieved in the camera unless a “custom white balance” procedure is performed.
Perfect color balance can also be achieved using the RAW camera mode where test shots are taken with a known-neutral object (grey
card or pure white card or background) included in the scene. Following the test shot, the neutral object can be removed from the
scene or, better, placed in a corner of the scene where it can later be cropped out. When the test shots or real shots are opened in a
RAW program, it is a simple matter to use the “eyedropper tool” to sample the grey card to achieve a custom white balance. This will
calculate a perfect color balance regardless of the effect of the power levels, accessories, etc. If this is done on a test image, the resulting
balance setting can be applied to all shots in a sequence taken at the same power levels and with the same accessories. Since it is
common in a photo session to change power levels and accessories, the preferred method is to include a grey card in each shot when
possible. A similar procedure may be accomplished directly in Photoshop when shooting either JPG or uncompressed modes.

9
the AlienBees™ Ringflash
abr800
The Universal Camera Mounting Bracket
FRONT VIEW TOP VIEW BOTTOM VIEW 1 BOTTOM VIEW 2
The universal camera mounting bracket is the connection point for your camera and
for each of the mounting options. The all-in-one bracket offers an adjustable camera
platform with a grip pad surface where your camera rests, attached to the platform using
the provided platform mounting screw. The bracket is easily attached to the ringflash,
sliding on the ringflash mounting post with different options to then connect to your
tripod, your tripod quick release plate and your light stand.
adjustable camera platform
light stand mount
swivel adjustment arm
mounting bracket
vertical adjustment knob
camera platform release latch
camera platform adjustment knob
slides forwards and backwards to
move the camera in and out of the
ringflash center hole
bracket mounting post
light stand mount attachment knob
screws clockwise to tighten around
the light stand’s brass connection stud
light stand mount swivel
adjustment arm
mounting bracket
vertical adjustment knob
light stand mount
attachment knob
camera platform
adjustment knob
tripod socket
bracket mounting post
BOTTOM VIEW

10 Toll Free 1-800-443-5542 Please call us if you need any assistance!
The Universal Camera Mounting Bracket
Attaching the Mounting Bracket to the ABR800 Ringflash
The ABR800 arrives with the bracket mounting post already in place, attached to the base of
the unit on the rear side below the control panel. To attach the mounting bracket to the ringflash,
you will simply slide the bracket over the mounting post and secure its position with the vertical
adjustment knob. First, position the mounting bracket with the padded camera platform facing
upwards and locate the two vertical grooves on the front side of the bracket. Place the bracket
underneath the mounting post on the ringflash unit and line up the two vertical grooves on the
bracket with the two corresponding rounded extrusions on the post. Slide the bracket on the
mounting post and use the vertical adjustment knob to secure the position. Before sliding the
bracket onto the mounting post, the vertical adjustment knob must be in the straight-down “unlocked”
position.
The mounting bracket can be positioned anywhere along this mounting post, accommodating
cameras with a 1-inch to 4.75-inch distance from the lens center to the camera base. Depending
on this distance present with your specific camera, you can slide the bracket up and down along
the post until the best position is determined for your camera lens to be centered vertically inside
the ringflash center hole. With the position set, turn the vertical adjustment knob clockwise
to secure the placement. Do not overtighten this knob - the knob is designed so that very light
tightening pressure will hold the bracket securely in place on the mounting post.
Attaching the Camera to the Mounting Bracket Camera Platform
The camera platform offers a grip pad surface where your camera rests, attached with the
provided platform mounting screw in any of the four horizontal slots. The different slots provide
flexibility for you to choose the best mounting position for your specific camera, choosing a slot
that is closer forward or further back depending on the width of your camera body. Additionally,
the slots offer side to side flexibility as the mounting screw can be positioned anywhere along the
slot based on the position of your camera’s tripod socket. You can use the platform mounting
screw to attach your camera to the bracket, or simply use the platform as a resting place as you
free-hold your camera. With your camera attached, you can slide the platform forwards and
backwards to move your lens in and out of the ringflash center hole. As the platform screw
connection is separate from the rest of the bracket, you can keep your camera attached to the
platform and remove it entirely as needed.
To attach your camera to the platform, you will first remove the platform from
the bracket. With the platform adjustment knob (located to the left and slightly
above the light stand mount silver bolt head) in the unlock position, slide the
platform backwards on the bracket. Lift the release latch to remove the platform
completely.

11
the AlienBees™ Ringflash
abr800
The Universal Camera Mounting Bracket
Attaching the Camera to the Mounting Bracket Camera Platform continued...
Your camera attaches to the platform using the provided 1110841 Platform Mounting Screw
(this screw is found in a labeled bag inside the box with the your ringflash unit). The mounting
screw fits underneath the platform, through one of the four horizontal slots and attaches to you
camera’s tripod socket. You will choose the slot that best positions your camera forwards or
backwards on the bracket, depending on the width of your camera body and the type of lens that
you are using. For most cameras, we recommend using the second slot from the front.
Once you have chosen the horizontal slot, you will then choose the position along the slot where
you wish to mount your camera based on the position of your camera’s tripod socket in relation
to the center of your lens. On the bottom of the platform you will notice that between each
slot there are engraved notches - these notches mark the center line of the bracket with the
platform attached. If your tripod socket is centered directly below your camera lens, you can
simply line up the socket with these notches to attach the platform screw. If your tripod socket
is off-center, move the platform left and right so that the lens is centered with these notches.
With your position set, you will slide the platform screw between the horizontal slots and use
a flathead screwdriver to tighten it into place inside your tripod socket. You can then reattach
the platform to the mounting bracket. To slide the platform onto the bracket, the platform
adjustment knob on the bracket must be in the straight-down “unlocked” position. Facing the
back of the ringflash unit, position the platform with the release latch on the left side and slide
the platform into place. You will then use the platform adjustment knob to slide the platform
forwards and backwards, moving the camera in and out of the ringflash center hole. You may
want to keep the screw loose to test the positioning.
With your mounting bracket attached to the ringflash, you can then choose to mount the unit
to a light stand or to your tripod as the all-in-one design of the mounting bracket offers both
options. To attach your unit to a standard tripod, you will simply use the flush-mount tripod
socket located on the bottom of the bracket. The threaded socket fits standard tripod screws
and quick-release plates. When using the tripod mount option, you can fold the light
stand mount out of the way using the stand mount adjustment handle. Loosening this
handle will allow the stand mount to be swiveled backwards, tucking beneath and behind
the mounting bracket in the cut groove on the back side of the bracket.
The unit can be mounted to a standard light stand as well with the included swivel
stand mount, fitting light stands with brass connection studs up to 5/8-inch (all Paul C.
Buff™ light stands may be used). You will simply slide the brass connection stud on your
light stand inside the stand mount center chamber and tighten the stand attachment
knob to securely hold the bracket in place around the stud. With the stand attached,
you can then use the stand mount adjustment handle to swivel and tilt the position of
the unit on the light stand. Loosening this handle will allow you to adjust the position until you
find the correct angle. The position is locked when the handle is tightened again. When adjusting
the angle with this handle, be sure to support the ringflash and bracket with your other hand.

12 Toll Free 1-800-443-5542 Please call us if you need any assistance!
Attaching the Front Cover / Diffuser
When traveling with the unit, the cover should be in place to protect the flashtubes and
modeling lamps. The unit will ship with the cover in place for this reason. When in use,
however, the ABR800 may be used with or without the diffuser.
To attach the front cover / diffuser, first ensure that the Reflector Lock on the back
control panel of the unit is pointing left in the “UNLOCK” position.
Next, line up the smaller, inside ring of the cover with the smaller, inside ring on the
circular face of the ringflash housing. You will notice that there are three protruding
ledges positioned around the inside edge of the ringflash housing – these three ledges
correspond to the three raised panels on the frosted cover.
Slide the frosted cover inside the center hole of the ringflash housing, allowing the
three raised panels on the cover to fit naturally between the three ledges on the
housing. Push gently until the cover will go no further and is comfortably seated inside
this center hole.
Each raised panel on the frosted cover has a cut insert, making an “L” shape. To
position the cover, rotate it around the center hole in the housing towards the raised
ledges, allowing them to fit snugly inside the “L” gap. Twist the cover until the housing
ledges are caught in the “L” gaps and will go no further.
Return to the Reflector Lock on the back panel and turn the knob to the right “LOCK”
position. This will lock the cover / diffuser into place.
The ring reflector and the front cover / diffuser may be attached and / or removed at the
same time or separately. One need not be in place to attach or remove the other.
The front cover /diffuser additionally operates as a gel holder, having a raised lip
around the center where our doughnut-shaped gels / filters (sold separately as the
ABRW/DF6 Set of 6 Diffusion / Warming Gels) attach. Our six gels / filters each have
a pre-cut center hole for use specifically with the ABR800 ringflash and diffuser. The
diffuser must be in place in order to use the ringflash gels, but the gels may be used
with or without the ring reflector in place. Call us or visit us online to learn more
about our gels / filters!

13
the AlienBees™ Ringflash
abr800
The larger, outside ring with the recessed outer lip is the front of the reflector, while the
smaller inside ring is the back. This back inside ring has three raised panels along the
interior that fit over the front housing of the ringflash unit.
To attach the reflector, first ensure that the Reflector Lock on the back control panel
of the unit is pointing left in the “UNLOCK” position.
Next, line up the smaller, inside ring with the circular face of the ringflash housing. You
will notice that there are three protruding ledges positioned around the top edge of
the ringflash housing – these three ledges correspond to the three raised panels on
the outside of the reflector.
Slide the reflector over the front face of the ringflash housing, allowing the three
raised panels on the reflector to fit naturally between the three ledges on the housing.
Push gently until the reflector will go no further and is comfortably seated over the
housing.
Each panel on the reflector has a cut insert, making an “L” shape. To position the
reflector, rotate the reflector around the housing towards the raised ledges, allowing
them to fit snugly inside the “L” gap. Twist the reflector until the housing ledges are
caught in the “L” gaps and will go no further.
Return to the Reflector Lock on the back control panel of the unit and turn the knob
to the right “LOCK” position. This will lock the reflector into place.
The ring reflector and the front cover / diffuser may be attached and / or removed at the
same time or separately. One need not be in place to attach or remove the other.
Attaching the Reflector
UNLOCK (to the left)
when attaching and removing
the reflector or diffuser
LOCK (to the right)
when the reflector or diffuser
is in place to be used
the ring reflector may be used with or without the diffuser

14 Toll Free 1-800-443-5542 Please call us if you need any assistance!
Replacing the Modeling Lamps
Each ABR800 unit arrives with a set of eight 10-Watt, 24-Volt modeling lamps. The lamps have a 500 to 3,000 hour
lifespanand may be replaced by the user upon exhaustion. To purchase replacement modeling lamps, please see item 10W,
a set of eight replacement bulbs available on our website. Should any of your modeling lamps break or exhaust prematurely, you
may use the three spare modeling lamps that we include with each unit for replacement.
Always turn your ringflash unit OFF and UNPLUG IT before replacing your modeling lamps.
Step One: Remove the Exhausted Modeling Lamps
Wearing gloves or using a piece of cloth or tissue, grip the modeling lamp and gently
pull it up and straight out of the unit. Working with one bulb at a time, repeat this
process to remove the remaining seven lamps.
Step Two: Installing Your New Modeling Lamps
Each modeling lamp has a two-pin base, fitting into the lamp socket in the corresponding
two holes. Begin with one bulb, and line up the two pins on the base of the bulb with
the two holes in the lamp socket. With the bulb in position, gently push down. The
modeling lamp is properly inserted when it is seated all the way down in the unit.
Repeat this process to install the remaining seven lamps.
With the lamps installed, you can plug the unit back into the power source and turn
it on. If the lamps have been properly replaced, pressing the white “Model ON”
button will turn the lamps on. You may then set the lamps to on, off, or tracking
and resume shooting.
Our long-life, high-efficiency bulbs have a 500 to 3,000 hour lifespan. The lamps
are positioned around the faceplate in two strings of four lamps. When one lamp
fails, the other three in its string will also go dark. This does not mean that the
other three have failed as well – if you can locate and replace the one failed bulb,
the other three will function properly again. We’ve included three extra modeling
lamps with each ABR800 for your convenience. Should any of the lamps in your
unit prematurely fail, you can locate the failed bulb and replace it with one of the
provided spare bulbs.
First, turn your unit OFF and unplug it. Begin with one bulb in the string and replace it
with one of the provided spare bulbs. With the first bulb replaced, plug the unit back
in and turn it on. If the failed lamp has been located and properly replaced, all of the
lamps in the string should now be on. If the lamps in the string are still dark, turn the
ringflash unit OFF, unplug it and move on to test the next lamp in the string. Remove
the replacement bulb that you just installed and re-install the original bulb that you first
removed. Move to the next modeling lamp in the string and repeat the same steps
outlined above. Repeat this process until you have located and replaced the failed
lamp, allowing all of the lamps to turn on when the “Model ON” button is pressed. As
you replace a bulb and turn the unit back on for testing, be sure that the unit is OFF
and unplugged before moving on to replace and test another bulb. Wait at least five
minutes before removing and replacing the next bulb.
STRING ONE - four bulbs in string
STRING TWO - four bulbs in string

15
the AlienBees™ Ringflash
abr800
Replacing the Flashtubes
Each ABR800 unit arrives with a pair of half-circle flashtubes. These 10mm, 6-inch diameter flashtubes have a life expectancy
of 250,000 to 1,000,000 flashes and may be replaced by the user upon breakage or exhaustion. For replacement flashtubes,
please see item ABRFT10MM, a single half-circle flashtube available on our website. As the flashtubes work as a pair, with both
required for a complete circular flash, you can purchase one ABRFT10MM half-circle tube or purchase two to replace the entire
pair.
Always turn your ringflash unit OFF and UNPLUG IT before replacing your flashtubes.
Step One: Remove the Failed Flashtubes
Wearing gloves or using a piece of cloth or tissue, grip the outer ring of one flashtube
and gently pull it up and straight out of the unit. Once the flashtube is out of the unit,
remove the three plastic insulating sleeves located on the legs of the tube. Be sure
to save these - they will be used with your new tube and are essential safety pieces.
Repeat this process to remove the other tube.
Step Two: Placing the Insulating Sleeves
Affix the plastic insulating sleeves onto the legs of your new flashtubes. When
placing the insulating sleeves, hold the glass ring in your hands with the three
metal legs sticking out. Make sure that these three legs are straight. They may
need to be straightened with either your fingers or needle-nose pliers.
Step Three: Installing Your New Flashtubes
Start with one flashtube and line up each of the tube’s legs with the corresponding
sockets on the unit.
Insert the tube by gently and evenly pushing until the tube is seated all the way down
in the unit. The flashtube should fit snugly and not be touching any metal parts of the
flash unit. Repeat this process to insert the other flashtube. With both new tubes
installed, you can plug the unit back in and turn it on.
When replacing either the modeling lamps or the flashtubes, first make sure that the ringflash is turned OFF and that
it is unplugged from the AC power source. Wait at least five minutes to ensure that the unit does not have
any power stored in the capacitors before handling it. You may want to wait longer if you have been actively using the
unit.
When replacing either the modeling lamps or the flashtubes, it is best to wear cloth or insulated gloves or use a
small piece of cloth when handling your modeling lamps and flashtubes. This will prevent finger oils from smudging the
tubes and lamps. Oils deposited on the lamps can cause premature failure.
Our ashtubes have a 250,000 to 1,000,000 ashes
life expectancy. Earlier ashtube failure is unlikely under
normal use.

The innovative design of the ABR800 allows us to offer various accessories that have
been specifically designed for use with the ringflash. All of our ringflash accessories may
be used with either the ABR800 AlienBees™ Ringflash or the Zeus™ ZRM1 RingMaster
Flash Head. These accessories are sold separately - contact us or visit us online to learn
more!
The MU30 30-inch Moon Unit™ - $59.95
The 30-inch Moon Unit™ is a lightweight and extremely shallow circular softbox that you
can aim the camera through and produce a precisely round circle of light with surprisingly
even illumination. The ABR800 / Moon Unit™ combination can be easily handheld for
action fashion shooting or mounted on a tripod or light stand. No other portable ringflash
can achieve the big round catchlights and large-source beauty dish effects that are so
desired - and its miniscule depth and weight make it an instant favorite even away from
the camera, in tight quarters that don’t allow for the typical 3-foot depth and much greater
weight of conventional softboxes.
The MU30-MASKS 30-inch Moon Unit™ Mask Set - $39.95
Add our exciting Mask Set to alter the shape of the light from the ringflash to become
a giant ring, stars, half-moons, sunburst, clouds and a host of other shapes including your
own custom creations. The set consists of 12 die-cut black paper masks (8 masks with
predefined light patterns and 4 blank masks for creating custom shapes).
The MU56 56-inch Moon Unit™ Foundation Package - $59.95
This versatile accessory functions as an extremely low-weight, ultra-thin 56-inch octabox
(with a varierty of front diffusion panel options) for conventional use away from the
camera or mounted on-camera for shadow-free aim-through use. The highly adaptable
unit can also function as a halo light in various shapes with various degrees of diffusion.
Front Diffusion Fabrics Sold Separately:
DF56OCH 56” Octagon (with center hole for aim-through use) - $15.95
DF56ONH 56” Octagon (without center hole for off-camera use) - $15.95
DF50RCH 50” Round (with center hole for aim-through use) - $24.95
DF50RNH 50” Round (without center hole for off-camera use) - $24.95
DF39SNH 39” Square (without center hole for off-camera use) - $24.95
DF39WPNH 39” Window Pane (without center hole for off-camera use) - $24.95
DF50RNGCH 50“ Giant Ring (with center hole for aim-through use) - $24.95
The ABRW/DF6 Set of 6 Warming and Diffusion Gels / Filters - $29.95
The set of center-cut circular gels / filters includes four warming filters and two diffusion
filters. The Warming Filters will add a light brown, almost sepia tint to your image,
reminiscent of a hazy late afternoon in the summer. They will adjust your light to a
soft golden glow which is excellent for outdoor shots and even in-studio portraits. The
Diffusion Filters will serve to soften your image, creating a slight foggy blur around the
light source.
The ABRHG20 Ringflash 20º Honeycomb Grid - $59.95
The standard ring reflector (supplied with each ABR800) is designed to hold our 20º
honeycomb grid for “Hollywood Style” lighting and for other low key effects. The
donut-shaped honeycomb grid will tighten the total beam spread of the reflector from
80º down to 20º.
The ABRBAG Ringflash Carrying Bag - $14.95
Conveniently carry your ringflash with our Ringflash Carrying Bag! The bag is designed to
carry one ABR800 (or ZRM1) with your front cover / diffuser and your reflector in place,
with room to carry your mounting bracket along with the sync and power cords. With
its tough nylon exterior and padded interior lining, the bag protects your ringflash as you
travel for around-town shoots. The bag includes a comfortable shoulder strap for easy
transport with a wrap-around zippered lid bearing our Paul C. Buff logo (12” x 12” x 6”
deep with adjustable strap).
The MUBAG Ringflash / Moon Unit™ Carrying Case - $24.95
This padded nylon case has compartments to hold a combination of any two ABR800
or ZRM1 units and 30-inch or 56-inch Moon Unit™ sets with various diffusers. The
convenient bag can be adapted to hold various accessories and allows you to carry your
entire ringflash setup around town easily (27” x 7” x 11” with shoulder strap and handle).
ACCESSORIES
Table of contents