Alisun SunVision V Series User manual

Manual Software 8.4
Handleiding Software 8.4
Bedienungsanleitung Software 8.4
Instructions logiciel 8.4
Manual software 8.4
S
UN
V
ISION
V120 XXL
S
UN
V
ISION
V180 XXL
S
UN
V
ISION
V200 XXL

2003/10
2
1
4
3
P
ROGRAMMING
For optimal use of the
S
UN
V
ISION
V some functions can be adjusted
according to your wishes. This programming is rather simple but we advise
that it is done carefully to ensure the correct functioning of the
S
UN
V
ISION
V. We recommend that you make a list with your wishes before you start
programming. You can change the following functions, for which standard
values have already been pre-programmed at the factory:
Maximum tanning time (function 10).
Standard 12 minutes, can be
adjusted between 0 and 30 minutes (UV-type 4) or 0 and 60 minutes
(UV-type 3)
.
After-cooling time (function 30).
Standard op 4 minutes, can be
adjusted between 3 and 10 minutes
.
Operating mode (function 40).
Standard stand-alone . See step 5 for
possibilities
.
Undressing time (function 50).
Standard 0 minutes, can be adjusted
between 0 and 4½ minutes
.
Startposition body cooler (function 61, 62 and 63).
Can be adjusted
between position 0 and position 9
.
Time per pulse (function 70).
Depends on the setting of function 40
(operating mode). Can be adjusted between 0 and 30 (or 60) minutes
.
Body tubes on/off facility
(function 80). Facility available as standard
Waiting time main cooling (function 90)
. Can be adjusted between ½
and 1 ½ minute.
When you put in the plug, the display shows the number of the software
version that is used in your
S
UN
V
ISION
V.
After 7 seconds it changes into
00 . When the display only shows a decimal point, the S
UN
V
ISION
V
has
been programmed in the display off mode.
Programming in brief
This chapter begins with a brief explanation of programming for the more
experienced programmers. In the paragraph "Programming step-by-step"
we tell you in 12 steps how you can change the standard values according
to your wishes.
The
S
UN
V
ISION
V can be programmed with the control panel
.
Press the keys (3), (4) and 1 simultaneous for 10 seconds. The
display will now show CN .
Press key (3) to go to the program-mode PR.
Press the start key (2) once to enter the program-
mode PR .
Using the red key (8) you can select the function you
wish to change.
When you are in the correct function, press the green key (7)
once.
The number shown in the display can be changed using
key (3) for down or key (4) for up .
Press the start key (2) to confirm the new value.
With the red key (1) you choose the next function in
the program-mode. If the display shows PR , you can
either choose to close by pressing the red key (1), or
you can choose to return to the program-mode by
pressing the start-key (2) once.
Programming step-by-step
In this paragraph we take you through the programming process step-by-
step.
Step 1 Entering the 'programming mode'
Press the keys (3), (4) and (1) simultaneous for 10 seconds. You will
now enter the counter-mode CN Press key (3), you will see PR in the
display.
Step 2 Entering the program-mode
Press the start key (2). The display shows '10'. You have now entered the
'program-mode'. In this mode you can select the function you want to
change. By pressing the red key (1) you will advance to the next step.

2003/10
Code
Function
10
Maximum tanning time (step 3)
20
- Not in use (step 4)
30
After-cooling time (step 5)
40
Operating mode (step 6)
50
Undressing time (step 7)
61/62/63
Bodycooling (step 8)
70
Time per pulse (step 9)
80
Body tubes on/off facility (step 10)
90
Waiting time main cooling (step 11)
Step 3 Setting the maximum tanning time (function 10)
The standard setting is 10 minutes.
Press the start key (2). The display shows a value ending with a
decimal point. This value represents the number of tanning minutes that
has been set. If your
S
UN
V
ISION
V comes straight from the factory the
display shows the value 12 .
Press the down key (3). The 12 in the display jumps to 11 . We
choose, for example, a 6-minute tanning-time so you can press the
down key (3) several times until the 11 in the display has changed to
6 . Use the up key (4) when you want to raise the value.
Press the start key (2) to confirm the adjusted maximum tanning time.
The display now shows the next function 20.
Step 4 This function is not used by the S
UN
V
ISION
V
(function
20)
Press the stop key (1) to go to function 30.
Step 5 Setting the after-cooling time (function 30)
Press the start key (2). The display shows a value which represents
the number of minutes for the after-cooling time that has been set. The
manufacturer's setting is 4 minutes. You can lower this value with the
down key (3) or raise this value with the up key (4). The minimum is 3
minutes and the maximum 10 minutes.
Confirm your choice by pressing de start key (2). The display shows
the value '40'. Function 40 can now be adjusted.
Step 6 Setting the operating mode (function 40)
The display shows the value 40 . 'Press the start key (2). The value in
the display changes to '01' (manufacturer's setting).
In this function you can choose one of the following codes:
Code
Setting
01
Stand-alone mode
02
Coinbox, with
S
UN
V
ISION
V display on
04
Coinbox, with
S
UN
V
ISION
V display off
08
- Not in use -
16
Reception control system
32
Coinbox, with pulse outlet
With key (3) you can decrease this value, and with key (4) you can
increase this value.
Press the start key (2) to confirm the setting. The display shows the
value '50'. Function 50 can now be adjusted.
Step 7 Setting the undressing time (function 50)
This function can be set when a coinbox with pulse outlet (code 32) or a
reception control system (code 16) has been chosen in step 5. On the
display you will now read the number 50 .

2003/10
The following codes are available to set the undressing time:
Code
Setting
00
- No undressing time -
01
½ minute
02
1 minute
03
1½ minute
04
2 minutes
05
2½ minutes
06
3 minutes
07
3½ minutes
08
4 minutes
09
4½ minutes
Press the up key (4) one time until the value in the display jumps to the
desired value(see table). With key (4) you can increase this value, and
with key (3) you can decrease this value.
Press the start key (2) to confirm the setting. The display shows the
value '61'. Function 61 can now be adjusted.
Step 8 Setting the positions for the body cooling (function
61/62/63)
Your guest can decide the air volume of the body cooler, large, standard or
small. You can decide the strength of these three positions. There are nine
positions available, the manufacturer's setting for function 61 (small) is
position '03.', for function 62 (standard) position '05.' and for function 63
(large) position '09.' for the
S
UN
V
ISION
V C
OMPACT
XL
and the
S
UN
V
ISION
V120 XXL
and
V200 XXL
.
Function 61 is now adjustable because you have either pressed the the
stop key (1) five times from the program-mode or you have confirmed your
settings in step 6 with the start key (2). The display shows the value 03 .
Press the down key (3) once to lower this value to position 02 .
Press the start key (2) to confirm the setting. The display shows the value
'62'. Function 62 can now be adjusted.
You can adjust function 62 (startposition '05.') following the same steps as
in function 61 or go directly to function 63 by pressing the stop key (1)
once.
You can adjust function 63 (large volume '09.' (do not increase!) for the
COMPACT
XL
and the
V120 XXL
and
V200 XXL
) following the same steps
as in function 61 or go directly to function 70 by pressing the stop key (1)
once.
Step 9 Setting the time per pulse (function 70)
You will only have to adjust this function if you have chosen a for the
coinbox value at function 40. With this function you can select how long
your guest can tan per coin. The tanning time is adjustable between 0 and
60 minutes.
Function 70 is now adjustable because you have either pressed the
the stop key (1) six times from the program-mode or you have
confirmed your settings in step 7 with the start key (2). The display
shows the value 10 . This is the manufacturer's setting.
Press the down key (3) or the up key (4) until the display shows the
desired value.
Press the start key (2) to confirm the setting. The display shows the
value '80'. Function 80 can now be adjusted.
Step 10
Setting the on/off facility for the tubes (function 80)
The standard setting provides an on/off facility for the body tubes. This
means that the user is able to switch the body tubes off during the tanning
session. We recommend that you alter this setting.
Function 80 is now adjustable because you have either pressed the the
stop key (1) seven times from the program mode or you have confirmed
your settings in step 8 with the start key (2). The display shows the value
01 (switchable). This is the manufacturer's setting.
Press the down key (3) once until the display shows the value 00 (non-
switchable).
Press the start key (2) to confirm your settings. The display shows the
value '90'. You can now set the desired value for function 90 .

2003/10
Step 11 Setting the waiting time for the main cooling
(function 90)
Activate function from function 80 by pressing the green key (2). The
display will now show 01 . This is the standard setting for the waiting time
of the main cooling. For setting the time for the main cooling, the following
values are available:
Code
Setting
00
Immediate start main cooling
01
Main cooling starts after ½ minute (V Compact XL only)
02
Main cooling starts after 1 minute (V Compact only)
03
Main cooling starts after 1 ½ minuite (V Compact only)
Press key (4) once or twice to select a different waiting time.
Confirm your choice by pressing the start-key (2) once. You are now
back in the program-mode.
Step 12 Confirmation
After you have entered all the desired settings, they have to be entered
into the active database of the
S
UN
V
ISION
V
. When this step is not carried
out in the right way, the settings will not be saved. Press the stop-key (1)
untill you see PR in the display (the program-mode) or, from function 90,
with the start-key (2).
Press the stop-key (1) once to save all the settings. If you have done
everything correctly you should hear an acoustic signal and you will
leave the programming-mode PR . All settings will be saved
automatically.
All steps have now been done, and your
S
UN
V
ISION
V
is now fully adjusted
to your wishes. In case of a power loss the values you entered will be
maintained in the memory of the
S
UN
V
ISION
V.

2003/10
O
PERATION
After entering the
S
UN
V
ISION
V
your guest can see the control panel in
front of him at a height of around 150 cm.
The material and printing of the
control panel are selected so that you guest can read the text and symbols
optimally during tanning, i.e. through UV goggles. The control panel is
covered by a membrane, making dirty edges a thing of the past and
cleaning easy.
Description of the control panel
On the control panel you can see the
following touch keys
:
Start key in green
Stop key in red
Display and LED
Touch key UP
Touch key DOWN
Touch key cooling increase
Touch key cooling decrease
How to use the control panel
Stop key red (1)
When the touch key marked
STOP
(1) is pressed the tubes go off and the
S
UN
V
ISION
V
switches over into pause mode.
If the start key (2) is pressed within 30 seconds, the
S
UN
V
ISION
V
comes
on again, as long as the tanning time has not passed. This makes it
possible for your guest to continue the tanning session after (accidently)
pressing the stop key (1).
If the start button is not pressed within 30
seconds, the tanning time is cancelled, the tubes go off and the
S
UN
V
ISION
V
switches over to the after-cooling mode to be ready for the next user.
During the after-cooling period the LED below the display will indicate that
the after-cooling time is running.
Display
The display shows the tanning time in minutes which counts down during
tanning.
The last minute is displayed in seconds
.
Start key green (2)
If your
S
UN
V
ISION
V has been programmed in the stand-alone mode
(code 01) the following operating instructions should be followed.
Your guest presses the start key (2). The display shows the remaining
tanning time in minutes.
Pressing the start key (2) once again reduces the remaining tanning time in
increments of 1 minute. The tanning time cannot be increased.
If your
S
UN
V
ISION
V has been programmed in the
reception control
mode
(code 16) the
S
UN
V
ISION
V
can be started in two different ways.
1.
If start is pressed in the reception three beeps can be heard at the
S
UN
V
ISION
V
. The beeps indicate that the undressing time has begun.
The number of tanning minutes alternates with the remaining
undressing time on the reception display. The undressing time (if set)
counts down to 0. Your guest undresses, enters the
S
UN
V
ISION
V
and
presses the start key (2)
.
When the undressing time has passed the
S
UN
V
ISION
V
comes on, regardless of whether your guest is in it or
not.
After the undressing time has passed, or when the start key (2) is
pressed on the
S
UN
V
ISION
V
, it starts up. At that moment the tanning
time can be seen counting down on the reception display in minutes
(the last minute is shown in seconds). If start is pressed repeatedly at
the reception the tanning time is decreased in steps of 1 minute. If
stop is pressed at the reception, the
S
UN
V
ISION
V stops.
2
1
4
3

2003/10
If the sunbed has not been started by the reception, the guest can
indicate this by pressing the start key (2). Three beeps are heard at
the reception. The displays of the
S
UN
V
ISION
V
and the reception
control flash with the set tanning time.
The reception can switch the
S
UN
V
ISION
V
on by pressing start and then, if necessary, can
decrease the tanning time in increments of one minute by holding
down the start key. It is not possible to increase the tanning time.
If stop is pressed at the reception during tanning the
S
UN
V
ISION
V
switches off. If, during tanning, the stop key (1) is pressed on the
control panel of the
S
UN
V
ISION
V,
it switches over to pause mode for
30 seconds. If the start key (2) is pressed within 30 seconds the
S
UN
V
ISION
V
continues. When the 30 seconds have passed the
S
UN
V
ISION
V
stops and switches over to after-cooling
.
If your
S
UN
V
ISION
V has been programmed in the coinbox with S
UN
V
ISION
V
display on
mode (code 02) or in the coinbox with S
UN
V
ISION
V
display
off
mode (code 04) the following operating instructions should be followed.
Your guest inserts a number of coins into a coin meter and the
S
UN
V
ISION
V starts up. 00 appears on the display and the tanning time increases to
the value of the coins inserted. The coinbox switches the
S
UN
V
ISION
V
off
when the tanning time has passed. If the stop key (1)
on the control panel
is pressed during tanning the
S
UN
V
ISION
V
switches over to pause mode
for 30 seconds. If the start key (2) is pressed within 30 seconds then the
S
UN
V
ISION
V
continues. After the 30 seconds the
S
UN
V
ISION
V
stops and
switches over to after-cooling.
If start is pressed at the reception during tanning nothing happens.
Pressing stop at the reception switches the
S
UN
V
ISION
V
off.
If your
S
UN
V
ISION
V has been programmed in the coinbox with pulse outlet
mode (code 32) the following operating instructions should be followed.
Your guest inserts a number of coins into the coin meter and the display on
the reception control system starts to flash. Each time a coin is inserted a
beep can be heard. Coins can be inserted until the maximum tanning time
has been reached. If coins are inserted after the maximum tanning time
has been reached, three beeps will be heard each time.
15 seconds after the last coin has been inserted the undressing time
starts. On the display of the
S
UN
V
ISION
V
t
he undressing time is counted
down
and the start key (2) can be pressed
.
After the undressing time has
finished or the start key (2) has been pressed, the
S
UN
V
ISION
V
starts.Inserting coins during tanning has no effect. Pressing the start key
(2) on the control panel has no effect either. If the stop key (1) is pressed
on the
S
UN
V
ISION
V
control panel during tanning the
S
UN
V
ISION
V
switches
over to pause mode. If the start key (2) start is pressed within the 30
seconds the
S
UN
V
ISION
V
continues. After the 30 seconds have passed the
S
UN
V
ISION
V
stops and switches over to after-cooling
.
If start is pressed on
the reception control during tanning, nothing happens. Pressing stop at the
reception switches the
S
UN
V
ISION
V
off.
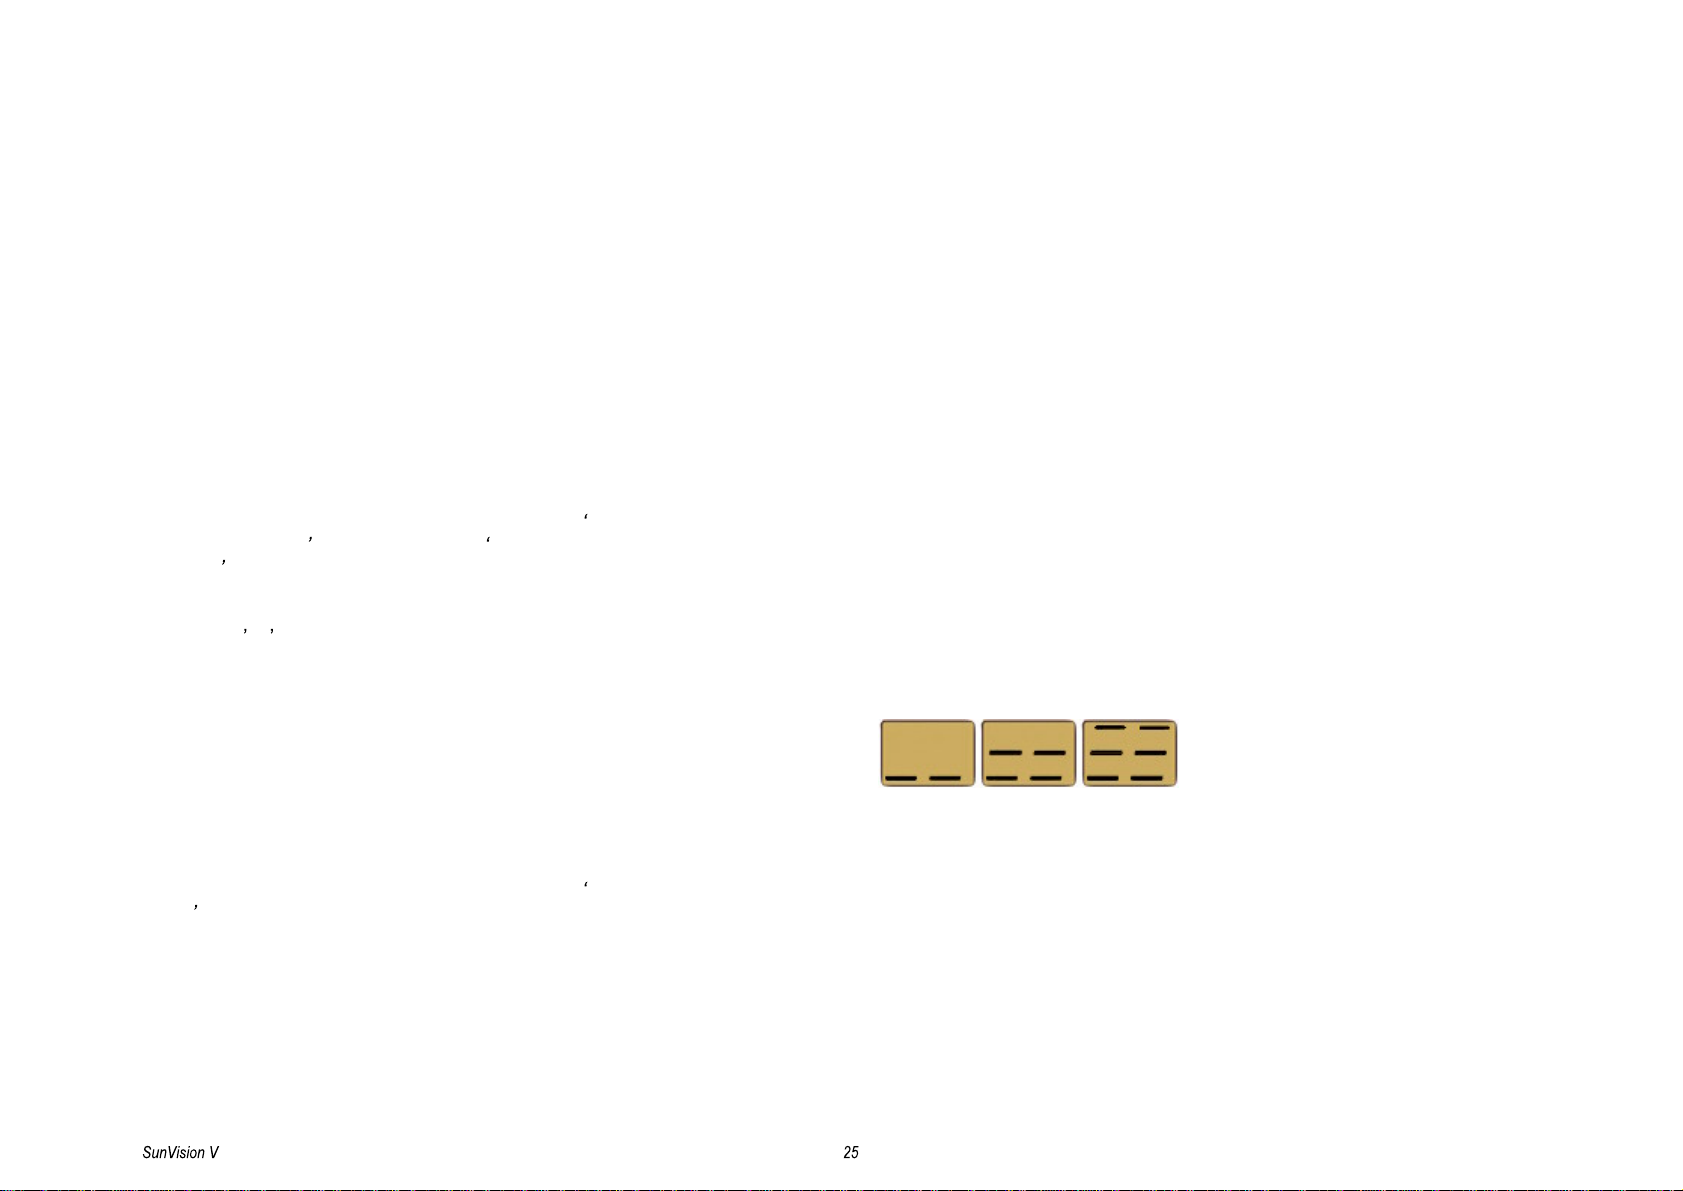
Body cooling harder / softer
Body coolers are fitted along the length of the shaft of the
S
UN
V
ISION
V.
The upper cooler is the face cooler with adjustable blower direction. The
intensity of the body cooling is adjustable via the control panel. The
intensity of a connected Cool Breeze Unit will also be adjusted.
When the touch key with the large ventilator symbol (5) is pressed the
body cooling starts to blow harder. When the touch key with the small
ventilator symbol (6) is pressed the intensity of the body cooling is
reduced. The cooling setting can be read off the display whilst the
ventilator touch key is pressed.
When the intensity of the body cooling is altered, the setting selected
remains visible upon the display for around 1 second.

2003/10
2
1
4
3
R
EADING OUT
S
ERVICE
D
ATA
Step 1 Entering the 'service-mode'
Press the keys (3), (4) and (1) for 10 seconds.
You will now enter the service-mode and the display
shows CN ..
Step 2 Entering the counter-mode
Press the start key (2). You have now entered the
counter-mode.
Step 3 The different functions
In the counter-mode you can use the stop key (1) to leaf
through the 9 different functions. These functions are:
Code
Function
10
Switching on lamps
20
Lamp operating hours
30
- Not in use -
40
- Not in use -
50
- Not in use -
60
- Not in use -
70
Cumulative total of switching on lamps
80
Cumulative total of operating hours
90
Resetting the counters
CN
Counters
If the display indicates CN , you can choose from closing the
service-mode by pressing the stop-key (1), or you can go back to the
service-mode by pressing the start-key (2).
Step 4 Reading-out the values
When you arrive at the function whose value you wish to find, select it by
pressing the start key (2).
Immediately after pressing the start key (2) two digits appear in the
display. The left-hand side of the display indicates the number of digits
of which the value exists. The point below at the right indicates that the
display shows a value.
Record the value on the right and continue leafing through, using the
down key (4). Continue to record each number that appears on the
right-hand side of the display until the value 1 appears on the left-hand
side of the display. At that point, the value shown in the right-hand side
of the display will be the final digit of the value of the function which you
selected.
Example: reading out the lamp operating hours:
Select function 20
.
The display shows [
40.
] This is the first value, record 0.
Press
the up
key (4)
.
The display shows [
32.
], record 2 (02).
Press
the up
key (4) again
.
The display shows [
29.
], record 9 (029).
Press the up key (4) again. The display shows [
13.
] (the value 1 on the
left-hand side of the display shows that this is the final digit of the
value), record 3 (0293).
This means the number of operating hours is 293.
Step 5 Returning to service mode
Press the up key (4) to go to the next function With the stop-key (1) you
can select the next function, and with the start-key (2) you can confirm your
choice.
Step 6 Resetting counters
Values can be reset (set to zero) using function 90. You can only reset the
following functions:
Code
Function
10
Switching on lamps
20
Lamp operating hours
30
- Not in use -
40
- Not in use -
50
- Not in use -

2003/10
Use the stop key (1) to leaf through to
function 90
(resetting counters)
and select the function you wish to reset using the start key (2)
.
The
point below at the right indicates that this function can be reset. You
can now:
a.
Reset the function which appears in the display (function 10), using
the stop key (1), or
b.
Continue leafing through the functions, using the up
key (4)
,
until the required function appears in the display and then reset it,
by pressing the
stop key (1)
.
After resetting the functions, press the up key (4) once again, in order
to leave function 90.
Example: resetting the lamp operating hours
:
Select function 20
.
The display shows [20.] Press the stop key (1) to reset the lamp
operating hours.
Step 7 Exit the service mode
After you have left function 90, you will see CN in the display. Or, if you
are in a different function, you can get to CN by pressing the stop-key (1)
several times. If you see CN , press the stop-key (1) one more time in
order to leave the service mode. You will hear a short acoustic signal; for
confirmation. There is now a 00 in the display and the S
UN
V
ISION
V is
ready for use.

2003/10
P
ROGRAMMEREN
Voor een optimaal gebruik van de
S
UN
V
ISION
V heeft u de mogelijkheid tot
het instellen van een aantal functies naar uw wensen. Dit programmeren
is relatief eenvoudig. Wij adviseren u deze instellingen zorgvuldig uit te
voeren voor een succesvolle werking. In de fabriek zijn standaardwaarden
voor de te wijzigen functies ingevoerd. Voor u begint aan het
programmeren raden wij u aan een lijstje te maken met uw wensen. De
volgende functies kunt u wijzigen:
Maximale zontijd (functie 10).
Standaard op 12 minuten, instelbaar
tussen 0 en 30 minuten (UV-type 4) of 0 en 60 minuten (UV-type 3
).
Tijdsduur nakoeling (functie 30).
Standaard op 4 minuten, instelbaar
tussen 3 en 10 minuten
.
Gebruikssituatie (functie 40).
Standaard op stand-alone . Zie stap 5
voor de mogelijkheden
.
Uitkleedtijd (functie 50).
Standaard op 0 minuten, instelbaar tussen 0
en 4½ minuten
.
Instelbare lichaamskoeling (functie 61, 62 en 63)
Instelbaar tussen
stand 0 en stand 9
.
Tijdsduur per puls (functie 70).
Afhankelijk van de instelling onder
functie 40 (gebruikssituatie). Instelbaar tussen 0 en 30 (of 0 en 60)
minuten
.
Schakelbare lichaamslampen (functie 80).
Standaard schakelbaar
Voorlooptijd hoofdkoeling (functie 90).
Instelbaar tussen ½ en 1 ½
minuut
.
Wanneer u de stekker in de wandcontactdoos steekt, ziet u het
versienummer van de software, gebruikt in uw
S
UN
V
ISION
V
, op het display
staan. Na 7 seconden verandert dit in 00. Ziet u alleen de decimale punt
dan is tijdens het programmeren gekozen voor display uit.
Programmeren in het kort
Voor de geroutineerde programmeurs beginnen we met een beknopte
uitleg van de algemene programmeerhandelingen. In de paragraaf
"Programmeren stap voor stap" vertellen wij u met een 12 stappenplan
hoe u de waarden naar uw voorkeur kunt veranderen.
Programmeren van de
S
UN
V
ISION
V doet u met het
bedieningspaneel
.
- Druk gelijktijdig de drie toetsen (3), (4) en (1) gedurende
10 seconden in. Op het display ziet u CN .
- Druk op toets (3) om naar de programmeer-mode te
gaan.
- Druk 1x op de groene toets (2) om de programmeer-
mode PR te selecteren.
- Met de rode toets (1) kiest u snel voor de functie die u
wilt wijzigen.
- In de juiste functie drukt u 1x op de groene toets (2).
- Het getal op de display wijzigt u met toets (3) omlaag-
en (4) omhoog-.
- Voor het bevestigen van het nieuwe getal drukt u 1x op
de groene toets (2).
- Met de rode toets (1) kiest u de volgende functie in de
programmer-mode. Als PR in het display staat, kunt u
kiezen voor afsluiten door op de rode toets (1) te drukken,
of het terugkeren naar de programmeer-mode door 1x op
groene toets (2) te drukken.
Programmeren stap voor stap
In deze paragraaf laten we stap voor stap zien hoe u uw
S
UN
V
ISION
V
programeert.
Stap 1 het bedieningspaneel in de programmeerstand zetten
Druk gelijktijdig gedurende 10 seconden de toetsen (3), (4) en (1) in. U
ziet nu CN in het display. Druk op toets (3), u ziet nu PR op het
display.
2
1
4
3

2003/10
Stap 2 kiezen voor de programmer-mode
Druk op de groene toets (2). Op het display ziet u 10 . U bent nu bij de
programmeer-mode. In deze mode kunt u kiezen voor de functies die u wilt
wijzigen. Door telkens op rode toets (1) te drukken komt u een stap verder.
Code
Functie
10
Instellen maximale zontijd (stap 3)
20
- Niet in gebruik (stap 4)
30
Instellen nakoeltijd (stap 5)
40
Instellen gebruikerssituatie (stap 6)
50
Instellen uitkleedtijd (stap 7)
61/62/63
Instellen lichaamskoeling (stap 8)
70
Tijdsduur per puls (stap 9)
80
Instellen schakelbare lichaamslampen (stap 10)
90
Instellen voorlooptijd hoofdkoeling (stap 11)
Stap 3 instellen van de maximale zontijd (functie 10)
De fabrieksinstelling is 12 minuten.
Druk 1x op de groene toets (2), in het display verschijnt nu een getal
met een punt daarachter. Dit getal staat voor het aantal zonminuten dat
staat ingesteld. Komt uw
S
UN
V
ISION
V rechtstreeks van de fabriek, dan
ziet u hier het getal 12 .
Druk 1x op toets (3). De 12 op het display verspringt naar 11 . Wij
kiezen bijvoorbeeld voor 6 minuten zontijd, dus u drukt zovaak op toets
(3) tot de 11 in het display is verandert in 6 . Wilt u het getal verhogen,
dan gebruikt u daarvoor toets (4).
Druk 1x op de groene toets (2) om de ingestelde zonminuten te
bevestigen. Op het display verschijnt nu het getal 20 van de volgende
functie.
Stap 4 Functie is niet van toepassing bij de S
UN
V
ISION
V
(functie 20)
Druk 1x op de rode toets (1) om verder te gaan naar functie 30.
Stap 5 het instellen van de nakoeltijd (functie 30)
Druk 1x op de groene toets (2). In het display staat nu een getal dat
het aantal minuten voor het nakoelen aangeeft. De fabrieksinstelling is
4 minuten. Met toets (3) kunt u dit getal verlagen en met toets (4)
verhoogt u het getal (minimaal 3 minuten, maximaal 10 minuten).
Bevestig uw keuze door 1x op de groene toets (2) te drukken. Op het
display verschijnt nu het getal 40 . Functie 40 is nu instelbaar.
Stap 6 het wijzigen van de gebruikssituatie (functie 40)
Op het display leest u nu het getal 40 . Druk 1x op de groene toets (2).
Het getal in op het display verandert in 01 (fabrieksinstelling).
In deze functie heeft u de keuze uit de volgende codes:
Code
Instelling
01
Stand-alone mode
02
Muntautomaat, met display op de
S
UN
V
ISION
V aan
04
Muntautomaat, met display op de
S
UN
V
ISION
V uit
08
Niet in gebruik
16
Receptiebedienings mode
32
Muntautomaat met pulsuitgang
Met toets (3) kunt u dit getal verlagen en met toets (4) verhogen.
Druk 1x op de groene toets (2) om de instelling te bevestigen. Op het
display verschijnt nu het getal 50 . Functie 50 is nu instelbaar.

2003/10
Stap 7 instellen uitkleedtijd (funtie 50)
Deze functie hoeft u alleen in te stellen wanneer u in functie 40 gekozen
heeft voor een muntautomaat met pulsuitgang (code 32) of een
receptiebediening (code 16). Op het display leest u nu het getal 50 .
Voor het instellen van de uitkleedtijd zijn de codes in de volgende tabel
beschikbaar:
Code
Instelling
00
Uitkleedtimer niet in gebruik
01
½ minuut
02
1 minuut
03
1½ minuut
04
2 minuten
05
2½ minuten
06
3 minuten
07
3½ minuten
08
4 minuten
09
4½ minuten
Druk 1x op toets (2), op het display staat nu een getal dat
overeenkomt met de minuten uitkleedtijd (zie tabel). Met toets (4) kunt u
dit getal verhogen, en met toets (3) verlagen.
Druk op de groene toets (2) om deze waarde te bevestigen. Op het
display staat nu 61 . Functie 61 is instelbaar.
Stap 8 - instellen lichaamskoeling (functie 61/62/63)
Uw gast kan zelf bepalen hoe snel de lichaamskoeling moet draaien, hard,
standaard of zacht. U bepaalt de sterkte van deze drie standen. U heeft de
keuze uit negen standen, de fabrieksinstelling voor functie 61 (zacht) is
stand '03.', voor functie 62 (standaard) stand '05.' en voor functie 63 (hard)
stand '09.' voor de
S
UN
V
ISION
V C
OMPACT
XL
en voor de S
UN
V
ISION
V120
XXL
,
V200 XXL
.. De waarde 00 is ook te programmeren; dan is de
lichaamskoeling uit. Stel u wilt de fabrieksinstelling van functie 61
veranderen van stand '03.' naar stand '02.'
Activeer functie 61 met de rode toets (1) vanuit de programmer-mode
of vanuit functie 50 met de groene toets (2). Op het display staat het
getal 02. .
Druk 1x op toets (3) om dit getal naar 02. te verlagen.
Bevestig deze instelling door op de groene toets (2) te drukken. Op het
display staat nu 62 . Functie 62 is instelbaar.
U kunt functie 62 (de startpositie '05.') wijzigen volgens de stappen bij
functie 61 of direct 1x op de rode toets (1) drukken en naar functie 63
gaan.
U kunt functie 63 (sterkste positie '09.' (niet verhogen!) voor de
S
UN
V
ISION
V C
OMPACT
XL
en de
S
UN
V
ISION
V120 XXL
,
V200 XXL
)
wijzigen volgens de stappen bij functie 61 of 1x op de rode toets (1)
drukken en direct naar functie 70 gaan.
Stap 9 pulsinstelling (functie 70)
Deze functie hoeft u alleen in te stellen als u bij functie 40 heeft gekozen
voor een muntautomaat. Met deze functie stelt u in hoelang uw gast kan
zonnen per munt. De zontijd is instelbaar tussen de 0 en 60 minuten.
Activeer functie 70 met de rode toets (1) vanuit de programmer-mode
of vanuit functie 63 met de groene toets (2). Op het display staat het
getal 10 , dit getal is de fabrieksinstelling.
Druk op toets (3) omlaag- of toets (4) omhoog- tot de juiste waarde
op het display staat.
Druk 1x op de groene toets (2) om de instelling te bevestigen. Op het
display verschijnt nu het getal 80 . Functie 80 is nu instelbaar
Stap 10 - instellen schakelbaarheid lichaamslampen (functie
80)
Standaard zijn de lichaamslampen schakelbaar. Dat betekent dat de
gebruiker de lichaamslampen tijdens het zonnen kan uitschakelen. Wij
adviseren u deze instelling te wijzigen. Activeer functie 80 met de rode
toets (1) vanuit de programmer-mode of vanuit functie 70 met de groene
toets (2). Op het display staat het getal 01. (uitschakelbaar), dit is de
fabrieksinstelling. Druk 1x op toets (3) omlaag- tot het getal 00. (niet
uitschakelbaar) op het display staat.

2003/10
Bevestig deze instelling door 1x op de groene toets (2) te drukken. Op het
display staat nu 90 . Functie 90 is nu instelbaar..
Stap 11 instellen voorlooptijd hoofdkoeling (functie 90)
Activeer functie 90 met de rode toets (1) vanuit de programmeer-mode of
vanuit functie 80 met de groene toets (2). Op het display staat nu 00 . Dit
is de fabrieksinstelling voor de voorlooptijd van de hoofdkoeling. Voor het
instellen van de voorlooptijd hoofdkoeling zijn de codes in de volgende
tabel beschikbaar:
Code
Instelling
00
Directe start hoofdkoeling
01
Na ½ minuut start hoofdkoeling (alleen V Compact XL)
02
Na 1 minuut start hoofdkoeling (alleen V Compact XL)
03
Na 1 ½ minuut start hoofdkoeling (alleen V Compact
XL)
Druk 1x of 2x op toets (4) om een andere voorlooptijd te selecteren.
Bevestig deze keuze door 1x op de groene toets (2) te drukken. U bent
nu terug in de programmeer-mode.
Stap 12 bevestigen
Nadat u alle gewenste instellingen gemaakt heeft, moeten ze nog
vastgelegd worden in de actieve database van uw
S
UN
V
ISION
V. Wanneer
deze handeling niet correct wordt uitgevoerd, worden de instellingen niet
opgeslagen. Druk zo vaak op de rode toets (1) tot op de display PR te
lezen is (de hoofd-mode ) of vanuit functie 90 met de groene toets (2).
Druk 1x op de rode toets (1) om de instellingen op te slaan. Als u alle
handelingen goed heeft verricht dan hoort u een piepsignaal.
Alle handelingen zijn nu verricht en de
S
UN
V
ISION
V is volledig naar uw
wensen geprogrammeerd. De ingevoerde waarden zijn opgeslagen in het
geheugen en al zou de stroom uitvallen: deze waarden blijven behouden.
Wanneer u wijzigingen wilt doorvoeren, zult u de
S
UN
V
ISION V-
SERIE
opnieuw moeten programmeren.

2003/10
B
EDIENEN
Wanneer uw gast in de
S
UN
V
ISION
V
staat, trekt hij/zij het toegangspaneel
dicht. Uw gast vindt het bedieningspaneel op de schacht, op ongeveer 150
cm hoogte.
Het materiaal en de bedrukking van het bedieningspaneel zijn zo gekozen
dat uw gast tijdens het zonnen, dus met UV-bril, de teksten en symbolen
goed kan aflezen. Over het bedieningspaneel is een membraanfolie
aangebracht waardoor vieze randen tot het verleden behoren en
schoonmaken eenvoudig is.
Beschrijving bedieningspaneel
Op het bedieningspaneel ziet u, van boven naar beneden
:
Starttoets - groen
Stoptoets - rood
Display en LED
Toets omhoog
Toets omlaag
Toets koeling harder
Toets koeling zachter
Gebruik bedieningspaneel
Stoptoets rood (1)
Met de stoptoets zet uw gast de
S
UN
V
ISION
V
in pauzestand. De
lichaamslampen gaan uit. Op het display knippert de overgebleven zontijd.
De pauzestand blijft 30 seconden gehandhaafd.
Drukt uw gast binnen deze 30 seconden op de starttoets (2), dan wordt de
pauzestand opgeheven en gaat de zontijd verder waar deze onderbroken
werd. Hierdoor kan een gast die per ongeluk op de stoptoets (1) drukt
gewoon verder zonnen.
Als tijdens de 30 seconden pauzestand niet op de starttoets (2) wordt
gedrukt, schakelt de
S
UN
V
ISION V-
SERIE
uit. Na het uitschakelen blijven de
ventilatoren nog nakoelen om de
S
UN
V
ISION
V
snel klaar te maken voor
het volgende gebruik. Tijdens het nakoelen brandt de LED onder het
display ten teken dat de nakoeling in werking is.
Display
In het display leest uw gast de zontijd in minuten, afgerond naar boven. De
laatste minuut wordt in seconden weergegeven
.
Starttoets groen (2)
Als uw
S
UN
V
ISION
V geprogrammeerd is in de stand-alone mode (01) dan
is de bediening van het zonneapparaat als volgt.
Uw gast drukt op de starttoets (2). Op de display is nu de zontijd in minuten
te zien.
Door op de starttoets (2) te drukken vermindert de tijd steeds met 1 minuut.
Dit kan net zo lang herhaald worden tot de gewenste tijd is bereikt.
Verhogen van de zontijd is niet mogelijk.
Als uw
S
UN
V
ISION
V is geprogrammeerd in de receptiebedienings mode
(16) , dan is de S
UN
V
ISION
V
op twee manieren te starten.
1.
Wanneer bij de receptie op start wordt gedrukt, laat de
S
UN
V
ISION
V
drie piepsignalen te horen. Die piepsignalen geven
aan dat de uitkleedtijd ingaat. Op de receptiebedieningsdisplay
wisselt het aantal zonminuten af met de resterende uitkleedtijd. De
uitkleedtijd (mits ingesteld) loopt daarbij af naar 0. Uw gast kleedt
2
1
4
3

2003/10
zich uit, gaat in de
S
UN
V
ISION
V
staan en drukt op de starttoets (2),
daarmee onderbreekt uw gast de resterende uitkleed tijd en gaat
de
S
UN
V
ISION
V
direct aan. Wanneer de uitkleedtijd is verstreken
gaat de
S
UN
V
ISION
V
aan, ongeacht of uw gast erin staat of niet.
Na het verstrijken van de uitkleedtijd, of door het drukken op de
starttoets (2) van de
S
UN
V
ISION
V
, start het zonneapparaat. Op dat
moment is de aftellende zontijd in minuten (de laatste minuut in
seconden) op de receptiedisplay te zien. Door bij de receptie
repeterend op start te drukken wordt de zontijd steeds met 1 minuut
verlaagd. Wanneer bij de receptie op stop wordt gedrukt, stopt de
S
UN
V
ISION
V.
2.
Wanneer het zonneapparaat niet door de receptie is gestart, kan
de gast dat aangeven door op de starttoets (2) te drukken. De receptie
hoort dan drie keer een piepsignaal. De displays van de
S
UN
V
ISION
V
en de receptiebediening gaan knipperen met de ingestelde zontijd. De
receptie kan door het drukken op startknop de
S
UN
V
ISION
V
inschakelen
en daarna, indien nodig, door het indrukken van de startknop de zontijd
in stappen van een minuut verlagen. Verhogen van de zontijd is niet
mogelijk.
Wanneer tijdens het zonnen bij de receptie op stop gedrukt wordt, schakelt
de
S
UN
V
ISION
V
uit. Als, tijdens het zonnen, op het bedieningspaneel van
het zonneapparaat op de stoptoets (1) wordt gedrukt, schakelt de
S
UN
V
ISION
V
voor 30 seconden over naar de pauzestand. Wordt er binnen
die 30 seconden op de starttoets (2) gedrukt, dan gaat het zonneapparaat
verder. Na die 30 seconden stopt de
S
UN
V
ISION
V
en schakelt over naar de
nakoeling
.
Als
UW
S
UNVISION
V is geprogrammeerd in de Muntautomaat met display
aan mode (code 02) of Muntautomaat met display uit mode (code 04)
dan is de bediening van het zonneapparaat als volgt.
Uw gast werpt een aantal munten in de muntautomaat en start de
S
UN
V
ISION
V. Op het display verschijnt 00 en de zontijd telt op tot de
waarde van de ingeworpen munten. De muntautomaat schakelt de
S
UN
V
ISION
V
uit wanneer de zontijd is verstreken.
Wanneer tijdens het zonnen op de stoptoets (1) van het bedieningspaneel
van de
S
UN
V
ISION
V
wordt gedrukt, schakelt het zonneapparaat voor 30
seconden over naar pauze. Wordt er binnen die 30 seconden op de
starttoets (2) gedrukt, dan gaat de
S
UN
V
ISION
V
verder. Na die 30
seconden stopt de
S
UN
V
ISION
V
en schakelt over naar de nakoeling.
Wanneer tijdens het zonnen bij de receptiebediening op start wordt
gedrukt, gebeurt er niets. Door bij de receptie op stop te drukken, schakelt
de
S
UN
V
ISION
V
uit.
Als
UW
S
UNVISION
V is geprogrammeerd in de Muntautomaat met
pulsuitgang mode (code 32) dan is de bediening van het zonneapparaat
als volgt.
Uw gast werpt een aantal munten in de muntautomaat en de display van
de receptiebediening gaat knipperen. Bij elke inworp van een munt is een
piepsignaal te horen. Munten kunnen ingeworpen worden tot aan de
maximale zontijd. Wanneer na het bereiken van de maximale zontijd
munten in de muntautomaat worden ingeworpen, zijn er steeds drie
piepsignalen te horen.
15 seconden na het inwerpen van de laatste munt, gaat de uitkleedtijd in.
Op het bedieningspaneel van het zonneapparaat telt de uitkleedtijd af en
kan de starttoets ingedrukt worden. Na het verstrijken van de uitkleedtijd of
het drukken op de starttoets, schakelt de
S
UN
V
ISION
V
in.Het inwerpen van
munten tijdens het zonnen heeft geen gevolgen. Het drukken op de
starttoets van het bedieningspaneel heeft
ook geen
gevolgen. Wanneer
tijdens het zonnen op de stoptoets van het bedieningspaneel van de
S
UN
V
ISION
V
wordt gedrukt, schakelt de
S
UN
V
ISION
V
over naar pauze.
Wordt er binnen die 30 seconden op de starttoets gedrukt, dan gaat het
zonneapparaat verder. Na die 30 seconden stopt de
S
UN
V
ISION
V
en
schakelt over naar de nakoeling
.

2003/10
Wanneer tijdens het zonnen bij de receptiebediening op start wordt
gedrukt, gebeurt er niets. Door bij de receptie op stop te drukken, schakelt
de
S
UN
V
ISION
V
uit.
Lichaamskoeling harder / zachter
Over de hele lengte van de schacht van de
S
UN
V
ISION V-
SERIE
zijn
lichaamskoelers aangebracht. De bovenste koeler is de gezichtskoeler
waarvan de blaasrichting instelbaar is. De sterkte van de lichaamskoeling
is instelbaar via het bedieningspaneel. Hiermee wordt tegelijk ook de
koeling van de eventueel aangesloten Cool Breeze Unit geregeld.
Door het indrukken van de tiptoets met het grote ventilator-symbool (5),
gaan de lichaamskoeling harder blazen. Door het indrukken van de tiptoets
met het kleine ventilator-symbool (6) wordt de sterkte van de
lichaamskoeling verminderd. Tijdens het drukken op de ventilator
tiptoetsen is de sterkte van de koeling in het display te lezen. Er zijn 3
standen: zacht, standaard en hard.
Wanneer de sterkte van de lichaamskoeling is gewijzigd, blijft de
ingestelde sterkte ongeveer 1 seconde op het display zichtbaar.

2003/10
2
1
4
3
U
ITLEZEN VAN
S
ERVICE
G
EGEVENS
Stap 1 Het bedieningspaneel in de
programmeerstand zetten
Druk gedurende 10 seconden op de toetsen (3), (4)
en (1).
Op het display van het bedieningspaneel ziet u CN .
U kunt nu de toetsen loslaten, het bedieningspaneel
staat in de programmeerstand.
Stap 2 Kiezen voor de servicemode
Druk op de groene toets (2). Op het display ziet u
10 . U bent nu bij de servicemode.
Stap 3 De verschillende functies
In de servicemode kunt u met de rode toets (1) door de 9
verschillende functies bladeren. De functies zijn:
Code
Functie
10
Aantal inschakelingen van de lampen
20
Aantal bedrijfsuren van de lampen
30
- Niet in gebruik -
40
- Niet in gebruik -
50
- Niet in gebruik -
60
- Niet in gebruik -
70
Aantal inschakelingen lampen cumulatief
80
Aantal bedrijfsuren cumulatief
90
Resetten van de tellers
CN
Counters
Staat er CN in het display, dan kunt u kiezen voor het afsluiten van de
service-mode door op de stop toets (1) te drukken, u kunt terugkeren naar
de service mode door op de start toets (2) te drukken.
Stap 4 Uitlezen van de gegevens
U kunt de functie die u wilt uitlezen selecteren door op de groene toets (2)
te drukken.
Direct na het indrukken van de groene toets (2) staan er twee cijfers in
het display. De linker waarde geeft aan uit hoeveel cijfers de waarde
van de gekozen functie bestaat. De punt rechts onderaan geeft aan dat
het display een waarde laat zien.
Noteer de rechter waarde en blader verder met toets (4). Noteer
telkens het getal welke aan de rechterkant van de dis
play verschijnt
achter elkaar, net zolang tot de linkerkant van het display de waarde 1
aangeeft. De waarde aan de rechterkant van het dis
play is dan het
laatste getal van de waarde van de door u gekozen functie.
Voorbeeld: uitlezen van het aantal bedrijfsuren van de lampen
:
Selecteer functie 20
.
Op het display staat [
40.
] Dit is de eerste waarde, noteer 0.
Druk op toets (4). Op het display staat [
32.
], noteer 2 (02).
Druk nogmaals op toets (4). Op het display staat [
29.
], noteer 9 (029).
Druk nogmaals op toets (4). Op het display staat [
13.
] (de waarde 1
aan de linkerkant van het display geeft aan dat dit het laatste getal is
van deze waarde), noteer 3 (0293).
Dit houdt in dat het aantal bedrijfsuren van de lampen 293 is.
Stap 5 Terugkeren naar de servicemode
Druk nogmaals op toets (4) om in de volgende functie terecht te komen.
Met de stop toets (1) kunt u de volgende functie kiezen en bevestigen met
de start toets (2).
Stap 6 Resetten van de tellers
Met functie 90 kunt u alle waarden resetten (op nul zetten). U kunt alleen
de volgende waarden resetten:

2003/10
Code
Functie
10
Aantal inschakelingen lampen
20
Aantal bedrijfsuren lampen
30
- Niet in gebruik -
40
- Niet in gebruik -
50
- Niet in gebruik -
Blader met de rode toets (1) door naar
functie 90
(resetten van de
tellers) en selecteer de functie die u wilt resetten met de groene toets
.
De punt rechts onderaan geeft aan dat u deze functie nu kunt resetten.
U kunt nu:
a.
de functie die op het display verschijnt (functie 10) resetten met de
rode toets (1), of
b.
met toets (4) verder bladeren naar de gewenste functie, en deze dan
vervolgens resetten met de rode toets (1).
U kunt functie 90 verlaten door nogmaals op toets (4) te drukken.
Voorbeeld: resetten van het aantal bedrijfsuren van de lampen
:
Selecteer functie 20
.
Op het display staat [
20.
] Druk op de rode toets (1) om het aantal
bedrijfsuren van de lampen te resetten.
Stap 7 Verlaten van de servicemode
Nadat functie 90 is verlaten komt CN in het display te staan. Dit kan ook
als vanuit een andere hoofdfunctie enkele malen op de stop toets (1) is
gedrukt totdat er CN in het display staat. Nu éénmaal op de stop toets (1)
drukken om de service-mode te verlaten. U hoort nu een kort akoestisch
signaal ter bevestiging. Er staat nu 00 of een : in het display en het
apparaat is klaar voor gebruik.

2003/10
2
1
4
3
P
ROGRAMMIEREN
Für eine optimale Benutzung der
S
UN
V
ISION
V haben Sie die Möglichkeit
einige Funktionen nach Ihren Wünschen einzustellen. Das Programmieren
ist relativ einfach. Für eine erfolgreiche Wirkung empfehlen wir Ihnen diese
Einstellungen sorgfältig auszuführen. Vom Hersteller sind schon
Standardwerte eingeführt. Wir empfehlen Ihnen vor dem Programmieren
eine Liste mit Ihren Wünschen zu machen. Die folgende Funktionen sind
einstellbar:
Maximale Bräunungszeit (Funktion 10). Standard 12 Minuten,
einstellbar zwischen 0 und 30 Minuten
(UV-Typ 4) oder zwischen 0
und 60 Minuten (UV-Typ 3).
Nachkühlzeit (Funktion 30). Standard 4 Minuten, einstellbar zwischen
1½ und 5 Minuten.
Betriebsstellung (Funktion 40). Standard stand-alone. Siehe Schritt 5
für die Einstellungsmöglichkeiten.
Auskleidezeit (Funktion 50). Standard 0 Minuten, einstellbar zwischen
0 und 4½ Minuten.
Einstellung Körperlüfter (Funktion 61, 62 und 63). Einstellbar zwischen
Stufe 0 und Stufe 9.
Zeit pro Puls (Funktion 70). Je nach Betriebsstellung (Funktion 40).
Einstellbar zwischen 0 und 30 (oder 0 und 60) Minuten.
Schaltbare Körperröhren (Funktion 80); serienmäßig schaltbar.
Vorlaufzeit Hauptkühlung (Funktion 90)
. Zwischen ½ und 1 ½
einstellbar.
Wenn Sie den Stecker in die Steckdose stecken sehen Sie die Nummer
der Softwareversion Ihrer
S
UN
V
ISION
V
, auf dem Display. Nach 7
Sekunden ändert dies in 00 . Sehen Sie nur den Dezimalpunkt dann ist
beim programmieren Display aus gewählt.
Programmieren kurz
Für erfahrene Programmierer fangen wir an mit eine kurze Erklärung der
allgemeine Programmierhandlungen. Im Paragraph "Programmieren
Schritt für Schritt" erzählen wir Ihnen in zwölf Schritten wie Sie die
Einstellungen nach Ihre Wahl ändern können.
Sie Programmieren der
S
UN
V
ISION
V mit dem Bedienungsfeld
.
Gleichzeitig die drei Tasten (3), (4) und (1) 10 Sekunden lang
eindrücken. Sie sehen jetzt CN auf dem Display.
1x auf die Taste (3) drücken. Jetzt sehen Sie PR auf
dem Display.
Drücken Sie auf der Starttaste (2), Sie kommen jetzt
in die Programmiermodus.
Mit der Stoptaste (1) wählen Sie schnell die gewünschte
Programmierfunktion.
In der richtigen Funktion drücken Sie 1x auf die grüne
Taste (7).
Mit den Tasten (4) aufwärts- und (3) abwärts- kann
den Wert geändert werden.
Drücken Sie auf der Starttaste (2) zum Bestätigung
der neuen Einstellung.
Mit der roten Taste (1) die nächste Funktion im
Programmiermodus wählen. Wenn im Display PR erscheint
können Sie sich durch auf die rote Taste (8) für Beenden bzw.
Durch 1-maligen Druck auf die grüne Taste (2) für Rückkehr nach
Programmiermodus entscheiden.
Programmieren Schritt für Schritt
In diesem Abschnitt zeigen wir ihnen Schritt für Schritt wie Sie ihnre
S
UN
V
ISION
V programmieren müßen..
Schritt 1 das Bedienungsfeld im Programmierstand setzen
Gleichzeitig 10 Sekunden lang die Tasten (3), (4) und (1) eindrücken.
Sie sehen jetzt CN im Display. Denn auf Taste (3) drücken. Sie sehen
jetzt PR im Display.

2003/10
Schritt 2 Normalbetrieb wählen
Drücken Sie auf die grüne Taste (2). Auf dem Display erscheint 10 . Sie
befinden sich jetzt im Programmiermodus Hier können Sie die Funktionen
auswählen, die Sie ändern möchten. Durch jeweiligen Druck auf die Taste
(1) kommen Sie einen Schritt weiter.
Kode
Funktion
10
Einstellung der maximalen Bräunungszeit (Schritt 3)
20
- Nicht belegt (Schritt 4)
30
Einstellung der Nachkühlzeit (Schritt 5)
40
Einstellung der Betriebsstellung (schritt 6)
50
Einstellung der Auskleidezeit (Schritt 7)
61/62/63
Einstellung Körperlüfter (Schritt 8)
70
Zeit pro Puls (Schritt 9)
80
Schaltbare Körperröhren (Schritt 10)
90
Vorlaufzeit Hauptkühlung (Schritt 11)
Schritt 3 Einstellung der maximalen Bräunungszeit (Funktion
10)
Die Einstellung des Herstellers beträgt 12 Minuten.
Drücken Sie auf der Starttaste (2), auf dem Display steht 10 . Funktion
10 ist jetzt einstellbar.
Drücken Sie auf der Starttaste (2), auf dem Display erscheint eine Zahl
mit einem Punkt. Diese Zahl steht für die Anzahl Sonneminuten das
eingestellt ist. Kommt ihr
S
UN
V
ISION
V direkt vom Hersteller, dann
sehen Sie hier die Zahl 12 .
Drücken Sie auf der Taste abwärts (3). Die 12 auf dem Display
verspringt nach 11 . Wir wählen beispielsweise 6 Minuten Sonnenzeit.
Drücken Sie solange auf der Taste abwärts (3) bis auf dem Display die
Zahl 6 steht. Mit der Taste aufwärts (4) können Sie die Zahl erhöhen.
Drücken Sie auf der Starttaste (2) zum Bestätigung der neuen
Einstellung. Auf dem Display erscheint die Zahl 20 . Funktion 20 wird in
der
S
UN
V
ISION
V
nicht benutzt und kann also überschlagen werden.
Mit einem Druck auf der Stoptaste (1) gehen Sie weiter nach Funktion
30.
Schritt 4 Diese Funktion is nicht belegt bij der SunVision V
(Funktion 20)
Drücken Sie auf die rote Taste (1) um weiter zu gehen zu Funktion 30.
Schritt 5 Einstellung der Nachkühlzeit (Funktion 30)
Zur Einstellung der Nachkühlzeit stehen die Codes in der nachstehenden
Tabelle zu verfügung:
Kode
Einstellung
03
1 ½ Minuten
04
2 Minuten
05
2 ½ Minuten
06
3 Minuten
07
3 ½ Minuten
08
4 Minuten
09
4 ½ Minuten
10
5 Minuten
Drücken Sie 1x auf die grüne Taste (2). Auf dem Display erscheint
jetzt ein Code, der die Anzahl an Minuten nach dem Nachkühlen
angibt. Die Einstellung des Herstellers beträgt 4 minuten, Code 08 . Mit
Taste (1) können Sie diese Zahl erniedrigen und mit Taste (2) erhöhen.
Bestätigen Sie Ihre Wahl, indem Sie 1x auf die grüne Taste (2)
drücken. Auf dem Display erscheint nun die Zahl 40 . Funktion 40 is
jetzt einstellbar.
Kode
Einstellung
01
Stand-alone mode
02
Münzautomat, mit Display der
S
UN
V
ISION
V ein
04
Münztautomat, mit Display der
S
UN
V
ISION
V aus
08
- Nicht belegt -
16
Bedienung von der Rezeption aus
32
Münzautomat mit Pulsausgang
Schritt 6 Einstellung der Betriebseinstellung (Funktion 30)
Auf dem Display steht jetzt 40 . Drücken Sie auf der Starttaste (2). Auf
dem Display erscheint die Zahl 01 (Herstellerseinstellung).
Wir wählen Kode 32 (siehe Beispiel).
This manual suits for next models
3
Table of contents
Languages:
Popular Hot Tub manuals by other brands

Aquatic
Aquatic INFINITY 1 Specifications

Canadian Spa
Canadian Spa Vancouver UV Spa KH-10032 owner's manual

Dimension One Spas
Dimension One Spas Triad II Specifications

Aquatic
Aquatic AI27AIRCOPPER Specification sheet

KIRAMI
KIRAMI Comfort Family Instructions for use

Jacuzzi
Jacuzzi FUZION 7236 RH Specification sheet

Master Spa
Master Spa Spas owner's manual

Jacuzzi
Jacuzzi Mito 5 Specification sheet

Master Spa
Master Spa Twilight Series owner's manual

Elecro Engineering
Elecro Engineering Nano SPA Heater Installation & operating manual

Dynasty Spas
Dynasty Spas 2007 Operator's guide

Tadpole
Tadpole Hot Tubs 2004 owner's manual