Alkeria NECTA Series User manual

NECTA
series
USB3 line-scan camera
USER GUIDE

Save the planet: do not print this manual unless you really need to.
Release 2.4 - March, 2022
© Copyright 2022 Alkeria SRL – All rights reserved
The information in this document is subject to change without notice. Information, drawings and illus-
trations contained herein are the property of Alkeria SRL. No part of this manual may be reproduced or
distributed by any means, electronic or mechanical, without the express written consent of Alkeria SRL.

WELCOME TO NECTA LINE-SCAN CAMERAS
Before starting using your camera, make sure you follow these basic rules and steps for a safe and effec-
tive use of NECTA .
• Make sure you are using a correct hardware (Section 1.1);
• Check safety and precautions chapter (Section 2.8);
• Access your User Area on www.alkeria.com and download camera manual and install MaestroUSB3
SDK (Section 1.2);
• Install your camera in your setup (Section 1.3).
Warning
Please do not connect I/O interface yet. Use the I/O connectors only after
completing the rst start of the camera and after reading Chapter 4 of this
manual.
• Connect and start the camera for the rst time (Section 1.4);
• Perform a camera calibration (Section 8.2).
Tip
Check the videos in your User Area about camera calibration.
IMPORTANT NOTES
• Make sure you check the information about NECTA Player and its functions in Chapter 9;
• Deeply check our manual and code samples: most of common operations and options available
are described there;
• Remember that you can always reach our support team through your User Area on www.alkeria.com
or emailing support@alkeria.com
Warning
NEVER try to power the camera through the I/O interface. Our cameras are
self powered through USB3.

Summary 3
Summary
1 Getting started 8
1.1 Requirements............................................ 8
1.2 Softwaredownload......................................... 9
1.3 Connections............................................. 12
1.4 FirstStart .............................................. 13
1.4.1 StatusLED ........................................ 13
1.4.2 RunAlkeriaplayer.................................... 13
1.4.3 Howtogetagoodimage................................ 15
2 Introducing NECTA Line Scan Cameras 16
2.1 NECTA................................................ 17
2.2 NECTAfamily............................................ 17
2.2.1 DetailedSpecications................................. 19
2.3 Optionalaccessories........................................ 25
2.4 OrderingInformations....................................... 25
2.5 USB 3.2 Gen 1x1 SuperSpeed interface . . . . . . . . . . . . . . . . . . . . . . . . . . . . . 26
2.5.1 Isochronousendpoint.................................. 26
2.5.2 Bulkendpoint ...................................... 26
2.5.3 USB 3.2 Gen 1x1 controller cards . . . . . . . . . . . . . . . . . . . . . . . . . . . 27
2.6 Installationrequirements..................................... 27
2.7 MaestroUSB3SDK......................................... 27
2.7.1 SoftwareLicense .................................... 28
2.8 SafetyandPrecautions ...................................... 28
3 Hardware Description 30
3.1 Sensors................................................ 30
3.1.1 Monochrome Quantum Efciency . . . . . . . . . . . . . . . . . . . . . . . . . . 30
3.1.2 Color Quantum Efciency . . . . . . . . . . . . . . . . . . . . . . . . . . . . . . . 30
3.2 Mechanicaldescription ...................................... 31
3.3 Sensorposition........................................... 33
3.4 Adaptersforstandardlens .................................... 33
3.4.1 Choosing the right adapter . . . . . . . . . . . . . . . . . . . . . . . . . . . . . . . 33
3.4.2 C-Mountadapter .................................... 34
3.4.2.1 Maximum lens protrusion . . . . . . . . . . . . . . . . . . . . . . . . . . . . . 35

Summary 4
3.4.3 F-Mountadapter .................................... 35
3.5 FlangeFocalDistance ....................................... 36
3.6 Handlingprecautions ....................................... 37
3.6.1 Temperature and humidity . . . . . . . . . . . . . . . . . . . . . . . . . . . . . . . 37
3.6.2 Warrantylimitations .................................. 38
3.6.3 Mechanicalstress.................................... 38
3.6.4 Heatdissipation ..................................... 38
3.6.5 Monitoring internal temperature . . . . . . . . . . . . . . . . . . . . . . . . . . . 39
3.6.6 Automatic internal temperature safety mechanism . . . . . . . . . . . . . . . . 39
3.6.7 EMI/ESD precautions: noise and electrostatic discharge . . . . . . . . . . . . . 40
3.7 CleaningNECTAcamera ..................................... 41
3.7.1 Beforestarting...................................... 41
3.7.2 Cleaning NECTA camera housing . . . . . . . . . . . . . . . . . . . . . . . . . . . 41
3.7.3 Opticalpathcleaning .................................. 41
3.7.4 Impurities......................................... 42
3.7.5 Sensorcleaning ..................................... 42
3.7.6 Usingcompressedair.................................. 42
3.7.7 After cleaning procedure . . . . . . . . . . . . . . . . . . . . . . . . . . . . . . . . 42
4 Interfacing to the world 43
4.0.1 DetectingI/Opower .................................. 44
4.1 I/Ocable............................................... 45
4.2 PowerSelection........................................... 46
4.3 I/Omodule.............................................. 46
4.3.1 Inputmodulestructure................................. 46
4.3.1.1 Debouncingmodule................................ 47
4.3.1.2 Inputevents..................................... 48
4.3.1.3 RS-422........................................ 49
4.3.1.4 RS-644........................................ 50
4.3.1.5 LV-TTL / LV-CMOS / 12 V - 24 V . . . . . . . . . . . . . . . . . . . . . . . . . 50
4.3.2 Output module structure . . . . . . . . . . . . . . . . . . . . . . . . . . . . . . . . 52
4.3.2.1 RS-422........................................ 53
4.3.2.2 RS-644........................................ 53
4.3.2.3 LV-TTL/LV-CMOS................................. 54
4.3.2.4 5to24VOutput .................................. 55
4.3.3 Bidirectional module structure (port 0) . . . . . . . . . . . . . . . . . . . . . . . 55
4.3.4 I/Oswitchingtime.................................... 55
4.4 Usinginputsignals ......................................... 56
4.4.1 Encodermodule..................................... 56
4.4.1.1 Encoderhysteresis................................. 57
4.4.1.2 Directionreversal ................................. 57
4.4.1.3 Conguring the encoder module . . . . . . . . . . . . . . . . . . . . . . . . . 58
4.4.1.4 Reading and resetting encoder position . . . . . . . . . . . . . . . . . . . . 58
4.4.2 Frequency Multiplier (Phase Locked Loop (PLL)) . . . . . . . . . . . . . . . . . . 59
4.4.3 Triggermanager..................................... 60

Summary 5
4.5 Controllingoutputports...................................... 61
4.5.1 Polarity .......................................... 61
4.5.2 Opencollector...................................... 62
4.5.3 Softwareoutput..................................... 62
4.5.4 TriggerOutput...................................... 62
4.5.4.1 Exposure....................................... 62
4.5.4.2 Strobe ........................................ 63
4.5.4.3 Trigger........................................ 64
4.5.4.4 Triggerready .................................... 64
4.5.5 Customsources ..................................... 64
4.5.6 Input and output ports usage examples . . . . . . . . . . . . . . . . . . . . . . . 65
4.6 SerialInterfaceModule ...................................... 65
5 System Setup 67
5.1 USBSetup.............................................. 67
5.1.1 How to choose a suitable USB cable . . . . . . . . . . . . . . . . . . . . . . . . . 67
5.1.2 Recommended USB interface . . . . . . . . . . . . . . . . . . . . . . . . . . . . . 68
5.2 StatusLED.............................................. 69
5.3 When one NECTA is not enough... . . . . . . . . . . . . . . . . . . . . . . . . . . . . . . . . 69
6 Trigger 70
6.1 Triggersources ........................................... 70
6.2 Acquisitionstarttrigger...................................... 71
6.3 Framestarttrigger......................................... 71
6.4 Linestarttrigger .......................................... 71
6.5 End-of-exposuretrigger...................................... 72
6.6 Triggerdelay............................................. 72
6.6.1 Encoderdelay ...................................... 73
6.6.2 Triggeroverrun ..................................... 73
6.7 Trigger conguration example . . . . . . . . . . . . . . . . . . . . . . . . . . . . . . . . . . 74
6.7.1 External trigger frame acquisition . . . . . . . . . . . . . . . . . . . . . . . . . . 74
6.7.2 Signal-driven exposure time . . . . . . . . . . . . . . . . . . . . . . . . . . . . . . 75
6.7.3 Encoder synchronization . . . . . . . . . . . . . . . . . . . . . . . . . . . . . . . . 75
7 The processing chain 77
7.1 LightMeter ............................................. 77
7.2 ChunkData ............................................. 78
7.2.1 Line Number (line related) . . . . . . . . . . . . . . . . . . . . . . . . . . . . . . . 79
7.2.2 FrameNumber...................................... 80
7.2.3 Timestamp........................................ 80
7.2.4 Encoderposition..................................... 80
7.2.5 InputStatus........................................ 81
7.2.6 Congurationexample ................................. 81
7.3 Flush ................................................. 82
7.3.1 FlushUsageExamples ................................. 82
8 Capturing Images 83

Summary 6
8.1 Videomodes............................................. 83
8.1.1 Mode0(Normal)..................................... 83
8.1.2 Mode1(RAW)...................................... 83
8.1.3 Mode 2 (Subsampling – Color models only) . . . . . . . . . . . . . . . . . . . . . 84
8.1.3.1 Sum.......................................... 84
8.1.3.2 Average ....................................... 84
8.2 Calibration.............................................. 85
8.2.1 BlackLevelOffset.................................... 86
8.2.2 Dark Signal Non-Uniformity (DSNU) and Photo Response Non-Uniformity (PRNU) 86
8.2.3 Restoring NECTA calibration . . . . . . . . . . . . . . . . . . . . . . . . . . . . . 87
8.3 RegionOfInterest ......................................... 88
8.4 Binning (monochrome models only) . . . . . . . . . . . . . . . . . . . . . . . . . . . . . . . 89
8.4.1 Sum-typebinning .................................... 90
8.4.2 Average-typebinning.................................. 91
8.5 PixelFormat............................................. 93
8.6 ADCresolution........................................... 94
8.7 Lineperiod.............................................. 95
8.7.1 High resolution Line period . . . . . . . . . . . . . . . . . . . . . . . . . . . . . . 96
8.8 Linedelay .............................................. 96
8.8.1 Colorcameras ...................................... 97
8.8.2 Monochromecameras ................................. 98
8.9 Framerateandbandwidth .................................... 99
8.9.1 Reserving bandwidth for isochronous channel . . . . . . . . . . . . . . . . . . . 99
8.9.2 Bandwidth limits for isochronous endpoint . . . . . . . . . . . . . . . . . . . . . 99
8.9.3 Bandwidth limit for bulk endpoint . . . . . . . . . . . . . . . . . . . . . . . . . . 100
8.9.4 Packet size for isochronous endpoint . . . . . . . . . . . . . . . . . . . . . . . . . 101
8.9.4.1 Calculating the required bandwidth . . . . . . . . . . . . . . . . . . . . . . . 102
8.9.5 Packet size for bulk endpoint . . . . . . . . . . . . . . . . . . . . . . . . . . . . . 103
8.9.6 Connecting multiple devices to the same host . . . . . . . . . . . . . . . . . . . 103
8.9.7 Preserverates ...................................... 103
8.9.8 Maximizingframerate ................................. 104
8.10Controls ............................................... 104
8.10.1 Brightness ........................................ 105
8.10.2 Contrast.......................................... 105
8.10.3 Color correction matrix (color models only) . . . . . . . . . . . . . . . . . . . . . 106
8.10.4 Hue (color models only) . . . . . . . . . . . . . . . . . . . . . . . . . . . . . . . . . 107
8.10.5 Saturation (color models only) . . . . . . . . . . . . . . . . . . . . . . . . . . . . . 108
8.10.6 White Balance (color models only) . . . . . . . . . . . . . . . . . . . . . . . . . . 109
8.10.7 Gamma .......................................... 109
8.10.8 Shutter .......................................... 111
8.10.9 High resolution line period . . . . . . . . . . . . . . . . . . . . . . . . . . . . . . . 112
8.10.10AnalogGain........................................ 112
8.10.11CDSGain ......................................... 113
8.10.12DigitalGain........................................ 113
8.10.13 User Look-Up Table (LUT)s . . . . . . . . . . . . . . . . . . . . . . . . . . . . . . . 114

Summary 7
8.10.14Luma............................................ 115
8.10.15TimeStamp........................................ 115
8.10.16FlipandRotate...................................... 116
8.11Savingdeviceconguration.................................... 116
8.11.1 ExportandimportXML................................. 117
8.11.2 User conguration (deprecated) . . . . . . . . . . . . . . . . . . . . . . . . . . . 117
8.11.3 Calibration ........................................ 117
8.12CongurationExample ...................................... 118
8.13PatternGenerator ......................................... 118
9 Alkeria player 120
9.1 Device Connection and Initialization . . . . . . . . . . . . . . . . . . . . . . . . . . . . . . 120
9.2 Toolbarbuttons........................................... 121
9.3 SettingsPanel............................................ 121
9.3.1 Features.......................................... 121
9.3.2 VideoSettings ...................................... 122
9.3.3 Trigger........................................... 123
9.3.4 Advancedfeatures ................................... 124
9.4 SaveSequencePanel........................................ 125
9.5 DisplayFramesPanel ....................................... 126
9.6 CameraMenu............................................ 126
9.6.1 Saving and Exporting Conguration . . . . . . . . . . . . . . . . . . . . . . . . . 127
9.6.2 I/Opanel ......................................... 127
9.6.3 Calibration ........................................ 127
9.6.4 LUTEditor ........................................ 128
10 Warranty 130
10.1RMA ................................................. 130
11 Firmware Update 131
12 EMC certication and compliance 132
12.1CEconformity............................................ 132
12.2 FCC conformity - Class A (USA) . . . . . . . . . . . . . . . . . . . . . . . . . . . . . . . . . 133
12.3ICES-003(Canada)......................................... 133
12.4Limitationofliability........................................ 133
12.5RoHSConformity.......................................... 133
12.6InformationforUsers ....................................... 134
List of Acronyms 135
Example Code 136

1. Getting started 8
1
Getting started
1.1 REQUIREMENTS
For getting started with NECTA you will need the material listed below:
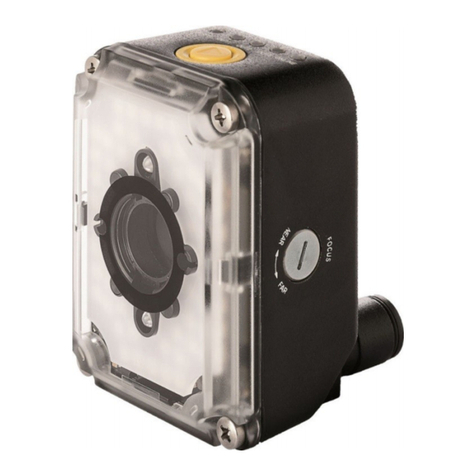
• A NECTA camera equipped with a lens adapter (Figure 1.1);
• A lens compatible with the chosen lens adapter;
• An USB 3.2 Gen 1x1 cable (Figure 1.2);
• A computer with an USB 3.2 Gen 1x1 controller;
Figure 1.1: NECTA camera

1. Getting started 9
(a) (b)
Figure 1.2: Required USB cable is type-A on the PC side (a) and micro-B on the camera side (b).
1.2 SOFTWARE DOWNLOAD
After camera purchasing, our Sales Department will provide you with access to our website’s User Area.
In there you can nd everything you need to set and use the camera: manuals, guides, tutorials, software
and rmware updates. Users Area accounts are personal, and can only be created by Alkeria’s Sales
Dept.
Once your account has been activated, you will receive an email to reset your account password: click
on the link to set your password. Please store your login credentials in a secure place.
To download the software, follow these steps:
Step 1: Go to our website www.alkeria.com (Figure 1.3)
Figure 1.3: Alkeria website

1. Getting started 10
Step 2: Click on “User Area - Support” top-right button (Figure 1.4)
Figure 1.4: User Area button
Step 3: Once redirected to login form, insert your username and password and click “Log in” (Figure 1.5)
Figure 1.5: User Area log in form
Step 4: On “Downloads” root folder, you can nd many le categories, each containing various les
(Figure 1.6)
Figure 1.6: User Area root folder

1. Getting started 11
Step 5: Click on “Download” to download a le (g. 1.7)
Figure 1.7: Example of le listing inside Linux & Windows SDK category
Figure 1.8: Example of single le view
Step 6: Click on the “Log out” orange button to end your session (Figure 1.8), then install the downloaded
executable as administrator.

1. Getting started 13
Step 4: Connect the USB type A plug (Figure 1.2a) to a SuperSpeed USB port on the PC.
1.4 FIRST START
1.4.1 Status LED
NECTA features a status LED on its back, showing the operating conditions of the camera. When a USB
connector is plugged in, LED remains red until the computer detects and congures the camera. At that
point the LED turns green: the camera is now ready to acquire. During acquisition, LED turns orange.
Different behaviours of the status LED may indicate that camera is malfunctioning. To a complete ref-
erence on the status LED codes, refer to Table 5.1.
1.4.2 Run Alkeria player
MaestroUSB3 comes with a user-friendly software application, allowing to explore the main features of
NECTA cameras and check the correct camera and software installation. Once installed MaestroUSB3
SDK, you can nd the application at the following path:
Program Files\Alkeria\USB3\MaestroUSB3\Players
Alternatively, you can easily start the Alkeria player by accessing the Windows Start button and look for
Alkeria player from the MaestroUSB3 Program folder: Start->All programs->Alkeria->USB3->MaestroUSB3.

1. Getting started 14
Figure 1.9: Alkeria player main window
A subset of the toolbar controls is shown in Table 1.1.
Init Initialize the camera to default settings (camera power-up status).
Play Start image playback.
Stop Stop image playback.
Settings Open the settings panel.
Table 1.1: Relevant Alkeria player buttons
Press “Play” button to start the acquisition of images from the camera. At the bottom of the player win-
dow a status bar displays the following data:
• The image resolution and the pixel depth;
• The frame rate;
• A frame lost counter, which indicates whether some frames have been corrupted during transfer
and have been discarded;
• A timer counter indicating the acquisition time;
• A frame counter;
Pressing the “Settings” button, you will have access to the main camera acquisition parameters such as
Shutter and Gain. Move them while NECTA is acquiring images to familiarize with the controls.
To get more information about player functionalities, please refer to Chapter 9.

1. Getting started 15
1.4.3 How to get a good image
The camera is not yet able to provide a perfect image. A step of calibration is needed to cancel out all the
differences between the individual pixels on the sensor, such as black level and individual pixel’s gain.
To calibrate the camera press NECTA on the toolbar and then click on Calibration to open the wizard.
If you want to learn more about calibration, check out tutorials and guides on your website’s User Area.
Figure 1.10: Alkeria player Calibration Wizard

2. Introducing NECTA Line Scan Cameras 16
2
Introducing NECTA
Line Scan Cameras
NECTA is Alkeria’s answer to the demand of its customers in industrial and medical eld for high speed
line scan cameras.
Featuring USB 3.2 Gen 1x1 interface, complying with the modern advance in machine vision, NECTA
takes performances to a new level, being specically designed to get the best from AMS (formerly AWAIBA)
CMOS sensors, sharing the same compact, reliable and versatile form factor of CELERA, its area-scan
counterpart. With advanced rmware features, uncompromised quality and a large FPGA for on-demand
customization, NECTA is the agship in Alkeria line-scan camera range.
Resolution
Max line rate
2048
47 klps 95 klps 188 klps
2048 x2 4096 4096 x2 8192
N2K-7
N8K-3
N2K2-7
N4K2-7
N4K-3 N4K-7
Figure 2.1: NECTA cameras overview

2. Introducing NECTA Line Scan Cameras 17
2.1 NECTA
NECTA is a family of ultra-compact line scan cameras with USB 3.2 Gen 1x1 interface. The adoption of
new technology Complementary MOS (CMOS) linear sensors and USB 3.2 Gen 1x1 connectivity allows
NECTA to reach very high acquisition speed while still using consumer-class interface.
NECTA is directly powered by the USB 3.2 Gen 1x1 bus eliminating the need for external power adapters.
Reduced size and low power consumption, solid construction, low installation cost, ease of program-
ming and versatility make NECTA devices suited for the most demanding industrial applications: in-line
inspection, web inspection, document scanning, metrology.
An easy-to-use set of software API is available, which allows developers to quickly produce fast and
clean code both on Windows and Linux, supporting all major programming languages, such as Python,
C#, VB, C++ in Visual Studio or QT environment. Our Software Development Kit provided with NECTA
cameras, is fully compatible with Cognex VisionPro, MVTech Halcon, NI LabView and other major ma-
chine vision software for industrial application.
Figure 2.2: NECTA camera
2.2 NECTA FAMILY
NECTA cameras use high performance linear CMOS sensors. The models in the family differ in size,
layout and number of pixels of the sensor. Table 2.1 shows all models and their characteristics. Some
cameras use sensors featuring two lines and they are available both in BW and RGB version. All cameras
are directly powered through the USB 3.2 Gen 1x1 connection. Except where explicitly specied, all
statements herein refer to the entire NECTA family.

2. Introducing NECTA Line Scan Cameras 18
Model Name Sensor Resolution (H x W) Chroma
NECTA N2K-7 AMS DR2K7 1 x 2048 Mono
NECTA N2K2-7 AMS DR2X2K7 2 x 2048 Mono
NECTA N2K2-7C AMS DR2X2K7 2 x 2048 Color
NECTA N4K-3 AMS DR4K3.5 1 x 4096 Mono
NECTA N4K-7 AMS DR4K7 1 x 4096 Mono
NECTA N4K2-7 AMS DR2X4K7 2 x 4096 Mono
NECTA N4K2-7C AMS DR2X4K7 2 x 4096 Color
NECTA N8K-3 AMS DR8K3.5 1 x 8192 Mono
Table 2.1: NECTA cameras family overview

2. Introducing NECTA Line Scan Cameras 19
2.2.1 Detailed Specications
Specication NECTA N2K-7
Sensor model AMS DR2K7
Sensor type Mono
Sensor resolution 1(H) x 2048(W)
Sensor technology CMOS, ll factor 100%
Pixel size 7 µm ×7 µm
Max. line rate (ADC Res. 12 bit) 23 641 lps (MONO8, MONO16)
Max. line rate (ADC Res. 9 bit) 94 340 lps (MONO8, MONO16)
A/D Conversion 9 to 12 bits
Synchronization External trigger, software trigger
Controls Gain, shutter, frame rate, brightness, contrast, LUT, gamma, trigger
Shutter control 2 µs ÷ 100 ms (100 ns steps)
Binning factor 2x horizontal
Readout Normal, ROI, binning, frame combiner, subsampling
Power supply 2 W max, powered by USB 3.2 Gen 1x1
Inputs/outputs 2 in, 2 out, 1 I/O (RS-422, RS-644, LV-CMOS, LV-TTL)
Lens adapter C-mount, F-mount, M42
Interface USB 3.2 Gen 1x1
Pixel formats Mode 0: MONO8, MONO16; Mode 1: RAW8, RAW16
Weight 129 g (with C-mount adapter)
Size (without adapters) 56 mm x 56 mm x 26.7 mm
Size (with C-mount) 56 mm x 56 mm x 38.3 mm
Size (with F-mount) 56 mm x 56 mm x 67.3 mm
Conformity CE, RoHS, FCC, IC
Operating temperature 0 ÷ 50 °C (referred to housing)
Software MaestroUSB3
Link www.alkeria.com/products/NECTA-series
Warranty 24 months
Table 2.2: NECTA N2K-7 Specications
This manual suits for next models
8
Table of contents
Other Alkeria Digital Camera manuals

