Operation and Maintenance Manual
8
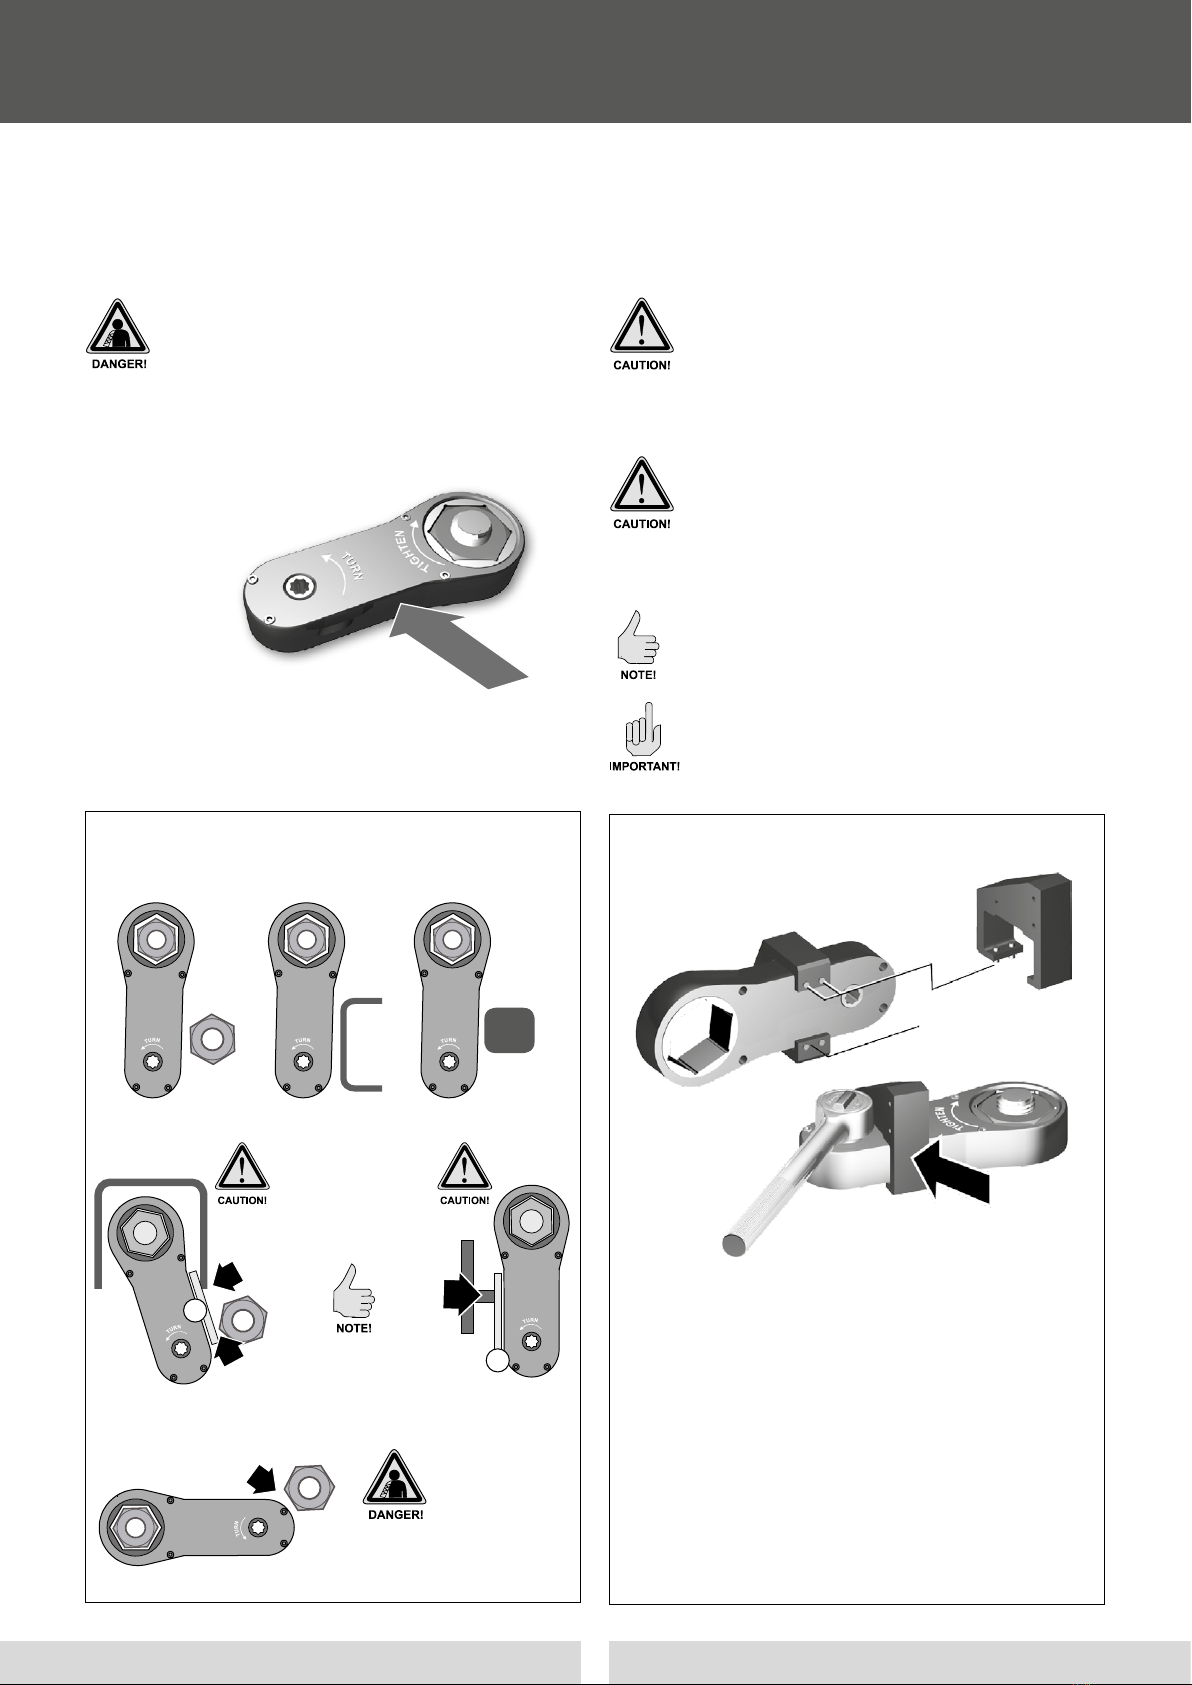
4.2 Tightening or loosening using torque wrench
Select the Link Tool corresponding to the joint.
• Place the alkitronic® M-ML/Norwolf Missing Link / Z series
completely on the nut.
• Position the housing (optional with DMA) against the
reaction point until contact is made.
• Determine whether you have a 4:1 or a 6:1 ratio of your
alkitronic®/Norwolf tool.
• Set the desired torque according to the operation manual
of your Torque Wrench
• Check the rotation direction switch (1) on the torque
wrench to ensure correct rotation (cw = R, ccw = L,
neutral position = O).
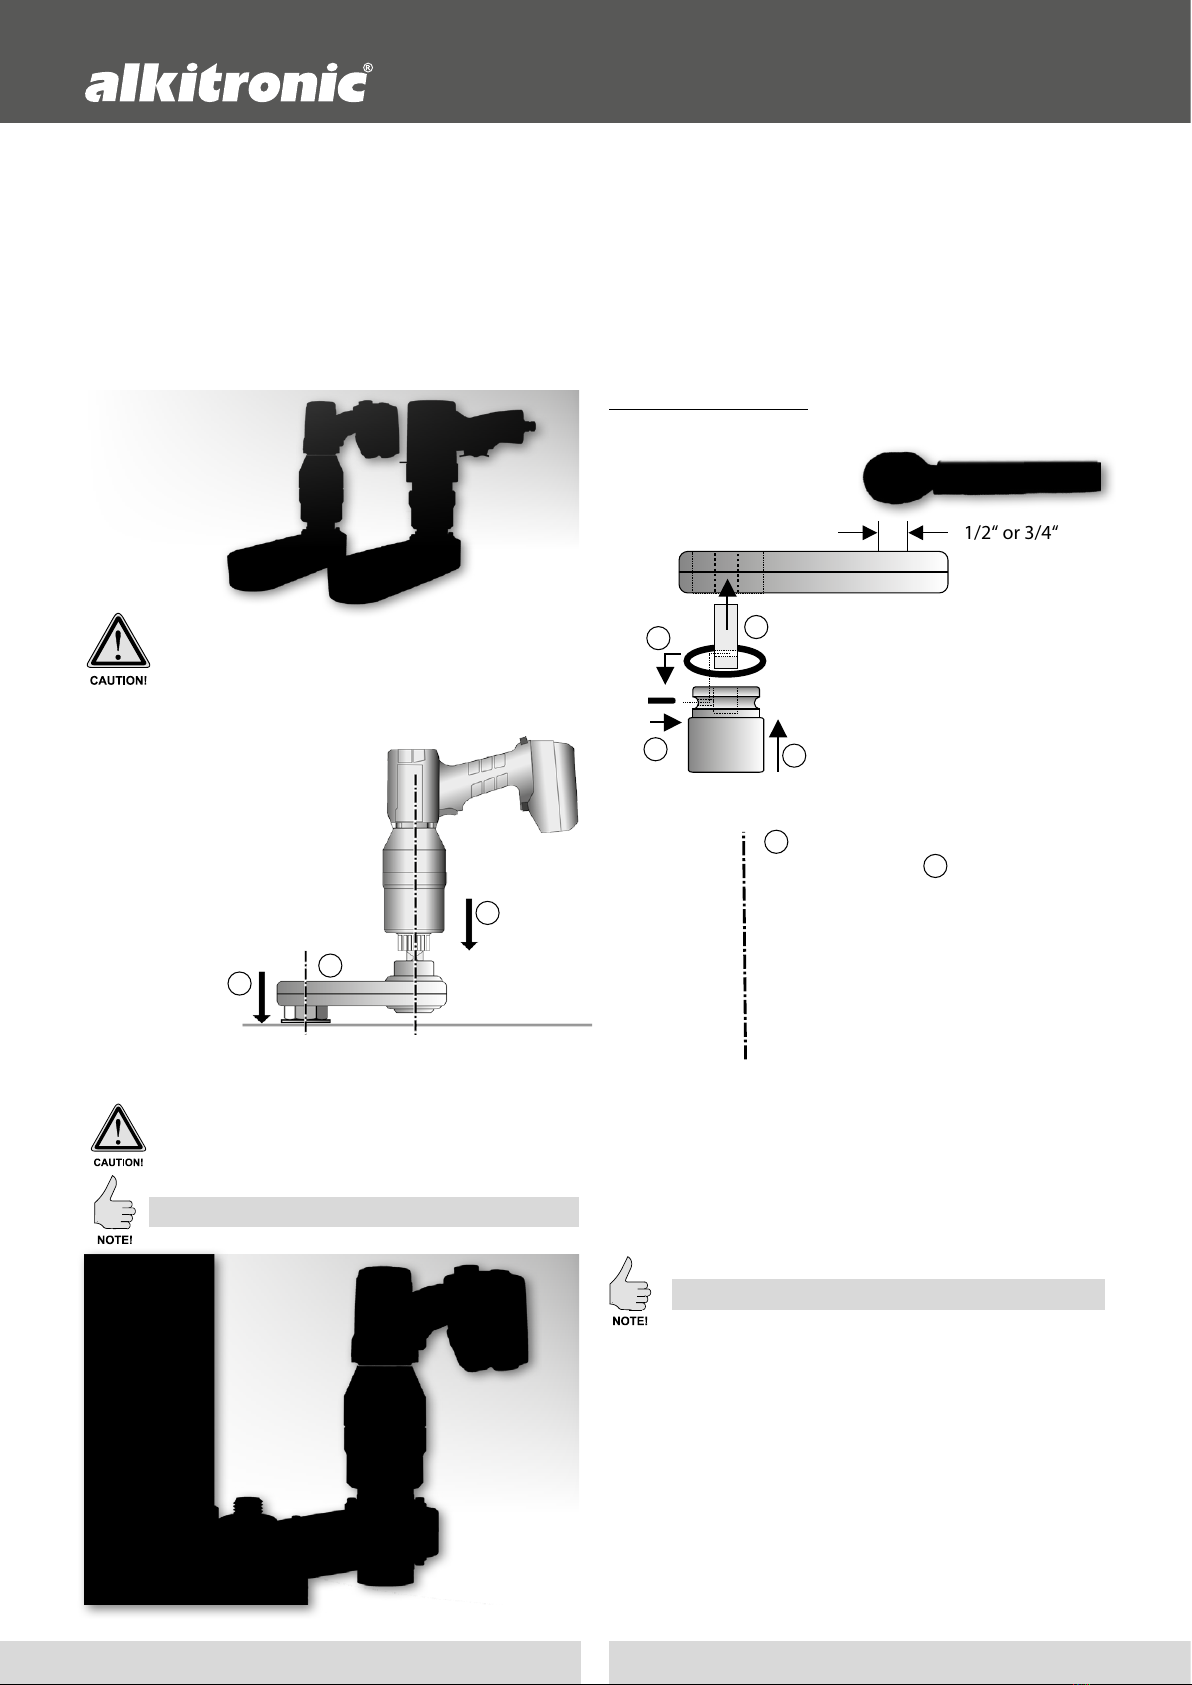
4.3 Tightening or loosening using torque multipliers
Select the alkitronic® / Norwolf XCE Link corresponding to
the joint.
• Place the XCE Link completely on the nut.
• Position the housing (optional with DMA) against the
reaction point until contact is made.
• Determine whether you have a 3:1 or 4:1 ratio of your
alkitronic® / Norwolf XCE Link.
• Set the desired torque according to the operation manual
of your electric or pneumatic driven Torque Multiplier.
Drive Ratio Input max Output
Nm Nm
1/2“ 4:1 340 1360
3/4“ 4:1 815 3260
3/4“ 6:1 815 4890
Models: alkitronic® M-ML/Missing Link / Z series
Drive Ratio Input max Output
Nm Nm
3/4“ 3:1 1150 3450
1“ 3:1 2440 7320
3/4“ 4:1 1150 4600
1“ 4:1 2440 9760
Models: XCE Link
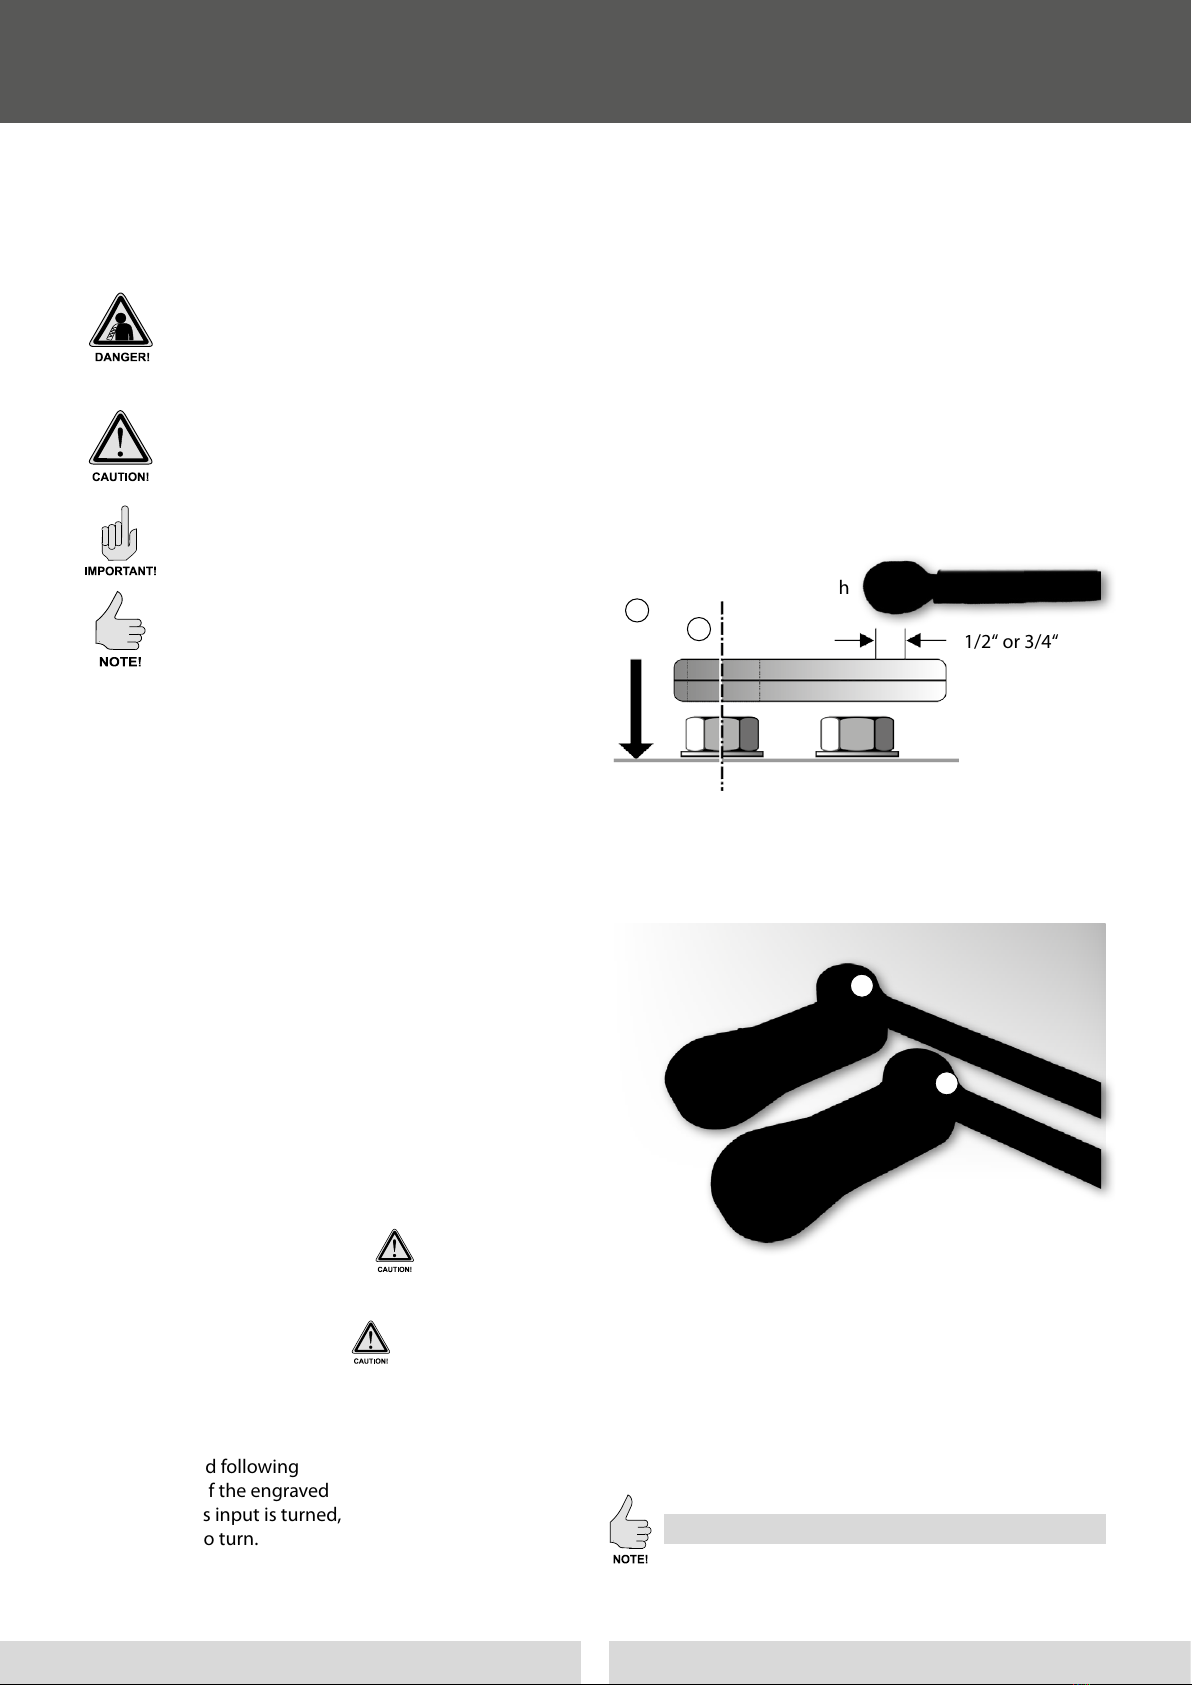
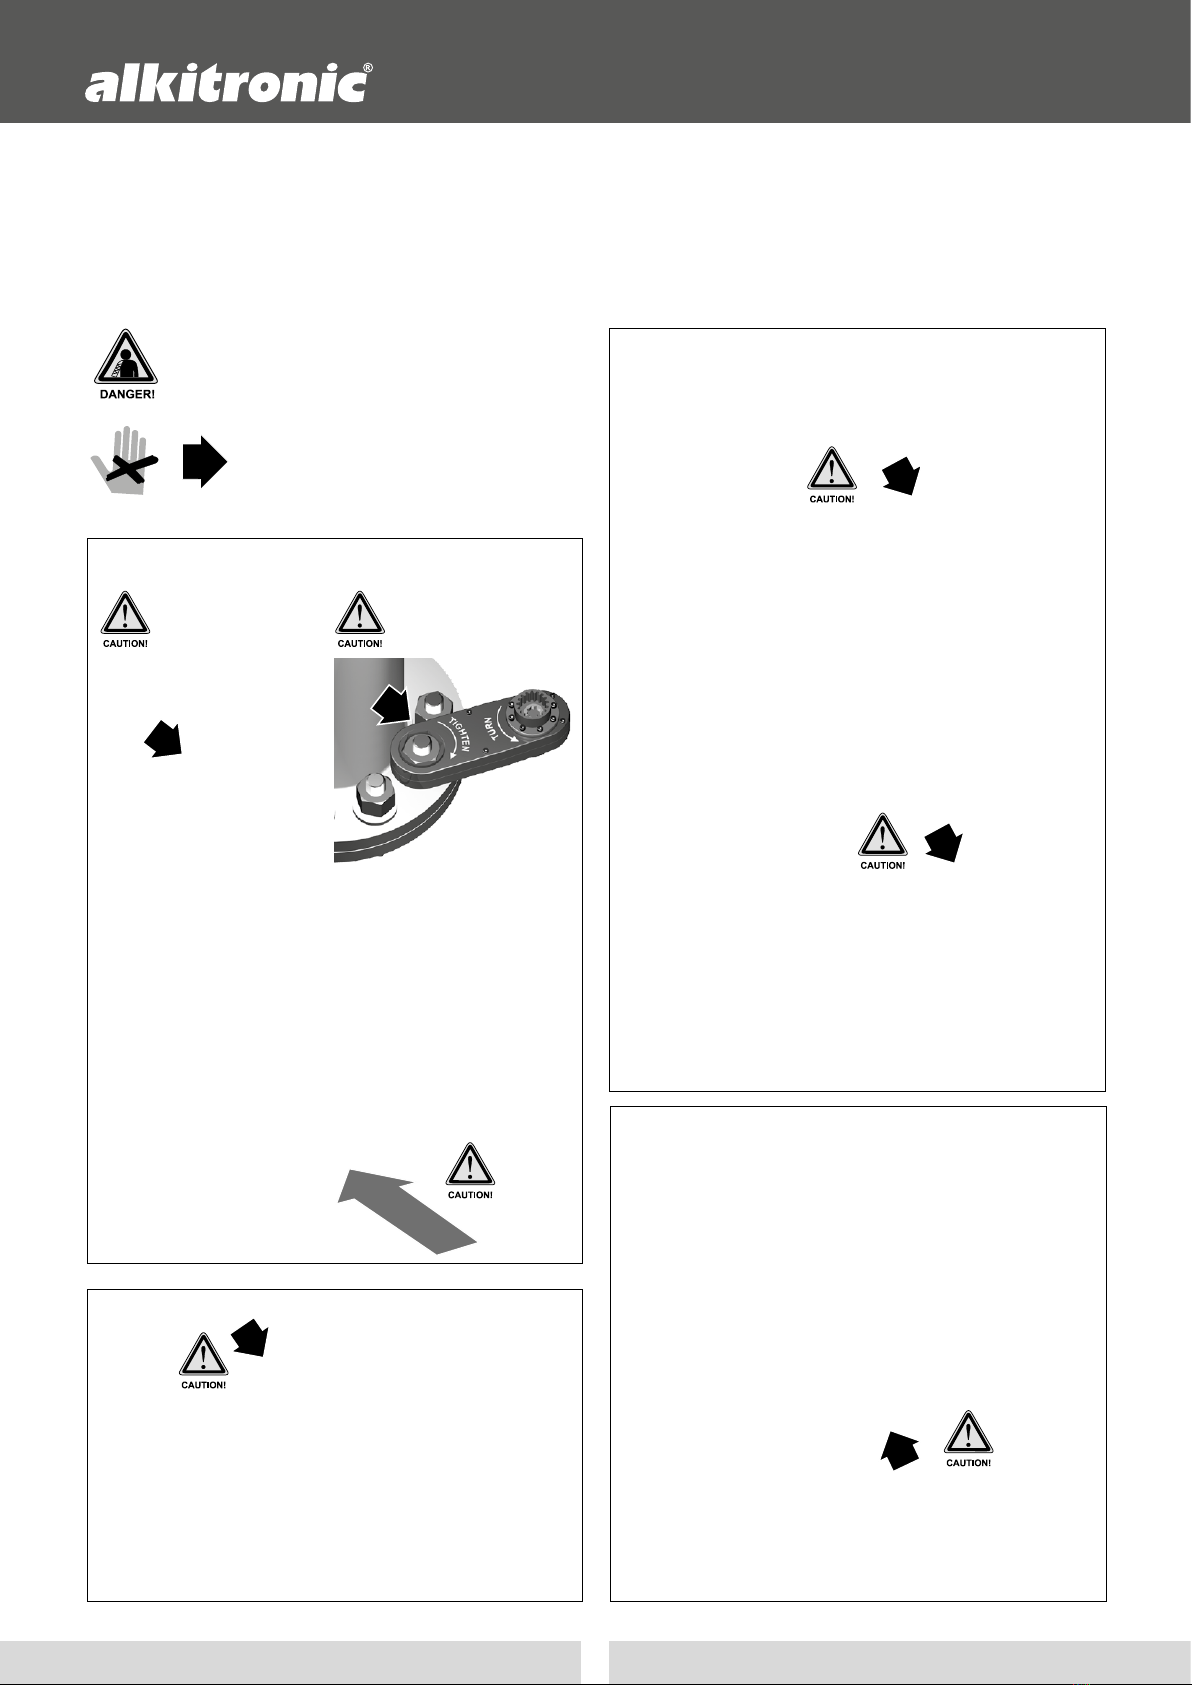
The rotation direction (1) of the Torque Wrench
must be in agreement with the engraved arrow
“TURN” (2) on the Missing Link / Z series.
The rotation direction of the Torque Multiplier must
be in agreement with the engraved arrow “TURN”
(Fig. 11/ 2) on the XCE Link.
The rotation is changed by reversing the XCE Link
by 1800. Insert the multiplier in the splined hub.
To loosen the bolt connection, the Torque Multiplier
drive direction
must be in agreement with the en-
graved arrow“TURN” on the
XCE Link.
The rotation is changed by reversing the Missing Link
by 1800. Insert the Torque Wrench. To loosen the bolt
connection, the direction of rotation must match
the engraved arrow “TURN” on the Missing Link
.
1
2
• Position the
TorqueWrench
on the drive and apply contin-
uous force until the application is tightened satisfactorily.
Make certain the final torque is transmitted to the
bolt connection. The tool does not stop until its
Rachet Drive Lever reaches the final position.
retract automatically. While retracting, you will hear 1-3
“clicks” indicating that the tool has reset itself. Repeat this
procedure once or twice and if no audible clicks are heard on
retraction, at this point, the pre-set torque is achieved with
an accuracy of ± 8%.
Repositioning the Missing Link / Z series on the next bolt joint.
Fig. 10
Fig. 11 2
3
• Insert the Torque Multiplier into the splined hub (3).
Energy supply depends on the type of drive. Turn on
machine.
• Keep pressing the start button of the electric or pneumatic
multiplier until the drive stops turning and pre-set pres-
sure is reached.
Repositioning the
XCE Link
on the next bolt joint.
Loosening
Loosening
You cannot turn the nut any further: Retain the
tension on the Torque Wrench. Switch the return
twist lock on the Torque Wrench to neutral position
without using force. The Rachet Drive Lever will